Tektronix WVR8200 Technical Reference
Waveform rasterizers system integration
Hide thumbs
Also See for WVR8200:
- User manual (216 pages) ,
- Technical reference (135 pages) ,
- Installation and safety manual (83 pages)

Related Manuals for Tektronix WVR8200


Summary of Contents for Tektronix WVR8200
- Page 1 WVR8200 and WVR8300 Waveform Rasterizers System Integration Technical Reference *P077039200* 077-0392-00...
-
Page 3: System Integration
WVR8200 and WVR8300 Waveform Rasterizers System Integration Technical Reference Warning The service instructions are for use by qualified personnel only. To avoid personal injury, do not perform any servicing unless you are qualified to do so. Refer to all safety summaries prior to performing service. - Page 4 Copyright © Tektronix. All rights reserved. Licensed software products are owned by Tektronix or its subsidiaries or suppliers, and are protected by national copyright laws and international treaty provisions. Tektronix products are covered by U.S. and foreign patents, issued and pending. Information in this publication supersedes that in all previously published material.
- Page 5 General Safety Summary ..................Service Safety Summary..................Preface ....................... Where to Find More Information ................Physical, Environmental, and Power Specifications ............Rack Installation ....................Instrument Connectors ..................... Video System Installation..................Power-On and Power-Off Procedure ................Network Operation ....................WVR8200 and WVR8300 System Integrator...
- Page 6 Do not operate in wet/damp conditions. Do not operate in an explosive atmosphere. Keep product surfaces clean and dry. Provide proper ventilation. Refer to the manual’s installation instructions for details on installing the product so it has proper ventilation. WVR8200 and WVR8300 System Integrator...
- Page 7 DANGER indicates an injury hazard immediately accessible as you read the marking. WARNING indicates an injury hazard not immediately accessible as you read the marking. CAUTION indicates a hazard to property including the product. The following symbol(s) may appear on the product: WVR8200 and WVR8300 System Integrator...
- Page 8 Use Care When Servicing With Power On. Dangerous voltages or currents may exist in this product. Disconnect power, remove battery (if applicable), and disconnect test leads before removing protective panels, soldering, or replacing components. To avoid electric shock, do not touch exposed connections. WVR8200 and WVR8300 System Integrator...
- Page 9 This document provides information for system integrators who are designing systems for high-definition (HD), standard-definition (SD), and 3 Gb/s SDI digital video content where the Tektronix WVR8200 and WVR8300 Waveform Rasterizers are to be deployed. Where to Find More Information The following tables list the documentation that is available for the product and shows where you can find it: in a printed manual, on the product documentation...
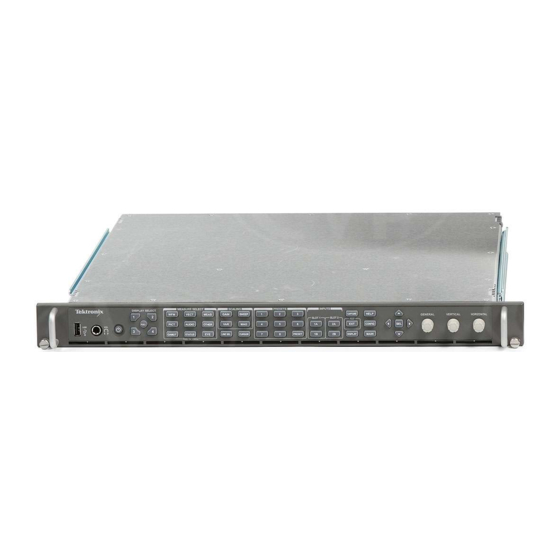
- Page 10 Product Documentation WVR8200 and WVR8300 to your customer Front and rear panel line art This line art might be useful if you need to present information Product Documentation to your customer CD and this manual WVR8200 and WVR8300 System Integrator...
-
Page 11: Physical, Environmental, And Power Specifications
20% to 80% relative humidity (% RH) at up to +40 °C, non-condensing Non Operating 5% to 90% RH (relative humidity) at up to +60 °C, non-condensing Altitude Operating 9,842 ft (3,000 m ) Non-operating 40,000 ft (12,192 m) WVR8200 and WVR8300 System Integrator... - Page 12 The intake air vents in the front of the instrument must not be blocked and the rear exhaust vents requires at least 1 inch of clearance. No clearance is required above or below the instrument. Pollution Degree 2, Indoor use only WVR8200 and WVR8300 System Integrator...
-
Page 13: Rack Installation
Spacing between the front rails must be at least 17-¾ inches. Front-to-rear rail spacing must be between 15-½ and 28 inches. Six inches of clearance between the instrument rear panel and any rear cabinet panel for connector space and to provide adequate air circulation. WVR8200 and WVR8300 System Integrator... - Page 14 LH marked on the rails. Stop latch holes should be towards the bottom when slides are in place. (The right hand rail is shown.) 2. Screw-mount to the front rail. If the front rail mounting hole is not tapped, use a bar nut as shown. WVR8200 and WVR8300 System Integrator...
- Page 15 2. Retighten the screws and check the tracks for smooth operation by sliding the instrument in and out of the rack several times. WVR8200 and WVR8300 System Integrator...
- Page 16 2. Insert the instrument chassis sections into the slide-out. 3. Press the stop latches, and push the instrument toward the rack until the latches snap into their holes. 4. Press the stop latches again, and push the instrument fully into the rack. WVR8200 and WVR8300 System Integrator...
- Page 17 5. Tighten the front-panel retaining screws. To Remove the Instrument 1. Before removing the instrument, be sure to disconnect all cabling. 2. Loosen retaining screw and pull instrument outward until the stop latches snap into the holes. WVR8200 and WVR8300 System Integrator...
- Page 18 Rack Installation 3. Press stop latches (visible in the stop-latch holes) and carefully slide the instrument free from the tracks. Rack Slide Maintenance The slide-out tracks do not require lubrication. WVR8200 and WVR8300 System Integrator...
-
Page 19: Instrument Connectors
NOTE. More illustrations and photographs of these instruments are available in JPEG format on the Tektronix Web site (www.tektronix.com) and on the Product Documentation CD that was shipped with your instrument. Figure 1: Rear panel with Option CPS, EYE or PHY, and AD or DPE installed... - Page 20 (Option 3G only), or the Pix Mon signal output, which contains configurable error brightups. This is done from the Config > Outputs > SDI Output menu. The following table lists the characteristics of the SDI video connectors. WVR8200 and WVR8300 System Integrator...
- Page 21 Option EYE or PHY) into 75 Ω load Alternate Output Frequency SD = 27 MHz HD = 74.25 or 74.17852 MHz Output Type BNC, 75 Ω internally terminated Output Level 800 mV ± 10% into 75 Ω load WVR8200 and WVR8300 System Integrator...
- Page 22 Table 6: External reference connector specifications Connector Characteristic Description Input Type BNC, passive loop-through, 75 Ω compensated Input Level -6 to +6 dB Maximum Input Voltage Level ± 5 V, DC Maximum Absolute Input Voltage ± 5 V, DC WVR8200 and WVR8300 System Integrator...
- Page 23 An example of a suitable cable is Belden 8451, which is a shielded twisted pair cable. Alternatively, you can purchase an audio breakout cable (Tektronix part number 012-1688-00), which provides a two meter cable with XLR connectors for all twelve inputs and eight outputs.
- Page 24 +24 dBu ± 0.3 dBu Output Type 62 pin, 3 row, DSUB, balanced, unterminated; ground negative output to support unbalanced mode Maximum Output Level +24 dBu ± 0.5 dBu (designed to drive a ≥ 600 Ω load) WVR8200 and WVR8300 System Integrator...
- Page 25 LTC Signal Amplitude Range 0.2 V to 5.0 V balanced differential or single-ended Ground Closure Input Signal TTL thresholds, 5 V max input, -0.5 min input; pull low to assert Ground Closure Output Signal One open collector output WVR8200 and WVR8300 System Integrator...
- Page 26 Vertical sync output Ground Not used Ground Characteristic Description Output Connector VGA DSUB Output Format Y, Pb, Pr with sync on Y; RGB with sync on all Active Video Accuracy 700 mV ± 5% (Y-Pb-Pr mode) WVR8200 and WVR8300 System Integrator...
- Page 27 Blue – (Link 2) Digital clock – (Links 1 and 2) Analog red Analog horizontal sync Analog green Analog ground Return for R, G, B signals Analog blue Characteristic Description Output Connector DVI-I (integrated, digital and analog) WVR8200 and WVR8300 System Integrator...
- Page 28 The pin assignments on the connector of a WVR8RFP Remote Front Panel are identical to those of the Front Panel connector on the WVR8200 and WVR8300 instruments. The WVR8RFP comes with a 25 foot remote cable. (An optional 100 foot remote cable is available.) If building a custom length cable, it’s recommended to use...
- Page 29 TX_D1+ Transceive Data+ TX_D1- Transceive Data- RX_D2+ Receive Data+ Not used Not used RX_D2- Receive Data- Not used Not used Description Characteristic Ethernet connector RJ-45 LAN supporting 10/100/1000 BaseT; supports manual and DHCP address modes WVR8200 and WVR8300 System Integrator...
- Page 30 USB memory drive. The following table describes the signal characteristics of the USB connector. Table 15: USB connector specifications Connector Characteristic Description Type Host Speed Complies with USB 1.1 and 2.0 Full Speed Specification (12 Mb/s) WVR8200 and WVR8300 System Integrator...
-
Page 31: Video System Installation
NOTE. To monitor serial digital signals around a routing switcher, connect your serial sources through a patch panel to a serial router. Connect the output of the serial router to an SDI input for comparison. WVR8200 and WVR8300 System Integrator... - Page 32 This monitoring connection is best because it checks the performance of the entire path. The return loss of the instrument is sufficiently high that, in most cases, the destination receiver sets the system return loss. WVR8200 and WVR8300 System Integrator...
- Page 33 The BNC connectors this instrument are designed to work with the 50 Ω standard (large diameter) center pins. CAUTION. To prevent intermittent signal connections, do not use connectors or terminators with the smaller diameter center pins. WVR8200 and WVR8300 System Integrator...
-
Page 34: Power-On And Power-Off Procedure
Make sure that the power cord is accessible when the product is operating. Power-Off 1. Press the power button on the instrument front-panel to turn the instrument off. 2. To remove power completely, disconnect the power cord from the rear-panel of the instrument. WVR8200 and WVR8300 System Integrator... -
Page 35: Network Operation
Event and Diagnostic log files, or to capture images of the instrument display Ethernet Connection Connect the instrument to your network using an Ethernet cable. You can connect it directly to the instrument or through a HUB, as shown below. WVR8200 and WVR8300 System Integrator... - Page 36 9. Repeat steps 7 and 8 for the Subnet Mask and the Gateway Address. 10. If desired, select Instrument Name and then press the right arrow button to assign the instrument a network name. 11. Press the CONFIG button to close the configuration menu. WVR8200 and WVR8300 System Integrator...
- Page 37 The SNMP commands are contained in a MIB (Management Information Base). Refer to the WFM Series Waveform Monitors and WVR Series Waveform Rasterizers Management Information Base Technical Reference (Tektronix part number 077-1592-XX) for information about using the MIB to control the instrument.
- Page 38 For example, the IP address 124.161.038.092 should be entered as follows: 124.161.38.92 7. The Web browser will display the remote interface for the instrument. To make a selection, click the desired link. WVR8200 and WVR8300 System Integrator...
Need help?
Do you have a question about the WVR8200 and is the answer not in the manual?
Questions and answers