Sungrow SH5K User Manual
Grid-connected hybrid inverter
Hide thumbs
Also See for SH5K:
- User manual (116 pages) ,
- Quick user manual (63 pages) ,
- Wiring manual (5 pages)
Table of Contents
Advertisement
Quick Links
Advertisement
Table of Contents
Troubleshooting

Related Manuals for Sungrow SH5K


Summary of Contents for Sungrow SH5K
- Page 1 User Manual SH5K Grid-Connected Hybrid Inverter SH5K-UEN-Ver14-201708 Version:1.4...
-
Page 3: About This Manual
Documents must be stored carefully and be available at all times. All rights to the content of this manual are owned by Sungrow Power Supply Co., Ltd. (hereinafter “SUNGROW”). No part of this document can be modified, distributed, reproduced or published in any form or by any means without prior written permission from SUNGROW. - Page 4 Symbol Explanation Indicates additional information, emphasized contents or tips that may be helpful, e.g. to help you solve problems or save time.
- Page 5 Contents About This Manual ................I 1 Safety ..................1 2 System Solution ............... 5 On-grid System ....................... 7 2.1.1 Conventional PV Grid-connected System ............7 2.1.2 PV Energy Storage System (PV ESS) ..............8 Off-grid System ....................10 ...
- Page 6 Identifying the Inverter ..................23 Storing the Inverter ................... 24 5 Mechanical Mounting ............25 Safety and Location Requirements .............. 25 Installing the Inverter ..................27 Grounding the Inverter ..................28 ...
- Page 7 7.4.1 Meter Installation and Connection ..............57 7.4.2 Battery Information ....................59 7.4.3 System Time ......................60 8 Troubleshooting and Maintenance ........61 Troubleshooting ....................61 8.1.1 Troubleshooting of LED Indicators ..............61 8.1.2 Troubleshooting of Faults ................... 61 ...
- Page 8 10.7.11 Adding the Existing System ................88 10.7.12 Testing Earth Fault ..................... 88 10.7.13 DRM Switch Setting ..................89 10.7.14 PT1000 Switch Setting..................89 10.7.15 Factory Reset ....................... 89 11 Appendix II: Visiting and Configuring the Webserver ..90 11.1 User and Authority .....................
-
Page 9: Safety
1 Safety General Safety The inverter has been designed and tested strictly according to international safety regulations. Read all safety instructions carefully prior to any work and observe them at all times when working on or with the inverter. Incorrect operation or work may cause: injury or death to the operator or a third party;... - Page 10 1 Safety User Manual There is a danger from a hot surface that may exceed 60°C. Danger to life due to high voltages! Only qualified personnel can open and service the inverter. Check the user manual before service! Danger to life from electric shock due to live voltage Do not open the enclosure when the inverter is working.
- Page 11 User Manual 1 Safety Only qualified personnel can change the country setting. Unauthorized alteration of the country setting may cause a breach of the type-certificate marking. Inverter damage due to electrostatic discharge (ESD). By touching the electronic components, you may damage the inverter. For inverter handling, be sure to: avoid any unnecessary touching;...
- Page 12 1 Safety User Manual Incorrect inverter parameters will lead to the premature aging of battery. Skills of Qualified Personnel Qualified personnel must have the following skills: training in the installation and commissioning of the electrical system, as well as the dealing with hazards; knowledge of the manual and other related documents;...
-
Page 13: System Solution
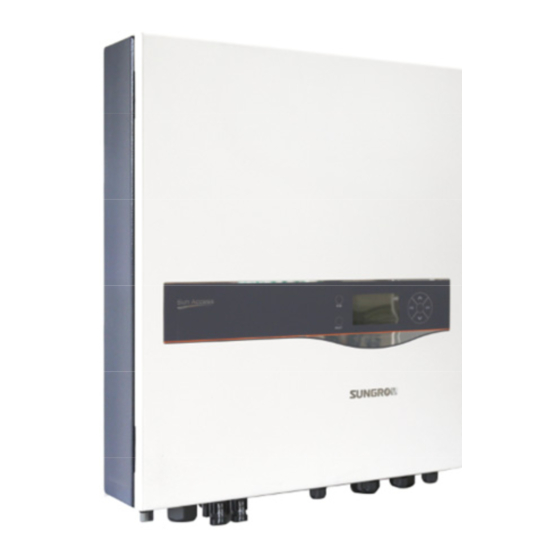
Any use other than that described in this chapter is not permitted. SH5K is a single-phase hybrid inverter applicable to both on-grid and off-grid PV systems. With the Energy Management System (EMS) integrated, it can control and optimize the energy flow so as to increase the self-consumption of the system. - Page 14 2 System Solution User Manual Name Description Communication connection RS485, Ethernet, CAN, AI, DO and DRM. Hasp lock To open/lock the enclosure lid. Second PE terminal For reliable grounding. LCD display panel Human-computer interaction interface. The following figure shows the dimensions of the inverter. Fig.
-
Page 15: On-Grid System
User Manual 2 System Solution Meter The SUNGROW single-phase energy meter is installed next to the main switch to measure the export power, grid voltage and current. It communicates with the inverter through an RS485 connection. The dimensions are shown below. -
Page 16: Pv Energy Storage System (Pv Ess)
User Manual Tab. 2-1 System Compositions Item Description Remark Utility grid Grid earthing system types: TT, TN SUNGROW single-phase Measures the export power and communicate energy meter with the inverter via the RS485 port. Inverter SH5K. Monocrystalline silicon, polycrystalline silicon, PV strings and thin-film without grounding. - Page 17 User Manual 2 System Solution Energy Management during Night The battery discharges to provide energy to loads. If the battery is empty or there is not enough power from the battery system to supply active loads, the unmet power will be supplied by the grid.
-
Page 18: Off-Grid System
2 System Solution User Manual If the meter is abnormal or not equipped: the inverter can run normally; the battery can be charged, but not allowed to discharge; the export power setting on the LCD display will be ineffective; the DO function of optimized mode will be disabled. 2.2 Off-grid System The utility grid must be a TN system for the off-grid application. -
Page 19: Retrofitting The Existing Pv System
User Manual 2 System Solution 2.3 Retrofitting the Existing PV System The SH5K hybrid inverter is compatible with any single-phase PV grid-connected inverters. An existing PV system can be retrofitted to be a PV ESS with the addition of SH5K. -
Page 20: Function Description
3 Function Description 3.1 Safety Function 3.1.1 Protection The basic protective functions can be grouped as follows. short circuit protection; insulation resistance detection; inverter output voltage monitoring; inverter output frequency monitoring; residual current monitoring; DC injection of AC output current surveillance; anti-islanding protection;... -
Page 21: Energy Conversion And Management
User Manual 3 Function Description 3.2 Energy Conversion and Management The inverter converts the DC power from the PV array or the battery to the AC power, which conforms to the grid requirements. It also transmits the DC power from the PV panel to the battery. - Page 22 3 Function Description User Manual When Vmin < V < 230 V, P = Pn ×(V / 230 V) grid Refer to “12.3.1 Volt-watt Response” for over-voltage curve. The following figure shows the under-voltage derating curve. Normally working area 230V Fig.
-
Page 23: External Demand Response
User Manual 3 Function Description 3.2.2 External Demand Response The inverter provides a terminal block for connecting to a demand response enabling device (DRED). The DRED asserts demand response modes (DRMs). The inverter detects and initiates a response to all supported demand response commands within 2s. -
Page 24: Active Power Response
3.3 Battery Management The following kinds of batteries are compatible with the SH5K PV ESS. Li-ion battery from Sungrow, LG Chem, GCL Pylon, BlueSun and BYD. Lead-acid battery from Narada (which has a pre-set setting) or others (which... -
Page 25: Charge Management
Tab. 3-2 Battery State Definition Port Voltage/SOC Type Damaged Empty Normal Full Sungrow 0 %–100 % < 28 V SOC < 0 % SOC = 100 % (new system) (by default) Sungrow 5 %–100 %... - Page 26 A battery under-voltage warning is stated on the LCD. Trigger (only An emergency charge command is reported to the inverter. for Sungrow / Bluesun / BYD) All the following conditions are met: ≥ ≥ (Min. SOC) – 1 % (valid only when the Min. SOC is 3 %).
-
Page 27: Discharge Management
3.3.4 Battery Temperature Sensor (PT1000) SH5K has integrated a PT1000 temperature sampling port for lead-acid batteries. With the external PT1000 installed, SH5K can sample the temperatures of the external environment or the battery cabinet. The system uses the sensor input to perform power derating, battery over-temperature and under-temperature protection. -
Page 28: Communication And Configuration
The inverter provides various parameter configurations for optimal operation. Data storage and display The inverter records running information and error information. They are displayed on the LCD screen. Remote firmware upgrade for the inverter Local and remote firmware online upgrade for Sungrow battery... -
Page 29: Unpacking And Storing
Check the delivery contents for completeness according to the packaging list. Check the inner contents for any visible damage. Contact SUNGROW or the distributor in case of any damaged or missing components. It is the best choice to store the inverter in the original packaging. So, do not dispose of it. -
Page 30: Delivery Contents
4 Unpacking and Storing User Manual 4.2 Delivery Contents Wall-mounting bracket Inverter Energy meter and CT cable Expansion plug set (x2) PV connectors (x2) AC connector set Power supply cable (meter) CAN cable (battery) RS485 cable (meter) Copper bar OT25-6 terminals M5 screws and washers Key to the front cover Documents... -
Page 31: Identifying The Inverter
The nameplate clearly identifies the product. It is located on the side of the enclosure. Fig. 4-3 Inverter Nameplate Item Description Item Description SUNGROW logo and product Marks of certification institutions type Barcode, grid standard, company Technical data name, website and origin Tab. 4-1 Description of Icons on Nameplate... -
Page 32: Storing The Inverter
4 Unpacking and Storing User Manual Icon Description TUV mark of conformity. CE mark of conformity. 4.4 Storing the Inverter If you do not install the inverter immediately, choose an appropriate location to store it. Instructions for storage are: The device must be stored in the original packaging. The storage temperature should be always between -30°C and +85°C, and the storage relative humidity should be always between 0 and 100 %. -
Page 33: Mechanical Mounting
5 Mechanical Mounting 5.1 Safety and Location Requirements In order to avoid electric shock or other injury, be sure there is no electricity or plumbing installations before drilling holes. Risk of injury due to improper handling The weight can cause injuries, serious wounds, or bruise. Always follow the instructions when moving and positioning the inverter. - Page 34 5 Mechanical Mounting User Manual The location should be away from flammable materials or gas, and not enclosed. The shaded side of the building would be better to prevent the inverter from exposure to the sun, rain, and snow. Place at eye level for easy Install vertically for good heat operation and reading: dissipation.
-
Page 35: Installing The Inverter
User Manual 5 Mechanical Mounting Clearance requirement and multiple installation: 5.2 Installing the Inverter Install the inverter on the wall by means of the wall-mounting bracket and expansion plug sets as follows: Install the wall-mounting bracket. Mount the inverter to the Secure the inverter with two M5 bracket. -
Page 36: Grounding The Inverter
5 Mechanical Mounting User Manual 5.3 Grounding the Inverter A second protective earth (PE) terminal is equipped at the side of the inverter. Be sure to connect this PE terminal to the PE bar for reliable grounding. Fig. 5-1 Second PE Terminal In no case shall the second PE connection substitute for the PE connection to the terminal block of AC connector. -
Page 37: Installing The Meter
5 Mechanical Mounting 5.4 Installing the Meter The SUNGROW meter should be installed between the grid and the load. It supports a 35 mm DIN-rail installation, as shown in the following figure. Fig. 5-2 Installing the Meter to the Rail... -
Page 38: Electrical Connection
6 Electrical Connection This chapter mainly describes the cable connections of the system. Danger to life due to a high voltage inside the inverter Make sure that the cables are not live before electrical connection. Do not turn on the AC circuit breaker until all the electrical connections are completed. - Page 39 User Manual 6 Electrical Connection Label Description AC-Grid AC terminal to the utility grid. Two holes for the control cable and DI cable of the backup Backup Ctrl box STB5K. PV1+, PV1-, PV2+, PV2- Terminals for the DC cables. ON, OFF DC switch.
-
Page 40: Meter Connection
6 Electrical Connection User Manual 6.2 Meter Connection The SUNGROW single-phase energy meter should be installed next to the main switch. Procedure Take out the meter (with 1-phase sensor) and the cables from the packaging. Connect the cables to the meter. - Page 41 User Manual 6 Electrical Connection Proceed as follows to connect the RS485 wires to the inverter. Open the enclosure lid. Unscrew the swivel nut from any Com. Port. Lead the cable through the cable gland. Connect the wires to terminals A2 and B2 on the inverter.
-
Page 42: Grid Connection
6 Electrical Connection User Manual 6.3 Grid Connection Residual Current Device With an integrated universal current-sensitive residual current monitoring unit inside, the inverter will disconnect immediately from the mains power as soon as a fault current with a value exceeding the limit has been detected. However if an external residual current device (RCD) is mandatory, the switch must be triggered at a failure current of 300 mA or higher. -
Page 43: Installing The Ac Connector
User Manual 6 Electrical Connection Observe the terminal layout of terminal block. Do not connect the phase lines to “PE” terminal, otherwise the inverter will not function properly. Assemble the housing, the terminal block and cable gland. Make sure that the rib of the terminal block and the groove on the housing engage perfectly until a “Click”... -
Page 44: Pv Connection
6 Electrical Connection User Manual 6.4 PV Connection Before connecting the PV array to the inverter, ensure that the impedances between the positive terminals of the PV string and Earth, and between the negative terminals of the PV string and Earth are larger than 200 kOhm. 6.4.1 PV Input Configuration Independent Mode The two PV inputs work independently, each with its own MPPT. -
Page 45: Connecting The Inverter To The Pv Array
User Manual 6 Electrical Connection Parallel Mode Both PV strings should have the same type, the same number of PV panels, identical tilt and identical orientation. Two trackers are configured in parallel to handle power and/or current levels higher than those a single tracker can handle. Prior to connecting the inverter to PV inputs, the specifications in the following table should be met: Total DC Power Limit... - Page 46 6 Electrical Connection User Manual Assembling the PV Connector Strip the insulation from the cables Assemble the cable ends by by 7 mm 8 mm. crimping pliers. – Lead the cable through the cable gland to insert into the insulator until it snaps into place.
-
Page 47: Communication Connection
User Manual 6 Electrical Connection The inverter will not function properly if the DC polarities are reversed. Check the positive and negative polarity of the PV cells. (Optional) Install the copper for Plug connectors into the parallel mode. corresponding terminals. Seal unused DC terminals with the terminal caps. -
Page 48: Ethernet Connection
6 Electrical Connection User Manual Ethernet function: Through the Modbus TCP/IP protocol, the EMS or the Control Box from the third party can fully control the on/off, derating, charging and discharging of the inverter. The inverter operation information can be transferred via Ethernet port. Visit the Webserver and you can view the information. -
Page 49: Wi-Fi Connection
User Manual 6 Electrical Connection Cable Requirements Use a TIA/EIA 568B standard network cable with a diameter of 3 mm 5.3 mm. – Refer to the switch/router’s manual for the definition of the communication port. Procedure: Unscrew the swivel nut from Lead the cable through the any Com. -
Page 50: Battery Connection
6 Electrical Connection User Manual 6.6 Battery Connection This section mainly describes the cable connections on the inverter side. Refer to the instructions supplied by the battery manufacturer for the connections on the battery side. A fuse with the specification of 150 V/125 A (type: Bussmann BS88 125LET) is integrated to the BAT- terminal. -
Page 51: Connecting The Can Cable
6.6.2 Connecting the CAN Cable The CAN cable enables the communication between the inverter and the Li-ion battery from LG, Sungrow, GCL, Pylon (US2000B), BlueSun or BYD. Procedure: Take out the CAN cable (terminal marks CANH and CANL) from the packaging. -
Page 52: Connecting The Rs485 Cable
6 Electrical Connection User Manual For GCL/BlueSun/BYD battery, please cut through the green (pin 6) and white-green (pin 3) wires from the CANH and CANL terminals to set up successful communication. 6.6.3 Connecting the RS485 Cable The RS485 cable connected to the RS485_1 enables communication between the inverter and the Pylon Li-ion battery US2000A. -
Page 53: Connecting The Temperature Sensor
Remove the cable jacket and strip the wire insulation. Tighten wires BAT_Temp.. Fasten the swivel nut and place the temperature sensor next to the lead-acid battery. 6.7 STB5K Connection (Off-grid) The backup box is installed between the SUNGROW meter and the hybrid inverter SH5K. - Page 54 A residual current device (RCD) should be required on the LOAD port of the backup box STB5K. Cross-section: 4 mm², cable diameter: 10 mm 14 mm – Connect terminals L1, N1 and PE to the grid, and connect terminals L4, N4 and PE to the AC terminals on SH5K.
- Page 55 User Manual 6 Electrical Connection Connecting the Control Cable and DI Cable The control cables (with end marks C1 and C2) and the DI cable (with end marks DI1, DI2, DI3 and VDD) are delivered with the backup box STB5K. Take out the cables from the packaging of STB5K.
-
Page 56: Do Connection
6 Electrical Connection User Manual 6.8 DO Connection The inverter has two DO relays with different functions as follows: − DO1: Consumer load control. Please choose the appropriate contactor according to the load power, e.g. the contactor types of the 3TF30 series from SIEMENS (3TF30 01-0X). - Page 57 User Manual 6 Electrical Connection An AC contactor must be installed between the inverter and appliances. It is forbidden to connect the load directly to the DO port. The current of the DO dry contact should not be larger than 3 A. The DO node is not controlled once the inverter is powered off.
-
Page 58: Commissioning
7 Commissioning Commissioning is essential for the system, which can protect it against fires, injury and electric shock. 7.1 Inspection before Commissioning Check the following items before starting the system: All the installation sites are convenient for operation, maintenance and service. -
Page 59: Commissioning Procedure
(Optional) Turn on the switch on the battery pack manually if the battery is equipped with a switch (such as LG Li-ion battery, Pylon Li-ion battery and lead-acid battery). Rotate the DC switch to “ON”. The DC switch may be integrated in SH5K or installed by the customer. The LCD screen will... - Page 60 7 Commissioning User Manual Refer to Fig. 7-1 for button operations and complete all initial settings according to the procedure in Fig. 7-2. Fig. 7-2 Procedure for Initial Settings...
- Page 61 User Manual 7 Commissioning Tab. 7-2 Grid Standard Description Grid company Code Company AusGrid, NSW Ergon Energy, QLD Energex, QLD SA Power Networks,SA Powercor,VIC Western Power,WA Default Company not mentioned above Tab. 7-3 Parameters of Grid Standards Parameter Default Over-voltage 260.0 260.0 260.0...
- Page 62 Leading: the inverter is sourcing reactive power to the grid. Lagging: the inverter is sinking reactive power from the grid. For the explanations of other modes, see “12.2 Reactive Power Regulation”. Battery parameters: “No Battery” or “Lead-acid Narada” option: “Li-ion Sungrow” option: “Li-ion LG” option: Set the battery capacity.
- Page 63 User Manual 7 Commissioning “Li-ion Pylon” option: “Li-ion GCL” option: “Li-ion BlueSun” option: “Li-ion BYD” option: “Other Lead-acid” option: Max. Chrg / Max. DChrg: Make sure that the charge or discharge current is not beyond the upper limit (65 A) to protect the battery from overcharging or deep discharging.
-
Page 64: Parameter Description
7 Commissioning User Manual Tab. 7-4 Description of Other Lead-acid Battery Parameter Parameter Description Default Range upper limit Max. Chrg 0.300C 0.05C to 2C charging current upper limit Max. DChrg 0.300C 0.1C to 2C discharging current The rated voltage of the Rate Vtg 48.0 V 30 V to 60 V... -
Page 65: Result Verification
User Manual 7 Commissioning Tab. 7-5 State Descriptions of LED Indicators LED Label LED State Description The inverter is running normally. Blinking The inverter is in the process of starting. “RUN” Other states except Running and Starting. (Refer to Tab. 10-1 for state descriptions.) Permanent fault or upgrade failure. - Page 66 Make sure that the L line and N line are connected to the right terminals. For Incorrect Installation Position Make sure that the 1-phase sensor of the SUNGROW meter should be placed to the phase line (L) from the main switch. If otherwise, the energy flow indicated on the LCD will be wrong.
-
Page 67: Battery Information
User Manual 7 Commissioning Action LCD Display Explanation Method 1: Turn off all the household loads. All the PV power generation should be exported to the grid, as shown in the “Correct” figure. Method 2: Stop the inverter via the LCD menu. -
Page 68: System Time
7 Commissioning User Manual Proceed as follows to modify the settings. Stop the inverter via the LCD menu. Refer to “10.6 Starting and Stopping the Inverter”. Reset the battery type and parameters. Refer to “10.7.9 Setting the Battery Type”. Start the inverter via the LCD menu. Refer to “10.6 Starting and Stopping the Inverter”. -
Page 69: Troubleshooting And Maintenance
“RUN” indicator goes out 4. Check whether the DC input voltage exceeds the start voltage of the inverter. 5. If all of the above are OK, please contact SUNGROW. 1. A fault is not resolved. 2. Perform troubleshooting according to the fault type on the LCD screen. -
Page 70: Troubleshooting
8 Troubleshooting and Maintenance User Manual For Inverter Side Code Specification Troubleshooting 1. Check the grid voltage. Grid over-voltage. 2. If the grid voltage exceeds the (default range: 257 V–270 V) permissible range, consult the utility grid for a solution. Temporary grid over-voltage in This is a short-term fault. - Page 71 45℃. If not, please contact SUNGROW for a solution. Wait 5 minutes for inverter recovery Relay fault on the grid side. or restart the system. 041, Wait 5 minutes for inverter recovery Leakage current sampling fault.
- Page 72 1. Check if the fan is blocked. Fan2 abnormal speed warning. 2. Restart the system. 1. Check whether the power cable connections are correct. 2. For Sungrow single-phase meter, Warning reverse cable check whether the CT clamp of the connection Sungrow 1-phase sensor is correctly placed.
- Page 73 PV1 boost short-circuit fault The inverter may be damaged. Contact SUNGROW for a solution. PV2 boost short-circuit fault 1. Check and clean the heat sink. 2. Check whether the inverter is installed in sunlight or the ambient INV over-temperature fault.
- Page 74 Abnormal communication Check whether RS485 warning of the Sungrow Meter. connection is correct. (Inverter normally 3. Check if the 120 Ohm (2) resistor connected to the grid.) for RS485_2 is pushed to “ON” when the length of RS485 cable is longer than 100 m.
- Page 75 User Manual 8 Troubleshooting and Maintenance Code Specification Troubleshooting exceeds 45℃. 3. Restart the system. 1. The inverter can normally be connected grid Transformer direction charge/discharge has stopped. recognition error. 2. Wait a moment for system recovery or restart the system. FRAM2 warning Restart the inverter.
- Page 76 4. Wait a moment for system recovery or restart the system. Restart the system, if the fault persists, ID competing failure please contact SUNGROW for a solution. inverter normally connected grid 837, charge/discharge has stopped.
- Page 77 User Manual 8 Troubleshooting and Maintenance Code Specification Troubleshooting fault. 3. Force a shutdown and restart the inverter and battery system. 4. Wait a moment for system recovery or restart the system. inverter normally connected grid Low SOH (State of Health) charge/discharge function is normal.
-
Page 78: Maintenance
Lethal voltage still exists in the inverter. Please wait at least 10 minutes and then perform maintenance work. There is a button battery on the inner PCB board of the LCD. Contact the SUNGROW Service Dept. for replacement when the relevant fault alarm occurs. -
Page 79: System Decommissioning
Stopping the Inverter”. Disconnect the AC circuit breaker and secure against reconnection. Rotate the DC switch to “OFF”. The DC switch may be integrated in SH5K or installed by the customer. Disconnect the DC circuit breaker between the battery and the inverter. -
Page 80: Decommissioning The Battery
User Manual 9 System Decommissioning Dismantling the Inverter Refer to Chapter 4 and Chapter 5, dismantle the cables in reverse procedure. Remove the wall-mounting bracket from the wall if necessary. Disposing of the Inverter Users should take the responsibility for the disposal of the inverter. Some parts and devices of the inverter, such as, LCD displayer, batteries, capacitors, may cause environment pollution. -
Page 81: Appendix I: Lcd Operation
16:37: Current system time. Neither the grid power nor the load power will be displayed on the main screen in case of no SUNGROW meter installed. If there is no button operation for: 1 minute, the LCD backlight is OFF;... - Page 82 Whether the insolation is sufficient and the PV connection is correct. Whether the battery level is sufficient and the cable connection is correct. If no anomaly is found, disconnect the DC switch and the main switch to restart. If it still does not work, contact SUNGROW.
-
Page 83: Lcd Menu Structure
User Manual 10 Appendix LCD Operation 10.2 LCD Menu Structure Main Menu Run Info ON / OFF Settings Time Country Fault Record Password: 111 Password: 111 Power curve Daily energy Total energy Reactive Power * Refer to 12.2 Reactive Power Regulation. Battery info Grid info Active Power... -
Page 84: Setting The Time
10 Appendix LCD Operation User Manual Abbreviations Abbreviation Complete Abbreviation Complete Csmp Consumption Export Chrg Charge Total Battery Temperature State of Charge State of Health Voltage Curr Current State Inverter Power Frequency Capacity Demand respond mode Ver. Version Ref. Reference Constant charging Max. - Page 85 User Manual 10 Appendix LCD Operation ×4)→Country (Press ENT) Main Screen (Press ENT)→Menu (Press Press and Press to input the password 111. Press to confirm the password. Only the codes of GB, NL, BE, CHN, SA and AU are supported. Select the correct grid standard for the country code“AU”.
-
Page 86: Viewing The Fault Codes
10 Appendix LCD Operation User Manual Country Code Full Name Language GR_L Greece Land English GR_IS Greece Island English Netherlands English Portugal English China Chinese Sweden English America English South Africa English Other Country not included above English Tab. 10-3 Description of Multi. Stage Protective Parameters Parameter Explanation Max-V prot. -
Page 87: Starting And Stopping The Inverter
User Manual 10 Appendix LCD Operation Refer to the following table for the fault type explanations. Fault Type Explanation GRID Grid faults (AC side) PV faults (DC side) System faults (inverter) Permanent faults WARN Warnings BDCF Faults of battery charge/discharge circuit BDCPF Permanent faults of battery charge/discharge circuit BATW... -
Page 88: Advanced Settings
10 Appendix LCD Operation User Manual When the DRM state is DRM0, the “ON” option will be disabled. 10.7 Advanced Settings 10.7.1 Inputting Password The parameter settings are protected with a password. If you want to set the inverter’s parameters, you have to input the correct password. ×2)→Settings (Press ENT) Main Screen (Press ENT)→Menu (Press Press... -
Page 89: Setting The Zero-Export Function
If the off-grid function is enabled, the buzzer inside the inverter will beep intermittently for 20 s when the battery level is lower than the threshold value specified in the following table. Tab. 10-4 Threshold Values of Different Batteries Battery Type SOC Threshold Sungrow ≤ 6 %... -
Page 90: Setting The Battery Usage Time
10 Appendix LCD Operation User Manual Battery Type SOC Threshold Pylon (US2000A) ≤ 20 % Pylon (US2000B) ≤ 21 % LG / GCL / BlueSun ≤ 16 % ≤ 11 % Narada lead-acid, other lead-acid ≤ 45 V 10.7.5 Setting the Battery Usage Time ×2)→Settings (Press ENT)→Input Main Screen (Press ENT)→Menu (Press password 111 (Press ENT)→Settings (Press... -
Page 91: Setting Load Control
User Manual 10 Appendix LCD Operation It is recommended to set the time period in off-peak tariff time. The time period 1 is in priority to the time period 2 if two periods overlap. The charging energy comes from the excess PV energy in priority to the energy from the grid. - Page 92 10 Appendix LCD Operation User Manual ON/OFF Control In this mode, the system will control the load operation according to the setting. Set to OFF in the following example. Fig. 10-3 DO Operation in ON/OFF Control Optimized Control The system will control the load operation according to the power optimization algorithm of energy management.
-
Page 93: Setting The Communication Parameters
User Manual 10 Appendix LCD Operation Fig. 10-4 DO Operation in Optimized Control 10.7.8 Setting the Communication Parameters ×2)→Settings (Press ENT)→Input Main Screen (Press ENT)→Menu (Press password 111 (Press ENT)→Settings (Press ×7)→Comm. Param (Press ENT) − The communication address ranges from 1 to 247. - Page 94 10 Appendix LCD Operation User Manual “No Battery” or “Lead-acid Narada” option: “Li-ion Sungrow” option: “Li-ion LG” option: Set the battery capacity. “Li-ion Pylon” option: “Li-ion GCL” option: “Li-ion BlueSun” option: “Li-ion BYD” option:...
-
Page 95: Setting The Protective Parameters
User Manual 10 Appendix LCD Operation “Other Lead-acid” option: * Refer to Tab. 7-4 for the explanations, ranges and default values of the parameters. 10.7.10 Setting the Protective Parameters ×2)→Settings (Press ENT)→Input Main Screen (Press ENT)→Menu (Press password 111 (Press ENT)→Settings (Press ×9)→Prot. -
Page 96: Adding The Existing System
+ [rated power of the existing PV system]). For example, retrofit an existing PV system (rated power: 3000 W) with SH5K hybrid inverter (rated power: 5000 W). The total export limit can be set from 3000 W to 8000 The export power limit can also be set via the Zero-export menu that described in section 10.7.3 . -
Page 97: Drm Switch Setting
User Manual 10 Appendix LCD Operation 10.7.13 DRM Switch Setting ×2)→Settings (Press ENT)→Input Main Screen (Press ENT)→Menu (Press password 111 (Press ENT)→Settings (Press ×12)→DRM Switch (Press ENT) The DRM function to the DRED (demand response enabling device) is enabled by default. Set to Disable to turn off the function. -
Page 98: Appendix Ii: Visiting And Configuring The Webserver
11 Appendix II: Visiting and Configuring the Webserver 11.1 User and Authority The Webserver provides user permission and installer permission: The user permission (by default): the username is user and the password is 1111. Installer permission: Select the username installer through the drop-down list. The password is 2222. -
Page 99: Main Interface
User Manual 11 Appendix Visiting and Configuring the Webserver If there is no operation for 10 minutes, the system will automatically return to the login interface. The user can change the password after signing in. For details, see the tab in the Webserver “System Information”. The figures in this chapter are all with an installer’s permission. -
Page 100: Navigation Introduction
11 Appendix Visiting and Configuring the Webserver User Manual 11.3 Navigation Introduction Fig. 11-2 Webserver Navigation History records: 10 records in each page, 100 records at most. Abbreviations Abbreviation Complete Abbreviation Complete Voltage Ter-Vtg Terminated voltage Temperature Curr Current Chrg Charge Ter-Curr Terminated current... -
Page 101: Appendix Iii: As/Nzs 4777.2 Compliant
12 Appendix III: AS/NZS 4777.2 Compliant The inverter supports the demand response modes, the reactive power regulation, and the power quality response, as specified in the standard AS/NZS 4777:2015. 12.1 Demand Response Modes 12.1.1 Connecting the inverter to a DRED The inverter has integrated a terminal block for connecting to a DRED. -
Page 102: Viewing The Drm State Via Lcd Menu
III: 12 Appendix AS/NZS 4777.2 Compliant User Manual The cable for connecting to the DRED is not included in the delivery. Use a TIA/EIA 568B standard network cable with a diameter of 3 mm 5.3 mm. – Procedure: Unscrew the swivel nut from Lead the cable through the any Com. -
Page 103: Reactive Power Regulation
III: User Manual 12 Appendix AS/NZS 4777.2 Compliant 12.2 Reactive Power Regulation Only qualified personnel can perform the power regulation settings. All the parameter settings must comply with standard AS/NZS 4777:2015. ×2)→Settings (Press ENT)→Input Main Screen (Press ENT)→Menu (Press password 111 (Press ENT)→Reactive Power (Press ENT) Press to select the desired option and Press... -
Page 104: Q(U)" Mode
III: 12 Appendix AS/NZS 4777.2 Compliant User Manual Fig. 12-1 Reactive Power Regulation Curve in Q(p) Mode 12.2.3 “Q(u)” Mode The reactive power output of the inverter varies in response to the grid voltage. Tab. 12-3 “Q(U)” Mode Parameter Explanations Parameter Explanation Default... -
Page 105: Active Power Response
III: User Manual 12 Appendix AS/NZS 4777.2 Compliant 12.3 Active Power Response ×2)→Settings (Press ENT)→Input Main Screen (Press ENT)→Menu (Press password 111 (Press ENT)→Settings (Press ×1)→Active Power (Press ENT) Press to select the desired option and Press to confirm. 12.3.1 Volt-watt Response The Volt-watt response mode is enabled by default. -
Page 106: Volt-Watt Response For Battery Charging
III: 12 Appendix AS/NZS 4777.2 Compliant User Manual 12.3.2 Volt-watt Response for Battery Charging When the power from the grid is required to charge the energy storage system, the import power from the grid varies in response to the grid voltages. The response curve is defined by the voltage reference values and the corresponding power consumption from the grid for charging energy storage. - Page 107 III: User Manual 12 Appendix AS/NZS 4777.2 Compliant Response to an increase in grid frequency: When there is an increase in grid frequency which exceeds the Start value (50.25 Hz), the inverter will reduce the power output linearly with an increase of frequency until the End value (52.00 Hz) is reached.
- Page 108 III: 12 Appendix AS/NZS 4777.2 Compliant User Manual charge rate of the storage system may be increased at a rate no greater than the power ramp rate limit, which can be set according to “10.7.10 Setting the Protective Parameters”. Fig. 12-6 Frq-Watt Mode for Under-frequency Conditions...
-
Page 109: Appendix Iv: Technical Data
13 Appendix IV: Technical Data 13.1 Inverter Technical Data PV Input Data Max. PV input power 6500 W Max. PV input voltage 600 V Startup voltage 125 V Nominal input voltage 360 V MPP voltage range 125 V–560 V MPP voltage range for nominal power 260 V–520 V No. - Page 110 13 Appendix Technical Data User Manual > 0.99 at default value at nominal power Power factor (adj. overexcited/leading–0.8 underexcited/lagging) Protection Anti-islanding protection AC short circuit protection Leakage current protection DC switch (solar) Optional DC fuse Over-voltage protection III [Main], II [PV] [Battery] System Data Max.
-
Page 111: Stb5K (Backup Box) Technical Data
User Manual 13 Appendix Technical Data Backup Data Nominal voltage 230 Vac (±2 %) Total harmonic factor output 4 % (full load) Frequency range 50 Hz (±0.2 %) Switch time to emergency mode 10 s 0.8 overexcited/leading–0.8 Power factor underexcited/lagging Max. - Page 112 The use of supplied software produced by SUNGROW is subject to the following conditions: SUNGROW rejects any liability for direct or indirect damage arising from the use of the SolarInfo software.
-
Page 113: Contact Information
The power rating of SUNGROW products covers from hundred watt to mega-watt systems. The vision of SUNGROW is to help our customers acquire stable and clean power with minimum cost, maximum reliability and enhanced safety. Contact Information Should you have any problems, please contact us through the following information.
Need help?
Do you have a question about the SH5K and is the answer not in the manual?
Questions and answers