
Related Manuals for Nilfisk-ALTO DELTABOOSTER


Summary of Contents for Nilfisk-ALTO DELTABOOSTER
- Page 1 Operating instructions DELTABOOSTER A translation of the original instructions into Danish, German, French, Dutch, Portuguese, Italian and Russian can be found on http://www.nilfisk-alto.com 7309021 d (09.2014) Original Instructions...
-
Page 2: Table Of Contents
Connection of inlet water ..................34 2.3.1 Control of filter in water tank ..............34 Connection of power between the DELTABOOSTER and the supply network (Settings on the plant, see section 3.5) .............. 35 Starting up / running in ..................36 2.5.1... - Page 3 DELTABOOSTER manual How to use the DELTABOOSTER ........38 Safety ......................38 Model survey ...................... 39 Functional diagram ..................... 40 Instrument panel ....................41 3.4.1 Main / emergency switch ..............41 3.4.2 Control switch / starting switch and stopping switch ......41 3.4.3...
-
Page 4: Product Description
DELTABOOSTER plants can be connected up on the same pipeline. With the DELTABOOSTER users no longer have to bother about the pros and cons of high or low pressure. From now on all choices are united in one system, and the solution with the optimal effect on the job to be done may always be found. - Page 5 Original Instructions...
-
Page 6: Model Survey And Main Functions
A switchboard A water tank KEW Technology C3K pumps Cabinet / frame The DELTABOOSTER is made of stainless materials through and through. DELTABOOSTER switchboard The switchboard comprises: - main (emergency) switch, to which the supply cable is connected - control switch 24V AC... - Page 7 1 (type A air gap). As standard the water tank is mounted for water connection in the left side (seen from in front). The water connection can be moved to the right side by a Nilfisk-ALTO service technician. (Water tank can be turned 180 degrees in the frame).
-
Page 8: Selection Of System
Selection of system The great degree of flexibility, an important characteristic of the DELTABOOSTER, means that each individual customer may select the system which suits his cleaning needs. The following solutions are offered: NUMBER OF PUMPS Choose from 2 to 6 pumps depending on the capacity required at the same time. In other words, the number of pumps should be decided on the basis of the number of places that are to use the system at one and the same time. -
Page 9: Technical Data
Technical data Identification of model The model identification appears from the identification plate on the cabinet. The model plate provides the following data: Model Nilfisk-ALTO No. Nozzle Pump pressure Max. pressure Water volume Max. temperature of inlet water Voltage / frequency / nominal input... -
Page 10: Switchboard
Model Electric Data Power Max. tion of absorption capacity tightness B,E,I, 230V 3~+ EARTH, 50Hz 6,7-20,4kW 3x6,7kW IP55 DELTABOOSTER-3P 20,6-63 A 230V 3~+ EARTH, 50Hz 6,7-40,5kW 6x6,7kW IP55 DELTABOOSTER-6P 20,6-125 A DK,S,N, 400V 3~+ EARTH, 50Hz 6,7-20,4kW 3x6,7kW IP55 DELTABOOSTER-3P... -
Page 11: Dimensions, Weight And Total Performance For Systems
1.3.3 Dimensions, weight and total performance per system 1 - water inlet for hot water 2 - water inlet for cold water 3 - water outlet, ∅22 mm No. of pumps Model 44C3 44C3 44C3 44C3 44C3 Cleaning power 13,2 17,6 22,0 26,4... -
Page 12: Location: Surroundings -Frost, Safety And Service Margins
Location of the DELTABOOSTER The DELTABOOSTER is fitted with vibration absorbing rubber supports, so it may be placed straight on an even surface (see section 2.2). The plant must be placed in frost-free premises where the maximum temperature does not exceed 40°C. -
Page 13: Installation Requirements For Water Connection
Installation requirements for water connection The water tank is fitted with two water inlets, one for cold water (BLUE marking) and one for hot water (RED marking). This allows the operator to control the temperature of the water being used. If no temperature control is desired both water inlets may be attached to the cold pipeline. -
Page 14: Installation Requirements For Mains Power Connection
In consideration of a future extension of the plant we recommend you to use a cable with a min. core section of cable of 25 mm. Earth wire protection is required and the connection of the DELTABOOSTER to the mains power supply MUST be carried out by an authorized electrician in conformity with local regulations. -
Page 15: Pipe System
Pipe system 1.7.1 Location of pipelines/general instructions The pump station and outlet points should be placed so that the lines become as short as possible. The line should be arranged with as few bends as possible. Sometimes it may pay to split the line close to the pump station so the lengths conducting large volumes of water become as short as possible. -
Page 16: Fittings, Standards
1.7.3 Fittings, standards - 1 Original Instructions... - Page 17 1.7.3 Fittings, standards - 2 Original Instructions...
- Page 18 1.7.3 Fittings, standards - 3 Original Instructions...
- Page 19 1.7.3 Fittings, standards - 4 Original Instructions...
- Page 20 1.7.3 Fittings, standards - 5 Original Instructions...
-
Page 21: Dimensioning Of Pipe Systems, Pressure Drop Graph
1.7.4 Dimensioning of pipe systems The below diagram shows the current pressure drop graphs meant for the dimensioning of pipe systems used in connection with the DELTABOOSTER plant. The diagram illustrates two vertical divisions for ) electro galvanized steel pipes 15x2 mm 22x2.5 mm -... - Page 22 Original Instructions...
-
Page 23: Examples
1.7.5 Examples The following examples have been worked out on the basis of stainless steel pipes and a 160 bar system, and the dimension requirements are max.15 bar pressure drop from the machine to the outlet points. Example 1 50 m 40 m 70 m Two different conditions may be used when... - Page 24 If, on the other hand, a green spray lance is selected = 33 l/min + a standard spray lance = 17 l/min the maximum load on the line b-c = 33 l/min. PRESSURE DROP Use of 50 m ∅15 mm pipe will result in a pressure drop of: 9.3 bar Maximum load on line a-b = 50 l/min.
- Page 25 Example 3 20 m 40 m 20 m 30 m 60 m 30 m 15 m 20 m 30 m 20 m 40 m 20 m 80 m Ring system Selection of spray lance: 2 green spray lances each of 33 l/min 2 blue spray lances each of 17 l/min If the maximum load is distributed evenly and symmetrically the maximum load on line b1 - c1 = 33 l/min.
-
Page 26: Mounting Requirements And Hints
1.7.6 Mounting requirements and hints Temperature compensation When hot water (max. 75°C) is used in the system due regard should be paid to thermal expan- sion of the pipes when mounting the system. When raising the temperature from10°C to 75°C the system will expand some 0.7 mm/m. - Page 27 FIXATION AT CORNERS AND TEE CONNECTORS Standard distance between pipe brackets is some 2 m. MOUNTING OF PIPE LINES/GENERAL INSTRUCTIONS Shorten the pipes by sawing off and take off burrs. When bending the pipe bending radii should not be smaller than those stated in the chart under “U-bends/hose connections”...
- Page 28 Mounting in Connection Socket Pipes of a large outer diameter and all connections in free pipings are mounted Saw the pipe rectangularly through and take off in a vice of practical reasons while you burrs. are fastening the connection socket. The screw spanner must have a length ap- It will be most easy proximately 15 times as long as the width...
-
Page 29: Outlet Points And Accessories
∅15 mm cutting ring connection. If a DELTABOOSTER spray lance is wanted the quick-coupling for the high- pressure hose should be fitted straight on to outlet point A. - Page 30 A. Pressure-relieved spray handle with 10 m hose. Hose coil with 20 m hose Single spray lance for DELTABOOSTER plant described in section 1.9 Foam lance To be used in conjunction with detachable foam injector and detergent trolley.
-
Page 31: Spray Lance System
1513 Steel 15075 none As the reactive power describes an angle together with the spray lance the pistol handle is also affected by a torque power. Alternative lances should only be mounted under the guidance of Nilfisk-ALTO staff. Original Instructions... -
Page 32: Instructions For Assembly
Instructions for assembly of DELTABOOSTER Location of the DELTABOOSTER The DELTABOOSTER is fitted with vibration absorbing rubber supports, so it may be placed straight on an even surface. The plant must be placed in frost-free premises where the maximum temperature does not exceed 40°C. -
Page 33: Mounting Base And Tip Over Safety Device
Mounting base If the base is uneven height adjustments may be made by adjusting the counter nut (1) on the machine foot (2) as shown on Fig. 1. It is important that the plant is adjusted to horizontal position. Otherwise it may be a problem opening the cabinet door. -
Page 34: Connection Of Inlet Water
Connection of inlet water The water tank is provided with two 1" water inlets: Inlet for cold water (BLUE marking) Inlet for hot water (RED marking) Fig. 3 Water is connected at the inlet sockets of the system by means of two 1" flexible hose con- nectors. -
Page 35: Connection Of Power Between The Deltabooster And The Supply Network (Settings On The Plant, See Section 3.5)
The cable should be rated to the existing current consumption which has been stamped on the DELTABOOSTER model plate. It is advisable to apply a cable with a conductor cross section of minimum 25 in preparation for a later expansion. -
Page 36: Starting Up/Running In
Check the oil level in the oil glas (cf. Fig. 6). If the oil level gets too low, the machine will automatically shut down. will light up. In the case of repeated low oil level (oil waste) please contact a Nilfisk-ALTO service technician. 2.5.2 Start Turn the main switch to position - I -. -
Page 37: Venting Of Pipe System
Adjustment of line pressure should only be carried out by an authorized Nilfisk-ALTO service technician. As a standard the DELTABOOSTER is adjusted to a line pressure of 160 bar, but it may be adjusted to any line pressure within the area 90 to 160 bar. -
Page 38: How To Use The Deltabooster
FFP 2 or higher. Save these instructions for later The high-pressure pumps of a DELTABOOSTER are fitted with a safety valve each. The safety valve has been set and sealed from the works. DO NOT INTERFERE WITH THIS SETTING! The motors in a DELTABOOSTER are protected against overload as thermal circuit breakers have been incorporated in the stator windings, and the motor is guarded. -
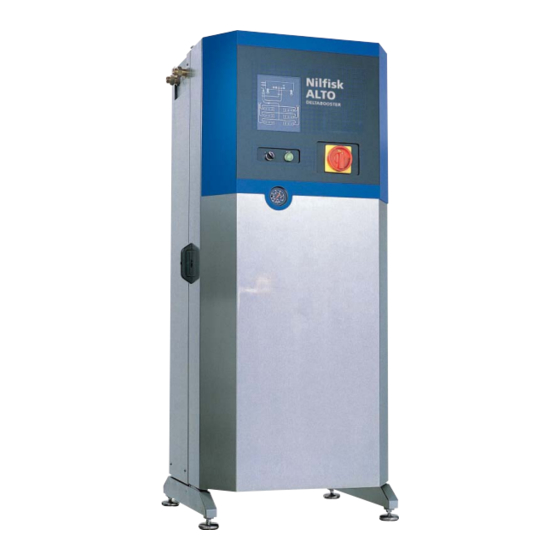
Page 39: Model Survey
Model survey 1. Switchboard 2. Main switch 3. Operation switch 4. Starting button 5. Switchboard 6. Water tank 7. Motor pump units 8. Water connection 9. Oil control 10. Pressure gauge 11. Outlet socket 12. Machine feet with vibration absorber 13. -
Page 40: Functional Diagram
Functional diagram 1. Water filter 14. Difuse filter, return 2. Water tank 15. Non-return valve 3. Overflow pipe 16. Accumulator 4. Level sensor (lack of water) 17. Motor pump unit (start inlet of water) 18. High pressure hose, machine outlet (stop inlet of water) 19. -
Page 41: Instrument Panel
The main switch (1) connects the DELTABOOSTER to the supply network when the switch is turned from pos. 0 to pos. I. At pos. 0 there is no connection between the DELTABOOSTER and the supply network and the capacity of the switch is sufficient to use it as an emergency device. -
Page 42: Control Panel
3.4.3 The control panel The control panel (5) is based upon a schematic drawing of the system where a number of control lamps will show the status of the system and possible faults. The control lamps have been divided into three categories: Green indicating a coupled unit (valve, C3K) Yellow indicating an activated sensor (pressure switch, flow, level) Red indicating a serious fault (leakage, over heating, etc.) -
Page 43: Setting And Reading Of Deltabooster
Setting and reading of DELTABOOSTER In the DELTABOOSTER the user will only need to make the following settings and readings: Setting of water temperature Setting of number of C3K pumps in operation Reading of hour meters In all three cases the switchboard (Fig. 3) will have to be opened by means of the enclosed special key. -
Page 44: Setting Of Water Temperature
3.5.1 Setting of water temperature The knob for adjusting the water temperature is placed on the steering A1 in the switchboard and may either be put in the OFF position (click function - vertically) or set on the desired mixing temperature. The yellow diode below the control knob indicates the starting point of the temperature adjustment. -
Page 45: Connection And Disconnection Of C3K Pumps
3.5.2 Connection and disconnection of C3K pumps The desired configuration of the DELTABOOSTER will determine this setting. As the system may have 2 to 6 C3K pumps connected, each module location has a specific figure connected to it.: The current configuration is set on the 8-poled transformer (cf. Fig. 3); below is a setting for a configuration of 4 C3Kpumps: C3K NO.1 ON... -
Page 46: Reading Of Hour Meters
3.5.3 Reading of hour meters On the hour meters you can read for how many hours each of the motor pump units has been running. Reading as follows: Motor pump unit 1 Hours 1/100 hours Example: 4 hours + 50/100 hour = 4½ hours Original Instructions... -
Page 47: Starting Up / Operation
Starting up/running in (cf. Fig. 4) Once the desired settings have been made the cover of the switchboard should be closed and both locks activated. Make sure the water supply has been connected. Turn the main switch (1) to position I. Turn the control switch (2), to position I and keep an eye on the control panel (3) to make sure that water is drawn in and the relief valve closed. - Page 48 The operation of the system may be controlled on the control panel. (cf. sect. 3.4.4, Fig. 2) From the above figure it appears which pumps and water supplies have been connected at the moment (green), and the status of the pressure, water flow and water level (yellow). Below is an example of the indications on the control panel in a given situation.
-
Page 49: Multipressure Spray Lance System
BLACK nozzle protection. The nine spray lances are marked with each their colour and on the spray lance chart on the DELTABOOSTER pressure, water volume and number of pumps may be read for the nine types of spray lance. The different water volumes and pressures depend on which high-pressure nozzle and which pre-nozzle the spray lance is fitted with. -
Page 50: Operation After Starting Up - Outlet Points And Equipment
Operation after starting up - outlet points and equipment 3.8.1 High pressure cock with Multipressure spray lance, Outlet point A 1. Open/close handle on high-pressure cock 2. Quick-coupling 3. Trigger on spray handle 4. Safety lock 5. Quick-coupling for spray lance 6. -
Page 51: Outlet Point With Foam Injector And Foam Lance, Outlet Point B
2. Apply the desired detergent or disinfectant by means of the foam lance (7). 3. Fit the DELTABOOSTER spray lance (6) (low pressure) in the quick-coupling (5) of the spray pistol and after-rinse. -
Page 52: Outlet Point With Detergent Trolley And Foam Lance, Outlet Point D
Nilfisk-ALTO can offer a wide range of effective substances for professional cleaning and disin- fection. The products are composed of substances which unite effectiveness with environmental considerations. -
Page 53: Maintenance
Maintenance 3.9.1 Service intervals Every six After the first months or Weekly 50 operation As required 500 operation hours hours Cleaning of water filter Check of oil level Oil change on pump 3.9.2 Pump oil The pump is supplied with a Castrol ALPHASYN T iso 150 oil. When replenishing use only this type of oil. -
Page 54: Trouble-Shooting And Correction
*) In both cases the plant will stop and the related control lamp will flash. When restarting the plant, the pump will AUTOMATICALLY cut out, and the operation can be resumed - the control lamp will now be constantly alight. If other faults occur than those enlisted, please contact your nearest Nilfisk-ALTO service centre. Original Instructions... -
Page 55: Ce Declaration
Декларация соответствия требованиям ЕС Продукт:: Моечная машина высокого давления Тип: P450 - DELTABOOSTER Описание 400 V 3~ 50 Hz IP X5 Конструкция устройства соответ- EC машина Директивы 2006/42/EC ствует следующим техническим EC Низковольтная Директива 2006/95/EC нормам: EC ЭМС директивой 2004/108/EC EC директива... - Page 56 Nilfisk-Advance AB Unit 1, 13 Bessemer Street Blacktown Taljegårdsgatan 4 ITALY NSW 2148 Australia 431 53 Mölndal Nilfisk-Advance S.p.A. www.nilfisk-alto.com.au Website: www.nilfisk-alto.se Strada Comunale Della Braglia, 18 Guardamiglio, Lombardia, I-26862 AUSTRIA SWITZERLAND www.nilfisk.it Nilfisk-ALTO NA Sondergger AG Geschäftsbereich der Nilfisk-Advance GmbH...
Need help?
Do you have a question about the DELTABOOSTER and is the answer not in the manual?
Questions and answers