Nilfisk-ALTO NEPTUNE 5 FA Service Manual
Hide thumbs
Also See for NEPTUNE 5 FA:
- Operating instructions manual (24 pages) ,
- Instrukcja obslugi (21 pages) ,
- Operating instructions manual (23 pages)
Table of Contents
Advertisement
Advertisement
Table of Contents

Subscribe to Our Youtube Channel
Related Manuals for Nilfisk-ALTO NEPTUNE 5 FA


Summary of Contents for Nilfisk-ALTO NEPTUNE 5 FA
- Page 1 NEPTUNE 5 FA Service Manual NEPTUNE 5 FA_EN_Ver.2.0_25/11...
- Page 2 Repair manuals and ” Service Technical Information” sheets should be available at the site where repairs are carried out. It is not permitted to give them to third parties. Use original Nilfisk-ALTO spare parts only. NEPTUNE 5 FA_EN_Ver.2.0_25/11...
- Page 3 Safety instructions Technical data 5-18 Construction 19 -24 Function 25-31 Troubleshooting 32-35 Service / Repair 36 -48 Adjustment / Test 49 -53 Wiring diagrams 54-61 Special tools / Spare parts...
-
Page 4: Safety Instructions
Safety instructions For your own safety Observe valid safety regulations for electrical equipment. In particular, observe the following regulations: IEC 60335-2-79 EN 60335-2-79 Additionally: Also see national regulations Before using the cleaner, always read the operating instructions Repair work should be carried and keep them readily available. -
Page 5: Technical Data
Technical data NEPTUNE 5 FA 5-50FA EU 5-50FAX EU Description 400V/3 ~50Hz 16A 400V/3 ~50Hz 16A Item no. Tol. 107146650 107146651 Technical data Test result Tol.+ Tol.- Test result Tol.+ Tol.- Pump-Data Max. inlet pressure (bar) 10,0 10,0 Max. Inlet temperature (°C) - Page 6 Technical data NEPTUNE 5 FA 5-50FA EU 5-50FAX EU Description 400V/3 ~50Hz 16A 400V/3 ~50Hz 16A Item no. Tol. 107146650 107146651 Technical data Test result Tol.+ Tol.- Test result Tol.+ Tol.- Heating Unit Boilerpower_input (kW) 78,0 78,0 Temperature t max, @ inlet 12°C...
- Page 7 Technical data NEPTUNE 5 FA SB FA EU 5-61FA EU Description 400V/3 ~50Hz 10A 400V/3 ~50 16A Item no. Tol. 107146652 107146653 Technical data Test result Tol.+ Tol.- Test result Tol.+ Tol.- Pump-Data Max. inlet pressure (bar) 10,0 10,0 Max. Inlet temperature (°C)
- Page 8 Technical data NEPTUNE 5 FA SB FA EU 5-61FA EU Description 400V/3 ~50Hz 10A 400V/3 ~50 16A Item no. Tol. 107146652 107146653 Technical data Test result Tol.+ Tol.- Test result Tol.+ Tol.- Heating Unit Boilerpower_input (kW) 67,0 85,0 Temperature t max, @ inlet 12°C...
- Page 9 Technical data NEPTUNE 5 FA 5-61FA NO 5-61FAX EU 400V/230/3 ~ Description 400V/3 ~50 16A 50Hz 25/16A Item no. Tol. 107146654 107146655 Technical data Test result Tol.+ Tol.- Test result Tol.+ Tol.- Pump-Data Max. inlet pressure (bar) 10,0 10,0 Max. Inlet temperature (°C)
- Page 10 Technical data NEPTUNE 5 FA 5-61FA NO 5-61FAX EU 400V/230/3 ~ Description 400V/3 ~50 16A 50Hz 25/16A Item no. Tol. 107146654 107146655 Technical data Test result Tol.+ Tol.- Test result Tol.+ Tol.- Heating Unit Boilerpower_input (kW) 85,0 85,0 Temperature t max, @ inlet 12°C...
- Page 11 Technical data NEPTUNE 5 FA 5-61FAX NO 5-61FA Expt 400V/230/3 ~ 440/220V/3 ~ Description 50Hz 25/16A 60Hz 23/14A Item no. Tol. 107146656 107146657 Technical data Test result Tol.+ Tol.- Test result Tol.+ Tol.- Pump-Data Max. inlet pressure (bar) 10,0 10,0 Max.
- Page 12 Technical data NEPTUNE 5 FA 5-61FAX NO 5-61FA Expt 400V/230/3 ~ 440/220V/3 ~ Description 50Hz 25/16A 60Hz 23/14A Item no. Tol. 107146656 107146657 Technical data Test result Tol.+ Tol.- Test result Tol.+ Tol.- Heating Unit Boilerpower_input (kW) 85,0 85,0 Temperature t max, @ inlet 12°C...
- Page 13 Technical data NEPTUNE 5 FA 5-61FAX AU 5-44FA JP Description 400V/3 ~50 16A 200V/3 ~50Hz 20A Item no. Tol. 107146658 107146660 Technical data Test result Tol.+ Tol.- Test result Tol.+ Tol.- Pump-Data Max. inlet pressure (bar) 10,0 10,0 Max. Inlet temperature (°C)
- Page 14 Technical data NEPTUNE 5 FA 5-61FAX AU 5-44FA JP Description 400V/3 ~50 16A 200V/3 ~50Hz 20A Item no. Tol. 107146658 107146660 Technical data Test result Tol.+ Tol.- Test result Tol.+ Tol.- Heating Unit Boilerpower_input (kW) 85,0 67,0 Temperature t max, @ inlet 12°C...
- Page 15 Technical data NEPTUNE 5 FA 5-44FA JP 5-50FAX USA Description 200/3 ~60Hz 20A 230V/1 ~60Hz 30A Item no. 107146661 107146665 Technical data Test result Tol.+ Tol.- Test result Tol.+ Tol.- Pump-Data Max. inlet pressure (bar) 10,0 10,0 Max. Inlet temperature (°C)
- Page 16 Technical data NEPTUNE 5 FA 5-44FA JP 5-50FAX USA Description 200/3 ~60Hz 20A 230V/1 ~60Hz 30A Item no. Tol. 107146661 107146665 Technical data Test result Tol.+ Tol.- Test result Tol.+ Tol.- Heating Unit Boilerpower_input (kW) 67,0 78,0 Temperature t max, @ inlet 12°C...
- Page 17 Technical data NEPTUNE 5 FA 5-61FA EU 5-61FAX EU Description 400V/3 ~50 16A 400V/3 ~50 16A Item no. Tol. 107146670 107146671 Technical data Test result Tol.+ Tol.- Test result Tol.+ Tol.- Pump-Data Max. inlet pressure (bar) 10,0 10,0 Max. Inlet temperature (°C)
- Page 18 Technical data NEPTUNE 5 FA 5-61FA EU 5-61FAX EU Description 400V/3 ~50 16A 400V/3 ~50 16A Item no. Tol. 107146670 107146671 Technical data Test result Tol.+ Tol.- Test result Tol.+ Tol.- Heating Unit Boilerpower_input (kW) 85,0 85,0 Temperature t max, @ inlet 12°C...
- Page 19 Impact = Q1 x √ P1 x 0.24 [ N ] P1 = bar. Q1 = l/min.v P1. The Neptune 5 FA is build with a NA5 pump. The by-pass system is flow activated, unlike the pressure activated by-pass system known from previous Neptune machines.
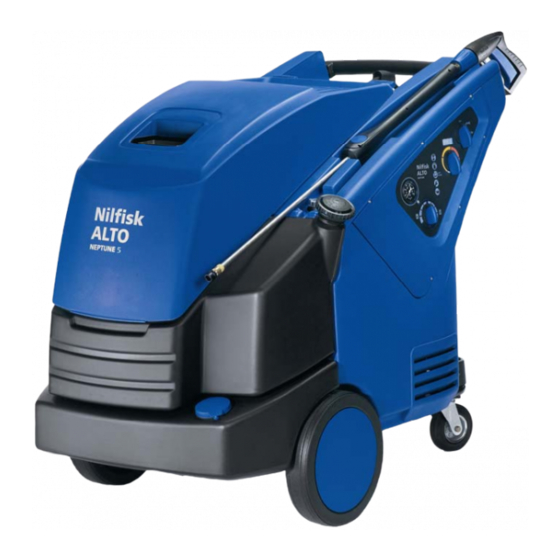
- Page 20 Construction Fig.C.3: NEPTUNE 5 FA Fig.C.3: Frame & cabinet parts Lance holder Handle Detergent tank Detergent tank Fuel tank Water break tank Fuel filter 10. External detergent filter Top cover 11. Frame Side cabinet—right 12. Side cabinet—left NEPTUNE 5 FA_EN_Ver.2.0_25/11...
- Page 21 Construction The electric box (Fig.C.6) contains the control board, the transformer. relays, fuses,and connection terminals. The cover plate is mounted with the main switch, the display, the temperature adjustment and five status/warningLights (Fig.C.4). The cover is sealed around the edge and around the manometer and the detergent valve. Display: Main switch S1: Temperature setting...
- Page 22 The transformer T1 supplies the system with 24V and 8V AC. X7 is the connector to a remote control which is available as an accessory. X2 is the connector to the Nilfisk-Alto Datalogger and to service interval settings. Detailed function is described in chapter D.
- Page 23 Construction The boiler is the heat generating part of a hot water machine. It consists of a labyrinth-constructed tube coil, which encloses the combustion chamber. The tube coil is enclosed by a double container with boiler jacket, bottom, and top in a sandwich construction, between which the combustion air is routed into the combustion.
- Page 24 Construction Fig.C.9: Motor - Pump unit The NA 5 three piston axial pump used in Neptune 5 FA is build in line with the electrical motor as one compact unit. Fig.C.10: By-pass valve Fig.C.11: Flow control The start/stop system in Neptune 5 FA is flow The flow control checks if there is flow in the Activated.
- Page 25 Function If the machine and the power supply are working correctly the following will happend during start up. Display Suction from pump Pressure Start—hot Start—cold Detergent A/B Temperature setting Status indicators Detergent valve A-B Connected to water tank Fig.D.1: Display Depending on the electronic set-up the following will happen.
- Page 26 Function When the machine is running in hot water mode, the fan draws in air and leads it into the side of the boiler, around and between the two jackets up to the air distributor. In this way the air is preheated before it is mixed with the oil spray from the nozzle.
- Page 27 Function Fig.D.3: Sensors & actors Sensors: B1: Temperature sensor in the outlet from the boiler. Controls the combustion (Y1 on/off) according to setting. B2: Flow switch sense the flow out of the pump into the boiler and controls solenoid Y1 on/off. B3: Safety thermal switch placed in the exhaust of the machine, if temperature >...
- Page 28 Function Fig.D.4: Motor/pump Stator. Suction valve. Rotor. Pressure valve. Wobble disc. BY-pass housing Ceramic piston. Water regulation valve The three ceramic pistons ”D” are driven by a wobble disc ”C”, the mission of which is to transform the rotating power from the rotor ”B” into the reciprocating pumping pistons ”D”. The angle of the wobble disc ”C”...
- Page 29 Function Fig.D.5: Working pressure Machine is started and the gun ”J” with correct lance/nozzle is open - Machine runs in working pressure ”K”: The water is pressed from the pump outlet ”A” into the by-pass housing ”C”. The water runs through the bottom of by-pass housing ”C” and directely to the outlet ”I”. Due to the water pressure the by-pass piston ”B”...
- Page 30 Function Fig.D.7: By-pass pressure The by-pass pressure is determined of the spring tension in valve ”A”. The tension is fixed and will bring out a by-pass pressure in about 30 - 35 bar. Valve ”A” also secures the self suction ability. The cut off pressure when the gun is released, is determined of the adjustment screw ”B”.
- Page 31 Function Hose connection/valve seat. Non return valves. Inlet for water from water supply. Magnet piston for reed switch E Reed switch for start of motor/pump. Water inlet from pump. Non return valve/magnet piston for H Reed switch for start of heating system.
-
Page 32: Troubleshooting
The internal faults require a systematic going through of the motor pump by a Nilfisk-ALTO technician. In order to establish the reason of the fault with certainty, it may be a help to use the over-leaf yes/no diagrams. - Page 33 Troubleshooting Below there is a list of the actual detectable errors with the belonging code. The codes „SEO“, „SEC“, „LHE“ and „FLF“ only occure in Hotwater operation. Error describtion Code Display Error micro-processor ( uProcessor ) ...
- Page 34 Troubleshooting ERROR CODE CHECK LIST Display Symptom Outer cause Inner cause Check Flow and pressure Boiler security Hot Safety temperature switch out of ad- adjustment. switch B3 opens when Wire defective. justment. Oil resi- Switch B3 must temp is higher than 270 due in boiler.
- Page 35 Troubleshooting Boiler performance: The symptom is reduced performance of the pump effect or the boiler effect. The symptom of redu- ced boiler effect is a lower water outlet temperature than the set value. The possible causes for this are as follows: Scale deposits in boiler tube: Scale formation acts as insulation and reduces heat transfer to the water.
- Page 36 Service / Repair Observitions Fig.F.01: Data Plate Fig.F.02: Water filter—Cleaning Prior to any maintenance, identify the As required clean the water filter. machine version at the data plate. Unscrew connector for water break tank. The data plate is situated in two places at the Pull out the filter by use of a nose pliers.
- Page 37 Service / Repair Electrical System - Maintenance Fig.F.05: Electrical box Fig.F.06: E box knob disassembly Caution ! Before any repair on the electrical Loosen the screw in the bottom of the knob. system - Pull out the power plug ! Drag the knob out from the shaft.
- Page 38 Service / Repair By-pass system. 1210558 Fig.F.10: By-pass - valve cone. By reassembling of the valve cone inside the water regulation, special tool no 1210558 can be used. Fig.F.09: By-pass—water regulation. By assembling and disassembling of the parts in the by-pass system be aware of the order of the components.
- Page 39 Service / Repair Valves Fig.F.12: Valve housing Fig.F.13: Thrust collar Dismount the valve housing from the Be carefull not to damage the surface cylinder block by the three M12 bolts. inside when dismounting the thrust collar. Be aware of the o-rings and valve parts.
- Page 40 Service / Repair Valves Pic. F.16: Suction valves Pic. F.17: Pressure valves Overview of the placement of suction valve Overview of the placement of pressure parts. valve parts Picture of piston guides Fig.F.18: Pressure valves Fig.F.19: Pressure valve seat ...
- Page 41 Service / Repair Cylinder block Fig.F.20: Cylinder block Fig.F.21: Oil Sleeves Overview of the placement of the parts in Take out the oil sleeves using an the cylinder block. adequate puller. Be careful not to damage the surface of the cylinder block.
- Page 42 Service / Repair Replacement of secondary seals and header ring Pic.9. Showing the right position of the header ring. Knob on header ring must be placed in groove against the centre of the cylinder head. Fig.F.24: Header ring If the header ring is mounted wrongly and not according to instruction, there is a big risk of damaging the header ring and parts of it will block pistons and valves in the pump or get stucked in the non return valve in the unloa-...
- Page 43 Service / Repair Wobble disc Fig.F.26: Pump head Fig.F.27: D-bearing cover and wobble disc The cylinder head and the cylinder block Overview of the parts inside the D- is fastend to the D-bearing cover by two bearing cover. 6mm mounting bolts for the cylinder block and three 12mm bolts for the cylinder head.
- Page 44 Service / Repair Bearing system Fig.F.30: Bearing track removal Fig.F.31: Bearing system & woble disc Remove bearing track in D-bearing cover. Replace the complete wobble disc system and make sure parts are as sembled according to instructions Fig.32 &...
- Page 45 Service / Repair D-bearing cover Fig.F.34: D-bearing cover Fig.F.35: Oil sleeve The D-bearing cover is mounted to the The oil sleeve in the D-bearing cover can Motor by four 6mm bolts. be demounted carefully using a When the bearing is damaged, always screwdriver.
- Page 46 Service / Repair Fuel tank. Heating system. Fig.F.49. Boiler top Fig.F.38: Fuel tank - Overview. 1. Detergent tank. 2. Fuel tank. 3.Strainer. 4. Float valve 5. gasket. Fig.F.39: Heating system - Overview. 1. Ignition Transformer 4. Flame sensor. 2. Ignition cords. 5.
- Page 47 Service / Repair Exhaust temperature sensor. Fig.F.42: Temperatur sensor. Fig.F.43: Temperatur relay. The exhaust temperature sensor is fitted with If the exhaust temperature reaches 270°C 2 screws in the exhaust. (518°F) the machine cuts out. The relay pla- ced in the E-box can be reset by pressing the green button.
- Page 48 Service / Repair Heat exchanger Fig.F.45: Dismounting coil Fig.F.46: Dismounting coil Remove the outer top cover and mount the Attention : Be aware of the fact that the machi- lifting tool over the two coil ends and fix it with ne can tip over.
- Page 49 Adjustment / Test Torque specifications 20 Nm 20 Nm Fig.G.01: Wobble disc Fig.G.02: Cylinder block 65 Nm 25 Nm Fig.G.03: Cylinder head Fig.G.04: Venting valve 10 Nm By hand Fig.G.05: By-pass housing Fig.G.06: Venting valve 40 Nm 40 Nm Fig.G.07: Outlet fittings Fig.G.08: Water regulation NEPTUNE 5 FA_EN_Ver.2.0_25/11...
- Page 50 Adjustment / Test Adjustment of by-pass system. Fig.G.09: Pressure gauge Fig.G.10: Test tap Connect test pressure gauge 1206358 to the Machines with hose reel: machine water outlet. Connect extension hose 301001311and test pressure gauge 1206358 to the machine water outlet Fig.G.11: Safety valve Fig.G.12: Pressure bolt Check the working pressure in data sheets...
- Page 51 Adjustment / Test Fig.G.13: Pressure bolt Fig.G.14: Safety valve When adjustment is done, lock the bolt with Let the machine run 5 bars lower than the cut the counter nut. off pressure (working + adjustment) and adjust NOTE: If the cut off pressure is adjusted too the safety valve out (Counter clockwise) until it high >...
- Page 52 Adjustment / Test Burner settings. Note: Higher CO2 concentrations at different barometric pressure, altitude or temperature and poor quality of the used fuel can lead to faster soot deposition on the heating coil of the heat exchanger. Preparation 1. Set the fuel pressure. 2.
- Page 53 Adjustment / Test Burner settings. Fig.G.17: Soot raiting Fig.G.18: Burner measurements. Determine the soot rating with a soot pump (1) The CO2 content in the exhaust, the intake and soot rating reference scale. The figure and exhaust temperature are determined. This should not exceed "1".
-
Page 54: Wiring Diagrams
Wiring diagrams NEPTUNE 5 FA_EN_Ver.2.0_25/11... - Page 55 Wiring diagrams NEPTUNE 5 FA_EN_Ver.2.0_25/11...
- Page 56 Wiring diagrams NEPTUNE 5 FA_EN_Ver.2.0_25/11...
- Page 57 Wiring diagrams NEPTUNE 5 FA_EN_Ver.2.0_25/11...
- Page 58 Wiring diagrams NEPTUNE 5 FA_EN_Ver.2.0_25/11...
- Page 59 Wiring diagrams NEPTUNE 5 FA_EN_Ver.2.0_25/11...
- Page 60 Wiring diagrams NEPTUNE 5 FA_EN_Ver.2.0_25/11...
- Page 61 Wiring diagrams NEPTUNE 5 FA_EN_Ver.2.0_25/11...
- Page 62 Notes NEPTUNE 5 FA_EN_Ver.2.0_25/11...
- Page 63 NEPTUNE 5 FA_EN_Ver.2.0_25/11...
Need help?
Do you have a question about the NEPTUNE 5 FA and is the answer not in the manual?
Questions and answers
Venttiilissä on rengassokka varmistus ei kierrettä.
If the header (sealing) ring is mounted incorrectly in the Nilfisk Neptune 5 FA, it can be damaged and parts of it may block the pistons and valves in the pump or get stuck in the non-return valve in the unloader.
This answer is automatically generated
kaj pomeni na zacetku zagona HOP