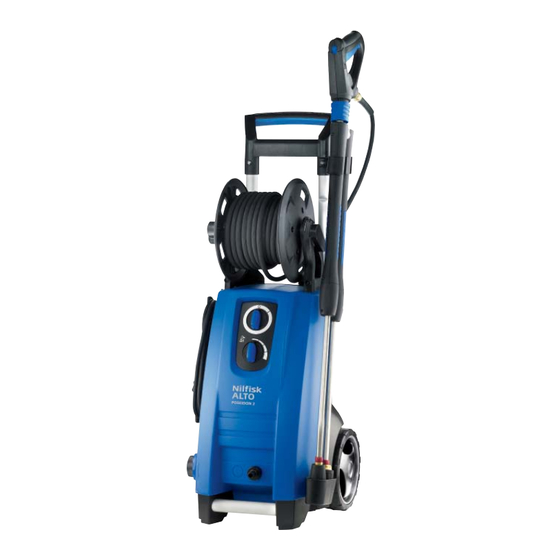
Nilfisk-ALTO 2 Instruction Manual
Nilfisk-alto pressure washer user manual
Hide thumbs
Also See for 2:
- Quick start manual (68 pages) ,
- Operating instructions manual (21 pages) ,
- Service manual (110 pages)
Table of Contents
Advertisement
Quick Links
POSEIDON 2
Instruktionsbog .................................................
3 - 16
Instruksjonsbok ................................................ 17 - 31
Instruktionsbok ................................................. 32 - 46
Käyttöohje ........................................................ 47 - 61
Instruction manual ............................................ 62 - 75
Betriebsanleitung ............................................. 76 - 92
Manuel d'Instructions ....................................... 93 - 108
Gebruikershandleiding ..................................... 109 - 123
Manuale di istruzioni ....................................... 124 - 138
Manual de Instrucciones ................................. 139 - 154
Manual de Instruções ...................................... 155 - 169
128330683
γχειριδιο οδηγιων ............................................ 170 - 186
Advertisement
Table of Contents

Summary of Contents for Nilfisk-ALTO 2
- Page 1 POSEIDON 2 Instruktionsbog ... 3 - 16 Instruksjonsbok ... 17 - 31 Instruktionsbok ... 32 - 46 Käyttöohje ... 47 - 61 Instruction manual ... 62 - 75 Betriebsanleitung ... 76 - 92 Manuel d'Instructions ... 93 - 108 Gebruikershandleiding ... 109 - 123 Manuale di istruzioni ...
- Page 2 Copyright © 2011 Nilfisk-Alto, Division of Nilfisk-Advance A/S...
-
Page 3: Safety Precautions And Warnings
Poseidon 2 Index 1 Safety precautions and warnings ...62 2 Description ...64 3 Before you start using your pressure washer ...65 4 Operating your pressure washer ...66 5 Fields of application and working methods ...70 6 After using your pressure washer ...71 7 Maintenance ...72... - Page 4 1.0 mm² max. 12.5 m 1.5 mm² max. 20 m 2.5 mm² max. 30 m Only POSEIDON 2-17 X: 2.0 mm² máx. 12.5 m 2.5 mm² máx. 20 m If the electric cable is damaged, it must be re-...
- Page 5 See illustration at the end of this manual. 1 Start/stop switch 2 Water inlet (with fi lter) 3 High pressure connection (only machines without hose reel) 4 High pressure hose 5 Electric cable...
-
Page 6: Before You Start Using Your Pressure Washer
3 Before you start using your pressure washer 3.1 Mounting of holders for spray lance 3.2 Mounting of hose hook (only models without hose reel) 3.3 Mounting of hose reel handle (only models with hose reel) Original Instructions Poseidon 2 Mount the holders for spray lance on the machine. -
Page 7: Operating Your Pressure Washer
4.1 Connection of high pres- sure hose 1. Screw the quick coupling tight on to the water inlet (2). Note: The inlet fi lter must al- ways be fi tted in the water inlet pipe to fi lter out sand, lime stone and other impurities as these will damage the pump valves. - Page 8 Poseidon 2 1. Pull the blue quick-release grip (A) of the spray gun backwards. 2. Insert the nipple of the spray lance (B) into the quick-re- lease connection and release 3. Pull the spray lance (or other accessory) forwards to check that it is securely attached to the spray gun.
- Page 9 1. Check that the machine is in upright position. NOTE: Do not place the ma- chine in tall grass! 2. Release the trigger lock. 3. Activate the trigger of the spray handle and let the wa- ter run until all air has es- caped from the water hose.
- Page 10 Separate detergent container 1. Remove the cover with suc- tion hose from the detergent container. 2. Mount the cover with suction hose on the separate deter- gent container. The cover has a standard thread and fi ts common detergent con- tainers.
-
Page 11: Fields Of Application And Working Methods
Accessories and detergents, when correctly cho- sen, can increase the effi ciency of your pressure washer. Here is some basic information about cleaning. Foam or detergent should be applied onto dry surfaces so that the chemical product is in direct contact with the dirt. -
Page 12: After Using Your Pressure Washer
6 After using your pressure washer 6.1 Storing the washer 6.2 Winding up of electric cable and high pressure hose 6.3 Storage of accessories Original Instructions The machine should be sto- red in a frost-free room! Pump, hose and accessories... -
Page 13: Maintenance
This is why cleaning is required immediately. 1. Stop the machine and dis- connect the nozzle. 2. Clean the nozzle. IMPOR- TANT: The cleaning tool (11) should only be used when the nozzle is detached! 3. Flush the nozzle backwards with water. -
Page 14: Troubleshooting
Check that the water supply corresponds to specifi cations required (see model tag) NB! Avoid using long, thin hoses (min. 1/2") Clean the nozzle (see section 7.2) Clean the fi lter (see section 7.1) Straighten out hose. -
Page 15: Further Information
Poseidon 2 9 Further information 9.1 Recycling the washer 9.2 Warranty conditions Make the old cleaner unusable immediately. 1. Unplug the cleaner and cut the electric cable. Do not discard electrical appli- ances with household waste. As specifi ed in European Direc- Nilfi... -
Page 16: Main Technical Data
< 2.5 28.1 28.1 High Pressure Washer Nilfi sk-ALTO Poseidon 2-20, 2-29 Nilfi sk-ALTO Poseidon 2-22 XT, 2-25 XT, 2-29 XT 120 V, 230 V, 1~, 50 Hz - IP X5 EC Machine Directive EC Low-voltage Directive EC EMV Directive... - Page 18 Nilfi sk-ALTO Division of Nilfi sk-Advance A/S Industrivej 1 DK - 9560 Hadsund tel.: (+45) 7218 2100 www.nilfi sk-alto.com...


Need help?
Do you have a question about the 2 and is the answer not in the manual?
Questions and answers