Advertisement
Table of Contents
- 1 Table of Contents
- 2 Safety Precautions and Warnings
- 3 Description
- 4 Before You Start Using Your Pressure Washer
- 5 Operating Your Pressure Washer
- 6 After Using Your Pressure Washer
- 7 Maintenance
- 8 Trouble Shooting
- 9 Further Information
- 10 Main Technical Data
- 11 Technical Data
- 12 Declaration
- Download this manual
Advertisement
Table of Contents

Subscribe to Our Youtube Channel
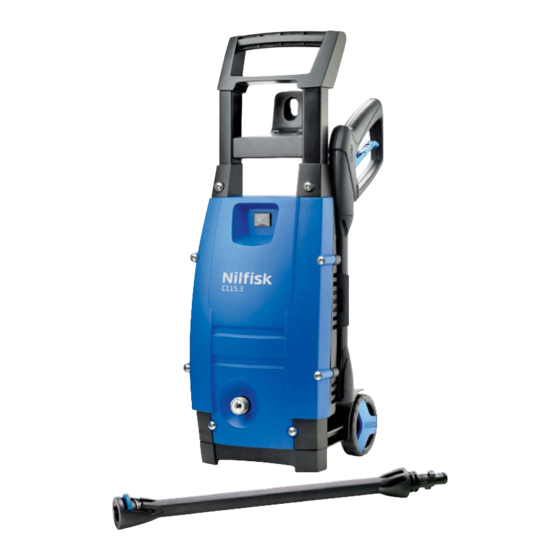
Summary of Contents for Nilfisk-ALTO C 105.5
- Page 1 Nilfi sk C 105.5 Nilfi sk C 115.3 User Manual...
- Page 2 Copyright © 2011 Nilfisk, Division of Nilfisk-Advance A/S...
-
Page 3: Table Of Contents
Hold the spray lance fi rmly with both hands. The spray lance is affected by a thrust of up to 16.4 N during ope– Nilfisk C 105.5 / C 115.3 This symbol is used to mark safety instructions that... - Page 4 Nilfisk C 105.5 / C 115.3 safety only use original spare parts from the manufacturer or approved by the manufac- turer. High pressure hoses, fi ttings and couplings are important for the safety of the appli- ance. Only use hoses, fi ttings and couplings recommended by the manufacturer.
-
Page 5: Description
7 Spray handle with lock (7a) 8 Click & Clean Tornado nozzle (C 105.5) 9 Click & Clean Tornado PR nozzle (C 115.3) Nilfisk C 105.5 / C 115.3 Only use the high-pressure washer for purposes described in this manual. The safety precautions must be... -
Page 6: Before You Start Using Your Pressure Washer
Nilfisk C 105.5 / C 115.3 3 Before you start using your pressure washer 3.1 Mounting of trolley handle (C 115.3) 3.2 Mounting of quick coupling 3.3 Mounting of high pressu- re hose on spray handle 1. Place the trolley handle on the machine. -
Page 7: Operating Your Pressure Washer
4.2 Mounting of spray lance and Click & Clean nozzles Nilfisk C 105.5 / C 115.3 1. Mount the high pressure hose on the outlet (3). 1. Push the spray lance (6) into the spray handle (7) and screw it on. - Page 8 Nilfisk C 105.5 / C 115.3 4.3 Water connection 4.4 Start and stop of the machine An ordinary 1/2" garden hose of min. 10 m and max. 25 m will be suitable. NOTE: Connection to the public mains according to regulations.
-
Page 9: After Using Your Pressure Washer
Let the machine run until no more water runs through the spray handle. Nilfisk C 105.5 / C 115.3 3. Stop the machine, unplug and wind up hose and cable. 4. Place spray handle, nozzles and other accessories in the holders of the machine. -
Page 10: Maintenance
Nilfisk C 105.5 / C 115.3 6 Maintenance 6.1 Cleaning of water inlet fi lter 6.2 Cleaning of nozzle WARNING! Always discon- nect the electrical plug from the socket prior to maintenance or cleaning. To ensure a long and problem... - Page 11 The machine should be kept clean so as to let cooling air pass freely through the ma- chine vents. To ensure an easy connec- tion and that o-rings do not dry up, the couplings should be greased regularly. Nilfisk C 105.5 / C 115.3...
-
Page 12: Trouble Shooting
Nilfisk C 105.5 / C 115.3 7 Trouble-shooting To avoid unnecessary disappointments, you should check the following before contacting the Nilfi sk service organization: Symptom Machine refuses to start Machine not plugged in Fluctuating pressure Machine stops Fuse blows Machine pulsating... -
Page 13: Further Information
that the product has not been exposed to abuse such as knocks, bumps or frost. Nilfisk C 105.5 / C 115.3 As specifi ed in European Direc- tive 2002/96/EC on old electri- cal and electronic appliances,... -
Page 14: Main Technical Data
Nilfisk C 105.5 / C 115.3 9 Main Technical Data Type Rated pressure Permissible pressure Rated flow Rated input Rated voltage Max. water temperature Inlet pressure Sound pressure level Guaranteed sound power level Vibration according to ISO 5349 10 Declaration... - Page 16 S e ri a l n o ./ W W /Y 8. 0 M Pa 11 .5 T in (8 0 M Pa ba r) m ax (1 15 W ei 1 2 8 gh t °C ba r) 5. 2 4 7 0 0 9 0 23 0-...
- Page 17 www.nilfi sk.com...


Need help?
Do you have a question about the C 105.5 and is the answer not in the manual?
Questions and answers