
Related Manuals for Avalue Technology RiTab-10T1


Summary of Contents for Avalue Technology RiTab-10T1
-
Page 1: St Ed - 01 April 2016
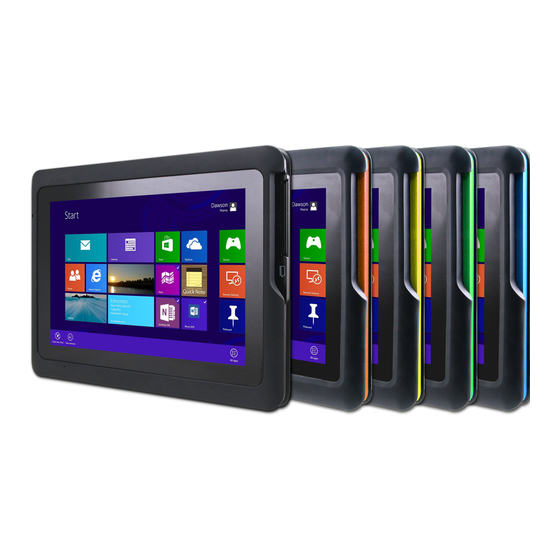
RiTab-10T1 10” Semi-Rugged Tablet Quick Reference Guide Ed – 01 April 2016 Copyright Notice Copyright 2016 Avalue Technology Inc., ALL RIGHTS RESERVED. - Page 2 This equipment should be installed and operated with a minimum distance of 0mm between the radiator and your body. Canada Statement This device complies with Industry Canada’s licence-exempt RSSs. Operation is subject to the following two conditions: (1) This device may not cause interference; and 2 RiTab-10T1 Quick Reference Guide...
- Page 3 For detailed information, please always refer to the electronic user's manual. Copyright Notice Copyright 2016 Avalue Technology Inc., ALL RIGHTS RESERVED. No part of this document may be reproduced, copied, translated, or transmitted in any form or by any means, electronic or mechanical, for any purpose, without the prior written permission of the original manufacturer.
- Page 4 RiTab-10T1 Disclaimer Avalue Technology Inc. reserves the right to make changes, without notice, to any product, including circuits and/or software described or contained in this manual in order to improve design and/or performance. Avalue Technology assumes no responsibility or liability for the...
- Page 5 These answers are normally a lot more detailed than the ones we can give over the phone. So please consult the user’s manual first. To receive the latest version of the user’s manual; please visit our Web site at: http://www.avalue.com.tw/ RiTab-10T1 Quick Reference Guide 5...
-
Page 6: Table Of Contents
3.1 Adjusting LCD Brightness ..................23 3.2 Adjusting Speaker Volume ..................25 3.3 Battery Overview ..................... 26 3.4 WiFi ......................... 27 3.5 Bluetooth ......................... 28 Accessories ......................29 4.1 Desktop Cradle ....................... 30 4.2 4-Bay Battery Charging Station ................31 6 RiTab-10T1 Quick Reference Guide... - Page 7 Quick Reference Guide 4.3 Handstrap ....................... 31 4.4 Mushroom Head Handle ..................33 4.5 Shoulder Strap ......................34 RiTab-10T1 Quick Reference Guide 7...
-
Page 8: Getting Started
Place all electronic components in a static-dissipative surface or static-shielded bag when they are not in the chassis. 1.2 Packing List 1 x RiTab-10T1 1 x 19V Adapter 1 x Power Cord 8 RiTab-10T1 Quick Reference Guide... -
Page 9: System Specifications
1 x Micro SIM Slot System Control 1 x Power Button 1 x G Sensor Lock Button Control Buttons 2 x Barcode Trigger LED Indicator 1 x Power/Battery In-Box Accessory Accessory +19V 40W Power Adaptor RiTab-10T1 Quick Reference Guide 9... - Page 10 MIL-STD-810G Method 514.6 Procedure 1 Shock Test MIL-STD-810G Method 516.6 Procedure 1 4-Feet Drop on Concrete Floor, Drop MIL-STD-810G 516.5 Procedure VI Certifications Certification Information CE, FCC Class B Note: Specifications are subject to change without notice. 10 RiTab-10T1 Quick Reference Guide...
-
Page 11: System Overview
Quick Reference Guide 1.4 System Overview 1.4.1 Front View NFC Reader Power Button LED Indicator 1.4.2 Rear View Accessory Hole Camera Barcode Scanner Barcode Scanner Trigger Trigger Battery Lock Speaker RiTab-10T1 Quick Reference Guide 11... -
Page 12: Right Side
1.4.3 Right Side 1.4.4 Left Side Power Button G Sensor Lock Power Button Control Mode Time Function 1 Sec. Power On 4 Sec. ForcedPower Off 1 Sec. Suspend 1 Sec. Resume 7 Sec. EC Reset 12 RiTab-10T1 Quick Reference Guide... -
Page 13: Top View
I/O Interface Connectors Label Function Note Micro HDMI Micro HDMI Connector Micro SD Micro SD Card Slot 1 x USB 2.0 Type A Docking Docking Station Connector Connector Audio Audio Connector DC-In DC Power-In Connector RiTab-10T1 Quick Reference Guide 13... -
Page 14: Led Indicator
Red, Blinking: ON 0.5sec., OFF 2 sec. LED Off LED Off Not Charging 4% ~ 10% Red, Blinking: ON 0.5 sec., OFF 1 sec. Amber Amber Amber Charging Charging Finished w A/C Green Green Green 14 RiTab-10T1 Quick Reference Guide... -
Page 15: System Dimensions
Quick Reference Guide 1.5 System Dimensions 1.5.1 RiTab-10T1 (Unit: mm) RiTab-10T1 Quick Reference Guide 15... -
Page 16: Hardware Configuration
RiTab-10T1 2. Hardware Configuration Note: If you need more information, please visit our website: http://www.avalue.com.tw 16 RiTab-10T1 Quick Reference Guide... -
Page 17: Battery Removal/Change
2.2 Inserting SIM Card SIM card slot is located inside the battery bay. Remove the battery before inserting the SIM card in the direction shown as below. NOTE: Cellular function is only available when 3G module is installed. RiTab-10T1 Quick Reference Guide 17... -
Page 18: Inserting Micro Sd Card
Push the Micro SD card into the slot. To remove the Micro SD card, simply push the card again and it will pop out automatically.. 2.4 MSR (Optionsl) The Magnetic Strip Reader is located at the right side of RiTab-10T1 and is used in the direction shown as below. 18 RiTab-10T1 Quick Reference Guide... -
Page 19: Scr (Optional)
Quick Reference Guide 2.5 SCR (Optional) The Smart Card Reader is located at the right side of RiTab-10T1 and is used in the direction shown as below. 2.6 Barcode Scanner (Optional) 2.6.1 Barcode Scanner Specifications Performance Sensor CMOS sensor with rolling shutter and 640*480pixel resolution. -
Page 20: Barcode Scanner Distance
USB: 5V input---Scan 220mA RMS, Idle 60mA RMS, Standby 2.5mA 2.6.2 Barcode Scanner Distance 2.6.3 Barcode Scanner Trigger Press the barcode scanner trigger to active the function if your RiTab-10T1 has built-in barcode scanner. Trigger Trigger 20 RiTab-10T1 Quick Reference Guide... -
Page 21: Nfc
Quick Reference Guide 2.7 NFC NFC is located at the top right of RiTab-10T1, indicated as below. RiTab-10T1 Quick Reference Guide 21... -
Page 22: Software
RiTab-10T1 3. Software Note: If you need more information, please visit our website: http://www.avalue.com.tw 22 RiTab-10T1 Quick Reference Guide... -
Page 23: Adjusting Lcd Brightness
The Brightness Control is accessed by swiping the tablet screen from the far right to the left. You will then have access to Action Center then choose . Tap on the icon to switch among 25%, 50%, 75% and 100%. RiTab-10T1 Quick Reference Guide 23... - Page 24 RiTab-10T1 If you need to further adjust the display setting, tap on the .to access to All Settings. 24 RiTab-10T1 Quick Reference Guide...
-
Page 25: Adjusting Speaker Volume
Quick Reference Guide 3.2 Adjusting Speaker Volume Speak volume adjustment can be accessed from the Desktop. Click on the icon and you can adjust the volume by dragging the volume bar. RiTab-10T1 Quick Reference Guide 25... -
Page 26: Battery Overview
RiTab-10T1 3.3 Battery Overview The Battery Overview can be accessed by pressing All settings -> System. 26 RiTab-10T1 Quick Reference Guide... -
Page 27: Wifi
Quick Reference Guide 3.4 WiFi Wifi connection can be turned on at Action Center. RiTab-10T1 Quick Reference Guide 27... -
Page 28: Bluetooth
RiTab-10T1 3.5 Bluetooth Bluetooth function can be turned on at Action Center. 28 RiTab-10T1 Quick Reference Guide... -
Page 29: Accessories
Quick Reference Guide 4. Accessories Note: If you need more information, please visit our website: http://www.avalue.com.tw RiTab-10T1 Quick Reference Guide 29... -
Page 30: Desktop Cradle
RiTab-10T1 4.1 Desktop Cradle Place RiTab-10T1 on the desktop cradle in the direction shown as below. 1xDC-in 2xUSB2.0 2xUSB2.0 1xRJ45 30 RiTab-10T1 Quick Reference Guide... -
Page 31: 4-Bay Battery Charging Station
4.2 4-Bay Battery Charging Station While charging the batteries on the charging station, place the batteries shown as below. NOTE: The adaptor for charging station is the same for RiTab-10T1 4.3 Handstrap There are two ways of having the handstrap installed according to user’s using habit shown as below. - Page 32 To install, insert the handstrap into the hole at the back of the tablet and turn the handstrap clockwise to lock the handstrap. To remove the handtrap, turn the handstrp counter-clockwise into horizontal, then press the button on the handstrap and remove. 32 RiTab-10T1 Quick Reference Guide...
-
Page 33: Mushroom Head Handle
Quick Reference Guide 4.4 Mushroom Head Handle To install the handle, insert it into the hole at the back of RiTab-10T1 and turn the handle clockwise to lock it. To remove, turn the handle counter-clockwise, press the button then remove from the tablet. -
Page 34: Shoulder Strap
RiTab-10T1 4.5 Shoulder Strap 34 RiTab-10T1 Quick Reference Guide...