Table of Contents
Advertisement
Advertisement
Table of Contents

Related Manuals for Elo Touch Solutions ESY13P1

Summary of Contents for Elo Touch Solutions ESY13P1
- Page 1 USER MANUAL Elo Touch Solutions ® PayPoint ESY13P1 SW602189 Rev A...
-
Page 2: Table Of Contents
Table of Contents Read this first ......................3 Chapter 1: Product Overview .................6 Product Description ..................6 Precautions ....................6 PayPoint Register Layout ................7 Chapter 2: Getting Started ..................10 Setting up your PayPoint Register ...............10 Chapter 3: Operation..................... 11 Power ......................11 Payment Features ..................12 Setting up WPA2 on your Wi-Fi network ............12 Chapter 4: Technical Support ................14... -
Page 3: Read This First
Use only approved power cords: Use only the power cord supplied by Elo Touch Solutions for the register. Unplug the register if any of the following occurs: The register or power cord has been exposed to rain, liquid, or excessive moisture. - Page 4 The power cord shows signs of physical damage. Elo is not responsible for the performance or safety of products not manufactured or approved by Elo. Dispose according to local laws and regulations: When the register reaches the end of its useful life, do not crush, incinerate, immerse in water, or dispose the register in any manner contrary to local laws and regulations.
- Page 5 situations or environments where risk of RF interference are perceived or identified as harmful. To minimize user RF Energy exposure, keep device further away from body. Polyvinyl Chloride (PVC) cable and cord notice: WARNING: Handling the cord on this product or cords associated with accessories sold with this product, will expose you to lead, a chemical known to the State of California to cause cancer, and birth defects or other reproductive harm.
-
Page 6: Chapter 1: Product Overview
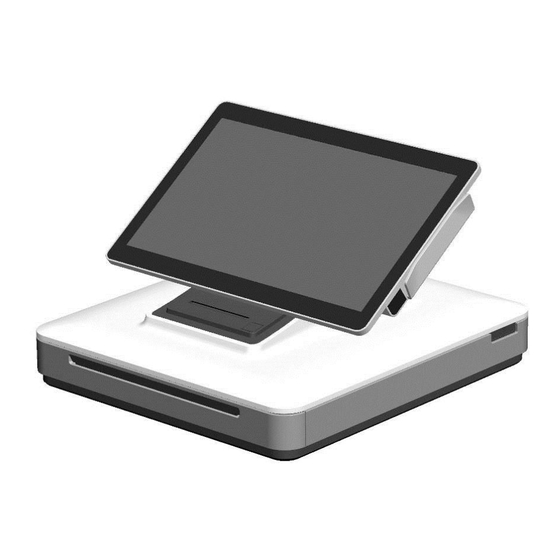
Chapter 1: Product Overview Product Description The Elo PayPoint register is an All-in-One Point-of-Sales transaction device that is equipped with built-in touchscreen display, cash drawer, magnetic swipe reader (MSR), barcode scanner, camera, receipt printer, and a customer facing display. The Elo PayPoint register display head is also designed with a display head that can be flipped to allow customers to complete purchase transactions by self-swiping payment cards, and to authorize transactions by signing directly onto the touchscreen. -
Page 7: Paypoint Register Layout
PayPoint Register Layout Figure 1a. PayPoint register front view (left), clerk right side view (middle), and back view (right) Figure 2a. PayPoint register top view (left) and bottom view (right) A. Register Display Head Magnetic Swipe Reader (MSR) Camera Touchscreen... - Page 8 1. Magnetic Stripe Reader (MSR) The register has a built in magnetic stripe reader and can read various credit cards. When the register is in clerk view, the MSR will be on the left of the register display head. When register is in customer view, the MSR will be on the right of the register display head.
- Page 9 11. Check compartment slot The cash drawer is designed with a slot for slipping checks into the cash drawer. 12. Power button Press the power button to turn on / off the register (set by default). The power button is equipped with an LED that displays: Solid white light when the register is on.
-
Page 10: Chapter 2: Getting Started
Chapter 2: Getting Started Setting up your PayPoint Register Unpacking the PayPoint Register: To unpack your PayPoint Register: 1. Open the box 2. Check that the following items are present and in good condition: ... -
Page 11: Chapter 3: Operation
Chapter 3: Operation Power To turn the PayPoint Register on and off, press the register power button once. Pressing power button when the register is on will bring up the Shut Down option screen (refer to Figure X). ... -
Page 12: Payment Features
Payment Features The Elo PayPoint System supports cash, checks, and card payment transactions via the PayPoint Register. The Elo PayPoint includes magnetic swipe reader (MSR) functionality for reading payment card information. Magnetic Swipe Reader (MSR): ... - Page 13 3. You will be prompted to provide a User Name and password to login into the router. This will bring up the router management console. Note: User name and password are set during initial router setup. Consult with router user manual (or other guidance documentation) for information on how to setup the router and for the default login credentials, incase initial router setup was not yet done.
-
Page 14: Chapter 4: Technical Support
Information and guidance on how to use and operate your PayPoint System are available in this User Manual, and at www.EloPayPoint.com. For further information, please contact your local dealer or contact Elo Touch Solutions Customer Service. ... -
Page 15: Technical Assistance
Refer to Chapter 5 for more information on how to properly install the thermal receipt paper in the receipt printer. Try and restart the register. Poor receipt printing quality may be due to the use of ... -
Page 16: Chapter 5: Safety & Maintenance
The PayPoint Register is equipped with a power cable. Do not use a damaged power cable. Use only the power cable supplied by Elo Touch Solutions for the PayPoint Register. Use of an unauthorized power cable may invalidate your warranty. -
Page 17: Elo Paypoint Register Care And Handling
Elo PayPoint Register Care and Handling The following tips will help maintain optimal performance of your Elo PayPoint Register: Disconnect the power cable before cleaning. To clean the unit (except for touch screen), use a soft cotton or microfiber cloth lightly dampened with a mild detergent. - Page 18 1. Ensure that the register display head is flipped away from the receipt printer (in customer-facing view). 2. Push the receipt printer head release button to release the printer head cover. 3. Lift printer head cover. ...
-
Page 19: Waste Electrical & Electronic Equipment
It is recommendable to clean the printer roller once a month. To do so: a. Apply isopropyl alcohol onto a cloth. b. Wipe off any stain from the printer roller with the alcohol dampened cloth. c. Use a dry soft cloth to wipe the roller. d. -
Page 20: Chapter 6: Regulatory Information
Chapter 6: Regulatory Information I. Electrical Safety Information Compliance is required with respect to the voltage, frequency, and current requirements indicated on the manufacturer label. Connection to a different power source than those specified herein will likely result in improper operation, damage to the equipment or pose a fire hazard if the limitations are not followed. - Page 21 Cet équipement devrait être installé et actionné avec une distance minimum de 20 centimètres entre le radiateur et votre corps. Hereby, Elo Touch Solutions, Inc., declares that this Radio LAN device is in compliance with the essential requirements and other relevant provisions of Directive 1999/5/EC.
-
Page 22: Chapter 7: Warranty Information
Chapter 7: Warranty Information For warranty information, go to http://www.elotouch.com/Support/warranty.asp ® User Manual: Elo Paypoint SW602189 Rev A, Page 22 of 24... -
Page 23: Specifications
Disclaimer The information in this document is subject to change without notice. Elo Touch Solutions, Inc. and its affiliates (collectively "Elo") makes no representations or warranties with respect to the contents herein, and specifically disclaims any implied warranties of merchantability or fitness for a particular purpose.
Need help?
Do you have a question about the ESY13P1 and is the answer not in the manual?
Questions and answers
How to factory reset when I don't know login information?