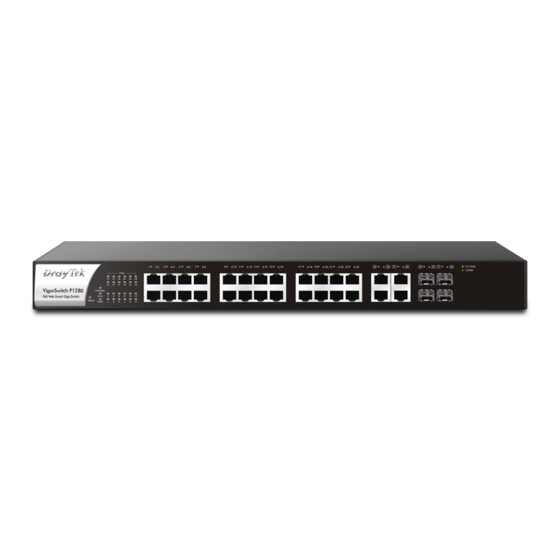
Draytek VigorSwitch P1280 User Manual
Poe gigabit ports web smart switch
Hide thumbs
Also See for VigorSwitch P1280:
- Quick start manual (13 pages) ,
- Quick start manual (14 pages)
Table of Contents
Advertisement
Advertisement
Table of Contents

Related Manuals for Draytek VigorSwitch P1280


Summary of Contents for Draytek VigorSwitch P1280
- Page 2 VigorSwitch P1280 PoE Gigabit Ports Web Smart Switch User’s Guide Version: 1.1 Firmware Version: V2.0.0 (For future update, please visit DrayTek web site) Date: October 13, 2017 VigorSwitch P1280 User’s Guide...
- Page 3 Web registration is preferred. You can register your Vigor router via http://www.DrayTek.com. Firmware & Tools Updates Due to the continuous evolution of DrayTek technology, all routers will be regularly upgraded. Please consult the DrayTek web site for more information on newest firmware, tools and documents.
-
Page 4: Table Of Contents
I-2-1 Typical Applications......................6 I-2-2 Installing Network Cables....................9 I-2-3 Configuring the Management Agent of Switch..............10 I-2-4 Managing VigorSwitch P1280 through Ethernet Port............10 I-2-5 IP Address Assignment ..................... 10 I-3 Accessing Web Page of VigorSwitch ..................14 I-4 Dashboard........................... 15 I-5 Status ............................ - Page 5 IV-1-6 IP Precedence Mapping....................68 IV-2 Bandwidth ..........................69 IV-2-1 Ingress Rate Limit ......................69 IV-2-2 Egress Shaping Rate ...................... 70 IV-2-3 Egress Shaping Per Queue .................... 71 Part V PoE Configuration ....................73 V-1 Properties........................... 74 VigorSwitch P1280 User’s Guide...
- Page 6 VII-3-2-1 SysLog Service................. 101 VII-3-2-2 Local SysLog ................102 VII-3-2-3 Remote SysLog ................ 103 Appendix: Reference .....................104 A-1 What’s the Ethernet ......................... 104 A-2 Media Access Control (MAC) ....................107 A-3 Flow Control..........................111 Index ..........................114 VigorSwitch P1280 User’s Guide...
-
Page 7: Part I Introduction
VigorSwitch P1280 User’s Guide... -
Page 8: Introduction
DSCP on Layer 3 of network framework. Support Port-based VLAN and IEEE802.1Q Tag VLAN. Support 24 active VLANs and VLAN ID 1~4094. Allows one or more links to be aggregated together to form a Link Aggregation Group by the static setting. VigorSwitch P1280 User’s Guide... -
Page 9: I-1-2 Specifications
It could efficient to save the switch power and reduce the power consumption. The VigorSwitch P1280, a standalone off-the-shelf switch, provides the comprehensive features listed below for users to perform system network administration and efficiently and securely serve your network. -
Page 10: I-1-3 Packing List
The port is supplied with PoE power. PoE 1~24 No PoE power is supplied on the port. RJ 45 On (Green) The device is connected with 1000Mbps. LNK/ACT On (Amber) The device is connected with 10/100Mbps. VigorSwitch P1280 User’s Guide... - Page 11 PoE connection, depending on the PoE for Port 1 ~ 24 device connected Power inlet for AC input (100~240V/AC, 50/60Hz). Power Output IEEE 802.3af Max. 15.4W Output Supported; IEEE 802.3at Max. 30W Output Supported PoE Power Budget 340 Watts (Max) VigorSwitch P1280 User’s Guide...
-
Page 12: Installation
VLAN and tag-based VLAN. They are different in practical deployment, especially in physical location. The following diagram shows how it works and what the difference they are. The same VLAN members could not be in different switches. VigorSwitch P1280 User’s Guide... - Page 13 VLAN2 members could not access VLAN1 and VLAN3 members, but they could access VLAN4 members. VLAN3 members could not access VLAN1, VLAN2 and VLAN4. VLAN4 members could not access VLAN1 and VLAN3 members, but they could access VLAN2 members. VigorSwitch P1280 User’s Guide...
- Page 14 Insert the screws and fully tighten with a suitable screwdriver. Repeat the two previous steps for the other side of the unit. Insert the unit into the rack and secure with suitable screws. Reconnect all the cables. VigorSwitch P1280 User’s Guide...
-
Page 15: I-2-2 Installing Network Cables
Category 3, 4, 5 or 5e, 6 UTP/STP cable: To make a valid connection and obtain the optimal performance, an appropriate cable that corresponds to different transmitting/receiving speed is required. To choose a suitable cable, please refer to the following table. VigorSwitch P1280 User’s Guide... -
Page 16: I-2-3 Configuring The Management Agent Of Switch
Category 5e, 6 UTP/STP Users can monitor and configure the switch through the following procedures. Configuring the Management Agent of VigorSwitch P1280 through the Ethernet Port. There are several ways to configure and monitor the switch through Ethernet port, includes Web-UI and SNMP. - Page 17 IP address range between 192.0.0.0 and 223.255.255.255. Each class C network has a 24-bit network prefix followed 8-bit host address. There are 2,097,152 (2^21)/24 networks able to be defined with a maximum of 254 (2^8 –2) hosts per network. VigorSwitch P1280 User’s Guide...
- Page 18 1s in that subnet mask. With this, you can easily count the number of IP addresses matched. The following table shows the result. Prefix Length No. of IP matched No. of Addressable IP VigorSwitch P1280 User’s Guide...
- Page 19 Second, Subnet Mask: as shown above, enter “255.255.255.0”. Choose a subnet mask suitable for your network. Note: The DHCP Setting is enabled in default. Therefore, if a DHCP server presented on network connected to the switch, check before accessing your switch is essential. VigorSwitch P1280 User’s Guide...
-
Page 20: Accessing Web Page Of Vigorswitch
Please type “admin/admin” as the Username/Password and click Login. Now, the Main Screen will appear. Info The DHCP Setting is enabled in default. Therefore, if a DHCP server presented on network connected to VigorSwitch, checking before accessing VigorSwitch essential. VigorSwitch P1280 User’s Guide... -
Page 21: Dashboard
Click Dashboard from the main menu on the left side of the main page. A web page with default selections will be displayed on the screen. Refer to the following figure: VigorSwitch P1280 User’s Guide... -
Page 22: Status
This page offers the traffic statistics inlcuding data information and data of interframe gap for each port (GE1 to GE28). In which, data of interframe gap can be displayed or hidden by choose Enable / Disable for IFG. VigorSwitch P1280 User’s Guide... -
Page 23: I-5-2 Lldp Statistics
This page offers the statistics of LLDP packets (in, out and error) of each port (GE1 to GE28). VigorSwitch P1280 User’s Guide... - Page 24 This page is left blank. VigorSwitch P1280 User’s Guide...
-
Page 25: Part Ii Switch Lan
VigorSwitch P1280 User’s Guide... -
Page 26: General Setup
192.168.1.224. If static mode is enabled, enter IP address in this field. Subnet Mask It is available when Static is selected as Mode. Enter the IP subnet mask of your switch in dotted decimal VigorSwitch P1280 User’s Guide... -
Page 27: Ii-1-2 Ipv6 Address
IPv6 address in this field. Link Local Address It is available when Auto Configuration is Disable. Type Gateway It is available when Auto Configuration is Disable. Enter the IPv6 address of the router as your default IPv6 VigorSwitch P1280 User’s Guide... -
Page 28: Ii-1-3 Management Vlan
Available settings are explained as follows: Item Description Management VLAN Select the VLAN ID as management VLAN. You can create additional VLAN profiles by Switch LAN>>VLAN management>> Create VLAN. Apply Save the settings or changes to the switch. VigorSwitch P1280 User’s Guide... -
Page 29: Port Setting
For SFP fiber module, you might need to manually configure VigorSwitch P1280 User’s Guide... - Page 30 Enable – Click it to enable such function. Disable – Click it to disable such function. Apply Save the settings or changes to the switch. VigorSwitch P1280 User’s Guide...
-
Page 31: Mirror
Select the port(s) which you wish to mirror the traffic, Rx for mirror the packets into the port, Tx for mirror the packets going out from the port. Apply Save the settings or changes to the switch. VigorSwitch P1280 User’s Guide... -
Page 32: Link Aggregation
IP/Mac Address - Aggregated group will balance the traffic based on MAC addresses and IP addresses. Therefore, the packets from same MAC addresses but different IP addresses will be sent to different links. Apply Save the settings or changes to the switch. VigorSwitch P1280 User’s Guide... -
Page 33: Ii-4-2 Lag Management
Static- The static aggregated port sends packets over active member without detecting or negotiating with remote aggregated port. LACP- The LACP aggregated ports place member into active only after negotiated with remote aggregated port for best reliability. VigorSwitch P1280 User’s Guide... -
Page 34: Ii-4-3 Lag Port Setting
For SFP fiber module, you might need to manually configure the speed to match fiber module speed. VigorSwitch P1280 User’s Guide... -
Page 35: Ii-4-4 Lacp Setting
Vigorwitch will be. Therefore, the switch with the highest system priority (e.g., 1) can make decisions about which ports actively participate in LAG at a given time. Apply Save the settings or changes to the switch. VigorSwitch P1280 User’s Guide... -
Page 36: Ii-4-5 Lacp Port Setting
90 seconds, it will cause port member timeout. Short - LACP PDU will be sent per second. If port member is not seen over 3 seconds, it will cause port member timeout. Apply Save the settings or changes to the switch. VigorSwitch P1280 User’s Guide... -
Page 37: Vlan Management
VLAN ID separated by comma, and/or range of VLAN ID using hyphen. VLAN Name Prefix Enter the prefix you wish to add followed by VLAN ID as VLAN name. Leave it empty for using default "VLAN". After clicking Apply, you will see: VigorSwitch P1280 User’s Guide... -
Page 38: Ii-5-2 Interface Settings
Available settings are explained as follows: Item Description Port Select Select LAN ports to configure VLAN Settings. Interface VLAN Mode Select the VLAN mode of the interface. Hybrid – Support all functions as defined in IEEE VigorSwitch P1280 User’s Guide... -
Page 39: Ii-5-3 Voice Vlan
VLAN is only active inside VigorSwitch for packet transmission. After these packets leave VigorSwitch, the Voice VLAN tag will be removed immediately. This page allows a user to configure global and per interface setting of voice VLAN. VigorSwitch P1280 User’s Guide... - Page 40 Select value of aging time (30~65536 min). Default is 1440 minutes. A voice VLAN entry will be age out after this time if without any packet pass through. Apply Save the settings or changes to the switch. VigorSwitch P1280 User’s Guide...
-
Page 41: Ii-5-3-2 Telephony Oui Setting
Click it to create a new voice OUI based on the settings configured above. Edit Click Edit for one entry to modify OUI setting for voice VLAN. Delete Click it to remove the selected OUI entry. VigorSwitch P1280 User’s Guide... -
Page 42: Ii-5-3-3 Port Setting
OUI, remark CoS/802.1p shall tag for only the matched ingress frame with pre-configured OUI. Apply Save the settings or changes to the switch. Edit Click Edit for one entry to modify port settings (State, Cos Mode) for voice VLAN. VigorSwitch P1280 User’s Guide... -
Page 43: Eee
Select one or multiple ports to configure (GE1 to GE28). Enable Enable –Click it to enable the EEE function. Disable - Click it to disable the EEE function. Apply Save the settings or changes to the switch. VigorSwitch P1280 User’s Guide... -
Page 44: Multicast
Set the IPv4 multicast forward method. Dst. MAC & VID: Forward using destination multicast MAC address and VLAN IDs. Dst. IP & VID: Forward using destination multicast IP address and VLAN ID. Apply Save the settings or changes to the switch. VigorSwitch P1280 User’s Guide... -
Page 45: Ii-7-2 Igmp Snooping
Click Enable to allow the switch to handle IGMP reports Suppression between router and host, suppressing bandwidth used by IGMP. Apply Save the settings or changes to the switch. Edit Click it to modify IGMP settings for selected VLAN profile. VigorSwitch P1280 User’s Guide... - Page 46 & VLAN where leave message is sent from, regardless there is still a subscribed member or not. Click Enable to enable Fastleave function. OK - Save the settings or changes to the switch. Cancel - Close the page and return to previous page. VigorSwitch P1280 User’s Guide...
-
Page 47: Ii-7-2-2 Igmp Querier Setting
IGMP snooping version, for there is possibile network mixed with IGMP v2/v3 client and v2 query message is widerly understandable for those clients. Apply Save the settings or changes to the switch. VigorSwitch P1280 User’s Guide... -
Page 48: Ii-7-2-3 Igmp Static Group
Specify the IPv4 multicast address you wish to assign for the static group (defined in VLAN ID). Member Ports Specify the port(s) that static group with given IPv4 multicast address shall include. Apply Save the settings or changes to the switch. VigorSwitch P1280 User’s Guide... -
Page 49: Ii-7-2-4 Igmp Group Table
Display the port(s) where subscribing member of this multicast group belongs to. Type Display if it is dynamically learned or statically assigned. Life(sec.) Display the life time of this multicast member left if no membership report sent again. VigorSwitch P1280 User’s Guide... -
Page 50: Ii-7-2-5 Igmp Router Table
Item Description VLAN ID Display the VLAN profile that the IGMP querier belongs to. Port Display the uplink ports where querier router exists. Expire Time (sec.) Display the time before querier is considered no longer existed. VigorSwitch P1280 User’s Guide... -
Page 51: Jumbo Frame
This page allows a user to configure switch port jumbo frame settings. Available settings are explained as follows: Item Description Jumbo Frame (Bytes) Enter Jumbo frame size. The valid range is 1526 bytes – 9216 bytes. Apply Save the settings or changes to the switch. VigorSwitch P1280 User’s Guide... -
Page 52: Stp
Filtering - Filter the BPDU when STP is disabled. Flooding - Flood the BPDU when STP is disabled. PathCost Method Specify the path cost method. Long - Specifies that the default port path costs are within the VigorSwitch P1280 User’s Guide... -
Page 53: Ii-9-2 Port Setting
No - It means the STP of link type on this port is “not” full-duplex and “does not” directly connect to another switch or host. Migrate Yes – Check it to force the specified port to send one RSTP BPDU (Rapid Spanning Tree Protocol Bridge Protocol Data Unit). VigorSwitch P1280 User’s Guide... -
Page 54: Ii-9-3 Bridge Setting
Specify the STP forward delay time, which is the amount of time that a port remains in the Listening and Learning states before it enters the Forwarding state. Its valid range is from 4 to 10 seconds. VigorSwitch P1280 User’s Guide... -
Page 55: Ii-9-4 Port Advanced Setting
Display if this port is configured as point to point link to another switch or host. Port Role Display current port role on the specified port. The possible values will be: “Disabled”, “Root”, “Designated”, “Alternative”, and “Backup”. VigorSwitch P1280 User’s Guide... -
Page 56: Ii-9-5 Statistics
Display the counts of the received CONFIG BPDU. TCN BPDUs Rx. Display the counts of the received TCN BPDU. Configure BPDUs Tx. Display the counts of the transmitted CONFIG BPDU. TCN BPDUs Rx Display the counts of the transmitted TCN BPDU. VigorSwitch P1280 User’s Guide... -
Page 57: Mac Address Table
Select the port where received frame of matched destination MAC address will be forwarded to. Click it to add any port into the static MAC table. Delete Click it to remove the selected port from the static MAC table. VigorSwitch P1280 User’s Guide... -
Page 58: Ii-10-2 Dynamic Address Setting
Enter the Dynamic MAC address aging out value (5-32767 seconds). Apply Save the settings or changes to the switch. This page displays the MAC address and port number automatically learned by VigorSwitch. Available settings are explained as follows: VigorSwitch P1280 User’s Guide... - Page 59 Switch) or Static Unicast (manually entered in the Static MAC Forwarding screen). Port Display the port to which this MAC address belongs. Add to Static Click this button to add any port into the static MAC table. VigorSwitch P1280 User’s Guide...
- Page 60 This page is left blank. VigorSwitch P1280 User’s Guide...
-
Page 61: Part Iii Security
VigorSwitch P1280 User’s Guide... -
Page 62: Storm Control
Excluded – Exclude preamble & IFG (20 bytes) when count ingress storm control rate. Included - Include preamble & IFG (20 bytes) when count ingress storm control rate. Apply Save the settings or changes to the switch. VigorSwitch P1280 User’s Guide... -
Page 63: Iii-1-2 Port Setting
Kbps (Kbits per-second). The range is from 16 to 1000000. Action Select the state of setting. Drop – Packets exceed storm control rate will be dropped. Shutdown - Port exceeds storm control rate will be shutdown. Apply Save the settings or changes to the switch. VigorSwitch P1280 User’s Guide... -
Page 64: Dos
Disabled – Disable the item function. Enabled - Enable the item function. TCP Blat Drop the packages if the TCP source port is equal to the TCP destination port. Disabled – Disable the item function. VigorSwitch P1280 User’s Guide... - Page 65 Drop the packets with SYN and FIN bits set. Disabled – Disable the item function. Enabled - Enable the item function.- TCP SYN-RST Attack Drop the packets with SYN and RST bits set. Disabled – Disable the item function. VigorSwitch P1280 User’s Guide...
-
Page 66: Iii-2-2 Dos Port Setting
Use the drop down list to select the port profile (GE1 to GE28) or profiles. DoS Protection Disabled – Disable the function of DoS Protection. Enabled - Enable the function of DoS Protection. Apply Save the settings or changes to the switch. VigorSwitch P1280 User’s Guide... -
Page 67: Part Iv Qos Configuration
VigorSwitch P1280 User’s Guide... -
Page 68: General
IP Precedence - All IP traffic is mapped to queues based on the DSCP field in the IP header. If traffic is not IP but has VLAN tag, mapped to queues based on the CoS value in the VLAN tag. VigorSwitch P1280 User’s Guide... -
Page 69: Iv-1-1-2 Trust Ports
Click Enable to make traffic follow the trust mode in general setting. Enable - Traffic will follow trust mode in general setting. Disable – No QoS service for this port. Apply Save the settings or changes to the switch. VigorSwitch P1280 User’s Guide... -
Page 70: Iv-1-2 Port Settings
DSCP – Egress traffic will be marked with DSCP value according to the Queue to DSCP mapping table. IP Precedence - Egress traffic will be marked with IP Precedence value according to the Queue to IP Precedence mapping table. VigorSwitch P1280 User’s Guide... -
Page 71: Iv-1-3 Queue Settings
Display the percentage of traffic which can be sent by current queue compared to total WRR queues. Apply Save the settings or changes to the switch. Strict Priority Queue Display the number of queues using Strict Priority method. Number VigorSwitch P1280 User’s Guide... -
Page 72: Iv-1-4 Cos Mapping
Queue Display the queue ID (level 1 to 8) for different class of service values. Class of Service Define the class of service value (0 to 7). Apply Save the settings or changes to the switch. VigorSwitch P1280 User’s Guide... -
Page 73: Iv-1-5 Dscp Mapping
Queue to DSCP Mapping (for Egress Remarking) - Settings for outgoing packets. Queue Display the queue ID (level 1 to 8) for different DSCP values. DSCP Define the DSCP value (0 to 7). Apply Save the settings or changes to the switch. VigorSwitch P1280 User’s Guide... -
Page 74: Iv-1-6 Ip Precedence Mapping
Queue to IP Precedence Mapping (for Egress Remarking) - Settings for outgoing packets. Queue Display the queue ID (level 1 to 8) for different IP Precedence values. IP Precedence Define the IP Precedence value (0 to 7). Apply Save the settings or changes to the switch. VigorSwitch P1280 User’s Guide... -
Page 75: Bandwidth
Use the drop down list to select the port profile (GE1 to GE28) or profiles. State Disable – Disable ingress bandwidth control. Enable - Enable ingress bandwidth control. Rate (Kbps) Enter the rate value,<16-1000000>,unit:16 Kbps. Apply Save the settings or changes to the switch. VigorSwitch P1280 User’s Guide... -
Page 76: Iv-2-2 Egress Shaping Rate
Use the drop down list to select the port profile (GE1 to GE28) or profiles. State Disable – Disable egress bandwidth control. Enable - Enable egress bandwidth control. CIR (Kbps) Enter the rate value,<16-1000000>,unit:16 Kbps. Apply Save the settings or changes to the switch. VigorSwitch P1280 User’s Guide... -
Page 77: Iv-2-3 Egress Shaping Per Queue
Use the drop down list to select queue number for the selected GE port. State Disable – Disable egress bandwidth control. Enable - Enable egress bandwidth control. CIR (Kbps) Enter the rate value,<16-1000000>,unit:16 Kbps. Apply Save the settings or changes to the switch. VigorSwitch P1280 User’s Guide... - Page 78 This page is left blank. VigorSwitch P1280 User’s Guide...
-
Page 79: Part V Poe Configuration
VigorSwitch P1280 User’s Guide... -
Page 80: Properties
Power Limit This setting is available when Manual is selected as PoE Mode. Enter the value as the maximum limit of power given to each physical port. Apply Save the settings or changes to the switch. VigorSwitch P1280 User’s Guide... -
Page 81: Status
Display remaining power that can be supplied to additional devices over PoE. Power Cycle Apply – If PoE device connects to VigorSwitch, such button will be avaible for you to manually perform the cold boot for the PoE device by cycling the power supply. VigorSwitch P1280 User’s Guide... -
Page 82: Device Check
PoE device. Power Off – The PoE divice will be powered off. Nothing – Log this event only, no action is taken on PoE device. Apply Save the settings or changes to the switch. VigorSwitch P1280 User’s Guide... -
Page 83: Schedule
Specify how often the schedule will be applied. Once – The schedule will be applied just once. Weekdays – Specify which days in one week should perform the schedule. Monthly, on date – Specify the day in a month as the starting VigorSwitch P1280 User’s Guide... -
Page 84: V-4-2 Port Scheduling
Use the drop down list to choose the schedule profile (from 1 to 15). After clicking Apply, the selected port(s) will be applied with the specified schedule. Apply Save the settings or changes to the switch. VigorSwitch P1280 User’s Guide... -
Page 85: Part Vi System Maintenance
VigorSwitch P1280 User’s Guide... -
Page 86: Lldp
Select the delay before a re-initialization (range 1–10 seconds, default = 2). Transmit Delay Select the delay after an LLDP frame is sent (range 1–8192 seconds, default = 3). Apply Save the settings or changes to the switch. VigorSwitch P1280 User’s Guide... -
Page 87: Vi-1-2 Lldp Port Setting
System Description, System Capability, 802.3 MAC-PHY, 802.3 Link Aggregation, 802.3 Maximum Frame Size, Management Address and 802.1 PVID. VLAN Select the VLAN ID number to be performed (multiple selections are allowed). Apply Save the settings or changes to the switch. VigorSwitch P1280 User’s Guide... -
Page 88: Vi-1-3 Lldp Local Device
Display detailed information of the selected GE port. Detail - Click it to review the detailed information contained in TLVs sent out from each interface, containing MAC/PHY, 802.3, 802.3 Link Aggregation, 802.1 VLAN and Protocol for each LAN port (GE1 to GE28). VigorSwitch P1280 User’s Guide... -
Page 89: Vi-1-4 Lldp Remote Device
Display the time interval in seconds after which the information for remote device will be deleted. Details Display detailed information contained in TLVs sent out from neighboring devices. Delete Click it to remove information of the selected port. VigorSwitch P1280 User’s Guide... -
Page 90: Vi-1-5 Lldp Overloading
Display how many bytes used by mandatory TLVs. 802.3 TLVs Display how many bytes used by 802.3 TLVs. Optional TLVs Displays how many bytes used by optional TLVs. 802.1 TLVs Displays how many bytes used by 802.1 TLVs. VigorSwitch P1280 User’s Guide... -
Page 91: Snmp
A network management station (NMS) executes applications that monitor and control managed devices. NMSs provide the bulk of the processing and memory resources required for network management. One or more NMSs may exist on any managed network. VigorSwitch P1280 User’s Guide... -
Page 92: Vi-2-1 Properties
This page allows a user to enable the function of SNMP for VigorSwitch. Available settings are explained as follows: Item Description State Enable – Enable the function of SNMP. Disable – Disable the function of SNMP. Apply Save the settings or changes to the switch. VigorSwitch P1280 User’s Guide... -
Page 93: Vi-2-2 Snmp Community
Read Only – It allows unidirectional access to node-specific information. Read & Write - It allows bidirectional access to node-specific information. Click it to add a new community. Action Delete – Remove the selectd community strings. VigorSwitch P1280 User’s Guide... -
Page 94: Vi-2-3 Snmp Trap Host
Version Specify SNMP notification version. v1 or v2c – Specify the SNMP Version 1 notification or SNMP Version 2 notification. Click it to add a new community. Action Delete – Remove the selected community strings. VigorSwitch P1280 User’s Guide... -
Page 95: Access Manager
Disabled – Click it for not accessing telnet service. Enabled – Click it to access telnet service. SSH Service Enabled – Enable SSH service. Apply Save the settings or changes to the switch. VigorSwitch P1280 User’s Guide... -
Page 96: Time And Date
It is available when Recurring is selected as Daylight Saving Offse Time. Specify the adjust offset of daylight saving time. Recurring From / To It is available when Recurring is selected as Daylight Saving Time. From - Specify the starting time of recurring daylight saving VigorSwitch P1280 User’s Guide... -
Page 97: Vi-4-2 Time
Enter the web site of the time server or the IP address of the Address server. Server Port Enter the port number use by the time server. Apply Save the settings or changes to the switch. VigorSwitch P1280 User’s Guide... -
Page 98: Backup Manager
It is available when TFTP is selected as Backup Method. Enter the IPv4/IPv6 address for the TFTP server. Backup Type Configuration – Make a backup copy for the configurations for VigorSwitch. Apply Save the settings or changes to the switch. VigorSwitch P1280 User’s Guide... -
Page 99: Upgrade Manager
It is available when TFTP is selected as Upgrade Method. Image – Click it to upgrade the firmware image. Configuration – Click ito to upgrade the configurations for VigorSwitch. Apply Save the settings or changes to the switch. VigorSwitch P1280 User’s Guide... -
Page 100: Account Manager
Use the drop down list to select privilege level (Admin/User) for new account. Admin - Allow to change switch settings. User - See switch settings only. Not allow to change it. Apply Save the settings or changes to the switch. Delete Remove the selected account. VigorSwitch P1280 User’s Guide... -
Page 101: Factory Default
Click Apply to return to factory default settings for VigorSwitch. VigorSwitch P1280 User’s Guide... -
Page 102: Reboot Switch
Click Apply to reboot VigorSwitch with current settings. VigorSwitch P1280 User’s Guide... -
Page 103: Part Vii Diagnostics
VigorSwitch P1280 User’s Guide... -
Page 104: Cable Diagnostics
After finished copper test, the results will be shown on the lower side of this web page. Available settings are explained as follows: Item Description Port Use the drop down list to select the port (GE1 to GE28) or ports for performing cable diagnostics. Start Perform the copper test action. VigorSwitch P1280 User’s Guide... -
Page 105: Ping Test
Enter a number between 1 and 5 as the count and the default configuration is 4. Interval(sec) Define the interval to perform ping action. For example, “1” means the ping action will be performed per second. Start Perform ping action. Stop Terminate ping action. VigorSwitch P1280 User’s Guide... -
Page 106: Syslog
System, Surveillance VLAN, Trunk, UDLD and VLAN. View Click it to display logs based on the settings configured above. Refresh Click it to refresh the log. Clear All Clear it to remove all logs displayed in this page. VigorSwitch P1280 User’s Guide... -
Page 107: Vii-3-2 Syslog Settings
Available settings are explained as follows: Item Description SysLog Service Enable – Click it to activate function of syslog. Disable – Click it to inactivate the function. Apply Save the settings or changes to the switch. VigorSwitch P1280 User’s Guide... -
Page 108: Vii-3-2-2 Local Syslog
Severity Select severity (emerg, alert, crit, error, warning, notice, info and debug) of log messages which will be stored. Apply Save the settings or changes to the switch. Delete Remove all logs displayed in this page. VigorSwitch P1280 User’s Guide... -
Page 109: Vii-3-2-3 Remote Syslog
ID, local0 to local7) of remote Syslog server. For each facility ID contains different syslog server configuration, please choose a facility ID for such Syslog server. Apply Save the settings or changes to the switch. Delete Remove specific remote syslog entry. VigorSwitch P1280 User’s Guide... -
Page 110: Appendix: Reference
The first two comprises Data link layer, which performs splitting data into frame for transmitting, receiving acknowledge frame, error checking and re-transmitting when not received correctly as well as provides an error-free channel upward to network layer. VigorSwitch P1280 User’s Guide... - Page 111 I/G bit indicates it is individual or group address. If all bit of DSAP is 1s, it’s a global address. The SSAP address field identifies the specific services indicated by C/R bit (command or response). The DSAP and SSAP pair with some reserved values indicates some well-known services listed in the table below. VigorSwitch P1280 User’s Guide...
- Page 112 LLC type 1 connectionless service, LLC type 2 connection-oriented service and LLC type 3 acknowledge connectionless service are three types of LLC frame for all classes of service. In Fig 3-2, it shows the format of Service Access Point (SAP). Please refer to IEEE802.2 for more details. VigorSwitch P1280 User’s Guide...
-
Page 113: Media Access Control (Mac)
Preamble (PRE) - The PRE is 7-byte long with alternating pattern of ones and zeros used to tell the receiving node that a frame is coming, and to synchronize the physical receiver with the incoming bit stream. The preamble pattern is: 10101010 10101010 10101010 10101010 10101010 10101010 10101010 VigorSwitch P1280 User’s Guide... - Page 114 This is referred to as sensing carrier, also “Listen”. If there is signal on the medium, the MAC defers the traffic to avoid a transmission collision and waits for a random period of time, called backoff time, then sends the traffic again. VigorSwitch P1280 User’s Guide...
- Page 115 Actually, the practice Gigabit Ethernet chips do not feature this so far. They all have their chips supported full-duplex mode only, as well as all network vendors’ devices. So this criterion should not exist at the present time and in the future. The switch’s Gigabit module supports only full-duplex mode. VigorSwitch P1280 User’s Guide...
- Page 116 What will it be if receiving device is busy and a frame is coming at the same time? Can it use “backpressure” to tell the source device? A function flow control is introduced in the full-duplex operation. VigorSwitch P1280 User’s Guide...
-
Page 117: Flow Control
The receiving node always “listens” if there is traffic running over the medium when it is not receiving a frame. When a frame destined for the target device comes, VigorSwitch P1280 User’s Guide... - Page 118 Routing Control and Route Descriptor. When MAC parses the received frame and finds a reserved special value 0x8100 at the location of the Length/Type field of the normal non-VLAN frame, it will interpret the received frame VigorSwitch P1280 User’s Guide...
- Page 119 The maximum length of the extension is equal to the quantity (slotTime - minFrameSize). The MAC continues to monitor the medium for collisions while it is transmitting extension bits, and it will treat any collision that occurs after the threshold (slotTime) as a late collision. VigorSwitch P1280 User’s Guide...
-
Page 120: Index
Stric Priority Queue, 64 F System Configuration, 19 Factory Default, 94 System Maintenance, 78 G U General, 61 Upgrade Manager, 92 General Setup, 20 W I Weight, 64 Ingress Rate Limit, 68 WRR Bandwidth, 64 Installation for VigorAPM, 6 VigorSwitch P1280 User’s Guide...
Need help?
Do you have a question about the VigorSwitch P1280 and is the answer not in the manual?
Questions and answers