Yealink T41P Setup And User Manual
Hide thumbs
Also See for T41P:
- User manual (187 pages) ,
- Manual (29 pages) ,
- Quick reference manual (8 pages)

Related Manuals for Yealink T41P


Summary of Contents for Yealink T41P
- Page 1 Yealink T41P and T42G Setup and User Guide Version Created: April 2015 Last Updated:...
- Page 2 ________________________________________________________________ Copyright Copyright © 2005, 2006, 2007, 2011, 2012, 2013, 2014, 2015 MyPhones Ltd. Information in this document is subject to change without any notice. No part of this document may be reproduced, transmitted or stored in a retrieval system, in any form or by any means, electronic or mechanical, for any purpose, without the written permission of MyPhones Ltd.
-
Page 3: Table Of Contents
Contents Introduction ......................5 1.1. Purpose of this Document ..............5 1.2. Related Documents................5 1.3. Yealink Phone On-line Customisation ........... 5 Getting Started ...................... 6 2.1. Equipment Required ................6 2.2. Phone Assembly ................6 2.3. Router ..................... 7 2.4. - Page 4 ________________________________________________________________ Call Parking and Retrieval ............... 21 Line Monitoring ..................22 Ringing Group Pickup ................22 Copyright © 2005-2015 MyPhones Ltd 4/23...
-
Page 5: Introduction
1. Introduction 1.1. Purpose of this Document This guide is to show you how to install and use your Yealink T41P or T42G phone which you will use in conjunction with your portal website (www.telephony- cloud.com), therefore the functionality and features described are an appropriate subset of those available. -
Page 6: Getting Started
________________________________________________________________ 2. Getting Started 2.1. Equipment Required Yealink T41P or T42G phone and desk stand Power Supply – either unit with plug or a PoE (Power over Ethernet) switch Ethernet Broadband Router Operational Ethernet LAN ... -
Page 7: Router
If you are using an external power source plug the power supply cable into the power port on the phone base. NOTE. The Yealink T42G does not ship with a power supply. If you are not using Power over Ethernet (PoE), you must order a suitable power supply separately. -
Page 8: Connection Failure
________________________________________________________________ 2.5. Connection Failure If at any time you don’t hear a dial tone or the LCD screen displays a message ‘Network is unavailable’ then unplug the power supply to the phone and reboot your router. When the router has successfully rebooted plug the power back into the phone. -
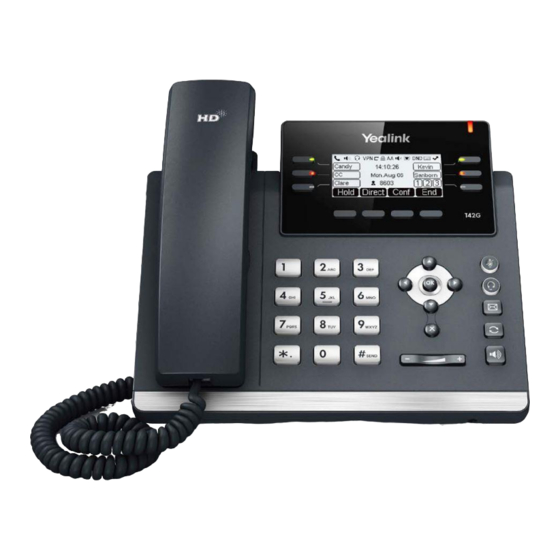
Page 9: Know Your Phone
________________________________________________________________ Know Your Phone Diag No Phone Feature Description Handset Pick up to place or answer call Line Buttons Solid Green – the line is being used Screen 1 Fast Flashing green – the line is receiving a call Slow Flashing green – the line is on hold Forward Calls Solid Green –... - Page 10 ________________________________________________________________ Diag No Phone Feature Description Power LED Solid Red - the phone is initializing Fast Flashing red - the phone is ringing Slow Flashing red - the phone is receiving a voice mail Soft Keys Press a soft key to perform the action shown on the label on the LCD Screen above Navigation Pad Press an arrow key to scroll left, right, up or down...
-
Page 11: Screen Icons
________________________________________________________________ 3.1. Screen Icons Network is unavailable Registered successfully Register failed Registering Hands-free speakerphone mode Handset mode Headset mode Multi-Lingual lower case letter input mode Multi-Lingual upper case letter input mode Alphanumeric input mode Numeric input mode Multi-Lingual upper and lower case letters input mode Voice mail Text Message Auto Answer... -
Page 12: Using Your Phone
________________________________________________________________ 4. Using Your Phone 4.1. Phone Operation You may use the handset, the inbuilt speaker or an approved headset to make and receive calls. Making the connection Picking up the handset, pressing a line button or pressing the speaker or headphone button will connect the phone to the first line on your phone. -
Page 13: Messages
________________________________________________________________ Messages The power LED light flashing red indicates that there is a voice mail message together with the voice mail icon on the screen. Pressing the Messages button on the phone will connect you to the phone messaging service. Call Forwarding The top right function button on screen 2 of the phone is labelled Forward and this allows you to divert all calls to another number. -
Page 14: Phone Functions
________________________________________________________________ 4.2. Phone Functions The main functions of the phone are enabled by the four buttons at the top of the phone under the screen which are known as soft keys and can have varying actions associated with them depending on the status of the phone at any particular time. -
Page 15: Receiving A Call
________________________________________________________________ Same functionality as MyDir soft key above but users should only access the LDAP portal directory. Receiving a Call When you receive a call only four soft keys are active: Answer Silence Reject Answer Either pick up the handset or press the speaker key to take the call. -
Page 16: Making A Call
________________________________________________________________ Making a Call If you know the number or short code you wish to call, just enter the number directly. Once you enter a phone number to make a call the soft keys become: Send Delete Cancel Send Once you have entered a number or short code you can invoke dialling by either picking up the receiver, pressing the speaker button, headphone button or pressing the Send soft key which will use the speaker if the handset is on the phone. -
Page 17: Putting A Call On Hold
________________________________________________________________ to call. As you start to dial a number the phone’s screen will display a list of phone numbers from your recent call history list that most closely match the numbers you have entered so far. Pressing the 123 soft key will give you the option of alphanumeric entry. -
Page 18: Receiving A 2Nd Call
________________________________________________________________ Receiving a 2nd Call If a 2 party calls you while you are speaking to the 1 party LCD screen displays ‘Incoming call xxxxx’. This makes the soft keys: Tran Answer Reject End Call Tran Gives you the options to transfer the incoming call to an entered number via the key pad. -
Page 19: Transferring A Call
________________________________________________________________ You can control who to speak to by using the following soft keys: Split Hold Manage End Call Split Splits the conference call into two individual calls on hold, you can switch between the calls using the up and down navigation buttons. -
Page 20: Voice Mail
________________________________________________________________ Voice Mail If you have configured your system to take Voice mail messages via your account on the portal website – see Setup and User Guide – you can access the messages directly from your phone without having to go online. A full description of all the options available can be found in the Setup and User Guide under the Picking up messages via an external phone section. -
Page 21: Advanced Phone Features
________________________________________________________________ 4.3. Advanced Phone Features Call Waiting Call Waiting On or Off To turn Call Waiting on press the Menu soft key and then select Features by scrolling with the navigation buttons. Select Call Waiting and using the Switch soft key select Enable or Disable. Finally press the Save soft key to confirm your setting. -
Page 22: Line Monitoring
________________________________________________________________ Dial service code *83 and press any dial key. You will then hear a message “The caller has been parked at extension XXX” The call has now been parked and the phone can be used to make or receive other calls. -
Page 23: Directed Pickup
________________________________________________________________ Directed Pickup You can answer a ringing phone within your company without being in the same call pickup group by dialling service code *89XXX where XXX is the number or short code of the ringing phone. On dialling the number you will first hear and engaged tone for a short time (this tells you that the system has identified the call to pick up) and then your phone will begin to ring.
Need help?
Do you have a question about the T41P and is the answer not in the manual?
Questions and answers