Yealink T19P E2 Manual
Hide thumbs
Also See for T19P E2:
- Administrator's manual (1056 pages) ,
- User manual (131 pages) ,
- Provisioning manual (67 pages)
Advertisement
Yealink T19P E2, T41P, T42G, T46G, T48G,
T41S, T42S, T46S, T48S, T52S, T54S, T53,
T53W, T54W, T57W manual
A. General information
1. Introduction
Welcome!
This manual helps you to optimize the usage of the IP telephone in combination with the PBX. Please
use this manual at initial operation. Some features differ from the features described in the
manufacturer's documentation.
The following pages describe the Yealink T19P E2, T41P, T42G, T46G, T48G, T41S, T42S, T46S,
T48S, T52S, T54S, T53, T53W, T54W, T57W system telephones.
Yealink T19P E2
Yealink T46G
Yealink T46S
Yealink T41P
Yealink T41S
Yealink T48G
Yealink T48S
Yealink T42G
Yealink T42S
Yealink T52S
1
Advertisement
Table of Contents

Related Manuals for Yealink T19P E2


Summary of Contents for Yealink T19P E2
- Page 1 Some features differ from the features described in the manufacturer's documentation. The following pages describe the Yealink T19P E2, T41P, T42G, T46G, T48G, T41S, T42S, T46S, T48S, T52S, T54S, T53, T53W, T54W, T57W system telephones.
-
Page 2: Used Symbols
Yealink T54S Yealink T53 Yealink T53W Yealink T54W Yealink T57W Yealink EXP40 Yealink EXP50 Yealink EHS36 2. Used symbols Type Icon Description Important information and notices that you Notice have to pay attention to. Useful hints that provide additional Hint information. - Page 3 B. Security 1. Notes The device was produced in accordance with the most common security standards. Nevertheless, note the safety guidelines in order to use the device securely. Please note the following safety guidelines to lower risk of burning, electric shocks, and similar risks. General guidelines Keep the device dry and clean at transport, storage, and usage.
-
Page 4: Initial Operation
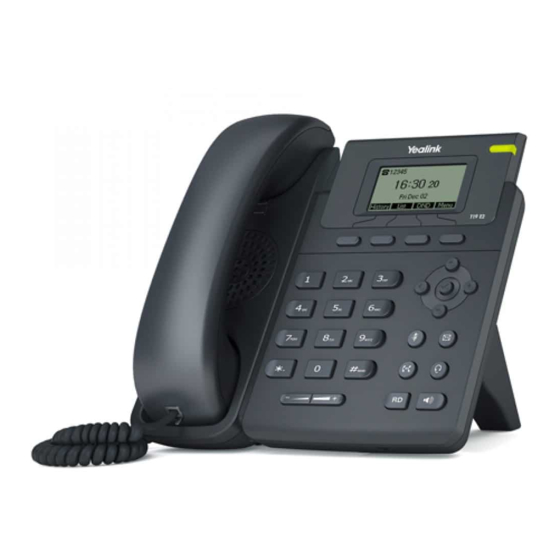
D. Operation 1. Basic Functions 1.1 Overview of Keys Below you will see an overview over all keys of the respective models. Yealink T19P E2 Position Description LCD display LED call indicator Navigation keys... - Page 5 Alphanumetrical key pad Soft keys Yealink T41P, T42G, T41S, T42S Position Description 2,7" display LED call indicator Freely assignable function keys Headset and mute key, keys for voice mail and redialing Speaker key Volume key Alphanumerical key pad Navigation keys...
- Page 6 Freely assignable function keys Headset and mute key Keys for voice mail, hold, redialing and transfer Speaker key Volume key Alphanumerical key pad Navigation key Soft key Yealink T48G, T48S Position Description LED call indicator 7" touchscreen Headset key Mute key Hold key...
- Page 7 Yealink T52S, T54S, T53, T53W, T54W Position Description LCD display LED call indicator Freely assignable function keys Soft keys Alphanumetrical key pad Headset and mute key, keys for voicemail, redialing, hold and call forwarding Speaker key Volume key Navigation keys...
- Page 8 Headset key Mute key Redial key Speakerphone key Transfer key Hold key Voicemail key Volume key Alphanumetrical key pad Speaker Reversible tab Hookswitch (on the back side) USB2.0 port 1.2. Keys in Detail Description You can use the navigation keys to steer through the menu.
-
Page 9: Outgoing Call
Redialing Speaker Transfer* Hold Conversation * not available for Yealink T41P and T42G Yealink T46G, T48G display icons Keys Description Keys Description No network access Redirect call Logged in successfully Hold call Not logged in Mute microphone Logging in Silent (ringtone) -
Page 10: Incoming Call
Speaker Press the speaker key to activate the speaker. Dial the telephone number. or the Send soft key. Confirm your call by pressing End the conversation by pressing the soft key End Call or Headset Activate the headset by pressing the headset key Dial the telephone number. -
Page 11: Call Transfer
Hold a Call In order to hold an active call, press the Hold key or push the Hold button To take an incoming call during an active conversation, press the Answer soft key. To reject an incoming call, press the Reject soft key. You can transfer incoming calls directly by pressing the transfer button * or the Transfer soft key. -
Page 12: Call Forwarding
Press the Transfer soft key or the Transfer button Choose the line you want to transfer to. Confirm with for an attended transfer. Confirm with the Transfer soft key or the Transfer button * for an unattended transfer. Blind Transfer Do not take the incoming call. - Page 13 Delayed call forwarding (no answer) Call forwarding condition: You do not answer the incoming call within a defined time period (timeout). The timeout can be set to 5, 10, 15 or 20 seconds. Where should the incoming call be forwarded after the specified time has elapsed? The caller receives a call waiting signal and is then forwarded to the defined destination.
-
Page 14: Three-Way Calls
1.8. Three-Way Calls Follow these steps to start a conference call: Call the first participant. Press the Conference soft key. Dial the second participant's number. Press , the soft key Send or Conference. As soon as the second party answers the call, press the Conference soft key once again to start the conversation with both participants. - Page 15 In order to activate the function, insert *5 into your key pad. An acoustic confirmation will finalize the activation. As soon as the other party is available again, your end device receives a callback generated by the PBX. As soon as you answer the callback, the PBX sends out a call to the number you tried to reach initially.
-
Page 16: Advanced Telephone Functions
configuration is automatically copied to the new telephone. Step 1: Cancelling the registration of the current extension Menu -> Phone settings -> Logoff -> Select Step 2: Registering the new extension Login -> Enter the extension number -> Submit -> Enter voice mail PIN -> Submit Loggin in and off may take a few moments. - Page 17 You can save up to 12 (T52S) or 16 function keys (T54S) on three levels on your telephone. Additional function keys can be configured via the EXP50 expansion module. Yealink T41P, T42G, T46G You can save up to 15 or 27 function keys (T46G) on three levels on your telephone.
- Page 18 Extension / telephone number You can add any extension or telephone number to the busy lamp field. You can start a call by pressing the respective busy lamp key. If an internal extension is programmed, you can see whether that extension is currently busy: If the LED next to the key flashes, the party receives a call.
- Page 19 *12+TN If not available, forward to telephone number (TN) **12 Cancel call forwarding if no answer *13+TN If busy, forward call to telephone number (TN) **13 Cancel call forwarding if busy *14+TN If not registered, forward to telephone number (TN) **14 Cancel forward if unregistered *2+Speed dial...
- Page 20 Lock the conference. ) nnnn is the four digit Service ID with leading zeros (0). For example, in a callgroup, IVR, eFax, etc. This means: is the Service ID "1", "0001" must be entered when entering the function code. 3. IP Address 3.1.
- Page 21 If neither the manuals nor the FAQs or other contents of the support website provide a solution, you can open a support ticket by phone. Our support staff is available Monday to Friday from 8:00 am to 6:00 pm at +44 20 3740 6740 for UK and +49 800 63 66 555 for Germany.
Need help?
Do you have a question about the T19P E2 and is the answer not in the manual?
Questions and answers
how do i enter contact details into the phone?
To enter contact details into the Yealink T19P E2 phone using the phone interface:
1. Press Directory → Local Directory → All Contacts.
2. Press the Add soft key.
3. Enter the name, address, work number, mobile number, home number, title, and email in the corresponding fields.
4. Select the desired ring tone using the arrow keys or the Switch soft key in the Ring field.
5. Press the Save soft key to save the contact.
If the contact name already exists, the screen will show “Contact name existed!”.
This answer is automatically generated