
Subscribe to Our Youtube Channel
Related Manuals for Hyco Sun Prince SP1000HLG


Summary of Contents for Hyco Sun Prince SP1000HLG
- Page 1 Product Instruction Manual Sun Prince 1.0kW, 1.5kW, 2.0kW, 3.0kW, 4.0kW and 4.5Kw Indoor Halogen Infrared Heater Version 3.2 Jan 2015 V15.10/2...
-
Page 2: Important Safety Points
Thank you for purchasing the Hyco Sun Prince Heater.This heater is ideal for heating applications in draughty or tall buildings such as garages, warehouses, factories and similar difficult to heat situations where convection heating would be impractical. Please read and understand these instructions before commencing installation and leave them with the user when installation is complete. -
Page 3: Installation
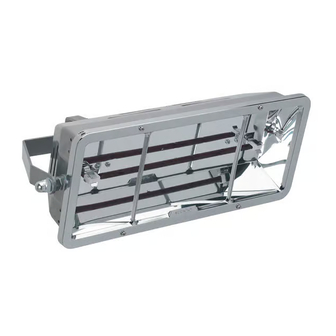
with the heater, for example in sports halls where balls may collide with the lamp. • FIRE RISK - take particular care when positioning the heater near moveable items such as curtains or doors. Make sure that a 1.8m clearance is achieved with the moveable item in its closest position. - Page 4 Fig 1 – Assembly drawing...
- Page 5 Wall mounting Fig 2 Wall bracket mount to main body of the heater. SP1000H SP3000H SP4500H SP1500H SP4000H SP2000H • When mounting the Sun Prince using the wall bracket provided, the minimum distances and angle must be observed. Model Number Distance A Distance B Angle C (°)
- Page 6 Once the position of the Sun Prince has been decided, the unit can be mounted. • The “L” piece of the bracket should be firmly fixed in position using screws and wall plugs. • Attach the main body holder part of the bracket to the piece attached to the wall using the nut and bolt provided.
- Page 7 Model Distance A Distance B Distance C Angle D Chain Rating Number To wall To wall To ceiling (Min - Max °) (kg) (mm) (mm) (mm) SP3000HL 20 - 45 SSP4000HLG 20 - 45 SSP4500HL 20 - 45 When mounting the unit ensure the mounting surface is capable of safely holding the weight of the unit being fitted.
- Page 8 PIR devices or other controllers may be used to control this unit provided all devices are rated to the appropriate electrical loading with due allowance for the in-rush current. (Hyco Quartz controllers are available and are fitted with a “soft start” feature that negates the need for a slow blow circuit breaker).
-
Page 9: Operation
3. Operation This unit does not have an on/off switch and will operate as soon as mains power is supplied to the unit. 4. Maintenance • Before cleaning, ensure the heater is disconnected from the power supply and has cooled completely. •... -
Page 10: Specifications
• Clip the lamp into the lamp holders. • Replace the reflector and secure the front guard using the four retaining screws. • Replace the back box covering the terminal block. 5. Specifications Model Power (kW) Lamp Colour* Lamp Qty x W SP1000HLG Gold 1 x L1000CGL... -
Page 11: Guarantee And Service Policy
This product is guaranteed against faulty materials and manufacture for a period of one year from the date of purchase. Hyco will in its sole discretion replace, repair or refund any faulty unit (excluding lamps). Incorrect installation and failure to follow correct operating instructions are excluded. - Page 12 In order to underline the duty to dispose of this equipment separately, the product is marked with a crossed out dustbin. Hyco Manufacturing Ltd Normandy Court Express Way...
Need help?
Do you have a question about the Sun Prince SP1000HLG and is the answer not in the manual?
Questions and answers