Table of Contents
Advertisement
Quick Links
Advertisement
Table of Contents

Related Manuals for Getac T800


Summary of Contents for Getac T800
-
Page 1: User Manual
USER MANUAL Rugged Mobile Computing Solutions... - Page 2 February 2016 TRADEMARKS TRADEMARKS TRADEMARKS TRADEMARKS All brand and product names are trademarks or registered trademarks of their respective companies.
- Page 3 NOTE NOTE NOTE NOTE The information in this manual is subject to change without notice. For the latest version of the manual, please visit the Getac website at www.getac.com.
-
Page 4: Table Of Contents
Table of Contents Table of Contents Table of Contents Table of Contents Chapter 1 Getting Started Chapter 1 Getting Started ....................1 1 1 1 Chapter 1 Chapter 1 Getting Started Getting Started ....................Getting the Tablet PC Running .......... 2 Unpacking .............. - Page 5 Menu Descriptions ............43 Information Menu ............43 Main Menu ............... 43 Advanced Menu ............43 Security Menu ............44 Exit Menu ..............45 Chapter 6 Using Getac Software Chapter 6 Using Getac Software ................47 Chapter 6...
- Page 6 General Guidelines ............. 57 Cleaning Guidelines ............ 57 Battery Pack Guidelines ..........58 Touchscreen Guidelines ..........59 When Traveling .............. 61 Chapter 8 Troubleshooting Chapter 8 Troubleshooting .................... 62 Chapter 8 Chapter 8 Troubleshooting Troubleshooting ....................
- Page 7 User Notification of Take-back Service ......87 ENERGY STAR 6.1 ............89...
-
Page 8: Getting Started
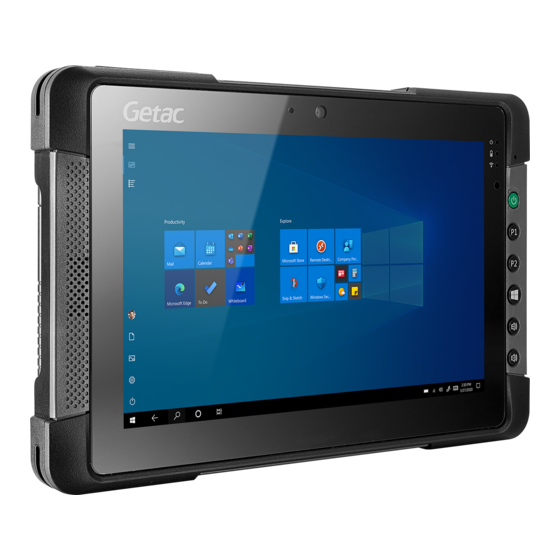
Chapter 1 Chapter 1 Chapter 1 Chapter 1 Getting Started Getting Started Getting Started Getting Started Congratulations on purchasing this rugged Tablet PC. This chapter first tells you step by step how to get the Tablet PC up and running. Then, you will find a section briefly introducing the external components of the Tablet... -
Page 9: Getting The Tablet Pc Running
Unpacking Unpacking NOTE: This packing list applies to standard models. Select models may have different items. After unpacking the shipping carton, you should find these standard items: T800 Tablet PC AC adapter AC power cord Stylus Tether Screen cleaning cloth... -
Page 10: Installing The Sim Card (Optional)
Installing the talling the SIM Card (Optional) SIM Card (Optional) talling the talling the SIM Card (Optional) SIM Card (Optional) 1. Locate the SIM card cover. Remove the cover by unfastening 4 screws. 2. Noting the orientation, slide the SIM card into place. 3. -
Page 11: Connecting To Ac Power
Connecting to AC Power Connecting to AC Power Connecting to AC Power Connecting to AC Power It is suggested that you use AC power when starting up the Tablet PC for the very first time. 1. Plug the DC cord of the AC adapter to the power connector of the Tablet PC ( ). -
Page 12: Using The Tether
Using the Tether Using the Tether Using the Tether Using the Tether A tether is provided for attaching the stylus to your Tablet PC. 1. Insert one of the tether’s loop ends through the hole of the stylus (as indicated below). -
Page 13: Turning On And Off The Tablet Pc
Turning On and Off the Tablet PC Turning On and Off the Tablet PC Turning On and Off the Turning On and Off the Tablet PC Tablet PC Turning On Turning On Turning On Turning On Press the power button ( ). -
Page 14: Taking A Look At The Tablet Pc
Taking a Look at the Tablet PC Taking a Look at the Tablet PC Taking a Look at the Taking a Look at the Tablet PC Tablet PC NOTE: Depending on the model you purchased, the appearance of your Tablet PC may not be exactly the same as those shown in this manual. - Page 15 Component Component Component Component Description Description Description Description See Also See Also See Also See Also (optional) Indicators Indicators Indicators Indicators Lights blue when the power is on. Power Blinks blue when the system is in Sleep mode. Lights amber when the battery is being charged. P.
- Page 16 Component Component Component Component Description Description Description Description See Also See Also See Also See Also Serves as the trigger button for the barcode reader P. 53 if your model has the barcode reader module. Can be changed to another set of predefined P.
-
Page 17: Rear Components
Rear Components Rear Components Rear Components Rear Components Component Component Description Description See Also See Also Component Component Description Description See Also See Also Connect to a proprietary snap-on module such Ex Ex Ex Expansion pansion pansion pansion Connector Connector Connector Connector - Second battery pack... -
Page 18: Top Components
Supplies power to your Tablet PC when external P. 28 Battery Pack Battery Pack Battery Pack Battery Pack power is not connected. Top Components Components Components Components Component Component Component Component Description Description Description Description See Also See Also See Also See Also For holding a tether (such as the stylus P. -
Page 19: Bottom Components
Connects the LAN cable. P. 19 RJ RJ RJ RJ- - - - 45 45 Connector Connector 45 45 Connector Connector Scans and reads barcodes. P. 53 Barcode Reader Lens Bottom Components Bottom Components Bottom Bottom Components Components Component Component Description Description See Also... - Page 20 Component Component Component Component Description Description Description Description See Also See Also See Also See Also Connects a HDMI monitor or TV set. P. 38 Micro HDMI Micro HDMI Micro HDMI Micro HDMI Connector Connector Connector Connector Connects a USB device. P.
- Page 21 Chapter 2 Chapter 2 Chapter 2 Chapter 2 Operating Your Operating Your Operating Your Operating Your Tablet PC Tablet PC Tablet PC Tablet PC This chapter provides information about the use of the Tablet PC. If you are new to Tablet PCs, reading this chapter will help you learn the operating basics.
-
Page 22: Navigating On The Screen
Navigating on the Screen Navigating on the Screen Navigating on the Screen Navigating on the Screen The screen of your Tablet PC is touch-sensitive. You can control the location of the cursor/pointer on the screen using the included stylus or your finger to communicate with the Tablet PC. - Page 23 The following table shows how you use the touchscreen to obtain equivalent mouse functions. E E E E quivalent quivalent quivalent quivalent Mouse Mouse Mouse Mouse Term/ Term/ Term/ Term/Action Action Action Action Function Function Function Function Tap: Touch the screen once. Click/Point Double-tap: Touch the screen twice rapidly.
- Page 24 Actions s s s Action Action Action Gestures Gestures Descriptions Descriptions Gestures Gestures Descriptions Descriptions = finger down; = finger down; = finger down; = finger down; = finger up) = finger up) = finger up) = finger up) Zoom Use zooming to make an (Pinch) item (a photo for...
-
Page 25: Using The Dual Mode Display (Optional)
Actions s s s Action Action Action Gestures Gestures Descriptions Descriptions Gestures Gestures Descriptions Descriptions = finger down; = finger down; = finger down; = finger down; = finger up) = finger up) = finger up) = finger up) Two- The function is defined by finger Tap applications that support... -
Page 26: Using The Network Features
Using the Network Using the Network Features Features Using the Using the Network Network Features Features Using the LAN N N N (Optional) Using the LA (Optional) Using the LA Using the LA (Optional) (Optional) To connect the network cable to the LAN module (if your model has the feature), connect one end of the LAN cable to the RJ-45 connector on the Tablet PC and the other end to the network hub. - Page 27 Wi-Fi. Slide the Wi-Fi switch to Settings Network & Internet the On position. To turn off the WLAN radio: You can turn off the WLAN radio the same way you turn it on. If you want to quickly turn off all wireless radio, simply switch on Airplane mode. Connecting to a WLAN Connecting to a W LAN Network...
-
Page 28: Using The Bt Feature
Using the Using the BT BT BT BT Feature Feature Using Using Feature Feature The BT technology allows short-range wireless communications between devices without requiring a cable connection. Data can be transmitted through walls, pockets and briefcases as long as two devices are within range. Turning Turning On/Off Turning... - Page 29 5. Depending on the type of BT device that you want to connect to, you will need to enter the pertinent information. For detailed information on using the BT feature, see Windows’ online Help.
-
Page 30: Using The Wwan Feature (Optional)
Using the WWAN Using the WWAN Feature Feature ( ( ( ( Optional Optional) ) ) ) Using the Using the WWAN WWAN Feature Feature Optional Optional A WWAN (Wireless Wide Area Network) uses mobile telecommunication cellular network technologies to transfer data. The WWAN module of your Tablet PC supports 3G and 4G LTE. -
Page 31: Setting Up A Wwan Connection
S S S S e e e e tting up a WWAN Connection tting up a WWAN Connection tting up a WWAN Connection tting up a WWAN Connection 1. Make sure that the SIM card is inserted and the WWAN function is enabled (as described above). -
Page 32: Managing Power
Chapter 3 Chapter 3 Chapter 3 Chapter 3 Managing Power Managing Power Managing Power Managing Power Your Tablet PC operates either on external AC power or on internal battery power. This chapter tells you how you can effectively manage power. To maintain optimal battery performance, it is important that you use the battery in the proper way. -
Page 33: Ac Adapter
AC Adapter AC Adapter AC Adapter AC Adapter CAUTION: The AC adapter is designed for use with your Tablet PC only. Connecting the AC adapter to another device can damage the adapter. The AC power cord supplied with your Tablet PC is for use in the country where you purchased your Tablet PC. -
Page 35: Battery Pack
Battery Pack Battery Pack Battery Battery Pack Pack The battery pack is the internal power source for the Tablet PC. It is rechargeable using the AC adapter. NOTE: Care and maintenance information for the battery is provided in the “Battery Pack Guidelines” section in Chapter Charging the Battery Pack Charging the Battery Pack... -
Page 36: Initializing The Battery Pack
It takes approximately 3 hours to fully charge the battery pack when the power is off and approximately 3.5 hours when the power is on (may need a longer charging time at lower temperatures). CAUTION: After the Tablet PC has been fully recharged, do not immediately disconnect and reconnect the AC adapter to charge it again. -
Page 37: Battery Low Signals And Actions
By Gas Gauge By Gas Gauge By Gas Gauge By Gas Gauge On the exterior side of the battery pack is a gas gauge for displaying the estimated battery charge. When the battery pack is not installed in the Tablet PC and you want to know the battery charge, you can press the switch to see the number of LEDs that light up. -
Page 38: Replacing The Battery Pack
Always respond to low-battery by connecting the AC adapter, placing your Tablet PC in Hibernation mode, or turning off the Tablet PC. Replacing the Battery Pack Replacing the Battery Pack Replacing the Battery Pack Replacing the Battery Pack CAUTION: There is danger of explosion if the battery is incorrectly replaced. - Page 39 2. Lift the battery pack off the compartment. 3. Fit another battery pack into place. 4. Slide the three latches to the locked position ( CAUTION: Make sure all the latches are correctly locked, not revealing the underneath red part. Correct Incorrect (revealing red part)
-
Page 40: Second Battery Pack (Optional)
Second Battery Pack (Optional) Second Battery Pack (Optional) Second Second Battery Pack (Optional) Battery Pack (Optional) You can purchase a second battery pack, designed as a snap-on module, for extra battery power. The second battery pack can be charged individually with the AC adapter when it is not attached to the Tablet PC. -
Page 41: Power-Saving Tips
Power- - - - Saving Tips Power Saving Tips Power Power Saving Tips Saving Tips Aside from enabling your Tablet PC’s power saving mode, you can do your part to maximize the battery’s operating time by following these suggestions. Do not disable Power Management. Decrease the LCD brightness to the lowest comfortable level. -
Page 42: Expanding Your Tablet Pc
Chapter 4 Chapter 4 Chapter 4 Chapter 4 Expanding Your Expanding Your Tablet PC Expanding Your Expanding Your Tablet PC Tablet PC Tablet PC You can expand the capabilities of your Tablet PC by connecting other peripheral devices. When using a device, be sure to read the instructions accompanying the device together with the relevant section in this chapter. -
Page 43: Connecting A Usb Device
Connecting a USB Device Connecting a USB Device Connecting a USB Device Connecting a USB Device Your Tablet PC has a USB 3.0 port for connecting a USB device, such as a digital camera, scanner, printer, modem, and mouse. USB 3.0 supports a transfer rate up to 5 Gbit/s. -
Page 44: Connecting An Audio Device
Connecting an an an an Audio Device Connecting Audio Device Connecting Connecting Audio Device Audio Device For higher audio quality, you can send sound through an external audio device. The audio combo connector is the “4-pole TRRS 3.5mm” type (Apple iPhone Recessed) so you can connect a compatible headset microphone. -
Page 45: Connecting An Hdmi Display Monitor
Connecting an n n n HDMI Display Connecting a HDMI Display Monitor Monitor Connecting a Connecting a HDMI Display HDMI Display Monitor Monitor If you want the benefits of a larger display screen with higher resolution, you can connect an external display monitor to your Tablet PC. Your Tablet PC has a micro HDMI connector. -
Page 46: Connecting A Serial Device (Optional)
Connecting a Serial Device Connecting a Serial Device (Optional) (Optional) Connecting a Serial Connecting a Serial Device Device (Optional) (Optional) If your model has the RS232 serial port, you can connect a serial device such as a serial mouse or serial communication device. -
Page 47: Using Microsd Cards (Optional)
Using M M M M icro Using icroSD SD Card Cards (Opt s (Optional) ional) Using Using icro icro Card Card s (Opt s (Opt ional) ional) If your model has the microSD card reader, you can use microSD cards for removable storage media. -
Page 48: Using Bios Setup
Chapter 5 Chapter 5 Chapter 5 Chapter 5 Using BIOS Setup Using BIOS Setup Using BIOS Setup Using BIOS Setup BIOS Setup Utility is a program for configuring the BIOS (Basic Input/ Output System) settings of the Tablet PC. BIOS is a layer of software, called firmware, that translates instructions from other layers of software into instructions that the computer hardware can understand. -
Page 49: When And How To Use
When and How When and How to Use to Use When When and How and How to Use to Use You need to run BIOS Setup Utility when: You see an error message on the screen requesting you to run BIOS Setup Utility. -
Page 50: Menu Descriptions
Menu Descriptions Menu Descriptions Menu Descriptions Menu Descriptions Information Menu Information Menu Information Information Menu Menu The Information menu contains the basic configuration information of the system. There are no user-definable items in this menu. NOTE: The “Asset Tag” information appears when you have entered the asset number for this Tablet PC using the asset management program. -
Page 51: Security Menu
Graphics Setup Graphics Setup Graphics Setup Graphics Setup Allocated sets the amount of pre-allocated (fixed) graphics memory DVMT DVMT Pre Pre- - - - Allocated DVMT DVMT Allocated Allocated for use by the internal graphics device. Device Configuration enables or disables several hardware components. The items available for setting depend on your model. -
Page 52: Exit Menu
Secure Boot enables or disables Boot. Secure Boot is a feature that helps prevent unauthorized firmware, operating systems, or UEFI drivers from running at boot time. Delete all Security Boot keys deletes all secure boot variables. Restore Factory Defaults resets secure boot variables to manufacturing defaults TPM Setup Menu TPM Setup Menu TPM Setup Menu... - Page 53 Discard Changes restores the previous values for all the items. Discard Changes Discard Changes Discard Changes Saves Changes saves the changes you have made. Saves Changes Saves Changes Saves Changes...
-
Page 54: Using Getac Software
Chapter 6 Chapter 6 Chapter 6 Chapter 6 Using Using Getac Software Using Using Getac Software Getac Software Getac Software Getac software includes application programs for specific computer components and utility programs for overall management. This chapter briefly describes the programs. -
Page 55: Osd Control Panel
OSD Control Panel OSD Control Panel OSD Control Panel OSD Control Panel The OSD (On Screen Display) Control Panel provides a user-friendly interface for you to quickly activate or operate certain functions on your Tablet PC with a simple tap of the screen. To open the OSD Control Panel, start the program named OSDC. -
Page 56: G-Manager
Change the function of the hardware button. Monitor the system. View GPS information (select models only). Tap and hold the Getac Utility icon located on Windows taskbar and select G-Manager to start the program. The G-Manager window appears, containing several tabs. - Page 57 Help For detailed information on the program, see the program’s online help.
-
Page 58: G-Camera (Optional)
G G G G - - - - Camera (Optional) Camera (Optional) Camera (Optional) Camera (Optional) G-Camera is a geo-tagging camera application. Geographical information can be embedded into JPEG files as EXIF 2.2 metadata. NOTE: G-Camera uses the standard location service of Windows. To start the G-Camera application, select All apps G-Camera. -
Page 60: Using The Barcode Reader (Optional)
Barcode Barcode Reader (Optional) Reader (Optional) NOTE: For enhanced applications and customization of the module, contact your authorized Getac dealer. If your model has the barcode reader module, you can read barcodes of the following types: Code 39 Code 128... - Page 61 Trigger button NOTE: If the code being scanned is highly reflective (e.g., laminated), it may be necessary to tilt the code +5° to prevent unwanted reflection. 3. Upon a successful scan, the system beeps and the scan beam turns off. The decoded barcode data will be entered into your processing software.
-
Page 62: Care And Maintenance
Chapter 7 Chapter 7 Chapter 7 Chapter 7 Care e e e and and Maintenance Maintenance Maintenance Maintenance Taking good care of your Tablet PC will ensure a trouble-free operation and reduce the risk of damage to your Tablet PC. This chapter gives you guidelines covering areas such as protecting, storing, cleaning, and traveling. -
Page 63: Taking Care Of The Tablet Pc
Taking Care of the Tablet PC Taking Care of the Tablet PC Taking Care of the Taking Care of the Tablet PC Tablet PC Location Guidelines Location Guidelines Location Location Guidelines Guidelines For optimal performance, use the Tablet PC where the recommended temperature is between 0 °C (32 °F) and 50 °C (122 °F). -
Page 64: General Guidelines
“Storage Device Retention” service is not available to your Tablet PC model. In case you have to return your Tablet PC to Getac for replacing the storage device and you want to completely erase the hard drive data before returning it, you can use the erasing tool supplied by Getac. -
Page 65: Battery Pack Guidelines
If the Tablet PC gets wet where the temperature is 0°C (32°F) or below, freeze damage may occur. Make sure to dry the wet Tablet PC. Battery Pack Battery Pack Guidelines Guidelines Battery Battery Pack Pack Guidelines Guidelines Recharge the battery pack when it is nearly discharged. When recharging, make sure that the battery pack is fully charged. -
Page 66: Touchscreen Guidelines
– avoid installing or removing the battery pack when the Tablet PC is in Sleep mode. Abruptly removing the battery pack may cause loss of data or the Tablet PC may become unstable. – avoid touching the battery pack terminals or damage may occur, thereby causing improper operation to it or the Tablet PC. - Page 67 Do not use excessive force on the display. Avoid placing objects on top of the display as this may cause the glass to break thereby damaging the display. Using the touchscreen during low temperature (less than 5 C) may cause a slower response time, this is normal.
-
Page 68: When Traveling
When Traveling When Traveling When Traveling When Traveling Before traveling with your Tablet PC, make a backup of your hard disk data into flash disks or other storage devices. As an added precaution, bring along an extra copy of your important data. Make sure that the battery pack is fully charged. -
Page 69: Troubleshooting
Chapter 8 Chapter 8 Chapter 8 Chapter 8 Troubleshooting Troubleshooting Troubleshooting Troubleshooting Computer problems can be caused by hardware, software, or both. When you encounter any problem, it might be a typical problem that can easily be solved. This chapter tells you what actions to take when solving common computer problems. -
Page 70: Preliminary Checklist
Preliminary Checklist Preliminary Checklist Preliminary Checklist Preliminary Checklist Here are helpful hints to follow before you take further actions when you encounter any problem: Try to isolate which part of the Tablet PC is causing the problem. Make sure that you turn on all peripheral devices before turning on the Tablet If an external device has a problem, make sure that the cable connections are correct and secure. -
Page 71: Solving Common Problems
Solving Common Problems Solving Common Problems Solving Common Problems Solving Common Problems Battery Problems s s s Battery Problem Battery Problem Battery Problem The battery does not charge (Battery indicator does not light amber). Make sure that the AC adapter is properly connected. Make sure that the battery is not too hot or cold. -
Page 72: Display Problems
Make sure that the other device is not in “Hidden” mode. Make sure that both devices are compatible. Display Problems Display Problems Display Problems Display Problems Nothing appears on the screen. During operation, the screen may automatically turn off as a result of power management. -
Page 73: Power Management Problems
Make sure if any device driver needs to be installed. (Refer to the documentation that came with the device.) Make sure if the device needs any jumper or switch settings. (Refer to the documentation that came with the device.) Check the cables or power cords for correct connections. For an external device that has its own power switch, make sure that the power is turned on. -
Page 74: Sensor Problems
Sensor Problems Sensor Problems Sensor Sensor Problems Problems The built-in digital compass doesn’t seem to be accurate. Rotating the display can affect the accuracy of the digital compass. This is normal, not a malfunction. The sensors for the compass require periodic recalibration. Follow this method to recalibrate the sensors: 1. -
Page 75: Software Problems
Software Problems Software Problems Software Problems Software Problems An application program does not work correctly. Make sure that the software is correctly installed. If an error message appears on the screen, consult the software program’s documentation for further information. If you are sure the operation has stop, reset the Tablet PC. Sound Problems Sound Problems Sound Problems... -
Page 76: Wan Problems
When you turn on the Tablet PC, it stops after POST. Reset your Tablet PC. WAN Problems WAN Problems WAN Problems WAN Problems I cannot use the WLAN feature. Make sure that the WLAN feature is turned on. Transmission quality is poor. Your Tablet PC may be in an out-of-range situation. -
Page 77: Other Problems
I cannot communicate with the computer in the network when Infrastructure mode is configured. Make sure that the Access Point your Tablet PC is associated with is powered on and all the LEDs are working properly. If the operating radio channel is in poor quality, change the Access Point and all the wireless station(s) within the BSSID to another radio channel. -
Page 78: Resetting The Tablet Pc
Resetting Reset ting the the Tablet PC Tablet PC Reset Reset ting ting Tablet PC Tablet PC You may have to reset (reboot) your Tablet PC on some occasions when an error occurs and the program you are using hangs up. If you are sure the operation has stopped and you cannot use the “restart”... -
Page 79: System Recovery
System Recovery System Recovery System Recovery System Recovery Update & security. You have several options. Settings System Restore This option allows you to restore Windows to an earlier point in time if you have created a restore point. Recover from a drive If you have created a recovery drive on Windows 10, you can use the recovery drive to reinstall Windows Reset this PC... -
Page 80: Using The Driver Disc (Optional)
NOTE: You can download the latest drivers and utilities from http://www.getac.com Support. Getac website at The Driver disc contains drivers and utilities required for specific hardware in your Tablet PC. Since your Tablet PC comes with drivers and utilities pre-installed, you normally do not need to use the Driver disc. -
Page 81: Appendix A Appendix A Appendix A Appendix A
Appendix A Appendix A Appendix A Appendix A Specifications Specifications Specifications Specifications NOTE: Specifications are subject to change without any prior notice. Parts Parts Specifications Specifications Parts Parts Specifications Specifications Intel® Cherry Trail-Z8700, 1MB cache BIOS Insyde, Flash EEPROM, supporting UEFI 4GB/8GB LPDDR3 Video Controller... - Page 82 Parts Parts Parts Parts Specifications Specifications Specifications Specifications Optional One of the below options on the top side: RS232 / RJ-45 / microSD / barcode reader LAN (option) 10/100/1000 Mbps Ethernet Wireless LAN + BT Intel® 7265 2x2 802.11 AC + BT 4.0 combo GPS (option) UART WWAN (option)
- Page 83 Button Button Button Button Function Function Function Function ↓ ↓ ↓ ↓ Down...
-
Page 84: Appendix B Appendix B Appendix B Appendix B
Appendix B Appendix B Appendix B Appendix B Regulatory Information Regulatory Information Regulatory Regulatory Information Information This appendix provides regulatory statements and safety notices on your Tablet PC. NOTE: Marking labels located on the exterior of your Tablet PC indicate the regulations that your model complies with. Please check the marking labels and refer to the corresponding statements in this appendix. -
Page 85: On The Use Of The System
On the Use of the System On the Use of the System On the Use of the System On the Use of the System Class B Regulations Class B Regulations Class B Regulations Class B Regulations Federal Communications Commission Radio Frequency Interference Statement NOTE: NOTE: NOTE:... -
Page 86: Ansi Warning
Canada Canada Canada Canada Canadian Department of Communications Radio Interference Regulations Class B Compliance Notice This Class B digital apparatus meets all requirements of the Canada Interference-Causing equipment regulations. Cet appareil numérique de Classe B respecte toutes les exigences du Règlement Canadien sur le matériel brouileur. -
Page 87: Safety Notices
Safety Notices Safety Notices Safety Notices Safety Notices About the Battery About the Battery About the Battery About the Battery Caution Texts Concerning Lithium Batteries DANISH DANISH DANISH DANISH ADVARSEL! Lithiumbatteri – Eksplosionsfare ved fejlagtig håndtering. Udskiftning må kun ske med batteri af samme fabrikat og type. Levér det brugte batteri tilbage til leverandøren. - Page 88 FRENCH FRENCH FRENCH FRENCH ATTENTION: II y a danger d’explosion s’il y a remplacement incorrect de la batterie. Remplacer uniquement avec une batterie du même type ou d’un type équivalent recommandé par le constructeur. Mettre au rebut les batteries usagées conformément aux instructions du fabricant.
-
Page 90: On The Use Of The Rf Device
On the Use of the On the Use of the RF Device RF Device On the Use of On the Use of RF Device RF Device USA and Canada Safety Requirements and Notices USA and Canada Safety Requirements and Notices USA and Canada Safety Requirements and Notices USA and Canada Safety Requirements and Notices Radio Frequency... - Page 91 no guarantee that interference will not occur in a particular commercial installation, or if operated in a residential area. If harmful interference with radio or television reception occurs when the device is turned on, the user must correct the situation at the user’s own expense. The user is encouraged to try one or more of the following corrective measures: Reorient or relocate the receiving antenna.
-
Page 92: European Union Ce Marking And Compliance Notices
European Union CE Marking and Compliance European Union CE Marking and Compliance European Union CE Marking and Compliance European Union CE Marking and Compliance Notices Notices Notices Notices Statements of Compliance Statements of Compliance Statements of Compliance Statements of Compliance English English English... - Page 93 Portuguese Portuguese Portuguese Portuguese Este produto cumpre com as normas da Diretiva Européia 1999/5/EC. Spanish Spanish Spanish Spanish Este producto cumple con las normas del Directivo Europeo 1999/5/EC. Swedish Swedish Swedish Swedish Denna produkt har tillverkats i enlighet med EG-direktiv 1999/5/EC. Restrictions Restrictions Restrictions...
- Page 94 Getac believes in providing our institutional customers with easy-to-use solutions to recycle your Getac-brand products for free. Getac understands the institutional customers will likely be recycling multiple items at once and as such. Getac wants to make the recycling process for these larger shipments as streamlined as possible.
- Page 95 If you have the above for recycling, please contact our recycler, All Green Electronics Recycling, LLC. For more information on recycling, visit the website http://www.allgreenrecycling.com.
- Page 96 ® Please reference ENERGY STAR related information from http://www.energystar.gov. ® As an ENERGY STAR Partner, Getac Technology Corporation has determined that ® this product meets the ENERGY STAR guidelines for energy efficiency. ® An ENERGY STAR qualified computer uses 70 % less electricity than computers without enabled power management features.
- Page 97 Getac Product Compliance Getac Product Compliance Getac Product Compliance ® ® All Getac products with ENERGY STAR logo comply with the ENERGY STAR standard, and the power management feature is enabled by default. As recommended ® by the ENERGY STAR...
Need help?
Do you have a question about the T800 and is the answer not in the manual?
Questions and answers