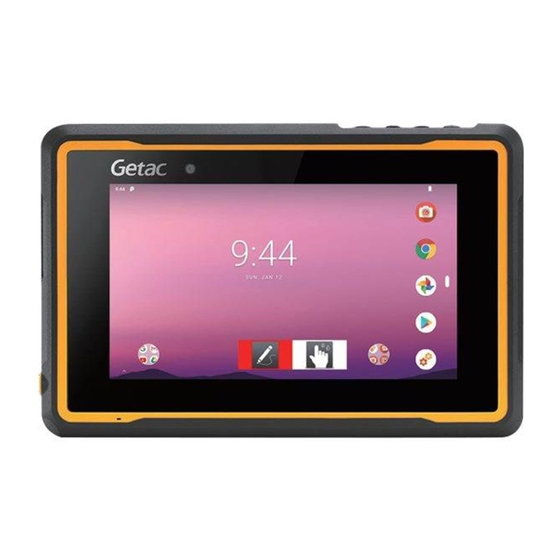
Getac ZX70 Series User Manual
Hide thumbs
Also See for ZX70 Series:
- User manual (59 pages) ,
- Quick manual (25 pages) ,
- User manual (17 pages)
Table of Contents
Advertisement
Advertisement
Table of Contents

Related Manuals for Getac ZX70 Series


Summary of Contents for Getac ZX70 Series
- Page 1 ZX70 Series USER MANUAL Rugged Mobile Computing Solution...
- Page 2 They may differ from the actual screens and presentations generated by the actual product. Your device is based on Android™ 9 operating system, with additions by Getac. For the latest version of the manual, please visit the Getac website at www.getac.com.
-
Page 3: Table Of Contents
Table of Contents Chapter 1 Getting Started ..............1 Identifying Hardware Components .......... 1 Front Components ..............1 Back Components ..............3 Top Components..............4 Bottom Components ............. 5 Left-Side Components ............6 Getting Your Device Ready for Use ........... 7 Installing the SIM Card (Select Models Only) ....... - Page 4 Restart or Hard Reboot ............48 Restart .................. 48 Hard Reboot ................. 48 Update Center ................49 Updating the OS ..............49 Updating Getac Apps ............50 Update Center Settings ............51 Update Center Scan ............. 52 Caring for Your Device ............52 Chapter 7 Regulatory Information ..........
- Page 5 European Union CE Marking and Compliance Notices ..57 Safety Precautions ..............59 About Charging ..............59 About the AC Adapter ............59 About the Battery ..............60 Heat Related Concerns ............61 User Notification of Take-back Service ........62 ENERGY STAR ................
-
Page 6: Chapter 1 Getting Started
Chapter 1 Getting Started This chapter introduces you to the external components of your device and guides you through the process of setting up your device for use. Identifying Hardware Components Front Components Component Description Allows you to use the camera function. The front lens Camera lens supports 8 MP with fixed focus. - Page 7 Component Description Indicators Power Lights blue when the device is turned on. Blinks blue when the device is in Suspend mode. Suspend mode is a deep sleep mode that saves more battery power. The device automatically enters Suspend mode after remaining idle in Sleep mode for some time.
-
Page 8: Back Components
Back Components Component Description Flash Provides extra light in certain applications. Camera lens Allows you to use the camera function. The rear lens supports 12 MP with auto focus. Fingerprint Serves as the fingerprint verification, preventing scanner unauthorized access to your device. -
Page 9: Top Components
Depending on your model, the default function is button one of the below. Functions as the trigger button for the Trigger barcode scanner. Shutter Functions as the shutter button for the camera. NOTE: The hardware buttons (except the power button) can be re-defined using Getac Settings. -
Page 10: Bottom Components
Bottom Components Component Description WWAN pass- Connects the external antenna for WWAN (wireless through connector wide area network) connectivity. (optional) GPS pass-through Connects the external antenna for GPS signal connector reception. (optional) Docking Connects to the office or vehicle dock (purchased connector separately). -
Page 11: Left-Side Components
Left-Side Components Component Description Tether holder For holding a tether. There is one holder on the left side and another on the right side. MicroSD card slot Accepts a microSD card for removable storage. (inside the cover) SIM card slot Accepts a SIM card for the WWAN function. -
Page 12: Getting Your Device Ready For Use
Getting Your Device Ready for Use Installing the SIM Card (Select Models Only) 1. Loosen the screw and flip open the cover. 2. With the SIM card’s chip side facing back and the beveled corner pointing to the slot, insert the card all the way into the slot. NOTE: To remove the SIM card, slightly push in the card to release it and then pull the card out of the slot. -
Page 13: Connecting To Ac Power And Charging The Battery
CAUTION: When closing the cover, you must firmly press all over the cover to ensure its sealing capability. And keep the screw tightened to protect against external impacts. To ensure IP67 protection performance, always have the cover closed with the screw tightened unless you need to open it for inserting or removing a card. -
Page 14: Performing The Initial Startup
2. The charge indicator glows in amber when charging is in progress. Do not disconnect your device from AC power until the battery is fully charged, as indicated by the amber indicator turning into green. This will take a couple of hours. Performing the Initial Startup NOTE: You must use AC power when starting up the device for the very first time. -
Page 15: Chapter 2 Operating Basics
Chapter 2 Operating Basics This chapter familiarizes you with the basic operations of your device. CAUTION: Do not expose your skin to the device when operating it in a very hot or cold environment. The device can get uncomfortably warm when you use it in high temperatures. ... -
Page 16: Navigating On The Screen
Navigating on the Screen Use your finger to navigate and select objects on the screen. Here are some common terms that you should know when using the touchscreen: Touch the screen once with your finger to open an item or select an object. -
Page 17: Touch Mode
Touch Mode You can change the touch mode to suit your scenario. To quickly switch the mode, touch one of the widgets on the Home screen. Select this if you are using the Select this when liquids (such as stylus. This mode responds to raindrops) are falling on the finger touches as well. -
Page 18: Using Applications
To return to the Home screen at any time, tap the Home icon at the right side or bottom side of the screen. You can add app icons, shortcuts, widgets, and other items to any part of the Home screen where there’s free space. Using Applications Swipe up from the bottom of the Home screen to open the All Apps screen. -
Page 19: Status Bar
Status Bar The Status Bar appears at the top of almost every screen. It displays icons indicating the current status (on the right) and icons indicating that you’ve received notifications (on the left), along with the current time. Quick Settings and Notifications Panel You can open Quick Settings and Notifications Panel by swiping down from the top of the screen. -
Page 20: Entering Information
Your device has two virtual keyboards (Gboard and GetacIME). Gboard: This is the default Google™ keyboard. GetacIME: This is a virtual keyboard developed by Getac. It incorporates a text scanner and barcode scanner into the English keyboard. (See “GetacIME”... -
Page 21: Quick Qr Code Scanning (Select Models Only)
Quick QR Code Scanning (Select Models Only) If your model has the barcode scanner lens, you can quickly scan an QR code to access a website. (For other information on the barcode scanner, see “Using the Barcode Scanner” in Chapter 4.) 1. -
Page 22: Chapter 3 Getting Connected
To check or modify settings, go to Settings Network & internet Mobile network. To check the specific WWAN module information, go to Getac Settings and check the items under LTE. Using Wi-Fi Networks Turning On/Off the Wi-Fi Radio Open Quick Settings and tap the Wi-Fi icon. -
Page 23: Using The Bluetooth Function
If the network is open, you are prompted to confirm that you want to connect to that network by tapping Connect. Using the Bluetooth Function NOTE: Getac does not guarantee the product’s compatibilities with the Bluetooth headsets/devices from all manufacturers. Turning On/Off the Bluetooth Radio Open Quick Settings and tap the Bluetooth icon. -
Page 24: External Connections
4. The devices pair with each other. If you’re prompted to enter a passcode, try entering 0000 or 1234 (the most common passcodes), or consult the documentation that came with the device to learn its passcode. If the pairing is successful, your device connects to the device. The icon appears in the status bar. -
Page 25: Using A Microsd Card
Using a MicroSD Card Inserting a MicroSD Card 1. Loosen the screw and flip open the cover. 2. Insert the card into the slot, with the golden contacts pointing to the slot and facing rear. 3. Close the cover and tighten the screw. CAUTION: When closing the cover, you must firmly press all ... - Page 26 Removing MicroSD card You can safely remove the microSD card from your device any time the device is shut down. If you need to remove the card while the device is on, unmount the card first to prevent corrupting or damaging the card. To unmount: 1.
-
Page 27: Chapter 4 Getac Applications
For instructions on using the preinstalled apps from Google, check Google official website for online help. You can use Update Center to update Getac apps to the latest version. (See “Updating Getac Apps” in Chapter 6 for information.) Getac Camera Use the Getac Camera app to take photos and record videos. -
Page 28: Taking Photos
Taking Photos 1. Open the Getac Camera app. If you are in Video mode, tap to switch to Camera mode. Settings Photo view Video mode Shutter Control buttons Zoom control A white circle will appear briefly in the center, indicating the focus area. -
Page 29: Recording Videos
Recording Videos 1. Open the Getac Camera app. If you are in Camera mode, tap to switch to Video mode. Settings Video playback Camera mode Record Control buttons Zoom control A white circle will appear briefly in the center, indicating the focus area. -
Page 30: Control Buttons
If you want to capture a still image while recording, tap 5. To stop recording, tap 6. An image from your most recent video is displayed as a thumbnail at the corner. You can tap the thumbnail to view the video. The video will be saved as a MP4 file in the predefined folder. - Page 31 Button Description To select a flash mode for photo taking. Tap to cycle through the choices. The icon indicates the current status. Flash - Automatic (default) (for Camera mode) - On - Off To turn on or off the flashlight for video recording. The icon indicates the current status.
-
Page 32: Camera Settings
Camera Settings While in Getac Camera, tap at the top left corner to open the settings menu. Item Description Camera Double tap to To set if you can take the photo by double tapping capture where you want to focus in the preview window. - Page 33 To specify the location for storing the photos/videos. File path Options are: • Internal Storage • SD card Reset Settings Reset settings To reset all Getac Camera settings to the default values. to default...
-
Page 34: File Browser
This is convenient when you want to copy the settings from another device. Export The QR code in this screen contains the current Getac settings Camera settings. When Getac Camera on another device scans the QR code, the settings will be copied to that device. -
Page 35: Viewing Files/Folders
Viewing Files/Folders 1. At the left side of the File Browser screen is the menu, where several directory categories are listed. NOTE: If you are in the portrait view, you have to tap the Menu button at the top left corner of the screen to open the menu. Directory categories The directory categories are:... -
Page 36: Managing Files/Folders
Sort type Sort order 3. To open a folder, tap the folder name. To go back to a higher folder level, tap the folder name at the top left corner where the current path is indicated. Current path 4. To view the properties of a file/folder, tap at the end of the item. - Page 37 3. When item(s) are selected, the action bar appears at the top of the item list. Action bar A check in the checkbox means it is selected. To abandon the selection and close the action bar, tap Cancel. To act on the selected item(s), see the relevant section below. Deleting Files/Folders 1.
- Page 38 3. Browse to the destination folder and tap in the action bar. Renaming a File/Folder 1. Browse to the desired file/folder. 2. There is no need to select the item you want to rename. Simply tap to the right of the item name. If you have already selected the item, tap in the action bar.
-
Page 39: Opening A File
Setting Bookmark(s) To bookmark item(s): 1. Browse to the desired folder. 2. Single selection: Tap the star to the left of the item name. Multiple selection: Tap each star to the left of the item name. Select all: Tap the star at the top of the item list. A white star indicates that the item is bookmarked. -
Page 40: File Browser Settings
File Browser Settings Tap Settings in File Browser to configure the app. Item Description Display To enable or disable the display of the following data: • Hidden files • File date • File size Directory To specify the home directory. Tap Home directory and select the folder. -
Page 41: Getacime
GetacIME GetacIME (Input Method Editor) is a virtual keyboard that features: QWERTY keyboard Text scanner Barcode scanner To switch to the GetacIME keyboard, tap and hold the space bar of the default Google keyboard and select GetacIME. NOTE: When you use Text Scanner or Barcode Scanner for the very first time, you ... -
Page 42: Using The Text Scanner
Using the Text Scanner NOTE: The Text Scanner supports Roman alphabet including letters, numerals, punctuation marks, and symbols. Most common 1D and 2D symbologies are supported. Text Scanner is a text and barcode recognition tool. It can detect text and barcodes from images captured by the rear camera. -
Page 43: Using The Barcode Scanner
Capture 7. Detected text will be highlighted in red and barcode(s) in green. When there are multiple groups of data, they will be identified as individual text strings and be highlighted separately. 8. The result is displayed at the top of the keyboard, divided into cells if there are multiple groups of data. - Page 44 4. If your model comes with the barcode scanner, you can choose between Device Scanner and Camera Scanner. • Using Device Scanner: Tap the Capture button on the screen or press the Fn button on your device. Aim the scan beam at the barcode. Upon a successful scan, the scan beam turns off.
-
Page 45: Getacime Settings
GetacIME Settings To open GetacIME Settings, use one of the below methods: When GetacIME is open, tap to access its settings menu. Go to Settings System Languages & input Virtual keyboard GetacIME. Item Description Sound Keypress sound To enable or disable the typing sound whenever a... - Page 46 Item Description Barcode Barcode To add character(s) before/after each decoded data prefix/suffix string. Besides alphanumeric characters, you can enter character code(s) such as \n, \t, \b, and \r. Tap Custom Text, enter the character(s) in the input field, and tap OK. Encoding type To specify the codepage for mapping the character codes to characters.
-
Page 47: Nfc Reader (Select Models Only)
To read information from NFC tags: 1. Tap the Getac Settings app icon , which can be found in the default Home screen, the Getac folder, and the All Apps screen. 2. Tap NFC reader. 3. Bring the tag near the RFID antenna. -
Page 48: Managing Your Device
Chapter 5 Managing Your Device This chapter tells you how to manage power and customize your device. Managing Power The operating time of a fully charged battery depends on how you are using the device. Some functions, such as using multimedia or operating a microSD card, may consume the battery power considerably. -
Page 49: Power-Saving Tips
You need to connect the device to external AC power for charging before you can use it again. Power-Saving Tips You can extend your battery’s life between charges by turning off features that you don’t need. You can also monitor how apps and system resources consume battery power. -
Page 50: Customizing Your Device
For information on standard Android settings, check Google official website for online help. Getac Settings Use Getac Settings to configure functions specific to your device. Tap the Getac Settings app icon , which can be found in the default Home... - Page 51 The following table describes the configurable items. Item Description Physical buttons (+) Plus Button To assign a function or app to a hardware button on your device. Tap a button name and select from the (-) Minus Button available options in the popup menu. Fn Button All support To select the LTE module firmware that matches your...
- Page 52 Besides configuring settings for specific components, you can also view device information in Getac Settings, such as sensor status, certain hardware and firmware information, etc.
-
Page 53: Care And Maintenance
Chapter 6 Care and Maintenance This chapter provides various care and maintenance information. Restart or Hard Reboot Restart To restart the device, press and hold the power button until a menu pops up. Then tap Restart. If the device somehow cannot display the power off menu, you can force the device to power off by pressing and holding the power button for more than 8 seconds. -
Page 54: Update Center
To open the app, tap the Update Center app icon , which can be found in the Getac folder and the All Apps screen. When opening the app for the very first time, you will be asked to allow the installation. Tap the on/off switch to turn it on and then tap ... -
Page 55: Updating Getac Apps
UPDATE FROM FILE and select the location where the file is stored. When the update is completed, you will be prompted to restart the device. Updating Getac Apps After opening Update Center, tap Application. The information you see depends on the current status of your device. -
Page 56: Update Center Settings
Receive To determine if you will receive the notification of an OS or notification Getac app update. • Never: You will not be notified. • Major updates only: You will be notified only if the update is a major one. -
Page 57: Update Center Scan
Update Center Scan The “Scan” feature is available for specific customers only. With a QR code provided by Getac, updates can be performed by scanning the QR code. Caring for Your Device Taking good care of your device will ensure trouble-free operation and reduce the risk of damage to your device. - Page 58 damage to your device and even bodily injury or property damage and will void the warranty. Do not store or carry flammable liquids, gases or explosive materials in the same compartment as your device, its parts or accessories.
-
Page 59: Chapter 7 Regulatory Information
Chapter 7 Regulatory Information This chapter provides regulatory statements and safety notices on your device. NOTE: Marking labels located on the exterior of your device indicate the regulations that your model complies with. Please check the marking labels on your device and refer to the corresponding statements in this chapter. Some notices apply to specific models only. -
Page 60: Industry Canada Statement
(1) This device may not cause harmful interference, and (2) this device must accept any interference received, including interference that may cause undesired operation. Company name: Getac USA Address: 15495 Sand Canyon Rd., Suite 350 Irvine, CA 92618 USA Phone: 949-681-2900 Industry Canada Statement This device complies with Industry Canada license-exempt RSS standard(s). - Page 61 This device and its antenna(s) must not be co-located or operating in conjunction with any other antenna or transmitter, except tested built-in radios. Cet appareil et son antenne ne doivent pas être situés ou fonctionner en conjonction avec une autre antenne ou un autre émetteur, exception faites des radios intégrées qui ont été...
-
Page 62: European Union Ce Marking And Compliance Notices
European Union CE Marking and Compliance Notices Statements of Compliance English This product follows the provisions of the European Directive 2014/53/EU. Danish Dette produkt er i overensstemmelse med det europæiske direktiv 2014/53/EU. Dutch Dit product is in navolging van de bepalingen van Europees Directief 2014/53/EU. - Page 63 Notices CE Max power: WLAN 2.4G: 18 dBm WLAN 5G: 18 dBm BT: 6 dBm NFC: -14.2 dBuA/m@10m WWAN: 24 dBm The device is restricted to indoor use only when operating in the 5150 to 5350 MHz frequency range. Waste Electrical and Electronic Equipment (WEEE) This symbol means that according to local laws and regulations your product and/or its battery shall be disposed of separately from household waste.
-
Page 64: Safety Precautions
Replace the unit if it is damaged or exposed to excess moisture. Specific models do not have the AC adapter and power cord as standard items. To purchase the AC adapter kit for your model, contact a Getac authorized distributor. (Check https://www.getac.com/en/contact/... -
Page 65: About The Battery
About the Battery Caution for service personnel: Risk of explosion if battery is replaced by an incorrect type. Dispose of used batteries according to the instructions. If the battery is mishandled, it may cause fire, smoke or an explosion and the battery’s functionality will be seriously damaged. -
Page 66: Heat Related Concerns
Heat Related Concerns Your device may become very warm during normal use. It complies with the user-accessible surface temperature limits defined by the International Standards for Safety. Still, sustained contact with warm surfaces for long periods of time may cause discomfort or injury. To reduce potential heat- related concerns, follow these guidelines: Keep your device and its AC adapter in a well-ventilated area when in ... -
Page 67: User Notification Of Take-Back Service
Getac-brand products for free. Getac understands the institutional customers will likely be recycling multiple items at once and as such. Getac wants to make the recycling process for these larger shipments as streamlined as possible. Getac works with recycling vendors with the highest standards for protecting our environment, ensuring worker safety, and complying with global environmental laws. -
Page 68: Energy Star
Please reference ENERGY STAR ® related information from http://www.energystar.gov. ® As an ENERGY STAR Partner, Getac Technology Corporation has determined ® that this product meets the ENERGY STAR guidelines for energy efficiency. ® An ENERGY STAR qualified computer uses 70 % less electricity than computers without enabled power management features. - Page 69 Getac Product Compliance All Getac products with ENERGY STAR® logo comply with the ENERGY STAR® standard. By default, the device will sleep after 1 minute of inactivity and, if remaining idle for some time, will enter a deep sleep mode that saves more battery power.
-
Page 70: California Proposition 65
California Proposition 65 For California USA: Proposition 65, a California law, requires warnings to be provided to California consumers when they might be exposed to chemical(s) identified by Proposition 65 as causing cancer and birth defects or other reproductive harm. Almost all electronic products contain 1 or more of the chemicals listed under Proposition 65.
Need help?
Do you have a question about the ZX70 Series and is the answer not in the manual?
Questions and answers
Hello, getac zx70 g2 is installed on Windows or ubunto, thank you very much, I wish you good work
The Getac ZX70 is based on Google's Android 7.1 operating system, not Windows or Ubuntu.
This answer is automatically generated