Table of Contents
Advertisement
Quick Links
Keithley Instruments, Inc.
28775 Aurora Road
Cleveland, Ohio 44139
(440) 248-0400
www.keithley.com
Introduction
This guide contains information on S46T relay installation and system configuration that is necessary after
installing new relays. To install a relay, refer to
follow the applicable installation instructions.
WARNING: The information in this section is only intended for qualified service
personnel. Do not attempt to replace parts or otherwise service the
equipment unless you are qualified to do so.
Relay kits
Table 1
summarizes available relay kits and part numbers.
WARNING: Use only the parts specified in
equipment. Use of improper parts may expose the operator to
hazardous voltages that could result in personal injury or death.
Table 1
S46T relay kits
Relay kit
Description
model number
S46T-SPDT-KIT
18GHz SPDT
S46T-SP4T-KIT
18GHz SP4T
S46T-SP6T-KIT
18GHz SP6T
S46T-SPDT-KIT-26
S46T-SP4T-KIT-26
1
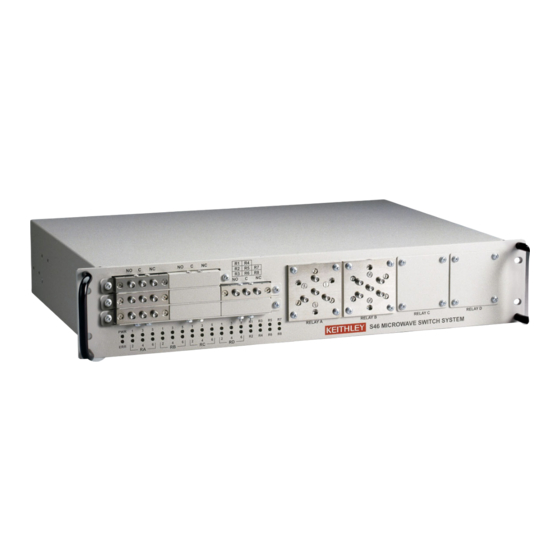
S46T Microwave Switch System
"Relay kits" on page 1
Relay
location
1 to 8
SPDT un-terminated relay (1)
SPDT spacer (1)
Connecting cable (1)
A to D 4-40 ×1/4 PPHSEM screws (2)
4-40 ×3/8 PFH screws (4)
SP4T relay (1)
Ribbon cable (1)
Mounting plate (1)
A to D 4-40 ×1/4 PPHSEM screws (2)
4-40 ×3/8 PFH screws (4)
SP6T un-terminated relay (1)
Ribbon cable (1)
Mounting plate (1)
26.5GHz
1 to 8
SPDT un-terminated relay (1)
SPDT
SPDT spacer (1)
Connecting cable (1)
26.5GHz
A to D 4-40 ×3/8 PFH screws (4)
SP4T
SP4T un-terminated relay (1)
Mounting plate (1)
Ribbon cable (1)
Relay Installation Guide
for a description of the kits and then
Table 1
of this guide when servicing the
Kit parts summary
(Quantity)
Keithley
part number
S40-0154
"SPDT relay 1–
S40-SE05-307
SYS46-311C
4-40X1/4PPHSEM
4-40x3/8PFH
Installation" on
RL-282-2
CA-286-1
S40-N410-312
4-40X1/4PPHSEM
installation" on
4-40x3/8PFH
RL-282-1
CA-286-1
S40-N410-312
RL-308
"SPDT relay 1–
S40-SE05-307
SYS46-311C
4-40x3/8PFH
installation" on
RL-312
S40-N410-312
S46-U100-350A
PA-913 Rev. A / 12-05
Installation
reference
8 installation"
on page 3
"Relay A–D
page 5
"Relay A–D
page 5
8 installation"
on page 3
"Relay A–D
page 5
Advertisement
Table of Contents

Subscribe to Our Youtube Channel
Related Manuals for Keithley S46T-SPDT-KIT


Summary of Contents for Keithley S46T-SPDT-KIT
- Page 1 S46T Microwave Switch System Keithley Instruments, Inc. Relay Installation Guide 28775 Aurora Road Cleveland, Ohio 44139 (440) 248-0400 www.keithley.com Introduction This guide contains information on S46T relay installation and system configuration that is necessary after installing new relays. To install a relay, refer to “Relay kits”...
- Page 2 SP6T installation” on SP6T un-terminated relay (1) RL-309 page 5 Mounting plate (1) S40-N410-312 Ribbon cable (1) S46-U100-350A S46T-SPDT-KIT-T 18GHz SPDT 1 to 8 SPDT terminated relay (1) S40-0172 “SPDT relay 1– 8 installation” on page 3 Connecting cable (1)
- Page 3 To find the applicable installation procedure for your specific kit, refer to the Installation reference column contained in Table 1, and then perform the referenced installation. SPDT relay 1–8 installation 1. Remove the 6 screws that secure the SPDT relay mounting brackets to the S46T chassis (see Figure 1) and remove the SPDT assembly from front panel.
- Page 4 Figure 3 SPDT 1–8 relay installation NOTE Use the shorter relay spacer screws when Terminated installing the right-most relay column. SPDT relay installation Either relay type (Terminated or Un-Terminated) may be installed in any Relay spacer screws of the 8 locations. (2 per relay column) Terminated SPDT relay...
- Page 5 Relay A–D installation 1. Remove the four screws securing the cover plate over the mounting hole where the new relay is to be installed (see Cover plate inset in Figure 2. Connect the supplied ribbon cable to the relay: XFER relays (transfer relays), 26.5GHz un-terminated relays, and MSPDT relays—solder the ribbon cable to the relay use Figure 5 as a guide.
- Page 6 Figure 6 A-D relay installation Cover plate System configuration After installing the new relays, you must program the S46T for the new relay configuration with the following command: :ROUT:CONF:CPOL <clist> <clist> is defined as follows: clist = (@0 | 3-6, 0 | 3-6, 0 | 3-6, 0 | 3-6, 0 | 1, ... 0 | 1) Relay: 1 ...
Need help?
Do you have a question about the S46T-SPDT-KIT and is the answer not in the manual?
Questions and answers