Table of Contents
Advertisement
Quick Links
Advertisement
Table of Contents

Related Manuals for Botex DC-192


Summary of Contents for Botex DC-192
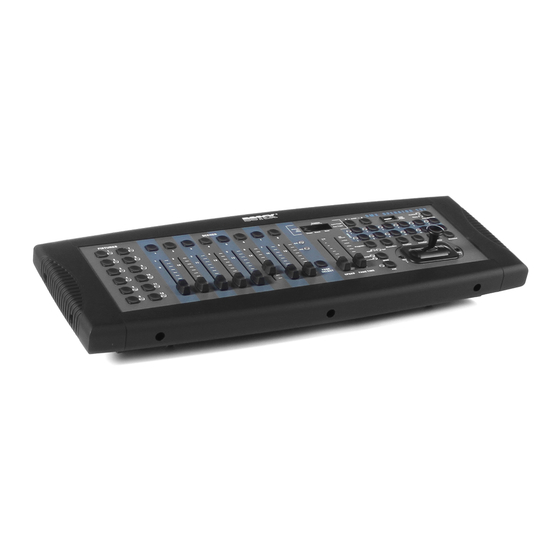
- Page 1 Manual Controller DMX DC-192...
-
Page 2: Table Of Contents
10.2. Data Transfer to DMX Operator DC-192 from Computer (ULink) ......... 18 10.3. Data transfer to memory stick from DMX operator DC-192 (USB MEM Stick) ..... 19 10.4. Store memory file to computer from USB MEM Stick ............20 10.5. -
Page 3: Safety Instructions
1. Safety instructions Read the safety instructions and also this manual carefully. Keep the manual. Observe all red flags. Observe the manual. To prevent fire or electric shocks, protect the device against rain and humidity ... - Page 4 Safety Do not remove the grounding. It is for your safety. If you remove the grounding it can cause electric shocks. Accessory Please use only the accessory which is set by the manufacturer. Important Damages caused by the disregard of this user manual are not subject to warranty. The dealer will not accept liability for any resulting defects or problems.
-
Page 5: Overview
2. Overview 2.1. Front view 1. Fixture buttons(1 - 12) These buttons are used to select the relevant fixtures for control. 2. Channel Fader (1 - 8) These faders are used to control the output of each corresponding fixture channel. 3. -
Page 6: Rear View
12. USB Input This input is used for data backup to USB MEM Stick or ULink cable. You can also use it for USB work light. 13. Fog machine button This button is used to trigger fog machine which should be connected to rear of console. 14. -
Page 7: Joystick Setup
7. 3-Pin (female) XLR Connect it to the first device in the DMX line. 8. DC INPUT: Here you can connect the included power supply (DC9V~15V, 500mA Min.) 9. Power switch Turn on / off the device 3. Joystick setup 3.1. -
Page 8: Assign Joystick Reverse (Pan / Tilt Invert)
6.) Press and hold down the PROGRAM button for approximately 2 seconds or until the PROG indicator in the display stops flashing. A flashing BLACKOUT indicator in the display confirms that the controller is out of program mode. 3.2. Assign Joystick Reverse (PAN / TILT invert) 1.) Press and hold down the PROGRAM button for approximately 2 seconds or until the PROG indicator in the display flashes. -
Page 9: Delete Joystick Pan / Tilt Assignment
7.) Press and hold down the PROGRAM button for approximately 2 seconds or until the PROG indicator in the display stops flashing. A flashing BLACKOUT indicator in the display confirms that the controller is out of program mode. 3.3. Delete Joystick PAN / TILT Assignment 3.3.1. -
Page 10: Scenes
5. Scenes 5.1. Recording scenes 1.) Press and hold down the Program button for approximately 2 seconds or until the PROG indicator in the display flashes. Once the indicator is flashing, record mode is engaged and you may release the Program button. 2.) Select the fixtures that you wish to include into your scene by pressing the FIXTURES buttons 1-12. -
Page 11: Copy A Scene
5.3. Copy a scene 1.) Press and hold down the PROGRAM button for approximately 2 seconds or until the PROG indicator in the display flashes. Once the indicator is flashing, record mode is engaged and you may release the PROGRAM button. 2.) Select with BANK UP / DOWN buttons the bank that contains the scene you want to copy. -
Page 12: Scene Playback
5.6. Scene Playback 5.6.1. Manual trigger 1.) When powered ON, this console defaults to Manual / Blackout mode. All output will be in blackout state until the BLACKOUT button is deselected. To determine blackout status, there is an indicator light in the display that flashes when engaged and OFF when disengaged. Press the BLACKOUT button so the indicator stops flashing. -
Page 13: Chases
6. Chases 6.1. Recording chases This product has 12 programmable chases. Each of this can store up to 240 scenes 7 steps. Please see the below constructions for chase setting. 1.) Press and hold down the PROGRAM button for approximately 2 seconds or until the PROG indicator in the display flashes. -
Page 14: Editing Chases
6.3. Editing chases 6.3.1. Add a chase step 1.) Press and hold down the PROGRAM button for approximately 2 seconds or until the PROG indicator in the display flashes. Once the indicator is flashing, record mode is engaged and you may release the PROGRAM button. 2.) Select the CHASE button 1-12, that you wish to add a step to. -
Page 15: Delete A Chase
6.3.3. Delete a chase 1. Press and hold down the PROGRAM button for approximately 2 seconds or until the PROG indicator in the display flashes. Once the indicator is flashing, record mode is engaged and you may release the PROGRAM button. 2. -
Page 16: Audio Trigger
3.) At any time, you can adjust SPEED and FADE fader to set your chase playback state. You can also press the TAP / DISP button twice to establish a chase rate. The rate will be determined by the tempo at which you press the TAP / DISP button. 6.4.3. -
Page 17: Midi
9. MIDI 9.1. Set MIDI channel 1.) Press and hold down the MIDI button for 2 seconds or until the display shows In:XX. XX represents the current set midi channel. 2.) Use BANK UP / DOWN buttons to set your desired midi channel from 1-16. 3.) Press and hold down the MIDI button for 2 seconds or until all LEDs flash three times to save your settings. -
Page 18: Data Transfer
WAITING RECEIVE DATA) 7.) On the DMX operator DC-192, simultaneously press the SCENE 7 and SCENE 8 buttons. The transfer will begin immediately. The controllers display should flash OUT during the transfer. -
Page 19: Data Transfer To Memory Stick From Dmx Operator Dc-192 (Usb Mem Stick)
USB Memory stick. If you have not done so please do so now then proceed to step 1 below. 1.) Install the USB MEM Stick into the USB port on your DMX operator DC-192. 2.) Flip the DMC operator power switch OFF which is located on the rear of the DMX operator DC-192. -
Page 20: Store Memory File To Computer From Usb Mem Stick
10.4. Store memory file to computer from USB MEM Stick This operation will allow you to store your memory files from your USB memory stick to your computer. You must first install the Usave application software and USB driver that was supplied with your USB MEM stick. -
Page 21: Delete And Format Files In Memory Stick
USB MEM stick. If you have not done so do so now, after this proceed to step 1 below. 1.) Plug in the USB MEM stick into the USB port on your DMX operator DC-192. 2.) Flip the DMX operator power switch OFF which is located on the rear of the DMX operator DC-192. -
Page 22: Technical Data
1-8 correspond with memory stick folders 1-8.) The controllers display will flash dAtA during the transfer. When the transfer is complete, the display should read 101 and you file will have been successfully stored to the computer. Technical data Power supply Voltage 9-15 V DC, 500 mA min. - Page 23 Importer: B & K Braun GmbH Industriestraße 1 D-76307 Karlsbad www.bkbraun.com info@bkbraun.com 23 / 23...
Need help?
Do you have a question about the DC-192 and is the answer not in the manual?
Questions and answers