Table of Contents
Advertisement
Quick Links
Advertisement
Table of Contents

Related Manuals for Botex DMX DC-136


Summary of Contents for Botex DMX DC-136
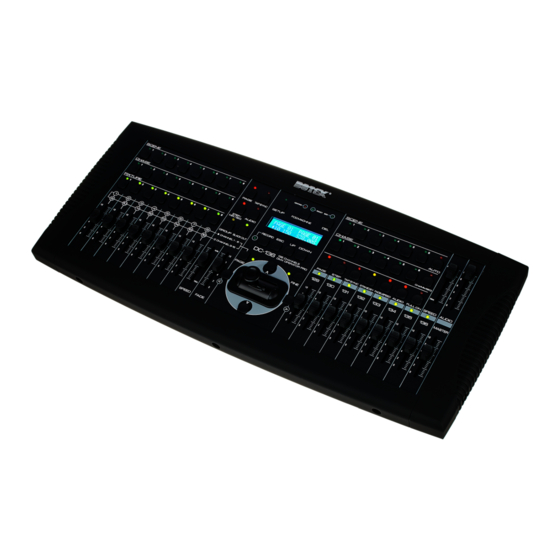
- Page 1 DMX DC-136 DMX controller...
- Page 2 Musikhaus Thomann Thomann GmbH Hans-Thomann-Straße 1 96138 Burgebrach Germany Telephone: +49 (0) 9546 9223-0 E-mail: info@thomann.de Internet: www.thomann.de 20.04.2018, ID: 346646...
-
Page 3: Table Of Contents
8.3 Assigning patch channel.................... 24 8.4 PAN / TILT FADE ONLY....................25 8.5 Display mode (100/255)..................... 25 8.6 MIDI channel........................26 MIDI implementation......................27 Formatting memory......................28 Technical specifications....................29 Plug and connection assignments................30 Protecting the environment................... 31 DMX DC-136 DMX controller... - Page 4 DMX DC-136 DMX controller...
-
Page 5: General Notes
The letterings for connectors and controls are marked by square brackets and italics. Examples: [VOLUME] control, [Mono] button. Displays Texts and values displayed on the device are marked by quotation marks and italics. Examples: ‘24ch’ , ‘OFF’ . DMX DC-136 DMX controller... -
Page 6: Symbols And Signal Words
NOTICE! This combination of symbol and signal word indicates a possible dangerous situation that can result in mate- rial and environmental damage if it is not avoided. Warning signs Type of danger Warning – danger zone. DMX DC-136 DMX controller... -
Page 7: Safety Instructions
Keep the device away from naked flames. NOTICE! Operating conditions This device has been designed for indoor use only. To prevent damage, never expose the device to any liquid or moisture. Avoid direct sunlight, heavy dirt, and strong vibrations. DMX DC-136 DMX controller... - Page 8 PVC floor and after some time cause permanent dark stains. In case of doubt, do not put the rubber feet directly on the floor, but use felt-pad floor protectors or a carpet. DMX DC-136 DMX controller...
-
Page 9: Features
16 faders for manual control Assigned or reversed DMX channel preview Sound-to-Light 3 function layers Blind home function Speed fade control Blackout master Stand-alone mode Manual overriding of scenes in chases MIDI control for banks, chases and blackout DMX DC-136 DMX controller... -
Page 10: Installation
Installation Installation Wiring diagram for fog machines DMX DC-136 DMX controller... -
Page 11: Starting Up
Turning the unit on When all cable connections are made, turn on the device with the main switch on the rear panel. The device is immediately operational. DMX DC-136 DMX controller... -
Page 12: Connections And Controls
When this button is pressed, the memory page can be selected with [UP] or [DOWN] 8 [BLACK OUT] Sets all DMX values of devices 1 – 8 to zero 9 [AUDIO] Activates the microphone for sound control 10 [TAP SYNC] Button for manual synchronization of the programme speed DMX DC-136 DMX controller... - Page 13 Button for manual synchronization of the programme speed 26 [STAND BY] Sets all DMX values of channels 129 – 136 to zero 27 [FADE + SPEED] Activates the parallel control of the fade time with the [SPEED] control DMX DC-136 DMX controller...
- Page 14 36 JOYSTICK Controls its assigned Pan and Tilt channels 37 [FADE] Sets the Fade speed 38 [SPEED] Sets the programme speed of the activated chases in a range between 0.05 s and 10 min per step DMX DC-136 DMX controller...
- Page 15 At this input, an audio signal with a level of 100 mV to 1 V can be connected. 44 [EXT STEP CONTROL] Connection for receiving STEP signals. 45 [POWER] Turns the device on and off. 46 [DC INPUT] Power supply port. DMX DC-136 DMX controller...
-
Page 16: Operating
The display shows: Press [PAGE] (on the left side) so that the corresponding LED is lit. Use [UP] and [DOWN] to select the corresponding ‘PAGE’ to save the scene to. A total of twelve pages are available. DMX DC-136 DMX controller... - Page 17 To delete a scene in recording mode: Press the button of a recorded scene. ð The associated LED flashes quickly. To delete the scene, press [DEL]. ð All LEDs light up simultaneously. To leave this mode, press [ESC]. DMX DC-136 DMX controller...
-
Page 18: Selecting Or Deselecting A Scene Or Chase
7.3.1 Selecting or deselecting a scene Press [PAGE]. ð The corresponding LED lights. Use [UP] and [DOWN] to select a page. ð ‘PAGE: XX’ is displayed in the left area of the display. The LEDs of the programmed scenes light up. DMX DC-136 DMX controller... - Page 19 All scenes are disabled when a chase is running. STEP function If you press [STEP], the chase progresses step-by-step while the program is running. Set the [SPEED] control to ‘10m’ , to advance an activated chase. DMX DC-136 DMX controller...
-
Page 20: Deleting A Chase
ð The LED flashes quickly. The display shows: ‘TL XX’ means TOTAL. Keep the respective Chase button pressed while briefly pressing [DEL]. ð The chase will be deleted within seconds. All LEDs flash. To leave this mode, press [ESC]. DMX DC-136 DMX controller... -
Page 21: Selecting Or Deselecting A Par Scene Or Par Chase
ð The device is in audio mode. The Audio LED lights. [FADE TIME] is ineffective. The [TAP SYNC] LED flashes at the rhythm of the audio signal. STEP function If you press [STEP], the chase progresses step-by-step while the program is running. DMX DC-136 DMX controller... - Page 22 Operating FADE + SPEED Press this button to adjust the cross-fade time in parallel to Speed with the [SPEED] control. STAND BY Pressing this button sets the DMX values of channels 129 – 136 to zero. DMX DC-136 DMX controller...
-
Page 23: Settings
Turn off the device before inserting or removing the memory card. For DC-136, only a 32 MBmemory card can be used. Otherwise your data could be lost. The DMX output should be stopped while reading or writing on the memory card. DMX DC-136 DMX controller... -
Page 24: Assigning Patch Channel
ð The display shows: Select the spotlight you want to assign. Use [UP] or [DOWN] to select the channel number you want to assign. Press [RECORD] to confirm. To cancel the procedure or exit the menu, press [ESC]. DMX DC-136 DMX controller... -
Page 25: Pan / Tilt Fade Only
Press [RECORD]. ð The display shows: Use [UP] and [DOWN] to select [MODE 100] (percentage indication) or [MODE 255] (indication of DMX value). Press [RECORD] to confirm. To cancel the procedure or exit the menu, press [ESC]. DMX DC-136 DMX controller... -
Page 26: Midi Channel
Use [UP] and [DOWN] to select ‘MIDI CH.’ . Press [RECORD]. ð The display shows: Use [UP] and [DOWN] to select a MIDI channel 1 – 16 . Press [RECORD] to confirm. To cancel the procedure or exit the menu, press [ESC]. DMX DC-136 DMX controller... -
Page 27: Midi Implementation
FIXTURE SCENE 1-8 58-65 FIXTURE CHASE 1-8 66-71 PAR SCENE 1-6 72-77 PAR CHASE 1-6 PAR STANDBY PAR FADE + SPEED FIXTURE BLACKOUT FIXTURE AUDIO PAR AUDIO PAR AUTO PAR STEP FIXTURE MIX/SEQ PAR ONE/MIX/SEQ PAR FULL ON DMX DC-136 DMX controller... -
Page 28: Formatting Memory
Switch off the device. Keep the Chase buttons [3], [6] and the spotlight buttons [ 2], [7] simultane- ously pressed while turning on the device. ð The screen shows: The memory will be formatted within 5 seconds. DMX DC-136 DMX controller... -
Page 29: Technical Specifications
5 mm × 20 mm, 0.5 A, 250 V, fast-acting Dimensions (W × H × D) 482 mm × 80 mm × 178 mm (w/o frame) 530 mm × 94 mm × 240 mm (w/ frame) Weight 4 kg DMX DC-136 DMX controller... -
Page 30: Plug And Connection Assignments
The unit offers a 3-pin XLR socket for DMX output and a 3-pin XLR plug for DMX input. Please refer to the drawing and table below for the pin assignment of a suit- able XLR plug. Configuration Ground, shielding Signal inverted (DMX–, ‘cold signal’) Signal (DMX+, ‘hot signal’) DMX DC-136 DMX controller... -
Page 31: Protecting The Environment
Dispose of this device through an approved waste disposal firm or through your local waste facility. When discarding the device, comply with the rules and regulations that apply in your country. If in doubt, consult your local waste disposal facility. DMX DC-136 DMX controller... - Page 32 Notes DMX DC-136 DMX controller...
- Page 33 Notes DMX DC-136 DMX controller...
- Page 34 Notes DMX DC-136 DMX controller...
- Page 36 Musikhaus Thomann · Hans-Thomann-Straße 1 · 96138 Burgebrach · Germany · www.thomann.de...
Need help?
Do you have a question about the DMX DC-136 and is the answer not in the manual?
Questions and answers