
Related Manuals for Motorola MTP8000Ex Series


Summary of Contents for Motorola MTP8000Ex Series
- Page 1 MOBILE RELEASE 15.0 MTP8550Ex Feature User Guide OCTOBER 2015 *MN002041A01* MN002041A01–AA © 2015 Motorola Solutions, Inc. All rights reserved...
-
Page 3: Table Of Contents
MN002041A01–AA Contents Contents List of Figures......................15 List of Tables......................17 Copyrights......................... 19 Chapter 1: General Information................21 1.1 Safety Information........................21 1.2 Icon Conventions........................21 1.3 Using this Guide........................21 1.4 Feature and Service Availability.................... 22 Chapter 2: Getting Started..................23 2.1 Product Technical Information....................23 2.2 Before Power On........................ - Page 4 MN002041A01–AA Contents 2.16 Broadcast Call........................48 2.17 Private Call.......................... 49 2.17.1 Making Private Calls....................49 2.18 Ambience Listening (AL) Call....................49 2.19 One-Touch Button Feature....................50 2.20 Terminal Temporary Disable/Enable................... 52 2.21 Terminal Permanent Disable....................52 2.22 High/Low Audio Toggle......................52 2.22.1 Using High Audio....................
- Page 5 MN002041A01–AA Contents 3.3.1 Entering Local Site Trunking..................63 3.3.2 Exiting Local Site Trunking..................63 3.4 Direct Mode Operation......................64 3.4.1 Entering DMO Mode....................64 3.4.2 Making Group Calls in DMO..................64 3.4.3 Receiving Group Calls in Idle...................64 3.4.4 Private Call With Presence Check................65 3.4.5 DMO Private Priority Call..................
- Page 6 MN002041A01–AA Contents 4.4 Different Location Displays....................79 4.5 Viewing Your Position......................79 4.6 Changing GNSS Accuracy....................80 4.7 Viewing Testpage........................80 Chapter 5: Main Menu....................81 5.1 Scrolling through the Menu....................81 5.2 Menu Icons..........................81 5.3 Messages..........................82 5.3.1 New Message......................83 5.3.1.1 Sending Messages to Private/Phone............
- Page 7 MN002041A01–AA Contents 5.3.10 Additional Address....................91 5.3.10.1 Enabling/Disabling Additional Address............ 91 5.3.10.2 Selecting Additional Address..............92 5.3.10.3 Viewing Additional Address..............92 5.3.10.4 Entering New Additional Address.............92 5.3.10.5 Editing Additional Address............... 92 5.3.10.6 Deleting Additional Address..............93 5.4 Contacts..........................93 5.4.1 Creating Contacts....................94 5.4.2 Editing Contacts.......................94 5.4.3 Deleting Numbers....................
- Page 8 MN002041A01–AA Contents 5.6.10 Firearms.......................105 5.7 Browser..........................106 5.8 Security..........................106 5.8.1 PIN Protect......................106 5.8.1.1 Protecting the Radio with a PIN Code............106 5.8.1.2 Unblocking Your Radio................106 5.8.1.3 Changing PIN Codes................107 5.8.2 Keypad Lock Feature.....................107 5.8.2.1 Keypad Lock Notification................107 5.8.2.2 Setting Automatic Keylock Delay............. 108 5.8.2.3 Setting Keylock on Startup...............108 5.8.3 Air Encryption......................108 5.8.3.1 Viewing the Air Encryption State..............108...
- Page 9 MN002041A01–AA Contents 5.10.5.1 Audio Profiles..................115 5.10.5.2 Setting Audio Profiles................115 5.10.5.3 Howling Suppression................116 5.10.5.4 Setting Howling Suppression..............116 5.10.5.5 Audio Toggle..................116 5.10.5.6 Setting Audio Toggle................116 5.10.5.7 Volume Adjustment Mode..............116 5.10.5.8 Setting Volume Adjustment Mode............117 5.10.6 Tones........................117 5.10.6.1 Keypad Tone..................117 5.10.6.2 All Tones....................
- Page 10 MN002041A01–AA Contents 5.10.10 Transmission Power Class................124 5.10.10.1 Selecting RF Power................124 5.10.11 Accry (Accessory) Setup..................125 5.10.11.1 Selecting CORE/Other/Secondary Accessories........125 5.10.12 Rotary Knob....................... 125 5.10.12.1 Setting Rotary Knob Mode..............126 5.10.12.2 Setting Rotary Lock................126 5.10.12.3 Setting In Keypad Lock................ 126 5.10.12.4 Setting Rotary Knob Wrap Around............127 5.10.12.5 Setting Rotary Knob Scroll Range............
- Page 11 MN002041A01–AA Contents 5.14.1 Viewing Recent Calls................... 136 5.14.2 Calling from Recent Calls..................136 5.14.3 Storing Recent Calls to Contacts................. 137 5.14.4 Deleting Recent Calls..................137 5.15 Shortcuts..........................137 5.15.1 Creating Menu Shortcuts..................137 5.15.2 Editing Menu Shortcut Lists................. 138 5.16 RUI.............................138 5.16.1 Logging On......................
- Page 12 MN002041A01–AA Contents 6.11.1 Enabling/Disabling SIM Card End-to-End Encryption..........148 6.12 RUA/RUI..........................148 6.13 Book On..........................149 6.13.1 Editing Book On Settings..................149 6.14 WAP...........................149 6.14.1 WAP Browser.......................149 6.14.2 Entering the Browser................... 149 6.14.3 Entering Browser Menu Panes................150 6.14.4 Tips for Browsing....................150 6.14.4.1 Creating Bookmarks through the Navigate Pane........150 6.14.4.2 Creating Bookmarks through the Bookmarks Pane.......
- Page 13 MN002041A01–AA Contents Appendix A: Tones....................163 Appendix B: LED Indications.................165 Appendix C: Troubleshooting................167 Appendix D: Maintenance..................171 D.1 Storage..........................171 D.2 Extending Battery Life......................171 D.3 Battery Charging Temperature....................171 D.4 Battery Charging Rules....................... 172 D.5 Additional Battery Warnings/Cautions.................172 D.6 Looking after Your Radio....................172 D.6.1 Washing the Radio....................
- Page 14 This page intentionally left blank.
-
Page 15: List Of Figures
MN002041A01–AA List of Figures List of Figures Figure 1: ..............................30 Figure 2: ..............................31 Figure 3: Charger Mode Screen......................34 Figure 4: Default Home Screen with Icons..................... 39 Figure 5: Trunked Mode Operation......................59 Figure 6: Direct Mode Operation......................64 Figure 7: Repeater Mode Operation.......................74 Figure 8: Call-Out Message........................159 Send Feedback... - Page 16 This page intentionally left blank.
-
Page 17: List Of Tables
MN002041A01–AA List of Tables List of Tables Table 1: Special Notations........................21 Table 2: Product Technical Information....................23 Table 3: Battery Icons..........................34 Table 4: LED Indicators.......................... 34 Table 5: Controls and Indicators......................36 Table 6: Display............................39 Table 7: Colors of the Soft Key Area...................... 39 Table 8: Status Icons..........................40 Table 9: Talkgroup Icon..........................48 Table 10: One-Touch Button Features .................... - Page 18 This page intentionally left blank.
-
Page 19: Copyrights
Laws in the United States and other countries preserve for Motorola certain exclusive rights for copyrighted computer programs. Accordingly, any copyrighted Motorola computer programs contained in the Motorola products described in this document may not be copied or reproduced in any manner without the express written permission of Motorola. - Page 20 This page intentionally left blank.
-
Page 21: Chapter 1: General Information
MN002041A01–AA General Information Chapter 1 General Information Safety Information RF Energy Exposure and Product Safety Guide For Two-Way Radios IMPORTANT: Before using this product, read the RF Energy Exposure and Safety Guide shipped with your radio. The guide contains recommendations for safe usage, important RF energy awareness and control information as well as regulatory information, to help ensure compliance with applicable standards and regulations. -
Page 22: Feature And Service Availability
MN002041A01–AA Chapter 1: General Information Example Description Entering TMO tone Italic words indicate a name of the tone. Powering Off Bold words indicate the soft menu items, MMI strings, or messages displayed on the radio. Setup → Tones → All Tones Bold words with the arrow between indicate navigation structure in the menu items. -
Page 23: Chapter 2: Getting Started
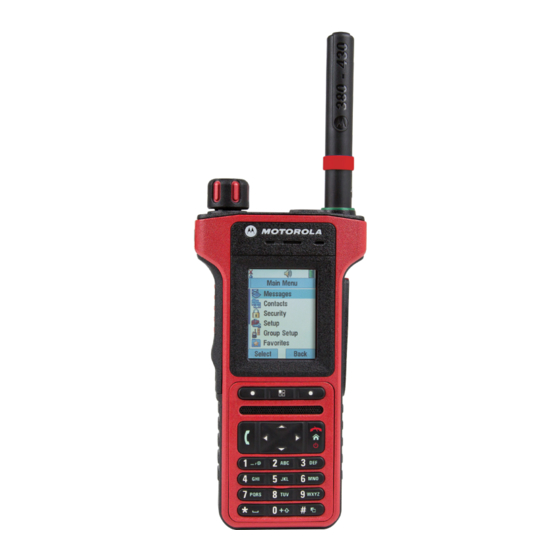
MN002041A01–AA Getting Started Chapter 2 Getting Started This chapter contains basic information on how to use the radio. Product Technical Information Table 2: Product Technical Information Description Value Maximum Voltage 8.0 V Maximum Current 2.5 A Maximum RF Power 1.8 W Maximum Speaker Load 1.3 W at 16 Ω... -
Page 24: Attaching The Antenna
MN002041A01–AA Chapter 2: Getting Started 2.2.1 Attaching the Antenna Procedure: 1 Insert the screw-in base of the antenna into the antenna terminal on the top of the radio. 2 Turn clockwise until snug. NOTICE: Use only the antenna intended for the radio. Use of other antennas can result in significant range loss due to poor RF performance. - Page 25 MN002041A01–AA Chapter 2: Getting Started 4 Slide the SIM card holder toward the dust cover side of the radio (as indicated by the UNLOCK arrow) to unlock it and lift it up. 5 Slide the dummy SIM card in the direction shown in the following figure to remove it from the SIM card holder.
- Page 26 MN002041A01–AA Chapter 2: Getting Started 6 Slide the SIM card into the SIM card door. Pay attention to the correct position of the notched corner. 7 Close the SIM card holder and slide the holder toward the PTT side of the radio (as indicated by the LOCK arrow) to lock it.
- Page 27 MN002041A01–AA Chapter 2: Getting Started 8 Visually inspect the SIM card door O-ring before slotting the SIM card door into the chassis. IMPORTANT: Replace the SIM door if there is any damage/tear/delamination on the O- ring seal. 9 Apply some grease (part number: 1110027B23) on the perimeter of the SIM card door O-ring. 10 Ensure proper positioning of the SIM card door by matching the shape of the SIM card door to the chassis (see the below figure).
-
Page 28: Microsd Card
MN002041A01–AA Chapter 2: Getting Started 11 Apply pressure on the SIM card door and use the Torx driver with T-5IP TORX-PLUS bit to fasten the SIM card door screws to the chassis with torque setting of 1.0±0.1 in-lbs (0.113±0.011 Nm). IMPORTANT: Ensure that the SIM card door is firmly screwed and the grey SIM card door O-ring cannot be seen. -
Page 29: Installing The Microsd Card
MN002041A01–AA Chapter 2: Getting Started NOTICE: The radio only supports the following characters to compose file names: 1 numeric digits 2 English alphabetic characters 3 space 4 non-alphabetic characters: ! # $ % & ' ( ) - @ ^ _ ` { } ~. Before using non-alphabetic characters from point 4, make sure your computer system supports them. -
Page 30: Figure 1
MN002041A01–AA Chapter 2: Getting Started 4 Slide the microSD card holder toward the top of the radio (as indicated by the UNLOCK arrow) to unlock it and lift it up. Figure 1: 5 Carefully insert the microSD card into the microSD card holder ensuring that the gold contact area is facing down. -
Page 31: Figure 2
MN002041A01–AA Chapter 2: Getting Started 6 Close the microSD card holder and slide the holder toward the bottom side of the radio (as indicated by the LOCK arrow) to lock it. Figure 2: Send Feedback... -
Page 32: Installing The Battery
MN002041A01–AA Chapter 2: Getting Started 7 Close the SIM card holder and slide the holder toward the PTT side of the radio (as indicated by the LOCK arrow) to lock it. IMPORTANT: Make sure the SIM card holder is not left empty, the holder must be occupied by either the dummy SIM card or an actual SIM card. -
Page 33: Removing The Battery
Charging a battery attached to a radio can be done with the radio either turned on or off. The battery charges faster when the radio is turned off. IMPORTANT: Use only Motorola approved chargers which provide optimal performance. Using other chargers invalidates the warranty, as well as may fail to fully charge, and reduces the life of the battery. -
Page 34: Charging Indicators
MN002041A01–AA Chapter 2: Getting Started NOTICE: If a multi-unit charger LED indicates an error (blinking red light) when radio is inserted and being charged with the multi-unit charger (MUC), re-insert the radio. If the light is still red after several reconnections to MUC, the battery may be damaged or depleted. -
Page 35: Low Battery Indication
MN002041A01–AA Chapter 2: Getting Started Indication Status Blinking green Battery charged at 90% Solid red Rapid charge Blinking red Faulty or invalid battery Blinking orange Battery is waiting to charge NOTICE: When you charge your radio in a multi-unit charger and the battery is at the 90–100% charge level, the LED indicators on the radio and on the multi-unit charger differ: •... -
Page 36: Controls And Indicators
MN002041A01–AA Chapter 2: Getting Started Controls and Indicators Table 5: Controls and Indicators Annotation Description HOTOSENSOR OTARY Table continued… Send Feedback... - Page 37 MN002041A01–AA Chapter 2: Getting Started Annotation Description • Rotate to set the volume. • Press and rotate to select a different talkgroup. • Press and hold the R to lock/unlock it. Powering the radio off and OTARY on also unlocks a locked R OTARY Programmable S buttons...
-
Page 38: Display
MN002041A01–AA Chapter 2: Getting Started Annotation Description ISPLAY Features a high resolution of 240 x 320 pixels and 262,144 colors. Supports scalable fonts and high color images. ONNECTOR Provides connection for accessories. You can connect the following cables: • Boot Programming/USB Data Cable Ex, PMKN4158_ •... -
Page 39: Configurable Idle Screen
MN002041A01–AA Chapter 2: Getting Started Figure 4: Default Home Screen with Icons 262/5003 Folder 1 Test Group 1 Optns Contcs Table 6: Display Annotation Description Status icon area Text display area key area /Context sensitive icon The color of the S key area changes according to the mode the radio is in. -
Page 40: Status Icons
MN002041A01–AA Chapter 2: Getting Started • Range alias • Talkgroup alias • Home mode display • Time and date • RMS/FMS • ISSI • Audio profile name • Gateway Background Mode (with one of the reasons for entering the mode): Configuration TMO Failure Gateway Detected... - Page 41 MN002041A01–AA Chapter 2: Getting Started Icon Description • Four gray sections: context activated – data idle • One blue (from the left): Packet Data active • Two blue (from the left): Multi Slot Packet Data active Direct Mode Operation Direct Mode Call – Displayed when the radio is receiving a Direct Mode call. The more bars, the stronger the signal.
- Page 42 MN002041A01–AA Chapter 2: Getting Started Icon Description Horn and Lights – Indicates that an external alarm (for example, horn and lights) is activated. GNSS Icon • Solid - the radio has a location fix • Blinking - the radio is acquiring a location fix. This is an optional setting and may not be enabled on your radio.
- Page 43 MN002041A01–AA Chapter 2: Getting Started Icon Description Call-Out Alert Unread – Indicates unread alert in the CO Box. End-to-End Encryption (E2EE) Solid, when the E2EE is enabled • for the selected talkgroup, • for the highlighted private number, • for the manually entered private number, •...
- Page 44 MN002041A01–AA Chapter 2: Getting Started Icon Description Non Secured Call – Air Encryption Unavailable Blinking, indicates that Air Encryption is not available when the radio: • Is in the Local Site Trunking Mode. • Attempts to connect to a gateway. Not Secured Call –...
-
Page 45: Powering On The Radio
MN002041A01–AA Chapter 2: Getting Started Powering On the Radio Procedure: Press and hold O button. Your radio performs a self-check and registration routine. After successful registration, your radio is in service. NOTICE: Your radio powers on without visible and audible notification if Covert Mode is activated. -
Page 46: Holding Your Radio
MN002041A01–AA Chapter 2: Getting Started 2.10 Holding Your Radio The radio has two microphones: a top microphone for simplex dispatcher/private calls and a bottom microphone for duplex telephone-like calls. Also, the radio is equipped with an internal speaker for high audio (located at the middle of the unit) and an internal earpiece for low audio (located at the top of the unit).The audio can be routed either to the speaker or the earpiece using the Audio Toggle menu (M →... -
Page 47: Transmit Inhibit Mode
MN002041A01–AA Chapter 2: Getting Started 2.12 Transmit Inhibit Mode The Transmit Inhibit Mode is a mode in which the radio sends no radio transmissions. It is recommended to activate the mode in RF sensitive areas, for example hospitals, airplanes, where safety can be jeopardized due to transmission radiation. -
Page 48: Talkgroup Icon Selection
MN002041A01–AA Chapter 2: Getting Started • Press R and rotate it until the required talkgroup name is displayed. Press Select to OTARY confirm. NOTICE: If the R mode is set to Scroll, then you do not need to press it to enter OTARY the scrolling mode. -
Page 49: Private Call
MN002041A01–AA Chapter 2: Getting Started 2.17 Private Call The Private Call, also called point-to-point, or individual call, enables calling between two individuals. No other radio can hear the conversation. This call type can be carried out in two ways: • Duplex call (if the system allows), in TMO Mode. -
Page 50: One-Touch Button Feature
MN002041A01–AA Chapter 2: Getting Started 2.19 One-Touch Button Feature The One-Touch Button feature allows for quick activation of functions by pressing and holding keys or buttons assigned to those functions. NOTICE: All the features can be assigned on the option buttons for RSM accessories. Table 10: One-Touch Button Features Feature Description... - Page 51 MN002041A01–AA Chapter 2: Getting Started Feature Description PABX Call Initiates a PABX call to a predefined entry in the contact list. Phone Call Initiates a phone call to a predefined entry in the contact list. Private Call Initiates a private call (simplex or duplex) to a predefined entry in the contact list or to the last group call originator.
-
Page 52: Terminal Temporary Disable/Enable
It is recommended to Permanent Disable your radio only when you do not expect to recover it. If it is recovered then a Permanent Disable radio can be reactivated by returning it to Motorola. 2.22... -
Page 53: Using Low Audio
MN002041A01–AA Chapter 2: Getting Started 2 Speak into the top microphone and listen through the internal speaker. Keep the antenna at least 2,5 centimeters from your head and body. 2.22.2 Using Low Audio When and where to use: Use it when placing and receiving a Phone, PABX, and Duplex Private calls. Procedure: 1 Hold your radio as you would a telephone. -
Page 54: Selecting Text Entry Methods And Languages
MN002041A01–AA Chapter 2: Getting Started NOTICE: In the text entry screen, you can also press # key repeatedly to toggle through the entry modes. 2.24.2 Selecting Text Entry Methods and Languages Prerequisites: Your radio displays the text entry screen. Procedure: 1 Press M →... -
Page 55: Keys Usage
MN002041A01–AA Chapter 2: Getting Started Enter punctuation and symbols. Table 13: Text Entry Screen Icons Icons Description A-Z – all capitals a-z – no capitals Enter numbers and symbols: 0-9 # § ¡ ¿ ^ ~ \ } { ] [ ¤ ¥ $ £ € > < = * × % & + ; _ : / ) ( - ” ’ @ ! ? , . -
Page 56: Writing In Itap Alphanumeric
MN002041A01–AA Chapter 2: Getting Started Alphanumeric Mode (TAP/iTAP) Symbol Mode 8 key T U V 8 € £ $ ¥ ¤ t u v 8 9 key W X Y Z 9 # % * w x y z 9 Table 15: Other Keys Description Any numeric key... -
Page 57: Writing In Tap Alphanumeric
MN002041A01–AA Chapter 2: Getting Started When and where to use: It allows you to write quicker. For example, try to write David 232! Procedure: 1 Press M → Entry Setup → Prim.. 2 Select iTAPEnglish and press Back. 3 Press M →... -
Page 58: Word Locking
MN002041A01–AA Chapter 2: Getting Started 2.24.7 Word Locking Prerequisites: Your radio displays the text entry screen. When and where to use: To add the words that are not in the dictionary. Procedure: 1 Press M → Entry Setup. 2 Select iTAPEnglish. 3 Try to enter the word. -
Page 59: Chapter 3: Modes
MN002041A01–AA Modes Chapter 3 Modes This chapter contains information on available modes that the radio can operate in. Using Networks Procedure: 1 From the home screen, press the key. MENU 2 Select Networks. 3 Select one of the following: • Trunked Mode •... -
Page 60: Making Group Calls In Tmo
MN002041A01–AA Chapter 3: Modes 2 Select Trunked Mode. 3.2.2 Making Group Calls in TMO The Group Call is received by all members of the selected group who have their units turned on and are connected through the network. Procedure: 1 Press and hold the PTT button. 2 Wait for the Talk Permit tone (if configured) and then speak into the microphone. -
Page 61: Dgna Reception
MN002041A01–AA Chapter 3: Modes All the above operations are performed by transmitting data to your radio. 3.2.6 DGNA Reception When a DGNA message is received, your radio plays a tone and displays a message Talkgroup list updated. If enabled by your service provider, your radio displays all added and deleted talkgroup list. When your service provider deletes (de-assigns) the currently selected talkgroup, depending on the settings, the radio can perform one of the following actions: •... -
Page 62: Initializing Broadcast Calls
MN002041A01–AA Chapter 3: Modes 3.2.11 Initializing Broadcast Calls Procedure: 1 From the home screen, press the key. MENU 2 Select Services → Broadcast. Your radio displays the predefined alias and the Broadcast Call icon. 3 To start the call press the PTT button. 3.2.12 Phone and PABX Calls The Phone Call allows you to call a landline telephone number or a cellular mobile phone number. -
Page 63: Local Site Trunking
MN002041A01–AA Chapter 3: Modes If call modification requested by your service provider cannot be followed by the radio (due to its settings), the radio rejects it and displays Service Not Available message. Local Site Trunking This mode is also called as Fallback Mode and it allows more than one radio from the same site to communicate when the link between the site and the network central controller fails. -
Page 64: Direct Mode Operation
MN002041A01–AA Chapter 3: Modes Direct Mode Operation Direct Mode Operation is a mode of simplex operation where radios communicate directly without the need of a network. Figure 6: Direct Mode Operation 3.4.1 Entering DMO Mode To enter the DMO Mode: •... -
Page 65: Private Call With Presence Check
MN002041A01–AA Chapter 3: Modes 3.4.4 Private Call With Presence Check This feature allows you to see if the calling party is available in DMO. When this feature is enabled, you can only initiate a Private Call if the called radio is present on the same channel and responds with a presence check acknowledgement. -
Page 66: Enabling Network Monitor
MN002041A01–AA Chapter 3: Modes Private Call 3.4.7.1 Enabling Network Monitor Prerequisites: Ensure your service provider enabled the Network Monitor feature. Procedure: From the home screen, select Optns → Network Monitor. 3.4.8 Communication through Repeaters Radios that are out of range and cannot communicate directly one with another in DMO Mode can do it through the repeater. -
Page 67: Communication Through Gateways
MN002041A01–AA Chapter 3: Modes 3.4.9 Communication through Gateways Gateway provides connectivity between radios operating in DMO Mode and the TETRA network, so that the DMO radios can communicate with the TMO radios. When the radio connects to a gateway, it plays a tone, displays the Gateway available message, and shows an appropriate icon. -
Page 68: Selecting Dmo Group Call Options
MN002041A01–AA Chapter 3: Modes 3.4.11 Selecting DMO Group Call Options When and where to use: Helps to communicate with other radio users on the same talkgroup through the Gateway or Repeater. Procedure: 1 From the home screen, press Optns. 2 Press Config. 3 Select one of the following: •... -
Page 69: Emergency Alarm
MN002041A01–AA Chapter 3: Modes When starting Emergency Operations, any ongoing voice call is aborted or cleared down, and any packet data transfer in progress is aborted. However, the session is kept open. During Emergency Operations, the radio rejects phone, PABX, and private calls, and does not monitor the talkgroups in the selected scan list. -
Page 70: Receiving Emergency Group Calls
MN002041A01–AA Chapter 3: Modes NOTICE: It is possible to cancel making an emergency group call in TMO. To do this, perform one of the following actions before the talk permit is granted (depending on your service provider settings): • Release the PTT button. •... -
Page 71: Alternating Hot Microphone
MN002041A01–AA Chapter 3: Modes Subsequent EMERGENCY button presses during the Emergency Operation restarts the Hot Microphone transmission. If a talk permit is granted to another member of the group, the Emergency Call received tone is played. If configured, the radio automatically attempts to get talk permit again. Pressing End key or END key ends the Hot Microphone operation. -
Page 72: Invisible Emergency
MN002041A01–AA Chapter 3: Modes • No success in sending the Silent Emergency Alarm and the maximum number of retries has been reached. • The control room terminates the Silent Ambience Listening. • The Ambience Listening is disconnected due to another reason. If you turn off the radio in the Silent Emergency Mode, the radio switches to pseudo power off state. -
Page 73: Emergency Mode By Dialing
MN002041A01–AA Chapter 3: Modes TMO, in coverage, idle Standard TMO Emergency Network Monitor, MS-MS Emergency Alert Gateway operation, in cov- Standard TMO Emergency erage Gateway operation, no cov- Emergency Alert erage Repeater operation Standard DMO Emergency 3.5.13 Emergency Mode by Dialing This feature allows you to trigger Emergency Mode by dialing a predefined number. -
Page 74: Exiting Emergency Operations
MN002041A01–AA Chapter 3: Modes 3.5.16 Exiting Emergency Operations Prerequisites: Make sure that your radio is engaged in Emergency Operations. Procedure: 1 If your radio screen displays Emergency Mic On, press End. 2 Press and hold Exit. NOTICE: If an Emergency Operation was triggered by Emergency number (not by button), you can press the E key to exit the Emergency Operation. -
Page 75: Encryption In The Repeater Mode
MN002041A01–AA Chapter 3: Modes 2 Press Monitor. 3 Select one of the following: • Off — Your radio works as a repeater only, no operation is available. • Receive Only — Allows you to listen. • Receive&Transmit — Allows you to listen and transmit by pressing PTT. 3.6.2 Encryption in the Repeater Mode While in the Repeater Mode, the radio supports Air Encryption and is able to repeat encrypted calls... - Page 76 This page intentionally left blank.
-
Page 77: Chapter 4: Global Navigation Satellite System (Gnss) Location Service
MN002041A01–AA Global Navigation Satellite System (GNSS) Location Service Chapter 4 Global Navigation Satellite System (GNSS) Location Service NOTICE: This is a selling feature. The Global Navigation Satellite System (GNSS) Location Service feature uses information from GNSS satellites orbiting the Earth to determine the approximate geographical location of your radio. The GNSS Location Service availability, accuracy, and the position calculation time vary depending on the environment in which you use the radio. -
Page 78: Enhancing Gnss Performance
MN002041A01–AA Chapter 4: Global Navigation Satellite System (GNSS) Location Service • Packet Data (in TMO mode only, with Packet Data enabled on the network by the service provider) The radio can be configured to give audio-visual notifications upon sending the Location Reports. Depending on the radio settings, viewing the radio position and the status of the visible satellites is available. -
Page 79: Different Location Displays
MN002041A01–AA Chapter 4: Global Navigation Satellite System (GNSS) Location Service Different Location Displays Table 17: Different Location Displays Latitude / Lon- Irish Coordi- UTM Coordi- MGRS Coordi- UK Coordinates gitude nates nates nates Time Time Time Time Time Latitude 2–Letter Code 1–Letter Code 3–Letter Code 3–Letter Code... -
Page 80: Changing Gnss Accuracy
MN002041A01–AA Chapter 4: Global Navigation Satellite System (GNSS) Location Service Changing GNSS Accuracy Procedure: 1 From the home screen, press the key. MENU 2 Select Location → Accuracy. 3 Select one of the following: • Medium (default) – Power consumption optimization is combined with less position accuracy. •... -
Page 81: Chapter 5: Main Menu
MN002041A01–AA Main Menu Chapter 5 Main Menu This chapter contains information on items in the main menu. You can enter the menu items during a call. If not programmed otherwise by your service provider the radio exits the menu, when a new call starts. IMPORTANT: Some menu items are model specific and may not be activated or available on your radio. -
Page 82: Messages
MN002041A01–AA Chapter 5: Main Menu Menu Icon Description Browser Starts the WAP browser. Man Down Allows you to activate the Man Down feature. Security Lets you turn on/off and verify security features, and change passwords. Setup Allows you to customize your radio. Group Setup Contains additional menu items for Scanning Talkgroups features. -
Page 83: New Message
MN002041A01–AA Chapter 5: Main Menu • The radio starts a Private Call with the message sender. • The radio starts a Group Call on a currently selected talkgroup. 5.3.1 New Message This menu item allows you to create a new message. 5.3.1.1 Sending Messages to Private/Phone Procedure:... -
Page 84: Delivery Report
MN002041A01–AA Chapter 5: Main Menu • Private – enter the private number or press abc to choose the destination number from the contact list. • Phone – enter the phone number or press abc to choose the destination number from the contact list. -
Page 85: Configuring Delivery Reports
MN002041A01–AA Chapter 5: Main Menu 5.3.1.6 Configuring Delivery Reports Prerequisites: Your service provider enabled the delivery report configuration. Procedure: 1 From the home screen, press the key. MENU 2 Select Messages → New Message. 3 Press MENU key and select Delivery Report. 4 Select one of the following: •... -
Page 86: Receiving New Messages
MN002041A01–AA Chapter 5: Main Menu 5.3.2.2 Receiving New Messages Prerequisites: Your radio displays a New Message icon, an animation, and plays a New Mail Received tone. Procedure: Select one of the following: • Read — opens the entire message. • Back —... -
Page 87: Calling Numbers In Messages
MN002041A01–AA Chapter 5: Main Menu 2 Select Messages → Inbox. 3 Highlight the required message and select Read. 4 Press the PTT button. 5 Radio displays a list of the numbers (including the senders number). 6 Highlight the required number and press Store. 7 Highlight required contact and press View. -
Page 88: Outbox
MN002041A01–AA Chapter 5: Main Menu The message stays on the screen until you press the End/Home key. 5.3.3 Outbox Outbox stores up to 100 sent messages arranged chronologically with the last sent message at the top of the list. Table 20: Outbox Icons Icon Description Delivery in Progress... -
Page 89: Sending User-Defined Templates
MN002041A01–AA Chapter 5: Main Menu 5.3.7.1 Sending User-Defined Templates Procedure: 1 From the home screen, press the key. MENU 2 Select Messages → Templates. 3 Highlight the required template name and press Send. 4 Do one of the following: • Enter the number or press abc to select the name from your contact list. -
Page 90: Status Messages
MN002041A01–AA Chapter 5: Main Menu 2 Select Messages → Predefined. 3 Highlight the required template and press Send, the PTT button, or the S key. NOTICE: You can edit the predefined template before you send it. Press the M and select Edit. Edit screen opens with the template text. You are only allowed to replace the existing text. -
Page 91: Sending Targeted Status Messages
MN002041A01–AA Chapter 5: Main Menu NOTICE: This feature is not supported on Dimetra networks. 5.3.9.4 Sending Targeted Status Messages Procedure: 1 From the home screen, press the key. MENU 2 Select Messages → Send Status. 3 Do one of the following: •... -
Page 92: Selecting Additional Address
MN002041A01–AA Chapter 5: Main Menu 5.3.10.2 Selecting Additional Address Procedure: 1 From the home screen, press the key. MENU 2 Select Messages → Additional Address → Select Address. Select Address display appears with an available list of aliases. 3 Scroll through the list to highlight your alias and press Select. 5.3.10.3 Viewing Additional Address Procedure:... -
Page 93: Deleting Additional Address
MN002041A01–AA Chapter 5: Main Menu 4 Press Menu key. 5 Select Edit. 6 Press Change. 7 Enter new values of the Alias and ISSI/GSSI fields, press Done key. The changed alias appears in the list of available aliases. There is no possibility to have two Additional Address items with the same Additional Address Alias. -
Page 94: Creating Contacts
MN002041A01–AA Chapter 5: Main Menu • # (number) — each contacts entry must contain a number. • Speed # — accept the default Speed Dial number or change it. 5.4.1 Creating Contacts Procedure: 1 From the home screen, select Contcs. 2 Select [New Contact]. -
Page 95: Deleting Contacts
MN002041A01–AA Chapter 5: Main Menu 4 Press M 5 Select Delete number. NOTICE: If an entry contains only one number, deleting the number deletes the entry. 6 Press Yes. 5.4.4 Deleting Contacts Procedure: 1 From the home screen, select Contcs. 2 Highlight a contact you want to delete. -
Page 96: Pictures
MN002041A01–AA Chapter 5: Main Menu Pictures This menu item activates the Picture Browser. The Picture Browser is an application that allows you to browse through pictures saved on the microSD card or in the internal radio memory and send them to other devices by using Bluetooth. -
Page 97: Zoom Levels
MN002041A01–AA Chapter 5: Main Menu Display a picture in the full screen view. • Highlight a picture and press View, • Highlight a picture and press the R OTARY Return to the main menu. Press Exit. View additional picture options. Highlight a picture and press M key. -
Page 98: Adding/Editing Comments To Pictures
MN002041A01–AA Chapter 5: Main Menu 5.5.4 Adding/Editing Comments to Pictures The maximum length of a comment to be added is 144 characters. Adding and editing comments is disabled if the Digital Fingerprint feature is active or if the picture size exceeds 3 MB. When and where to use: To add a new or edit an existing comment assigned to a picture. -
Page 99: Bluetooth
MN002041A01–AA Chapter 5: Main Menu Bluetooth NOTICE: Bluetooth Audio and Object Push, Bluetooth Connectivity and Bluetooth Radio Control are selling features. There are three separate Bluetooth features available: • Bluetooth Audio and Object Push - includes: Bluetooth Audio, Object Push Profile (OPP), Fast PTT, and Indoor Location •... -
Page 100: Enabling And Disabling Bluetooth
NOTICE: This setting does not affect the Motorola headset with PTT (NNTN8143_ or NNTN8191_) as it is always in the GC Optimized mode. -
Page 101: Adding Bluetooth Devices
MN002041A01–AA Chapter 5: Main Menu 5.6.5 Adding Bluetooth Devices Audio devices, such as headsets or PTT pods are added (and connected) by selecting Add Device from the Bluetooth menu. Sensor devices, such as barcode scanners or firearms devices, as well as devices used for radio control must be added to the radio codeplug by the service provider before they can be used. -
Page 102: Bluetooth Sensor Data
MN002041A01–AA Chapter 5: Main Menu 5.6.6.3 Bluetooth Sensor Data Your service provider can configure the details of the sensor information the radio displays. Depending on the type of sensor connected to the radio and the setup configured by your service provider, various types of information are displayed. -
Page 103: My Received Files
MN002041A01–AA Chapter 5: Main Menu 3 Highlight the required device and press the M key. • Name – shows the name of the device (up to 32 characters long). The name is editable by the user only if it has not been pre-set by the service provider. •... -
Page 104: Viewing Received Files
MN002041A01–AA Chapter 5: Main Menu 3 Highlight the required file and press the M key.The maximum recommended file size is 2 GB. 4 Select Forward. 5 Perform one of the following actions: If… Then… If the paired devices list is empty, wait until the radio displays the list and then high- light the device and press Connect. -
Page 105: Disconnecting All Devices
MN002041A01–AA Chapter 5: Main Menu 5.6.8 Disconnecting All Devices When and where to use: To disconnect all remote devices connected to your radio. Procedure: 1 From the home screen, press the key. MENU 2 Select Bluetooth → Disconnect All. All devices are disconnected. NOTICE: To disconnect only one device, from the home screen select M →... -
Page 106: Browser
MN002041A01–AA Chapter 5: Main Menu NOTICE: Activation code must be sent to the device by third party application. Radio-initiated automatic reconnection with remote Bluetooth devices cannot be guaranteed to be successful in 100% of cases when several devices need to reconnect at the same time, due to the fundamental nature of Bluetooth. -
Page 107: Changing Pin Codes
MN002041A01–AA Chapter 5: Main Menu 2 Enter 8–digit PUK (Personal Unblocking Key) number. NOTICE: The PUK is an eight-digit master code provided by your service provider. 3 Enter the new PIN code twice. 5.8.1.3 Changing PIN Codes Procedure: 1 From the home screen, press the key. -
Page 108: Setting Automatic Keylock Delay
MN002041A01–AA Chapter 5: Main Menu • Notification and Instruction — Press Menu * to lock/unlock keypadPress Menu + Left to lock/ unlock keypad is displayed. 5.8.2.2 Setting Automatic Keylock Delay Procedure: 1 From the home screen, press the key. MENU 2 Select Security →... -
Page 109: Deleting User Keys
MN002041A01–AA Chapter 5: Main Menu 5.8.3.2 Deleting User Keys Prerequisites: The user key deletion is enabled in the codeplug. Procedure: 1 Verify that the radio is turned on. 2 Press the following key sequence: *, *, 0, 0, #, #.S 1, S 1, S UTTON... -
Page 110: Dmo Sck
MN002041A01–AA Chapter 5: Main Menu 5.8.5.2 DMO SCK Use of SCKs in DMO needs to be enabled by your service provider. The SCKs used in DMO are called DMSCKs. 5.8.5.3 Changing DMO SCK IMPORTANT: Changing this setting may cause radios not to operate correctly Procedure: 1 From the home screen, press the key. -
Page 111: Covert Mode
MN002041A01–AA Chapter 5: Main Menu 5.8.8 Covert Mode This feature enables you to completely shut down all visible and audible alerts and notifications making the radio unnoticeable even in a silent and dark environment. When your radio is in the Covert Mode, you cannot enter the following menu items of the Setup menu. •... -
Page 112: Status Remote Control
MN002041A01–AA Chapter 5: Main Menu 5.8.10 Status Remote Control Status Remote Control is a feature that provides limited control of the radio (unlike SDS Remote Control) because it uses only status messages, not SDS messages. NOTICE: Only one type of remote control can be active on a radio: either SDS or Status. This feature is not supported by the Dimetra system. -
Page 113: Setting Man Down
MN002041A01–AA Chapter 5: Main Menu • No movement is detected in a predefined time interval. In case any of the above conditions are met, the radio alerts you with a Man Down pre-alert. If you do not remove the pre-alert condition, the radio switches to the Emergency Operation. For the easier localization of the radio, visual and audible indications are started until they are deactivated. -
Page 114: Set Volume
MN002041A01–AA Chapter 5: Main Menu 5.10.2 Set Volume This menu item allows you to adjust the Simplex, Duplex, Earpiece, Speaker, and Keypad tone volume. This menu item allows you to adjust the Speaker and Earpiece tone volumes. 5.10.2.1 Setting Volume Procedure: 1 From the home screen, press the key. -
Page 115: Setting Data Function
MN002041A01–AA Chapter 5: Main Menu NOTICE: • Data services are available only in TMO Mode. • Data services are blocked in TXI Mode. • When set to Voice Only, the built in data modem is disabled to conserve battery power. 5.10.4.1 Setting Data Function Procedure:... -
Page 116: Howling Suppression
MN002041A01–AA Chapter 5: Main Menu 5.10.5.3 Howling Suppression The howling suppression is a mode increasing the stability of the acoustic feedback loop. The radio eliminates howling caused by the feedback loop from the receiving radios to the sending radio in simplex calls. -
Page 117: Setting Volume Adjustment Mode
MN002041A01–AA Chapter 5: Main Menu NOTICE: When volume control capable Bluetooth device is connected, the radio always uses the Common setting. 5.10.5.8 Setting Volume Adjustment Mode Procedure: 1 From the home screen, press the key. MENU 2 Select Setup → Audio → Volume Adj. Mode. 3 Select one of the following: •... -
Page 118: Talk Permit
MN002041A01–AA Chapter 5: Main Menu 3 Select one of the following: a On — Activates all the tones. b Off — Deactivates all the tones. 5.10.6.4 Talk Permit You can set a different tone upon pressing the PTT button. 5.10.6.5 Setting Talk Permit Procedure: 1 From the home screen, press the... -
Page 119: Setting Periodic Alert
MN002041A01–AA Chapter 5: Main Menu 5.10.6.9 Setting Periodic Alert Procedure: 1 From the home screen, press the key. MENU 2 Select Setup → Tones → Periodic Alert. 3 Select one of the following: • Alert — Activates/deactivates periodic tone. • Period —... -
Page 120: Setting Large Idle Font
MN002041A01–AA Chapter 5: Main Menu 3 Select one of the following: • 1 – small font size • 2 – medium font size • 3 – large font size • 4 – extra large font size In some languages number of available font levels can be decreased. 5.10.7.2 Setting Large Idle Font When and where to use: To enable/disable large font on the home screen. -
Page 121: Setting Brightness
MN002041A01–AA Chapter 5: Main Menu • Auto – backlight is triggered by turning on the radio, by pressing any key on the device or on the accessory that is connected to it. Also charging or getting signal from the services like: Call-Out message, RUA request, DGNA and TX timeout during priority call are going to turn on the backlight. -
Page 122: Time And Date
MN002041A01–AA Chapter 5: Main Menu • Off — To deactivate this feature. 5.10.8 Time and Date This sub-menu controls the displayed time and date on the home screen. NOTICE: If the Home Display Text Message feature is enabled, Home Mode Display Text may cover time and date, depending on the Configurable Idle Screen settings. -
Page 123: Setting The Date Format
MN002041A01–AA Chapter 5: Main Menu 5.10.8.4 Setting the Date Format Prerequisites: If M → Setup → Time & Date → Display is set to Time & Date or Date Only. Procedure: 1 From the home screen, press the key. MENU 2 Select Setup →... -
Page 124: Energy Economy
MN002041A01–AA Chapter 5: Main Menu • Time & Offset — Time and offset are updated after receiving from the infrastructure. 5.10.9 Energy Economy Energy Economy (EE) is a mode of operation to save battery life. Your radio does not monitor all downlink time slots of the Main Control Channel. -
Page 125: Accry (Accessory) Setup
CORE Earpiece — select an earpiece from the list of the CORE accessories. • Other RSM/PHF — select an accessory from the list of the non-Motorola accessories. • RSM Earpiece — specify if the accessory is connected to the RSM. -
Page 126: Setting Rotary Knob Mode
MN002041A01–AA Chapter 5: Main Menu 5.10.12.1 Setting Rotary Knob Mode Procedure: 1 From the home screen, press the key. MENU 2 Select Setup → Rotary Knob → Rotary Mode. 3 Select one of the following: • Dual — Both modes are available. Turn the R to adjust the volume or press and OTARY then turn to switch to a different talkgroup. -
Page 127: Setting Rotary Knob Wrap Around
MN002041A01–AA Chapter 5: Main Menu 5.10.12.4 Setting Rotary Knob Wrap Around Procedure: 1 From the home screen, press the key. MENU 2 Select Setup → Rotary Knob → Wrap Around. 3 Select one of the following: • On — Scrolling through the talkgroup list is looped or is moved to the next folder. •... -
Page 128: Usb Settings
MN002041A01–AA Chapter 5: Main Menu NOTICE: If the Rotary Mode is set to: • Dual or Volume — Display shows Auto Selected (OTB), volume can be set only through R OTARY • Scroll — Display shows Auto Selected (Volume), volume can be set only through S buttons. -
Page 129: Group Setup
MN002041A01–AA Chapter 5: Main Menu • Mass Storage – allows managing pictures stored in the radio internal flash memory or on the microSD card via the computer interface without installing any additional application. After connecting the radio to the computer, the radio is recognized as an additional disk drive with two folders: My Pictures and My Received Files. -
Page 130: Standard Home Group
MN002041A01–AA Chapter 5: Main Menu 5.11.1.1 Standard Home Group This menu item allows you to configure the standard home group to be used during start up and when changing modes: TMO –> DMO and TMO –> Repeater. 5.11.2 Scan This menu item allows you to activate/deactivate scanning, view the active scan list, and edit the scan lists. -
Page 131: Deleting Talkgroups From Scan Lists
MN002041A01–AA Chapter 5: Main Menu 2 Select Group Setup → Scan → Scan Lists. 3 Highlight required scan list and press M to see additional settings: • Rename — Enters new name for that scan list. • Capacity — Displays the number of assigned and unassigned talkgroups for the scan list. •... -
Page 132: Editing My Folder List
MN002041A01–AA Chapter 5: Main Menu 5.11.3.3 Editing My Folder List Procedure: 1 From the home screen, press the key. MENU 2 Select Group Setup → My Groups. 3 Highlight required favorite folder. 4 Press M 5 Select one of the following: •... -
Page 133: Adding Contact Numbers To Favorites
MN002041A01–AA Chapter 5: Main Menu 5.12.2 Adding Contact Numbers to Favorites Procedure: 1 From the home screen, press the key. MENU 2 Select Contacts 3 Highlight a contact that you want to add to Favorites and using the left or right N AVIGATION select the required number. -
Page 134: Managing Folders In Favorites
MN002041A01–AA Chapter 5: Main Menu 5.12.5 Managing Folders in Favorites Procedure: 1 From the home screen, press the key. MENU 2 Select Favorites. 3 Highlight a required folder. 4 Press the M key. 5 Select one of the following: • Rename Folder –... -
Page 135: Formatting The Microsd Card
MN002041A01–AA Chapter 5: Main Menu 2 Select My Info. 3 Select one of the following: • My Private Num – displays your radio private number. • My Phone Num – displays your radio phone number. NOTICE: To modify the displayed phone number, select Edit. Type the number and press OK. -
Page 136: Viewing Recent Calls
MN002041A01–AA Chapter 5: Main Menu • Missed — calls you received but not answered or rejected. Each list of calls may contain up to 50 numbers, the most recent call being at the top of the list. If the number of a recent call is stored in the contact list, the name associated with the number appears in the recent calls list. -
Page 137: Storing Recent Calls To Contacts
MN002041A01–AA Chapter 5: Main Menu 5.14.3 Storing Recent Calls to Contacts Procedure: 1 From the home screen, press the key. MENU 2 Select Recent Calls. 3 Select Dialed, Received or Missed. 4 Press Store. NOTICE: If Store is not assigned to the left S key, the number is already stored in your contact list. -
Page 138: Editing Menu Shortcut Lists
MN002041A01–AA Chapter 5: Main Menu 3 Highlight All Tones and press and hold M until Assign Shortcut for:All Tones is displayed. 4 Select Yes and ShortcutsKey:1 is displayed. 5 Press Done. NOTICE: To use this shortcut, from the home screen, press M and the key 5.15.2 Editing Menu Shortcut Lists... -
Page 139: Networks
MN002041A01–AA Chapter 5: Main Menu 2 Select RUI → Log off. 3 Press Accept. 5.17 Networks This menu item allows you to switch between the radio operation modes. 5.17.1 Selecting Network Operation Mode Procedure: 1 From the home screen, press the key. -
Page 140: Using The Foreign Network Registration
MN002041A01–AA Chapter 5: Main Menu 3 Select the required network from the list. Your radio registers to the selected network. 5.17.4 Using the Foreign Network Registration When and where to use: Use this feature to migrate to another predefined network, when you are out of the range of your network and your radio displays the No Service message. -
Page 141: Viewing Data Statistics
MN002041A01–AA Chapter 5: Main Menu 5.18.1 Viewing Data Statistics Procedure: 1 From the home screen, press the key. MENU 2 Select Packet Data. NOTICE: Data services are only available in TMO Mode. The data option must be set to Voice & Data or Data Only. 3 Select one of the following: •... - Page 142 This page intentionally left blank.
-
Page 143: Chapter 6: Features
MN002041A01–AA Features Chapter 6 Features Private Call The Private Call, also called point-to-point, or individual call, enables calling between two individuals. No other radio can hear the conversation. This call type can be carried out in two ways: • Duplex call (if the system allows), in TMO Mode. Both parties can speak at the same time. Start the conversation using the S key. -
Page 144: Rms Icons
MN002041A01–AA Chapter 6: Features • RMS Free Text – (available in SDS-TL only) a unidirectional message containing free text that is sent to the radio by the service provider. Since this type of message may be longer, the radio displays only its beginning on the home screen. To view the full message, go to Menu → Messages →... -
Page 145: Buffer Full Overwrite Policy
MN002041A01–AA Chapter 6: Features • Press and hold the One Touch Button configured to display the Send RMS/FMS menu. • Use a menu shortcut assigned to the Send RMS/FMS menu. NOTICE: The navigation through the radio menu is only available if your service provider enabled the Send RMS/FMS menu item. -
Page 146: Selecting Talkgroups By Index
MN002041A01–AA Chapter 6: Features 3 Press M → View. Example: Radio displays SpeedNum1*, which means that this talkgroup speed number is 1. 6.5.2 Selecting Talkgroups by Index Procedure: 1 From the home screen, enter talkgroup speed number and *. 2 Press Attach. NOTICE: To start a group call, press the PTT button. -
Page 147: Ms-Isdn
MN002041A01–AA Chapter 6: Features MS-ISDN This feature adds to the radio ISDN number. You can choose between MS-ISDN and ISSI to address the call, send the message or pre-defined templates. It works for both simplex and duplex calls, based on the assigned ISDN number. DTMF Overdial This feature allows you to communicate with an automated answering device (for example, the voice mail or answering machine) during an on-going private, phone or PABX call. -
Page 148: Enabling/Disabling Sim Card End-To-End Encryption
MN002041A01–AA Chapter 6: Features Transmission Transmitting Ra- Receiving Radio Result Type Message SIM card No SIM card Delivery failed notification appears and the message is not received. Message No SIM card SIM card Message is received. NOTICE: To send a message or call a non-SIM card radio, turn off the SIM card End-to-End Encryption. -
Page 149: Book On
MN002041A01–AA Chapter 6: Features Force Off Your service provider can log you off. Radio displays Force Off. 6.13 Book On This menu item allows you to edit RUA/RUI feature settings to automatically accept or reject book on requests. 6.13.1 Editing Book On Settings Procedure: 1 From the home screen, press the key. -
Page 150: Entering Browser Menu Panes
MN002041A01–AA Chapter 6: Features 6.14.3 Entering Browser Menu Panes Prerequisites: You are in the browser. Procedure: 1 Press Menu or M key. 2 Usually, it brings up the Navigate pane, or the last browser menu pane. NOTICE: If the web page you navigated to has two or more soft keys/options, the Options pane pops up. -
Page 151: Using Bookmarks
MN002041A01–AA Chapter 6: Features 6.14.4.3 Using Bookmarks Procedure: 1 Enter the browser. 2 Scroll to Bookmarks pane. 3 Scroll to the required bookmark and select Go. The bookmark downloads the selected page from the web. 6.14.4.4 Creating Hotkeys Procedure: 1 Enter the browser. 2 Scroll to Bookmarks pane. -
Page 152: Disabled Packet Data Service
MN002041A01–AA Chapter 6: Features 4 Select Go to enter the Saved Pages folder. 5 Select a saved page and press Ok. The display shows the saved page. Depending on the saved page, you may browse the web from here. 6.14.5 Disabled Packet Data Service If there is no Packet Data Service, your radio displays Error:No Network Available when entering the browser for the first time. -
Page 153: Browser Menu Panes Overview
MN002041A01–AA Chapter 6: Features Key Press Action Left or right S Selects the option that appears in the display di- rectly above the left and right soft key (part of the page). Up N While in list of options, moves up one line. AVIGATION Up N key (hold) -
Page 154: Navigate Pane
MN002041A01–AA Chapter 6: Features Table 28: Additional Menu Panes Menu Pane Description Options Displayed only when there are additional options for the pane or page. Displayed only when an image is selected. Provides access to im- Image age details, storage, and display use. Input Text Displayed only in text entry mode. -
Page 155: Bookmarks Pane
MN002041A01–AA Chapter 6: Features certificates installed. Please ask your service provider if you wish to have these custom WTLS certificates added. CA Certificates — for viewing the digital certificates installed in the browser and digitally signed by Certificate Authorities (CA). Send Referrer —... -
Page 156: History Pane
MN002041A01–AA Chapter 6: Features 4 Press Menu to open the Options pane for the saved page. 5 Select one of the following: a Back — for displaying this page saved on its cache. b Details — for modifying the page title and URL of the saved page. c Update Page —... -
Page 157: Text Input Pane
MN002041A01–AA Chapter 6: Features • Save — for saving the image in the terminal. • [Send] — for sending the image to the destination of your choice. • Reload — for reloading the image. • Details — for displaying the image details. •... -
Page 158: Viewing Wap Messages
MN002041A01–AA Chapter 6: Features NOTICE: Your service provider sets the priority of the message. • Push Message High — animation and the icon (blinking) are displayed with the New WAP Message tone and the browser opens. Medium — animation and the icon are displayed with the New WAP Message tone. Low —... -
Page 159: Types Of Call-Out Alerts
MN002041A01–AA Chapter 6: Features Figure 8: Call-Out Message 6.15.1 Types of Call-Out Alerts There are four types of the Call-Out alerts: Normal Call-Out An alert message that is sent by a dispatcher either to a single radio or to a group of radios. There two types of Normal Call-Out: With user receipt The radio gets to the Accepted phase when you:... -
Page 160: Call-Out Modes Interaction
MN002041A01–AA Chapter 6: Features Test Call-Out a special Call-Out alert that is sent by the dispatcher to test this feature. On receiving the Test Call- Out, the radio plays a tone and displays Test Call-Out. To respond and clear the alert, press the Test OKS key. - Page 161 MN002041A01–AA Chapter 6: Features In DMO, the Shadow Group contains one target address. Each talkgroup may be configured to send status messages or GPS LIP reports to a specific Shadow Group. Each radio can store up to 255 Shadow Groups (both in TMO and DMO). The Shadow Groups feature may affect Emergency Calls setup time to be slightly elongated.
- Page 162 This page intentionally left blank.
-
Page 163: Appendix A: Tones
MN002041A01–AA Tones Appendix A Tones The radio has two tone packs: Classic Tones (default) and New Tones. Your service provider decides which one is enabled. To listen to the tone samples, click NOTICE: Some radio tones are model-specific and may not be available on your radio. Table 30: Radio Tones New Tone Classic Tone... - Page 164 MN002041A01–AA Appendix A: Tones New Tone Classic Tone Tone Description Clear-to-send – Data transmission ready to begin. Emergency – The Emergency Call received. Emergency 2 – The Emergency Call received (optional tone) Low Battery – The battery charge level is low. Over the Air 1 –...
-
Page 165: Appendix B: Led Indications
MN002041A01–AA LED Indications Appendix B LED Indications Table 31: LED Indications Indication Status Solid green In use Repeating call Battery fully charged Blinking green In service Battery charged at 90% Solid red Out of service Rapid charge Trickle charge Blinking red Connecting to the network Entering DMO Faulty or invalid battery... - Page 166 This page intentionally left blank.
-
Page 167: Appendix C: Troubleshooting
MN002041A01–AA Troubleshooting Appendix C Troubleshooting Your radio displays the following messages: Table 32: Displayed Messages Message Message Description ...-Received Call received but not answered, or rejected. Attachment Failed Your radio could not perform talkgroup attachment. It keeps on trying. If it does not succeed, try another talk- group. - Page 168 MN002041A01–AA Appendix C: Troubleshooting Message Message Description File Invalid The picture you are trying to open is damaged. File Storage Not Available or Memory for file storage is inaccessible. Possible reasons: the microSD card is formatted incorrectly or is not installed No Picture Storage at all, the internal radio memory is damaged, there is not enough available space to save a file, the radio is connect-...
- Page 169 MN002041A01–AA Appendix C: Troubleshooting Message Message Description No Entries This message is displayed when accessing an empty list. No Group • Attachment failed. Your radio detached from current talkgroup. Please wait until it attaches again to the cur- rent talkgroup. •...
- Page 170 MN002041A01–AA Appendix C: Troubleshooting Message Message Description Service Restricted This service or feature is restricted by your service provid- er, it has not been purchased, or it is not available. TalkGrp ... cannot be deleted Your service provider set this group so you cannot delete it from the favorite talkgroup folder.
-
Page 171: Appendix D: Maintenance
A battery is an expendable part and may need replacing during the life of the radio. To ensure maximum service life of your radio, always replace the battery with a genuine Motorola replacement. In order to ensure maximum life for your battery: •... -
Page 172: Battery Charging Rules
MN002041A01–AA Appendix D: Maintenance If, during charging, the temperature is out of range, the battery might not be fully charged since the charging is temporarily stopped until the temperature becomes suitable. The temperature range of battery operation is from 0 °C to +45 °C in charger mode and from -30 °C to +60 °C in discharge mode. Battery Charging Rules Generally, to reduce the number of charge cycles as much as you can, wait for the Low Battery message to charge, as it ensures maximum battery life. -
Page 173: Washing The Radio
Motorola details the disassembly, test, and reassembly procedures along with necessary test equipment needed to inspect, maintain and troubleshoot radio seals in the radio’s service manual. - Page 174 MN002041A01–AA Appendix D: Maintenance 2 Pull the radio out of the water and turn the encoder knob 360° clockwise and 360° anti-clockwise twice. 3 Submerge the radio completely in the detergent solution. Repeat for the encoder knob. 4 Gently scrub the plastic surfaces of the radio (front, back, bottom, top and side areas) with a soft cotton cloth.
- Page 175 MN002041A01–AA Appendix D: Maintenance 5 Submerge the radio in water and shake it to remove the detergent. 6 Pull the radio out of the water and thoroughly rinse it under running water to remove excess detergent. Take extra care to remove any detergent trapped in the crevices of the radio. 7 Shake off excess water and dry the radio with a towel.
- Page 176 This page intentionally left blank.
Need help?
Do you have a question about the MTP8000Ex Series and is the answer not in the manual?
Questions and answers