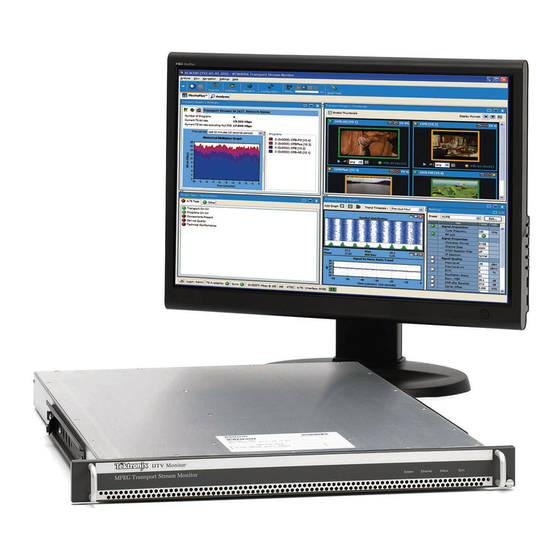
Tektronix MTM400A Technical Reference
Dtv monitors
Hide thumbs
Also See for MTM400A:
- Technical reference (182 pages) ,
- Manual (138 pages) ,
- Quick start user manual (102 pages)
Table of Contents

Related Manuals for Tektronix MTM400A


Summary of Contents for Tektronix MTM400A
- Page 1 MTM400A and RFM300 DTV Monitors Technical Reference *P077017501* 077-0175-01...
- Page 3 MTM400A and RFM300 DTV Monitors Technical Reference This document applies to firmware version 3.2 and above. Warning The servicing instructions are for use by qualified personnel only. To avoid personal injury, do not perform any servicing unless you are qualified to do so. Refer to all safety summaries prior to performing service.
- Page 4 Copyright © Tektronix. All rights reserved. Licensed software products are owned by Tektronix or its subsidiaries or suppliers, and are protected by national copyright laws and international treaty provisions. Tektronix products are covered by U.S. and foreign patents, issued and pending. Information in this publication supersedes that in all previously published material.
- Page 5 product.
- Page 6 In order to obtain service under this warranty, Customer must notify Tektronix of the defect before the expiration of the warranty period. If Tektronix is unable to provide a replacement that is free from defects in materials and workmanship within a reasonable time thereafter, Customer may terminate the license for this software product and return this software product and any associated materials for credit or refund.
-
Page 7: Table Of Contents
GbE Interface....................2-41 COFDM Interface ..................2-50 8PSK Interface ..................... 2-51 QPSK (L-Band) Interface................. 2-52 QAM (Annex A and Annex C) Interface ............... 2-52 QAM (Annex B II) Interface ................2-53 8VSB Interface..................... 2-54 MTM400A and RFM300 DTV Monitors Technical Reference... - Page 8 3-54 Reference Event Log......................Event Log Control ................... Pinning the Event Log..................Copying the Event Log..................Exporting the Event Log ..................Color Coding Events ..................Chart Views and Bit Rates..................Bar Charts ....................MTM400A and RFM300 DTV Monitors Technical Reference...
- Page 9 Table Filtering....................4-17 Table Column Configuration ................4-17 Context Menus ....................4-19 Maintenance Maintenance....................... Preventative Maintenance .................. Removing or Replacing an Interface Card ..............Battery Maintenance..................5-14 Repacking for Shipment .................. 5-15 Index MTM400A and RFM300 DTV Monitors Technical Reference...
- Page 10 2-39 Figure 2-25: Interface view (typical)................. 2-40 Figure 2-26: Interface view - GbE................2-41 Figure 2-27: IP Traffic view (tear-off view) ..............2-42 Figure 2-28: GbE interface Readings view (tear-off view) ..........2-44 MTM400A and RFM300 DTV Monitors Technical Reference...
- Page 11 Figure 4-6: Set Bit Rate Limits context menu..............Figure 4-7: Set Bit Rate Limits dialog box ..............Figure 4-8: Pie chart ..................... Figure 4-9: Historical multiplex graph ............... 4-10 Figure 4-10: Typical timing graph display..............4-12 MTM400A and RFM300 DTV Monitors Technical Reference...
- Page 12 Figure 5-8: Cable connections for QAM (Annex A), QAM (Annex B1), QAM (Annex C), and QPSK (L-Band, old version) interface cards..............5-11 Figure 5-9: Cable connections for QAM (Annex B2), 8PSK/QPSK, 8VSB, and COFDM interface cards ......................5-12 Figure 5-10: Cable connections for GbE interface card............ 5-13 MTM400A and RFM300 DTV Monitors Technical Reference...
- Page 13 Table 5-1: QAM (Annex A), QAM (Annex B1), QAM (Annex C), and QPSK (L-Band, old version) card connectors ....................Table 5-2: QAM (Annex B2), 8PSK/QPSK, 8VSB, and COFDM interface card connectors ... Table 5-3: GbE interface card connectors ..............MTM400A and RFM300 DTV Monitors Technical Reference...
-
Page 14: General Safety Summary
Do Not Operate in an Explosive Atmosphere. Keep Product Surfaces Clean and Dry. Provide Proper Ventilation. Refer to the manual’s installation instructions for details on installing the product so it has proper ventilation. viii MTM400A and RFM300 DTV Monitors Technical Reference... - Page 15 DANGER indicates an injury hazard immediately accessible as you read the marking. WARNING indicates an injury hazard not immediately accessible as you read the marking. CAUTION indicates a hazard to property including the product. The following symbol(s) may appear on the product: MTM400A and RFM300 DTV Monitors Technical Reference...
- Page 16 General Safety Summary MTM400A and RFM300 DTV Monitors Technical Reference...
-
Page 17: Preface
PSI/SI/PSIP/ARIB analysis, and unique user-defined template tests to ensure the right content in the right place at the right time. Deployed at key network nodes, the MTM400A monitor enables the cause of faults to be pinpointed and solved. -
Page 18: Product Documentation
Preface Product Documentation The following table lists the product documentation supporting the MTM400A monitor. Table i: Product documentation Item (Tektronix part number) Purpose Location Quick Start User Manual Provides installation and high-level operational overviews (071-2492-xx English, 071-2493-xx Japanese) RUI v3.x Upgrade Technical... -
Page 19: Rui Overview
RUI Overview... - Page 21 Phase Shift Keying) (L-Band), 8PSK (Eight level Phase Shift Keying) and 8VSB (Eight level Vestigial Side Band), and IP Video interfaces are available as options for the MTM400A monitor. The 8VSB interface is the only interface available for the RFM300 monitor; it is supplied as standard.
-
Page 22: Rui Components
The title bar shows the stream name (defined in the Stream Configuration view), the IP address of the connected DTV monitor, and the product title, for example the MTM400A Transport Stream Monitor. 1–2 MTM400A and RFM300 DTV Monitors Technical Reference... -
Page 23: Table 1-1: Menu Options
Opens the Configuration dialog box. Settings Configuration... Interface... Alt + I Opens the Interface Configuration dialog box. Standard... Alt + T Opens the DTV Standards Selection dialog box. Help About... Displays application and system information. MTM400A and RFM300 DTV Monitors Technical Reference 1–3... -
Page 24: Figure 1-2: Toolbar Controls
Recording controls Opens the Recording Settings dialog box. You can set up and initiate stream recording (See page 3-4.) Reset Tests Resets all tests, including Stream, Device, and Interface tests and Informational warnings. 1–4 MTM400A and RFM300 DTV Monitors Technical Reference... -
Page 25: Figure 1-3: Button Bar
Monitoring buttons. All of the buttons associated with monitoring are grouped under the Monitoring primary button. You can hide or show the monitoring buttons by clicking on the ▲ or ▼ symbols. Figure 1-3: Button bar MTM400A and RFM300 DTV Monitors Technical Reference 1–5... -
Page 26: Figure 1-4: Customize Button Bar Dialog Box
Move Up and Move Down buttons. You can customize the display to show or hide the button bar depending on your monitoring needs. (See page 1-7.) Figure 1-4: Customize Button Bar dialog box 1–6 MTM400A and RFM300 DTV Monitors Technical Reference... - Page 27 Tree view. Each analysis view includes a tree view. This is a hierarchical view of the related analysis information. Detail view(s). The detail views vary depending on which node is highlighted in the tree view. Detail views include summary views, error logs, and thumbnail views. MTM400A and RFM300 DTV Monitors Technical Reference 1–7...
-
Page 28: Figure 1-5: Panel Slide Controls
Windows manner to resize them. Figure 1-5: Panel slide controls Tear-off Function. Click the tear-off icon to display a view in a window separate from the main application view. (See Figure 1-6.) Figure 1-6: Tear-off view 1–8 MTM400A and RFM300 DTV Monitors Technical Reference... -
Page 29: Figure 1-7: Status Bar
Processing status, Shows the "overwhelmed" processor status; that is whether the processing engine is able to Overwhelmed cope with the amount of information in the stream even after throttling. MTM400A and RFM300 DTV Monitors Technical Reference 1–9... -
Page 30: Figure 1-8: Breadcrumb Trail
RUI structure immediately beneath the title bar. (See Figure 1-2 on page 1-4.)(See Figure 1-8.) Click on an element of the breadcrumb trail to open the corresponding Analysis view. Figure 1-8: Breadcrumb trail 1–10 MTM400A and RFM300 DTV Monitors Technical Reference... -
Page 31: Flexvuplus Display
(See Figure 1-10.) Use this icon to select views for Selection simultaneous display in the FlexVuPlus window. When you click the icon, you can then select the FlexVuPlus panel in which the view will be displayed. Figure 1-10: FlexVuPlus select icon MTM400A and RFM300 DTV Monitors Technical Reference 1–11... - Page 32 RUI Overview 1–12 MTM400A and RFM300 DTV Monitors Technical Reference...
-
Page 33: Analysis Views
Analysis Views... - Page 35 From the Analysis view window, you can access the following views: Programs Tests SI/PSI (Tables) Packets Interface These views are described on the following pages. MTM400A and RFM300 DTV Monitors Technical Reference 2–1...
- Page 36 Analysis Views 2–2 MTM400A and RFM300 DTV Monitors Technical Reference...
-
Page 37: Programs View
(PIDs). The transport stream carries a number of programs and each program carries a number of elementary streams. Elementary streams are carried in packets that are identified by packets identifiers (PIDs). MTM400A and RFM300 DTV Monitors Technical Reference 2–3... -
Page 38: Table 2-1: Programs View Nodes
LED in the current view. Only the lowest level nodes will be considered and highlighted in the search because the parent nodes simply reflect the state of the lowest level nodes. 2–4 MTM400A and RFM300 DTV Monitors Technical Reference... -
Page 39: Transport Stream Node
Event Log The Event Log displays the log entries for the whole transport stream. A detailed description of event log management is provided. (See page 4-1, Event Log.) MTM400A and RFM300 DTV Monitors Technical Reference 2–5... -
Page 40: Figure 2-2: Thumbnail Display
PID. The Brief Details and Full Summary views provide progressively more detailed information about each video channel. Selecting the thumbnail viewing size from the context menu affects all thumbnails. Figure 2-2: Thumbnail display 2–6 MTM400A and RFM300 DTV Monitors Technical Reference... - Page 41 Select the audio content to be streamed. The available audio content will vary from stream to stream. Stop the current streaming session. Refer to the decode set up to configure the decoder to be used by backhaul. (See page 3-32.) MTM400A and RFM300 DTV Monitors Technical Reference 2–7...
- Page 42 However, a template can subsequently be uploaded to any device. The presence of service 8258 in the transport stream is being checked. (See Figure 2-3.) In addition, details of the service and associated PIDs are checked. 2–8 MTM400A and RFM300 DTV Monitors Technical Reference...
-
Page 43: Figure 2-3: Template View
The State icons indicate that an element listed in the template has conformed to the requirement. The following template section of a configuration file resulted with the display. (See Figure 2-3.) MTM400A and RFM300 DTV Monitors Technical Reference 2–9... - Page 44 Programs View 2–10 MTM400A and RFM300 DTV Monitors Technical Reference...
- Page 45 Create and Download a template for further modification or examination. Template checking can be turned off by disabling the Template checking checkbox on this view or the Configuration > Stream page. MTM400A and RFM300 DTV Monitors Technical Reference 2–11...
-
Page 46: Figure 2-4: Service Logging - Data Storage
final row. Accumulated data is added to the bottom row for up to three days. After this time the data is discarded and the PID is no longer monitored. 2–12 MTM400A and RFM300 DTV Monitors Technical Reference... -
Page 47: Figure 2-5: Stream View - Summary
This RUI will then be guaranteed to get all of the data without another RUI consuming the data. Where the data is logged to disk, the logging RUI must be the consuming RUI. MTM400A and RFM300 DTV Monitors Technical Reference 2–13... - Page 48 The PIDs may be specified as separate elements or as a space delimited list. This configuration can be embedded in a full configuration file, or just uploaded as an incremental change. (Refer to Configuration File Structure in the DTV Monitor Programmer Manual). 2–14 MTM400A and RFM300 DTV Monitors Technical Reference...
-
Page 49: Program Node
The Program Tests view shows tests related to the program. The Event Log shows the errors for the highlighted program or test. When no tests are selected, the event log will show the events related to all tests associated MTM400A and RFM300 DTV Monitors Technical Reference 2–15... -
Page 50: Elementary Stream Node
PCR interval data. When the transport stream contains timestamped data, the PCR overall jitter, PCR frequency offset, PCR arrival time, and PCR drift rate graphs are also available. (See page 2-18, Timing Graphs.) 2–16 MTM400A and RFM300 DTV Monitors Technical Reference... -
Page 51: Figure 2-8: Pcr Graphs View
Similarly, the Event Log shows the errors for the highlighted test. When no tests are selected, the event log will show the events related to all tests associated with the elementary stream selected in the program tree. MTM400A and RFM300 DTV Monitors Technical Reference 2–17... -
Page 52: Table 2-2: Timing Measurement Graphs
PCR on the Y-axis. Expected PCR values are calculated from the byte index of the PCR. The Maximum PCR Accuracy Error limit can be adjusted by modifying the Max PCR accuracy error. 2–18 MTM400A and RFM300 DTV Monitors Technical Reference... - Page 53 Presentation Time Stamps (PTS) graph provides a display of the time interval between successive PTSs. PTS-PCR Variation Significant variation between the PTS and PCR arrival intervals may indicate that there are timing problems in the monitored stream. MTM400A and RFM300 DTV Monitors Technical Reference 2–19...
- Page 54 Programs View 2–20 MTM400A and RFM300 DTV Monitors Technical Reference...
-
Page 55: Tests View
The view is displayed when the Tests button is selected in the button bar or when the Tests tab is selected in the tree view. (See Figure 2-9.) Figure 2-9: Tests view MTM400A and RFM300 DTV Monitors Technical Reference 2–21... -
Page 56: Figure 2-10: Test View Nodes
Two other primary nodes are displayed, Informational Events and Device Tests. Informational Events include stream events and messages that are logged but do not constitute a test failure; for example, a version change of a table carried in 2–22 MTM400A and RFM300 DTV Monitors Technical Reference... -
Page 57: Figure 2-11: Test Filtering Buttons
Black Maintenance mode. Test Filtering Interpreting the display of tests can be made easier using the three filter buttons at the top of the Tests navigation view. Figure 2-11: Test filtering buttons MTM400A and RFM300 DTV Monitors Technical Reference 2–23... -
Page 58: All Tests Node
The right column lists all tests that have failed at some point since monitoring began (or since the last reset), but are not currently failing. Any tests that were not present in a list in the previous update are shown shaded. 2–24 MTM400A and RFM300 DTV Monitors Technical Reference... -
Page 59: Test Nodes
When you select a test node, the Associated PIDs pane displays a summary of all of the PIDs and an event log listing all events that are associated with the test. Figure 2-13: Tests view - test nodes MTM400A and RFM300 DTV Monitors Technical Reference 2–25... -
Page 60: Pid Nodes
Where tests have failed, the PIDs affected are listed under the test node in the Tests navigation view. Selecting a PID will display the Event Log for that PID. Figure 2-14: Test view - PID nodes 2–26 MTM400A and RFM300 DTV Monitors Technical Reference... -
Page 61: Si/Psi (Tables) View
(See page 2-31, SI Repetition Graphs View.) Some of the nodes that represent less common tables or table groups may not have specific summary views available in the analyzer. In these cases, a generic summary view is used. MTM400A and RFM300 DTV Monitors Technical Reference 2–27... -
Page 62: Table Summary Pane
Figure 2-16: SI/PSI (tables) view - Programs (example) EPG Views A specific departure from the Table Summary view is the EPG view that is displayed when a section of the EPG table is highlighted. (See page 2-31, EPG Views.) 2–28 MTM400A and RFM300 DTV Monitors Technical Reference... -
Page 63: Section View
fields are arranged in a hierarchical order. The presence of subordinate fields is indicated using { } bracket symbols adjacent to the container field. The container can be expanded or collapsed by clicking the + or - icon. MTM400A and RFM300 DTV Monitors Technical Reference 2–29... -
Page 64: Figure 2-18: Section Payload
If the section is corrupt or empty, the hexadecimal view background is red instead of blue. The view is continually updated. Updating can be paused, to allow you to examine specific details. Pause table section updating Resume table section updating 2–30 MTM400A and RFM300 DTV Monitors Technical Reference... -
Page 65: Si Repetition Graphs View
Nodes representing an individual table or subtable will offer the usual Summary, Section, and SI Repetition graph detail views. However, the higher nodes will display the programming information graphically. (See Figure 2-19.) MTM400A and RFM300 DTV Monitors Technical Reference 2–31... -
Page 66: Figure 2-19: Epg Summary View (Tear-Off View)
Display Range. Shows the extent of the event panel. More detail can be displayed by choosing a shorter time period. Select the required range from the drop-down list. The adjacent zoom buttons select the next/previous range in the drop-down list. 2–32 MTM400A and RFM300 DTV Monitors Technical Reference... - Page 67 Red: Present event Green: Following event Blue: Schedule event Yellow: (ISDB only) After event Event Detail Panel. Shows details of the selected event. The details are contained in the EIT (event information table). MTM400A and RFM300 DTV Monitors Technical Reference 2–33...
-
Page 68: Figure 2-20: Epg Nodes
SDT (Service Description Table) Nodes. Links to services identified in the SI for a specific transport stream. Service Summary Nodes. Graphical view of the events identified in the service. EIT Nodes. Detailed view of event information for a single EIT subtable. 2–34 MTM400A and RFM300 DTV Monitors Technical Reference... -
Page 69: Pids View
The PIDs view displays information about all of the PIDs found in the transport stream being monitored. (See Figure 2-21.) The tree view contains the PID tree structure representing all of the PIDs that have occurred within the transport stream. Figure 2-21: PIDs view MTM400A and RFM300 DTV Monitors Technical Reference 2–35... -
Page 70: All Pids Node
Event Log and Parameters for only that test. The Thumbnails tab displays views of the PIDs carrying video information. Three modes of thumbnail display are available: Thumbnails only, Brief Details, and Full Summary. (See page 2-6.) 2–36 MTM400A and RFM300 DTV Monitors Technical Reference... -
Page 71: Detail View (All Pids And Pid Group)
Where a PID has failed a test, one or more test nodes are displayed as child nodes of the PID. The combination and detail of the views vary depending on the selected PID type and node. MTM400A and RFM300 DTV Monitors Technical Reference 2–37... -
Page 72: Figure 2-23: Pid Detail View - Timing Graphs
Figure 2-23: PID detail view - timing graphs A Presentation Time Stamp (PTS) graph may also be available on PIDs carrying audio and video information. (See page 4-11, Graph Management.) (See page 2-18, Timing Graphs.) 2–38 MTM400A and RFM300 DTV Monitors Technical Reference... -
Page 73: Packets View
(IIPs) and TMCC data in ISDB-T mode. The following figure shows an example of the IIP view in an ISDB-T transport stream. Figure 2-24: Packets view - ISDB-T, IIP detail example MTM400A and RFM300 DTV Monitors Technical Reference 2–39... -
Page 74: Interface View
Interface related tabbed views and panels are described in the remainder of this section. Setting up the interface cards is described in Interface Card Configuration. (See page 3-34.) 2–40 MTM400A and RFM300 DTV Monitors Technical Reference... -
Page 75: Gbe Interface
IF Warnings Collection. (See Figure 2-26.) The secondary nodes are specific to the GbE interface. The detail views are contained under five tabs: IP Tables, Diagnostics, Graphs, Interface Event Log, and All Session Event Log. Figure 2-26: Interface view - GbE MTM400A and RFM300 DTV Monitors Technical Reference 2–41... -
Page 76: Figure 2-27: Ip Traffic View (Tear-Off View)
(See Table 2-4 on page 2-43.) If a single subscription mode is selected, all sessions will be suspended except the one currently subscribed. Figure 2-27: IP Traffic view (tear-off view) 2–42 MTM400A and RFM300 DTV Monitors Technical Reference... -
Page 77: Table 2-4: Gbe Ip Traffic View Column Descriptions
Session bitrate (not the same as the stream bitrate, this includes IP wrappers) At the top of each of the IP tables (Multicast Database and IP Traffic) is a Show filter option. (See page 4-17.) MTM400A and RFM300 DTV Monitors Technical Reference 2–43... -
Page 78: Figure 2-28: Gbe Interface Readings View (Tear-Off View)
Selecting from the drop-down menu is equivalent to applying a configuration in the Configure Interface dialog box. Use the Edit button to open the Edit Interface Settings. (See page 3-37.) Figure 2-28: GbE interface Readings view (tear-off view) 2–44 MTM400A and RFM300 DTV Monitors Technical Reference... -
Page 79: Table 2-5: Gbe Interface Readings
Maximum packet interarrival time (PIT) of the currently selected stream. Time IP Errored Packet Rate The calculation is maintained per session on the interface card. The field pkt/min displays a red background if the rate is greater than zero. MTM400A and RFM300 DTV Monitors Technical Reference 2–45... - Page 80 Datagram size of the transport stream IP packets. VLAN Tag Virtual Local Area Network (VLAN) tag displayed in hex format. This is a two byte value containing priority bit, canonical format indicator (CFI), and VLAN ID (VID). 2–46 MTM400A and RFM300 DTV Monitors Technical Reference...
-
Page 81: Figure 2-29: Gbe Interface - Diagnostics
Ping button is clicked. The address format, IPv4 or IPv6, should be selected in accord with the address format used. Figure 2-29: GbE interface - Diagnostics MTM400A and RFM300 DTV Monitors Technical Reference 2–47... -
Page 82: Figure 2-30: Gbe Interface Graphs (Tear-Off View)
This log collects all events. Apart from displaying all events, two other subsets of all events can be selected from a drop-down list and displayed, that is Selected Stream Events and All IP Session Events. 2–48 MTM400A and RFM300 DTV Monitors Technical Reference... - Page 83 An SFP (Small Format Pluggable) module is used to facilitate the Ethernet Optical interconnection feature. The GbE interface card has been tested with SFP module(s) ordered from Tektronix. SFP modules purchased from a supplier other than Tektronix are not warranted to work.
-
Page 84: Cofdm Interface
Linear Amplitude response (selected carriers). A linear amplitude response is shown for the carriers selected using the carrier START and STOP controls. Allows you to view and zoom in on frequency dependent amplitude distortions. 2–50 MTM400A and RFM300 DTV Monitors Technical Reference... -
Page 85: 8Psk Interface
The Persistence setting in the graph context menu sets the time in seconds that the dots persist on the graph. MTM400A and RFM300 DTV Monitors Technical Reference 2–51... -
Page 86: Qpsk (L-Band) Interface
The Persistence setting in the graph context menu sets the time in seconds that the dots persist on the graph. QAM (Annex A and Annex C) Interface Readings (See page 2-52, QPSK (L-Band) Interface.) Graphs (See page 2-52, QPSK (L-Band) Interface.) 2–52 MTM400A and RFM300 DTV Monitors Technical Reference... -
Page 87: Qam (Annex B Ii) Interface
If there are echoes or other time related distortions on the signal, the Equalizer display will display the amplitude of the corresponding tap correction values versus time. MER. This graph gives a time record of MER over the last 255 seconds. MTM400A and RFM300 DTV Monitors Technical Reference 2–53... -
Page 88: 8Vsb Interface
Equalizer. The equalizer coefficients are plotted across the graph display. The display illustrates the presence of multi-path echoes by indicating how the equalizer is adjusting to cancel them out. NOTE. The Equalizer graph amplitude values are approximate. 2–54 MTM400A and RFM300 DTV Monitors Technical Reference... -
Page 89: Configuration
Configuration... -
Page 91: Stream Configuration
Stream. The Stream section of the configuration dialog box includes the following pages: Recording Settings, Test Parameters, PCR Filters, Slot Management, and Schedule Management. Each page can be accessed by selecting the relevant node in the tree view. Figure 3-1: Configuration dialog box MTM400A and RFM300 DTV Monitors Technical Reference 3–1... -
Page 92: Stream Global Settings
Select Stream in the tree view to access the Stream configuration global settings. (See Figure 3-2.) NOTE. The changes made to the Miscellaneous check boxes are applied immediately. Figure 3-2: Stream global settings configuration page 3–2 MTM400A and RFM300 DTV Monitors Technical Reference... - Page 93 Factory Default. Resets all configuration items, including interface card settings, to their factory defaults. Reset SI Throttle. Resets the SI table processing throttle. The status of this throttle is shown graphically on the RUI status bar. MTM400A and RFM300 DTV Monitors Technical Reference 3–3...
-
Page 94: Recording Settings
PC for storage and further analysis. The file is stored as a valid MPEG file; however extra information is encoded in the file to allow Tektronix MPEG analysis products to reconstruct the real-time timing artifacts present at the time of recording. - Page 95 For example, if the available memory will hold a 20 second recording, with 25% pretrigger specified and an event-triggered recording starting five seconds or more into the run, the contents of the recorded file will be as illustrated in the following figure. MTM400A and RFM300 DTV Monitors Technical Reference 3–5...
-
Page 96: Figure 3-4: 25% Pretrigger Example
20 second file will contain all of the data up to the trigger. If recording was triggered at three seconds only the first 15% of the file would hold pretrigger data. The file contents would be as illustrated in the following figure. Figure 3-5: 15% pretrigger example 3–6 MTM400A and RFM300 DTV Monitors Technical Reference... -
Page 97: Figure 3-6: Record Trigger Set - Example
External Rising Edge / External Falling Edge. The trigger is set when Arm is selected. Recording will start when a rising / falling edge is detected at the TTL input on the TS Processor alarms connector. See the MTM400A and RFM300 DTV Monitor Specifications and Performance Verification Technical Reference for a listing of the product specifications. -
Page 98: Test Parameters
(although the test result may then not conform to the standard). The Test Parameters configuration page can be accessed using Configuration (toolbar) > Stream > Test Parameters. (See Figure 3-7.) 3–8 MTM400A and RFM300 DTV Monitors Technical Reference... -
Page 99: Figure 3-7: Test Parameters Configuration Page
You can access parameters associated with individual tests by selecting Edit Parameters from the context menu of a test. Not all tests have parameters that can be edited. All of the test parameters are described in the MTM400A and RFM300 DTV Monitor Test Parameter and Configuration File Technical Reference, which can be downloaded from the Tektronix Web site (www.tektronix.com). -
Page 100: Pcr Filters
MGF4 and entering a value between 1 MHz and 10000 MHz (10 Hz). Alternatively, these filter values can be changed in the Test Parameters page. Search for "PCR_" to find the high- and low-pass filter parameters. 3–10 MTM400A and RFM300 DTV Monitors Technical Reference... -
Page 101: Table 3-1: Pcr Settling Times
For more information about PCR measurements, read the PCR Measurements Primer, available on the Tektronix Web site (www.tektronix.com). Table 3-1: PCR settling times Filter cut-off... -
Page 102: Slot Management
DTV monitor to load configuration slots at specific times and days during the week. (See page 3-16, Schedule Management.) In the MTM400A monitor, configuration settings are held in storage slots. (See Figure 3-11.) Eight storage slots are available for each stream. The contents of a storage slot must be applied to the active area (active configuration) before... -
Page 103: Figure 3-10: Configuration - Slot Management Page
Stream Configuration Figure 3-10: Configuration - Slot Management page Figure 3-11: Configuration file handling MTM400A and RFM300 DTV Monitors Technical Reference 3–13... - Page 104 file header; however, the position of the slot in the list remains the same. For the configuration file structure, refer to the MTM400A and RFM300 DTV Monitor Test Parameter and Configuration File Technical Reference.
- Page 105 4. Save the file, ensuring that the file name extension is xml. 5. Upload the file to a slot as required. NOTE. The file name in the header is used as the slot name. MTM400A and RFM300 DTV Monitors Technical Reference 3–15...
-
Page 106: Schedule Management
This allows the RTM unit to synchronize, for example, if the instrument is switched on in the middle of a weekly schedule. The schedule will be specified in a text file using XML. The following is an example of the schedule file format: 3–16 MTM400A and RFM300 DTV Monitors Technical Reference... - Page 107 (LoadDays). NOTE. There should be only a single day listed in the LoadDay entry in the BaseScheduleItem section; there can be multiple days listed in the LoadDays entry in the ScheduleItem section. MTM400A and RFM300 DTV Monitors Technical Reference 3–17...
-
Page 108: Figure 3-12: Schedule Management Configuration Page
Figure 3-12: Schedule Management configuration page With a prepared schedule file available, you can upload, download, and enable scheduling from the stream Configuration dialog box. 3–18 MTM400A and RFM300 DTV Monitors Technical Reference... - Page 109 If an uploaded schedule is replacing a running schedule, the Enable Scheduler checkbox on the Schedule Management page should be cleared and then checked to allow the new schedule to take effect. MTM400A and RFM300 DTV Monitors Technical Reference 3–19...
- Page 110 RTM device at the same instant in time. 3–20 MTM400A and RFM300 DTV Monitors Technical Reference...
-
Page 111: Figure 3-13: Scheduling And Time Zones
Stream Configuration Figure 3-13: Scheduling and time zones MTM400A and RFM300 DTV Monitors Technical Reference 3–21... -
Page 112: Device Configuration
The product name is identified as DTV monitor. Device Name The device name identifies the DTV monitor. The name is used in the Device button. Use the Set button to apply the name. 3–22 MTM400A and RFM300 DTV Monitors Technical Reference... -
Page 113: Passwords Settings
User. Gives read only access to all views and settings, including options where installed. You can also reset alarms. The Passwords configuration page can be accessed using Configuration (toolbar) > Device > Passwords. (See Figure 3-15.) Figure 3-15: Passwords configuration page MTM400A and RFM300 DTV Monitors Technical Reference 3–23... -
Page 114: Network Settings
SNMP community strings can also be set using the Network Settings dialog box. The Network Settings page can be accessed using Configuration (toolbar) > Device > Network Settings. (See Figure 3-16.) 3–24 MTM400A and RFM300 DTV Monitors Technical Reference... -
Page 115: Figure 3-16: Network Settings Configuration Page
DTV instrument will send to the control network. It is recommended that the MTU setting be left at the default value of 1514. The community strings, Read Community (alternate) and Write Community (alternate), are provided to support some older management systems. MTM400A and RFM300 DTV Monitors Technical Reference 3–25... -
Page 116: Time Settings
UTC, local time at the client PC, or local time at the RTM device. All times are calculated with respect to UTC. Figure 3-17: Time zones example 3–26 MTM400A and RFM300 DTV Monitors Technical Reference... -
Page 117: Figure 3-18: Time Settings Configuration Page
This is most likely to be seen if you apply Sync with Local and observe that the Local and RTM Device times are slightly out of step. MTM400A and RFM300 DTV Monitors Technical Reference 3–27... - Page 118 IP address of a suitable SNTP server entered in the SNTP Server field. The network Gateway and Subnet Mask must be set up for the remote server to be able to communicate. (See page 3-24, Network Settings.) 3–28 MTM400A and RFM300 DTV Monitors Technical Reference...
-
Page 119: Preferences Configuration
Fonts and Decode. The page can be accessed by selecting the relevant node in the tree view. The Preferences configuration page can be accessed using Configuration (toolbar) > Preferences. (See Figure 3-19.) Figure 3-19: Preferences configuration page MTM400A and RFM300 DTV Monitors Technical Reference 3–29... -
Page 120: Preferences Global Settings
The font and size of all of the font settings can be reset to Locale Default Font and the normal size using the Set to Default button. 3–30 MTM400A and RFM300 DTV Monitors Technical Reference... -
Page 121: Figure 3-20: Configuration - Font Page
The DTV monitor RUI is capable of displaying these private character extensions, but the operating system must be correctly configured. The instructions for installing custom font extensions are located in the MTM400A and RFM300 DTV Monitor Quick Start User Manual. -
Page 122: Decode
The Select Player fields show the location and setting of the VideoLAN VLC video and audio player installed on the RUI PC. (Installation of the VideoLAN VLC player is described in the MTM400A and RFM300 DTV Monitor Quick Start User Manual. - Page 123 Preferences Configuration Streaming Control pane If the Leave the MTM400A... check box is selected, and if the VLC player or the RUI is closed, any stream that is playing will continue to be played out of the DTV instrument. It is your responsibility to stop the traffic when it is no longer needed.
-
Page 124: Interface Card Configuration
Each configuration setup can be allocated a preset name. The test results and readings displayed in the Interface view for each of the interface cards are described. (See page 2-40.) 3–34 MTM400A and RFM300 DTV Monitors Technical Reference... -
Page 125: Configuring An Interface Card
(bolded) configuration and allocate a name beginning with the word "Preset". 4. If required, modify the allocated name in the Preset Name Value field of the Selected Preset area. MTM400A and RFM300 DTV Monitors Technical Reference 3–35... - Page 126 4. Click Apply to activate the highlighted preset. If you click OK, the highlighted preset will be activated and the dialog box will close. 5. Click OK to close the dialog box. 3–36 MTM400A and RFM300 DTV Monitors Technical Reference...
-
Page 127: Ip Interface Configuration
The following configuration settings are available for the GbE interface card. (See Figure 3-23.) Figure 3-23: GbE Configure Interface dialog box Preset Name The name allocated to a preset interface configuration setup. MTM400A and RFM300 DTV Monitors Technical Reference 3–37... - Page 128 Active IPv6 only - If you select this option, complete only the IPv6 Addressing fields. Active (IPv4 and IPv6) - If you select this option, complete all of the IPv4 Address and IPv6 Addressing fields. 3–38 MTM400A and RFM300 DTV Monitors Technical Reference...
- Page 129 Null packets are inserted into the stream to achieve a constant bit rate output. The result can be recorded and played back with the timing preserved. VBR Detection: Enhances VBR detection. MTM400A and RFM300 DTV Monitors Technical Reference 3–39...
- Page 130 Destination: Enter the destination port address to filter. Input port number in integers between 0 and 65535. Protocol: Select the session protocol: Don’t Care, UDP (User Datagram Protocol), or RTP (Real time Transport Protocol). 3–40 MTM400A and RFM300 DTV Monitors Technical Reference...
-
Page 131: Figure 3-24: Single Subscription Mode
Selecting the single subscription option, displays the Edit Current Subscription edit button. Use the settings in the Edit Current Subscription dialog box to identify the multicast protocol to be used, IGMP (IPv4) (Internet Group Management MTM400A and RFM300 DTV Monitors Technical Reference 3–41... -
Page 132: Figure 3-25: Multicast Subscription Mode
Multicast Database and IP Traffic. The multicast database lists the sources of traffic sessions that are available on the network. The IP traffic table lists the sessions available from the sources that have been joined. 3–42 MTM400A and RFM300 DTV Monitors Technical Reference... - Page 133 Add Current Subscription dialog box must be used to create a new subscription; this can then be edited. The Add dialog box is identical in contents to the Edit Current Subscription dialog box. MTM400A and RFM300 DTV Monitors Technical Reference 3–43...
- Page 134 Session Alias column. For adding multiple aliases it is recommended to download the Session Aliases list for manual editing in a text or XML editor. This can then be uploaded to overwrite the previous list. 3–44 MTM400A and RFM300 DTV Monitors Technical Reference...
-
Page 135: Rf Interface Configuration
SNR, but at the expense of receiver sensitivity. So for general purpose monitoring where the input signal may vary over a wide range, typically -75 dBm and lower, high sensitivity mode is preferred. MTM400A and RFM300 DTV Monitors Technical Reference 3–45... -
Page 136: 8Psk Interface Settings
LNB Power. The 8PSK/QPSK interface card incorporates a regulated power supply for control of a LNB (Low Noise Block) or similar equipment. The supply voltage, using the drop-down dialog box, can be set to Off (default), 13 V, or 18 V. 3–46 MTM400A and RFM300 DTV Monitors Technical Reference... -
Page 137: Qpsk (L-Band) Settings
Viterbi Rate. Select the code rate from the drop-down list: 1/2; 2/3; 3/4; 5/6; 6/7; 7/8. It might be overwritten if the Viterbi Rate Auto selection is enabled. Symbol Rate (MS/s). Symbol rate value in mega symbols per second. MTM400A and RFM300 DTV Monitors Technical Reference 3–47... -
Page 138: Qam (Annex A And C) Settings
Normal is the default setting and is recommended for most applications. AFC Range. Two carrier recovery ranges are available: Normal and Wide. In Normal mode, the range is approximately "150 kHz. In Wide mode, the range is 3–48 MTM400A and RFM300 DTV Monitors Technical Reference... -
Page 139: Qam (Annex B2) Settings
Normal mode is recommended for general use. Equalization Range. The channel equalizer can be configured to give a long equalization range, at the expense of equalizer resolution, or, in normal mode, MTM400A and RFM300 DTV Monitors Technical Reference 3–49... -
Page 140: 8Vsb Settings
Tuner Phase Noise. Normal and High. This control modifies the carrier loop bandwidth to allow the acquisition of noisy carriers. Normal mode is recommended for general use. Signal Detection. NTSC (National Television Standards Committee) and VSB (Vestigial Side Band). 3–50 MTM400A and RFM300 DTV Monitors Technical Reference... -
Page 141: Channel Polling
The results of the simultaneously monitored session tests are displayed in the Information screen. The results of the user-defined sequential tests are displayed in the Polling screen. Polling Setup Setting up channel polling is described in the following paragraphs: MTM400A and RFM300 DTV Monitors Technical Reference 3–51... - Page 142 The Interface Settings dialog box is modal. You cannot open any other windows while it is open. GbE Interface Card Setup An alternative method, useful for setting up preset configurations on a GbE interface card, is as follows: 3–52 MTM400A and RFM300 DTV Monitors Technical Reference...
-
Page 143: Figure 3-28: Polling Overview Screen (Example)
When the Generate Script button is clicked, the Generate Polling Script dialog box is displayed. Set the Dwell time and the Acquire time and click OK. 3. Click the Start/Resume button to start polling. MTM400A and RFM300 DTV Monitors Technical Reference 3–53... -
Page 144: Polling Screen
Channel Polling, Channels to be polled can also be defined as part of the configuration file, see MTM400A and RFM300 DTV Monitor Test Parameter and Configuration File Technical Reference. Figure 3-29: Stream view - Polling screen Error states are maintained (remembered), even when another channel is being polled. - Page 145 The generated polling script accounts for the interface card that is present and all the currently defined preset card configurations. The script defaults to spending 60 seconds interrogating each preset and allowing 15 seconds settling time at the start of each channel change. MTM400A and RFM300 DTV Monitors Technical Reference 3–55...
- Page 146 Channel Polling 3–56 MTM400A and RFM300 DTV Monitors Technical Reference...
-
Page 147: Reference
Reference... -
Page 149: Event Log
At this point the entry will be lost, the view will return to the most recent entries at the top of the screen, and automatic scrolling will start again. MTM400A and RFM300 DTV Monitors Technical Reference 4–1... -
Page 150: Pinning The Event Log
Export the log by selecting the Export icon or Export Log from the context menu. Select the format in which the log file is to be saved, either xml or csv, and a location for the file. 4–2 MTM400A and RFM300 DTV Monitors Technical Reference... -
Page 151: Color Coding Events
HSB (Hue, Saturation, Brightness) or RGB (Red, Green, Blue) terms by selecting the appropriate tab and entering the required values. 3. Select OK. All events of the same type are now highlighted in the selected color. MTM400A and RFM300 DTV Monitors Technical Reference 4–3... -
Page 152: Figure 4-2: Event Log - Color Dialog Box
The color-coding on a single event type can be removed by selecting Reset Color from the Event Log context menu. Color-coding can be removed from all event types by selecting Reset All Colors from the context menu. Figure 4-2: Event log - Color dialog box 4–4 MTM400A and RFM300 DTV Monitors Technical Reference... -
Page 153: Chart Views And Bit Rates
The bit rate bars are scaled so that all bars are displayed relative to the one with the highest bit rate. Column widths can be adjusted by dragging the line dividing the column headers to the left or right. MTM400A and RFM300 DTV Monitors Technical Reference 4–5... -
Page 154: Error Status
A range bar indicates the variation of bit rate in each program or PID. (See Figure 4-5.) The ends of the bar show the maximum and minimum values of the bit rate since monitoring started. Figure 4-5: Bar chart range bar 4–6 MTM400A and RFM300 DTV Monitors Technical Reference... -
Page 155: Bit Rate Limits
You can highlight the program or PID and then select Set Bit Rate Limits... from the context menu and to open the dialog box. (See Figure 4-6.) (See Figure 4-7.) Figure 4-6: Set Bit Rate Limits context menu MTM400A and RFM300 DTV Monitors Technical Reference 4–7... -
Page 156: Figure 4-7: Set Bit Rate Limits Dialog Box
Stream Occupancy test. This can be found under the Other tab in the Tests view. The Bit Rate Limits of all programs in a stream can be disabled and reset by selecting the Clear Bit Rate Limits (All PIDs) from the context menu. 4–8 MTM400A and RFM300 DTV Monitors Technical Reference... -
Page 157: Pie Charts
The maximum and minimum values are not shown. If a segment label is hidden at the edge of the window, click on a segment to display the label in full. MTM400A and RFM300 DTV Monitors Technical Reference 4–9... -
Page 158: Historical Multiplex Graph
You can display trend graphs of the programs in the transport stream using the historical multiplex icon. This graph displays stacked program bit rates over a period that you have selected from the Time period drop-down list. Figure 4-9: Historical multiplex graph 4–10 MTM400A and RFM300 DTV Monitors Technical Reference... -
Page 159: Graph Management
The phrase "Settling Time" will be displayed briefly in the graph area while the necessary data is gathered. Graphs may occasionally display discontinuities; however, the underlying testing process is continuous. MTM400A and RFM300 DTV Monitors Technical Reference 4–11... -
Page 160: Cursor Data And Control
The values displayed above the graphs (maximum, minimum, mean and standard deviation) are calculated for all of the data that is received while the node is 4–12 MTM400A and RFM300 DTV Monitors Technical Reference... -
Page 161: Figure 4-11: Graph Cursors
Graph Management highlighted. Data for the selected cursor position is displayed in the Data at Cursor panel. Figure 4-11: Graph cursors MTM400A and RFM300 DTV Monitors Technical Reference 4–13... -
Page 162: Graph Menu And Toolbar
All graphs can be opened by selecting Add All Graphs from the same menu. Each graph type can only be displayed once. 4–14 MTM400A and RFM300 DTV Monitors Technical Reference... -
Page 163: Out Of Range Indicators
Graph Controls Right-clicking in a graph displays a context menu that allows you to control the appearance of the graph. The controls that appear vary depending on the type of graph selected. MTM400A and RFM300 DTV Monitors Technical Reference 4–15... - Page 164 Uses a logarithmic scale for the summary bars. This setting applies to 8VSB interfaces only. Toggles the use of a logarithmic scale for the summary bars shown at the bottom of the 8VSB Symbol Distribution graph. 4–16 MTM400A and RFM300 DTV Monitors Technical Reference...
-
Page 165: Miscellaneous
Table Column Configuration Most of the views in tabular form allow you to configure the column layout. The layout will be remembered between sessions. MTM400A and RFM300 DTV Monitors Technical Reference 4–17... - Page 166 Individual column widths can also be adjusted by dragging the separator between column headers. 4–18 MTM400A and RFM300 DTV Monitors Technical Reference...
-
Page 167: Context Menus
Allows editing of the selected Test or Test Group’s parameters Enable Enables the selected test and all of its subtests Enable All Tests Enables all the tests in the Tests tree Enable Listed Tests Enables only the tests in the list MTM400A and RFM300 DTV Monitors Technical Reference 4–19... - Page 168 Reset All Range Bars Resets the minimum and maximum range indicators (Range Bars) shown on the PID Group Summary Table for each PID Group Reset All Tests Resets all previously failed tests (amber) to green 4–20 MTM400A and RFM300 DTV Monitors Technical Reference...
- Page 169 Switches to the SI/PSI tab and selects the Program’s PMT Table node in the Tables tree View this PID in PIDs tree Switches to the PIDs tab and selects this PID in the PIDs tree MTM400A and RFM300 DTV Monitors Technical Reference 4–21...
- Page 170 Zooms into the graph by 25%. Holding down the Shift key locks the Y axis, holding down the Ctrl key locks the X axis Zoom Out Zooms out of the graph by 25% 4–22 MTM400A and RFM300 DTV Monitors Technical Reference...
-
Page 171: Maintenance
Maintenance... -
Page 173: Preventative Maintenance
There are older version interface cards that were available with the MTM400 monitor; those interface cards will operate properly if they are installed in the MTM400A monitor. The following procedure includes instructions for removing or replacing those older version interface cards. -
Page 174: Figure 5-1: Removing The Instrument Cover
Remove the Instrument 1. Remove the 21 cover retaining screws and set them aside. (See Figure 5-1.) Cover 2. Lift the cover clear of the instrument. Figure 5-1: Removing the instrument cover 5–2 MTM400A and RFM300 DTV Monitors Technical Reference... - Page 175 QAM (Annex A), QAM (Annex B1), QAM (Annex C), or QPSK (L-Band, old version) interface card. c. Disconnect the eight-wire power cable from the connector labeled J7 on the interface card. d. Proceed to step 9. MTM400A and RFM300 DTV Monitors Technical Reference 5–3...
-
Page 176: Table 5-1: Qam (Annex A), Qam (Annex B1), Qam (Annex C), And Qpsk (L-Band, Old Version) Card
(serializer) Miniature coaxial O/P A on TS Processor card Data and control (serializer) Figure 5-2: QAM (Annex A), QAM (Annex B1), QAM (Annex C), and QPSK (L-Band, old version) interface card location 5–4 MTM400A and RFM300 DTV Monitors Technical Reference... -
Page 177: Location
Maintenance Figure 5-3: (See Figure 5-2.)QAM (Annex B2), 8PSK/QPSK, 8VSB, and COFDM interface card location MTM400A and RFM300 DTV Monitors Technical Reference 5–5... -
Page 178: Figure 5-4: Gbe Interface Card Installation
QAM (Annex B2), 8PSK/QPSK, 8VSB, or COFDM interface card. c. Disconnect the eight-wire power cable from the connector labeled JR1 on the interface card. d. Proceed to step 9. 5–6 MTM400A and RFM300 DTV Monitors Technical Reference... -
Page 179: Table 5-2: Qam (Annex B2), 8Psk/Qpsk, 8Vsb, And Cofdm Interface Card Connectors
Leave the ribbon cable connected to the TS Processor card if your are going to install a QAM (Annex B2), 8PSK/QPSK, 8VSB, or COFDM interface card. c. Disconnect the eight-wire power cable from the connector labeled J8 on the interface card. MTM400A and RFM300 DTV Monitors Technical Reference 5–7... -
Page 180: Table 5-3: Gbe Interface Card Connectors
(See Figure 5-7.) Figure 5-5: Retaining screw locations for QAM (Annex A), QAM (Annex B1), QAM (Annex C), and QPSK (L-Band, old version) interface cards 5–8 MTM400A and RFM300 DTV Monitors Technical Reference... -
Page 181: Cards
Maintenance Figure 5-6: Retaining screw locations for QAM (Annex B2), 8PSK/QPSK, 8VSB, and COFDM interface cards MTM400A and RFM300 DTV Monitors Technical Reference 5–9... -
Page 182: Figure 5-7: Retaining Screw Locations For Gbe Interface Card
For QAM (Annex A), QAM (Annex B1), QAM (Annex C), and QPSK (L-Band, old version) interface cards, install the four retaining screws in the card and install the three retaining screws in the rear panel. (See Figure 5-5.) 5–10 MTM400A and RFM300 DTV Monitors Technical Reference... -
Page 183: L-Band, Old Version) Interface Cards
Connect the eight-wire power cable from P1 on the interface card to J7 on the Power Distribution card. Figure 5-8: Cable connections for QAM (Annex A), QAM (Annex B1), QAM (Annex C), and QPSK (L-Band, old version) interface cards MTM400A and RFM300 DTV Monitors Technical Reference 5–11... -
Page 184: Cards
J750 on the TS Processor card. (See Figure 5-10.) Connect the eight-wire power cable from J8 on the interface card to J7 on the Power Distribution card. 5–12 MTM400A and RFM300 DTV Monitors Technical Reference... -
Page 185: Figure 5-10: Cable Connections For Gbe Interface Card
Before the Interface card can be used, it must be selected through the user interface and an input must be provided. Refer to the Interface Card Configuration for instructions on how to configure the interface card. (See page 3-34.) MTM400A and RFM300 DTV Monitors Technical Reference 5–13... -
Page 186: Battery Maintenance
NOTE. The following precautions must be observed when replacing and handling the batteries: Batteries must be replaced only with the correct Tektronix part. (Refer to the MTM400A and RFM300 Specifications and Performance Verification Technical Reference.) Both batteries must always be replaced. -
Page 187: Repacking For Shipment
Management for instructions on how to restore the configuration settings. (See page 3-12.) Repacking for Shipment If an instrument is to be shipped to a Tektronix field office for repair, attach a tag to the instrument showing the following: Owner’s name and address Serial number Description of the problem(s) encountered and/or service required. - Page 188 (and its supporting packaging material) or in such a way as to provide similar protection. To prevent the loss of your instrument’s warranties, Tektronix strongly recommends that you use an DTV monitor shipping carton (that is in good condition) when you ship your instrument to another location or when you return the instrument to a Tektronix service center for repair.
- Page 189 Index...
- Page 191 8PSK, 3-46 Configuration, 3-1 8VSB, 3-50 device, 3-22 Overview, COFDM, 3-45 interface, 3-34 MTM400A, 1-1 L-band, 3-47 preferences, 3-29 QAM (A&C), 3-48 slot management, 3-12 QAM (BII), 3-49 stream, 3-1 QPSK, 3-47 MTM400A and RFM300 DTV Monitors Technical Reference Index-1...
- Page 192 Recording configuration, 3-4 all tests node, 2-24 Repacking, 5-15 PID nodes, 2-26 RUI, 1-1 test nodes, 2-25 Remote User Interface, 1-1 Thumbnails, 2-6 Time settings configuration, 3-26 Time zones, 3-26 Safety Summary, viii Index-2 MTM400A and RFM300 DTV Monitors Technical Reference...
Need help?
Do you have a question about the MTM400A and is the answer not in the manual?
Questions and answers