
Related Manuals for Tektronix PRISM MPI2-RACK-MD


Summary of Contents for Tektronix PRISM MPI2-RACK-MD
- Page 1 PRISM MPI2-RACK-MD Extended Touch Display with Rack Cabinet Installation and Safety Instructions *P071364100* 071-3641-00...
- Page 3 PRISM MPI2-RACK-MD Extended Touch Display with Rack Cabinet Installation and Safety Instructions Register now! Click the following link to protect your product. ► www.tek.com/register www.tek.com 071-3641-00...
- Page 4 Copyright © Tektronix. All rights reserved. Licensed software products are owned by Tektronix or its subsidiaries or suppliers, and are protected by national copyright laws and international treaty provisions. Tektronix products are covered by U.S. and foreign patents, issued and pending. Information in this publication supersedes that in all previously published material.
- Page 5 Warranty Tektronix warrants that this product will be free from defects in materials and workmanship for a period of one (1) year from the date of shipment. If any such product proves defective during this warranty period, Tektronix, at its option, either will repair the defective product without charge for parts and labor, or will provide a replacement in exchange for the defective product.
- Page 6 2. Transfer the Program to any person or organization outside of Customer or the corporation of which Customer is a part without the prior written consent of Tektronix, except in connection with the transfer of the equipment within which the programs are encoded or incorporated;...
- Page 7 The license granted herein is effective upon acceptance by Customer, and shall remain in effect until terminated as provided herein. The license may be terminated by Customer at any time upon written notice to Tektronix. The license may be terminated by Tektronix or any third party from whom Tektronix may have obtained a respective licensing right if Customer fails to comply with any term or condition and such failure is not remedied within thirty (30) days after notice hereof from Tektronix or such third party.
-
Page 9: Table Of Contents
Environmental considerations ....................PRISM MPI2-RACK-MD Installation and Safety Instructions... - Page 10 Table of Contents PRISM MPI2-RACK-MD Installation and Safety Instructions...
-
Page 11: Important Safety Information
To safely perform service on this product, additional information is provided at the end of this section. (See page v, Service safety summary.) The MPI2-RACK-MD is designed only for use with the Tektronix MPI2, do not use this product for any other purpose. General safety summary Use the product only as specified. - Page 12 Avoid improper or prolonged use of keyboards, pointers, and button pads. Improper or prolonged keyboard or pointer use may result in serious injury. Be sure your work area meets applicable ergonomic standards. Consult with an ergonomics professional to avoid stress injuries. Use only the Tektronix rackmount hardware specified for this product. PRISM MPI2-RACK-MD Installation and Safety Instructions...
-
Page 13: Service Safety Summary
(This symbol may also be used to refer the user to ratings in the manual.) The following symbol(s) may appear on the product: PRISM MPI2-RACK-MD Installation and Safety Instructions... -
Page 14: Preface
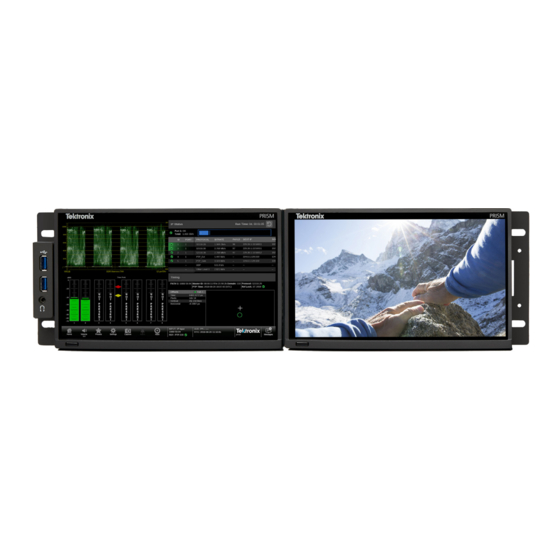
The touch display extends the functionality of the MPI2 product by providing an additional full HD application tile. The additional tile supports several different monitoring applications, including picture, trace, audio, and status. The PRISM MPI2-RACK-MD rack cabinet is 19 inches wide and comes with a USB/Headphone connector on the rack ear. -
Page 15: Conventions Used In This Manual
Download this manual link. See the image below for an example of the location. NOTE. The first seven numbers of the P/N are the Tektronix part number from the product documentation table. The last two numbers are the revision level number. - Page 16 Preface viii PRISM MPI2-RACK-MD Installation and Safety Instructions...
-
Page 17: Installation
(See page 2, Accessories.) 3. Remove the PRISM MPI2-RACK-MD from the shipping cartons, and then check that the extended touch display with rack cabinet has not been damaged in transit. Prior to shipment the items are thoroughly inspected for mechanical defects. -
Page 18: Accessories
When ordering the A99 option, it is the responsibility of the end user to ensure that a certified power cord, for the country or region it is installed, is used with this module. CAUTION. To reduce risk of fire and shock, use the certified power cord provided with the product. PRISM MPI2-RACK-MD Installation and Safety Instructions... -
Page 19: Operating Requirements
To ensure proper airflow, there must be at least 2 inches of clearance on both sides of Instrument the instrument, at least 2 inches of clearance from the rear of the instrument, and at least a 1/2 inch of clearance from the top of the instrument. PRISM MPI2-RACK-MD Installation and Safety Instructions... - Page 20 Table 3: Extended touch display physical characteristics Parameter Description Dimensions Height 13.72 cm (5.4 in.) Width 21.84 cm (8.6 in.), includes bezel Depth 11.18 cm (4.4 in.), includes bezel Weight 1.59 kg (3.5 lbs.) Shipping 3.57 (7.87 lbs.) PRISM MPI2-RACK-MD Installation and Safety Instructions...
-
Page 21: Rear Panel Connectors
USB B port. A USB 3.0 port for connecting to a PRISM waveform monitor for touchscreen operation. USB A ports. Currently not enabled. Do not make connections to these ports. Headphone jack. Currently not enabled. Do not make connections to this port. PRISM MPI2-RACK-MD Installation and Safety Instructions... -
Page 22: Equipment Rack Installation
Phillips or PoziDriv-driver tip for #2 size screw heads T-10 TORX tip Used for removing instrument screws. TORX-driver bit for T-10 size screw heads. T-15 TORX tip Used for removing instrument screws. TORX-driver bit for T-10 size screw heads. PRISM MPI2-RACK-MD Installation and Safety Instructions... - Page 23 WASHER; SHOULDER & RETAINER, 0.195 ID X 0.195 THK, PLASTIC, TV GRAY, 6.575 OD 212-0591-XX SCREW, MACHINE; 10-32 X 0.750 OVAL HEAD, POZI Guide bracket 407-3752-XX BRACKET, EXT; 2.5 X 8.06 X 0.06, STEEL; SAFETY CONTROLLED Figure 2: MPI2-RACK-MD parts diagram PRISM MPI2-RACK-MD Installation and Safety Instructions...
- Page 24 6. Repeat steps 5 and 6 to install the second guide bracket to the other side of the cabinet. 7. Tighten all of the attaching screws that were left loose in the previous steps. Figure 3: Adjusting the handle brackets and installing the guide brackets PRISM MPI2-RACK-MD Installation and Safety Instructions...
- Page 25 Connect signal and Ethernet cables to the instrument as needed. See the PRISM MPI2 Installation and Safety Instructions manual for information about making signal connections to the instrument. e. Connect the power cable to the instrument. (See page 11, Power cord installation.) PRISM MPI2-RACK-MD Installation and Safety Instructions...
- Page 26 Connect the power cable to the extended touch display. (See page 11, Power cord installation.) Figure 5: Connecting the cabinet USB and audio cables (use any USB port) Figure 6: Connect the PRISM waveform monitor to the extended touch display PRISM MPI2-RACK-MD Installation and Safety Instructions...
-
Page 27: Power-On And Power-Off Procedures
CAUTION. To minimize the risk of damage to the module, it is strongly recommended that the power cord be connected to the module before the power cord is connected to the AC power source. PRISM MPI2-RACK-MD Installation and Safety Instructions... - Page 28 2. To completely remove power from the module, disconnect the power cord from each module. The power cord has a locking mechanism to keep it attached to each module. Push the button on the cord housing to release the locking mechanism. PRISM MPI2-RACK-MD Installation and Safety Instructions...
-
Page 29: Operation
For example, if you change the USB port connections on the back of the MPI2 instrument. Figure 7: Extended display mode configuration PRISM MPI2-RACK-MD Installation and Safety Instructions... -
Page 30: Compliance Information
Australia / New Zealand EMC Complies with the EMC provision of the Radiocommunications Act per the following standard, in accordance with ACMA: PRISM MPI2-RACK-MD Installation and Safety Instructions... -
Page 31: Safety Compliance
Use – Part 1: General Requirements. Additional compliances IEC 61010-1. Safety Requirements for Electrical Equipment for Measurement, Control, and Laboratory Use – Part 1: General Requirements. Equipment type Test and measuring equipment. Safety class Class I – grounded product. PRISM MPI2-RACK-MD Installation and Safety Instructions... - Page 32 Only mains power supply circuits have an overvoltage category rating. Only measurement circuits have a measurement category rating. Other circuits within the product do not have either rating. Mains overvoltage category rating Overvoltage category II (as defined in IEC 61010-1). PRISM MPI2-RACK-MD Installation and Safety Instructions...
-
Page 33: Environmental Considerations
This symbol indicates that this product complies with the applicable European Union requirements according to Directives 2012/19/EU and 2006/66/EC on waste electrical and electronic equipment (WEEE) and batteries. For information about recycling options, check the Tektronix Web site (www.tek.com/productrecycling). PRISM MPI2-RACK-MD Installation and Safety Instructions...
Need help?
Do you have a question about the PRISM MPI2-RACK-MD and is the answer not in the manual?
Questions and answers