Advertisement
Quick Links
Advertisement

Subscribe to Our Youtube Channel
Related Manuals for VTech ErisStation VCS702


Summary of Contents for VTech ErisStation VCS702
- Page 1 ErisStation Conference Phone with Two Wireless Mics busines s phones.v tec h.c om...
- Page 2 VTech product. Before using this product, please read on page i of this manual. This manual includes the information and procedures necessary to install and operate your new VTech product. Please review this manual thoroughly to ensure proper installation and operation of this innovative and feature rich VTech product.
- Page 3 When using your ErisStation Conference Phone, basic safety precautions should always be followed to reduce the risk of fire, electric shock and injury to persons, including the following: Read and understand all instructions. Follow all warnings and instructions marked on the product. Unplug this product from the wall outlet before cleaning.
- Page 4 in such an environment could create a fire or explosion. Such environments might include: medical use of oxygen without adequate ventilation; industrial gases (cleaning solvents; gasoline vapors; etc.); a leak of natural gas; etc. Only put the wireless mic next to your mouth when it is in normal talk mode. The power cables are intended to be correctly oriented in a vertical or floor mount position.
- Page 5 3-way conference ........17 Call waiting ..........18 About ErisStation Conference Phone ..1 Paging ..........18 Parts checklist ........1 Chain dialing ........19 Connect base unit ........2 About the phonebook ......20 Install battery to the wireless mic ..3 Add a phonebook entry .......20 Before use ..........4 Review phonebook entries ....21 Base unit overview (front) ......5 Alphabetical search ......21...
- Page 6 Battery ..........30...
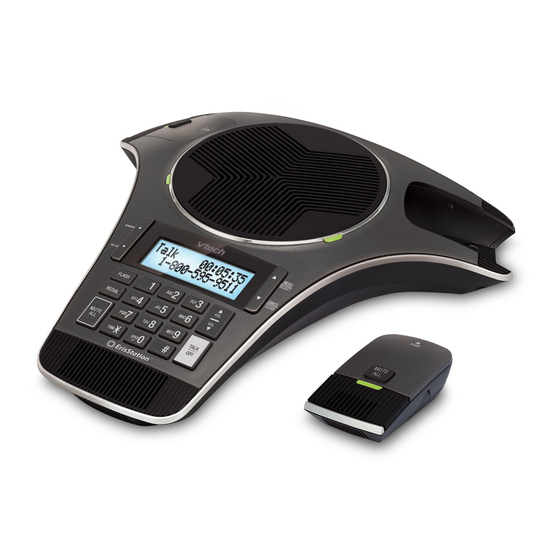
- Page 7 The ErisStation Conference Phone with is designed for use in office settings. It consists of a base unit and two wireless mics, enabling participants of a meeting room to deliver clear conversation in a phone conference. Your conference phone contains the following items. Save your sales receipt and original packaging in the event warranty service is necessary.
- Page 8 Connect the base unit as shown below. V C S 7 0 2 T E L LI N E The DC power cable is already connected to the base unit. Plug the other end into the jack of the power adapter. Route the cord through the slots. Plug one end of the telephone line cord into the jack of the power adapter, and plug the other end into a wall jack.
- Page 9 1. Plug the battery connector securely into the socket inside the battery compartment. Insert the battery with the label facing up onto the battery compartment. 2. Slide the battery door until it clicks into place. 3. Place the wireless mic onto the charging cradle until it is flush. The status indicator on the wireless mic turns orange when charging, and turns off when the wireless mic is fully charged.
- Page 10 Lift the wireless mics from the charging cradles, and then put them on the table. After that, press . If you hear a dial tone, and see that the status indicators turns green on both the base unit and the wireless mics, the installation is successful. •...
- Page 11 • Indicate the system status. See also page 9. • Press to show the menu. • Press to select an item, or save an entry or setting in a menu. • While in a menu, press to return to the previous menu. •...
- Page 12 • Press to scroll through the menu, phonebook, or call log. • Press to adjust the ringer volume. • During a call, press to adjust the listening volume. • Press to make, answer, or end a call. • Press to enter numbers or characters. •...
- Page 14 • Functions as an extended microphone of the base unit during a call. • Indicates the system status. See also page 9. • During a call, press to mute or end mute all microphones in the system.
- Page 15 Power up • Green for about two seconds. On a call • Green during a call. • Red when the system is muted during a call. Incoming call • Flash green when there is an incoming call. Power up • Red for about two seconds.
- Page 16 You can enter the menu to change the settings. In the ringers menu, you can adjust the ringer volume and select the ringer tones for incoming calls. In the set date/time menu, you can set the date and time which will be displayed on the base unit when idle, or showing caller ID information.
- Page 17 You can choose from different ringer tones on the base unit. Press when the base unit is not in use. Press to scroll to , and then press Press to scroll to , and then press The base unit displays with the current setting.
- Page 18 You can select English, French, or Spanish to be used in the base unit screen display. Press when the base unit is not in use. Press to scroll to , and then press Press to choose Ñ Press to choose , or , and then press Ñ...
- Page 19 You can adjust the key tone volume or turn the key tone off for the base unit. If the key tone is on, the base unit beeps with each key press. If the key tone is off, there are no beeps when you press the keys. Press when the base unit is not in use.
- Page 20 If you dial local calls using only seven digits (area code not required), you can program your home area code so that when you receive a call within your local area, the telephone number is automatically stored in the call log without the area code. Press when the base unit is not in use.
- Page 21 You can reset the base unit to the default settings. Once the base unit is reset, all your customized settings and redial entry will be deleted. All the phonebook records, call log entries and speed dial entries will remain. The default settings are listed below. Speakerphone volume Volume 6 Ringer volume...
- Page 22 Press on the base unit. When you hear a dial tone, dial the number with the dialing keys ( - , , or ). The screen displays the elapsed time as you talk (in hours, minutes, and seconds). During a call, lift a wireless mic from the base unit charging cradle, and then put it on the table.
- Page 23 The mute function allows you to hear the other party but the other party cannot hear you. • During a call, press on the base unit or a wireless mic. The base unit displays . The status indicators on the base unit and wireless mics turn red. All microphones in the system are muted.
- Page 24 Public switched telephone network (PSTN) provides traditional landline phone service to residences and many other establishments. Private branch exchange (PBX) is a private telephone network used within a company, It allows a single access number to provide several lines to outside callers while providing a range of external lines to internal callers or staff.
- Page 25 Use this feature to initiate a dialing sequence from numbers stored in the phonebook, call log, or the last number dialed while you are on a call using the base unit. Chain dialing can be particularly useful when you are required to enter a PIN code to access a conference call.
- Page 26 The phonebook can store up to 50 entries with up to 30 digits for each phone number and 15 characters for each name. • When you access the phonebook without an entry, the base unit displays • When the phonebook is full and you try to save an entry, the base unit displays •...
- Page 27 Phonebook entries displays in alphabetical order. Press when the base unit is not in use. The base unit displays the first entry in the phonebook. Press to browse through the phonebook. 1. Press when the base unit is not in use. 2.
- Page 28 Search for the desired entry in the phonebook (see on page 21). When the desired entry displays, press Press again to choose The base unit displays . Use the dialing keys to edit the number. • Press to move the cursor to the left or right. •...
- Page 29 Press when the base unit is not in use. Press again to select Press to scroll to , and then press . The base unit displays Press to confirm. The base unit displays , and then returns to previous menu. You hear a confirmation tone. You can copy up to 10 of your phonebook entries to the speed dial locations ( and - ).
- Page 30 Press when the base unit is not in use. Press again to select Press to scroll to , and then press Press , , or a dialing key ( or - ) to choose an occupied speed dial location, and then press twice.
- Page 31 This product supports caller ID services offered by most telephone service providers. Depending on your service subscription, you may see the caller’s number, or the caller’s name and number after the first or second ring. Caller lD allows you to see the name, number, date and time of calls.
- Page 32 Review the call log to find out who called, to return the call, or to copy the caller’s name and number into your phonebook. Press when the base unit is not in use. 2. Press to browse through the call log. Press when the base unit is not in use.
- Page 33 Search for the desired call log entry (see on page 26). When the desired entry displays, press on the base unit to dial. Search for the desired call log entry (see on page 26). When the desired entry displays, press twice.
- Page 34 Your wireless mics are pre-registered. If for some reason, you want to purchase replacement wireless mics ( ), visit our website at or call . In Canada, call . You should register your new wireless mics to the base unit following the instructions below.
- Page 35 You may also deregister manually a wireless mic that you not going to use for some time. Remove battery from the wireless mic, and then press and hold on the wireless mic. While you press and hold , insert battery back into the wireless mic (see page 3).
- Page 36 While the wireless mic is in use (talking*) Up to 12 hours While not in use (standby**) Up to 70 hours * Operating times vary depending on your actual use and the lifespan of the battery. ** The wireless mic is not charging or in use. •...
- Page 37 If you have difficulty with your conference phone, please try the suggestions below. For customer service, visit our website at or call . In Canada, call After powering up the base unit with a correct setup (page 2), the LCD display will show the default name of the base, “...
- Page 38 • Make sure there is a dial tone before use (page 4). • Make sure the ringer volume of the base unit is not set to off (page 10). • Make sure the DC power cable, telephone line cord, AC power cord, and the power adapter are plugged in properly (page 2).
- Page 39 If that still does not work, the wireless mic might have lost its connection to the base unit. Re-register all the wireless mics with the base unit (page 28). Remove the wireless mic from the charging cradle. Press again. The status indicator under the button should turn green.
- Page 40 The efficiency of the battery might have been reduced after being used for some time. • Make sure the wireless mic is placed in the charging cradle correctly (page 3) when charging. • Remove and install the battery again (page 3) and use it until the battery is fully depleted, and then charge the wireless mic in charging cradle for 8 hours.
- Page 41 • Disconnect the base unit from the telephone wall jack. Plug in a different telephone. If you still hear other calls, the problem is probably in the wiring or telephone/PBX service. Contact your telephone service provider (charges may apply) or PBX system administrator. If you are using a PSTN line, please refer to the details below: •...
- Page 42 Your conference phone contains sophisticated electronic parts, so it must be treated with care. Place the wireless mic down gently. Save the original packing materials to protect your ErisStation Conference Phone if you ever need to ship it. Your ErisStation Conference Phone can be damaged if it gets wet. Do not use the wireless mic outdoors in the rain, or handle it with wet hands.
- Page 43 This equipment has been tested and found to comply with the requirements for a Class B digital device under Part 15 of the Federal Communications Commission (FCC) rules. These requirements are intended to provide reasonable protection against harmful interference in a residential installation. This equipment generates, uses and can radiate radio frequency energy and, if not installed and used in accordance with the instructions, may cause harmful interference to radio communications.
- Page 44 If this equipment is malfunctioning, it must be unplugged from the modular jack until the problem has been corrected. Repairs to this telephone equipment can only be made by the manufacturer or its authorized agents. For repair procedures, follow the instructions outlined under the Limited warranty. If this equipment is causing harm to the telephone network, the telephone service provider may temporarily discontinue your telephone service.
- Page 45 This telephone is set up to comply with the energy-conserving standards right out of the box. These instructions are intended for California Energy Commission (CEC) compliance testing only. When the CEC battery charging testing mode is activated, all telephone functions, except battery charging, will be disabled.
- Page 46 Ne surchargez pas les prises de courant et les rallonges. Débranchez cet appareil de la prise de courant et communiquez avec le département de service à la clientèle de VTech dans les cas suivants : • Lorsque le cordon d’alimentation est endommagé ou écorché.
- Page 47 adéquate. Une flammèche dans un tel endroit pourrait provoquer un incendie ou une explosion. De tels environnements peuvent comprendre: des endroits où l’on utilise de l’oxygène médical sans ventilation adéquate; des gaz industriels (dissolvants de nettoyage, des vapeurs d’essence, etc.); une fuite de gaz naturel, etc.
- Page 48 À Les mêmes caractéristiques qui constituent des avantages pour les téléphones sans fil affichent également des restrictions. Les appels téléphoniques sur les téléphones conférence sans fil sont transmis entre le combiné sans fil et le socle par le biais d’ondes radio; il y a donc la possibilité que vos conversations téléphoniques sans fil soient interceptées par des équipements de réception radio se trouvant dans la portée du combiné...
- Page 49 The manufacturer of this VTech Product warrants to the holder of a valid proof of purchase (“Consumer” or “you”) that the Product and all accessories provided in the sales package (“Product”) are free from defects in material and workmanship, pursuant to the following terms and conditions, when installed and used normally and in accordance with the Product operating instructions.
- Page 50 Product in transit. If the Product failure is not covered by this limited warranty, or proof of purchase does not meet the terms of this limited warranty, VTech will notify you and will request that you authorize the cost of repair prior to any further repair activity.
- Page 51 Frequency control Crystal controlled PLL synthesizer Transmit frequency Wireless mic: 1921.536-1928.448 MHz Base unit: 1921.536-1928.448 MHz Channels Nominal effective Maximum power allowed by FCC and IC. Actual operating range may vary range according to environmental conditions at the time of use. Optimal and minimum Optimal distance between the base unit/wireless mic and the participant: distances...
- Page 52 Designed to fit your home. And your life. VTech Communications, Inc. A member of THE VTECH GROUP OF COMPANIES. VTech is a registered trademark of VTech Holdings Limited. ® ErisStation is a registered trademark of VTech Communications, Inc. Orbitlink Wireless Technology is a trademark of VTech Communications, Inc.
Need help?
Do you have a question about the ErisStation VCS702 and is the answer not in the manual?
Questions and answers