Table of Contents
Advertisement
Advertisement
Table of Contents

Related Manuals for AnyCubic i3 MEGA


Summary of Contents for AnyCubic i3 MEGA
- Page 3 Thank you for choosing ANYcUBIC products. Please read the user manual carefully. Please visit www.anycubic3d.com for more information. Email us on support@anycubic3d.com james@anycubic3d.com technical support. If you experience any issues with this product, or the performance is not what you had expected, please contact us first.
-
Page 4: Safety Instructions
It is recommended to use protection glasses when cleaning/sanding the printed models to avoid small particles contacting eyes. In case of emergency, immediately turn off the ANYcUBIC 3D printer and contact us or consult for professional advice. Never leave the ANYcUBIC 3D printer unattended during operation.。... -
Page 5: Table Of Contents
Contents 1. Product overview ......................1 2. Part list ..........................4 3. Assembly instruction ....................5 4. Leveling ........................... 9 5. Software installation ....................15 5.1 Driver installation ....................15 5.2 Cura Installation ....................17 6. Printing .......................... 26 7. Manual filament change ..................28 8. - Page 6 Technical Specification Printing Technology: FDM (Fused Deposition Modeling) Build Size: 210×210×205 (mm Layer Resolution: 0.05-0.3 mm Positioning Accuracy: X/Y 0.0125mm,Z 0.002mm Extruder Quantity: Single Nozzle/Filament Diameter: 0.4 mm/1.75mm Print Speed: 20~100mm/s (suggested 60mm/s) Travel Speed: 100mm/s Supported Materials: PLA, ABS, HIPS, Wood Temperature Ambient Operating Temperature: 8°C - 40°C...
-
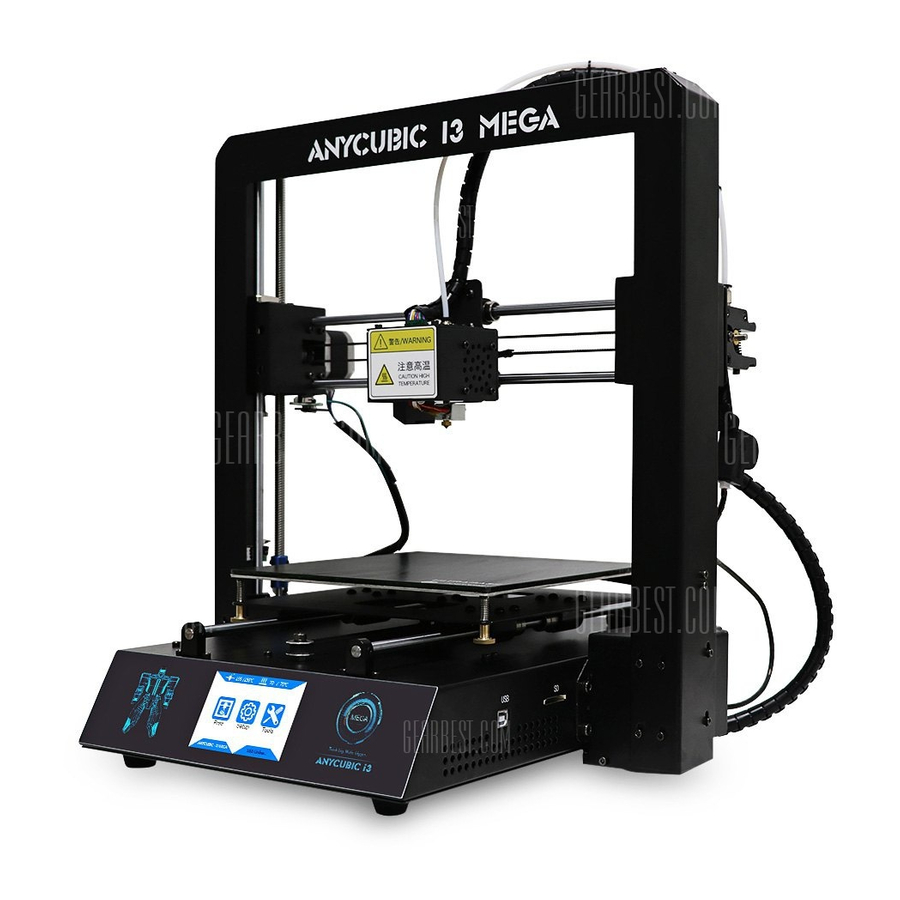
Page 7: Product Overview
1. Product overview ⑴ ⑺ ⑵ ⑶ ⑿ ⑻ ⑷ ⑸ ⑼ ⑽ ⒀ ⑾ ⑹ ⒁ (21) ⒂ (22) ⒃ (23) ⒄ ⒅ ⒆ ⒇ ⑴Frame ⑵Print head ⑶Hotend cooling fan ⑷Nozzle ⑸Model cooling fan ⑹Base ⑺X smooth rods ⑻X end stop ⑼Print platform ⑽Y smooth rods ⑾Touch screen ⑿Filament spool ⒀Spool holder ⒁Z smooth rods ⒂Z lead screw ⒃X motor ⒄Z adjustable nut ⒅Z end stop ⒆Y end stop ⒇... - Page 8 Menu Directory Home Menu Print Setup Tools Home menu Print: enter the print list Setup: enter the setup menu Tools: enter the tools menu (Other information: ①nozzle temperature ②heated bed temperature ③printer status) Print Print: print the selected files in SD card Resume: Resume from outage (only valid for offline print via SD card) (Other information: ①Page up and down ②Refresh the list ③Return to the home menu) Setup...
- Page 9 Temp: Enter the menu to adjust ① E0 (hotend) Temp (170-260°C) ②Bed Temp (0-120°C) Motor: Disable all motors (only valid when machine is not printing) Status: Enter the sub-menu with Print/Pause/Resume icon (only valid for offline print) (Other information: ①Files ②Print Rate ③Time ④Progress ⑤E0 Temp ⑥Bed Temp ⑦ coordinates for X/Y/Z axis ⑧Return to previous menu) Speed: Enter the menu to adjust ①Fan speed (0-100) ②Print Rate (50-999) Return: Return to Home Menu...
-
Page 10: Packing List
2. Packing list Tool kit M5*8 screws SD card SD Card reader Gloves Power cord Tweezer Spool holder ANYcUBIC 3D printer PLA filament (Random color) USB cable Extra hotend Scraper Plier... -
Page 11: Assembly Instruction
3. Assembly instruction Step 1. Unpack and take out the printer and accessories. Wear gloves because the smooth rods and lead screw may be greased in factory. Step 2. Follow ① ② ③ in Fig. 1. Carefully lift the base to fit into the frame and fix them by 8 pieces of M5*8mm hex cap screws. - Page 12 Step 3. Wiring (1) Fig.2, select the correct voltage mode according to your local voltage ratings (110V/220V). The switch is inside the bottom left of the base and 220V is default. Allan keys can be used to move the switch inside. (Figure 2) (2) There are 3 ports with different color (Red/Green/Black) at the bottom right side of the base, and there are 3 different color cable connectors respectively.
- Page 13 (3) Fig. 4, customers may notice there is a ring of zip tie attached just below the plastic ring of the quick connector. Do not cut it off. Only cut this zip tie when swapping or repairing the hotend. (Figure 4) Plastic ring Zip tie Do not cut...
- Page 14 (2) As shown in Fig.6, manually install the filament spool to the spool holder. Pass the filament through the filament sensor. Insert the filament into the extruder and Teflon tubing, but do not fully reach it into the hotend (until preheat the hotend later). Turn this holder out and hook the filament sensor on by magnets on the holder by magnets...
-
Page 15: Leveling
4. Leveling It is essential to level the platform for 3D printer. Please follow procedures below: Step 1. Check and ensure all wirings are OK. Connect the machine to the power outlet by power cord. Switch on the machine. Step 2. As shown in Fig. 7, on Home Menu, click “Tools”-->“Home”-->“Home All”. - Page 16 Step 4. Put a piece of paper onto the print platform, and then manually move the print head and platform back and forth to let the print head travel to the 4 corners and center one by one (①→②→③→④→⑤), as shown in Fig.9. (Avoid nozzle rub against the platform directly without the paper in-between)
- Page 17 (concave or convex) due to many factors in manufacture and usage. ANYCUBIC promise that the flatness of the print platform is in the range of 0~0.2mm variation, means every piece of the platforms has been tested by a 0.2mm feeler...
- Page 18 Customers may use tweezers to carefully remove the extruded filament at the nozzle tip before printing. Step 8. There might be 3 kinds of results for the first layer of the test prints (Fig. 11). Nozzle too close Lack of extrusion Proper nozzle height Good extrusion and adhesion √...
- Page 19 “Stop” on the screen, raise the nozzle (click “Tools”-->“Axis”-->“10”on +Z column), and manually fine tune the corresponding nuts under the platform. Particularly, when “nozzle too high” slowly loosen the corresponding nuts underneath the platform by half circle, while “nozzle too close”, slowly tighten the corresponding nuts underneath by half circle.
- Page 20 ‘tell’ the machine Z axis is getting to zero and stop moving. (Figure 13) Z adjustable nut Therefore, tighten Z adjustable nut by mm if nozzle is lower than the platform , while loosen it by mm if is defined by how much the nozzle is under the platform) nozzle is too high from the platform is defined by how much the nozzle is above the .
-
Page 21: Software Installation
5. Software installation There are two operation mode for ANYCUBIC Mega 3D printer, print offline (via SD card) and print online (controlled by PC via USB). Print offline: After leveling the platform, insert SD card, click “Print” at the Home menu and select a file (gcode file) to print. - Page 22 then follow the steps in Fig. 15 below. ② ① Not installed Right click and choose update ③ ④ Find the directory of CP2102 Click \Desktop\Mega\ Files_Engish_Mega\Driver_CP2102\win ⑤ ⑥ COM3 appears in Ports (Figure 15) After successfully installation, a COM would appear in the Ports of Device Manager, random (as here is COM3), customers will have their own COMx depends on their PC.
-
Page 23: Cura Installation
5.2 Cura Installation ANYCUBIC Mega 3D printer reads Gcode file and prints. It is necessary to convert 3D files (such as stl file) into Gcode files for machine to recognize. Software that convert 3D files into Gcode files is called slicing software. - Page 24 Next, before start Cura for the first time, there will be more settings about the language and machine types, as show in Fig. 17. ② ① ④ ③ (Figure 17) Upon finish, open Cura for the first time, there might be a default robot model appears, customers may click “File”--->“Clear platform”...
- Page 25 5.2.1 Load 3D model into Cura (1) Clear the platform by clicking “File”--->“Clear platform” (2) Load 3D files onto the platform by “File” ---> “Load model file…” . Files with extension such as “STL”, “OBJ”, “DAE” and “AMF” can be loaded. Model in grey means it is outside of the printable area and needs to be moved or scaled to fit in.
- Page 26 (5) Scale: to uniformly scale the model along X/Y/Z dimensions. To disable uniform scaling, click the lock in the lower section of the scaling window. (Fig. 19) (Figure 19) (6) View mode (Fig. 20): to view the model in different ways and helps to spotting issues before print starts.
- Page 27 Suggested “Basic” and “Advanced” setting are shown in Fig. 22. Stay the mouse upon each box and there will be explanation for it. Those parameters are suggested for ANYCUBIC Mega 3D printer to print ANYCUBIC PLA filament. Generally, those settings are also compatible with other brand of PLA, but customers may need to fine tune the parameters to get the best results, for example, customers could try different ‘printing temperature’...
- Page 28 (Figure 22) (3) Plugins It is recommended for new user to leave the plugins as default (i.e. no plugins enabled). Plugins are custom settings which will active at specific point during printing. There are two pre-loaded plugins with Cura: Pause at height and Tweak At Z. More plugins can be found via: http://wiki.ultimaker.com/Category:CuraPlugin As shown in Fig.
- Page 29 “Tweak at Z” would allow custom changes at specified Z height. Customers may decide the Z height or layer counts at which to make a change. Then there are more settings for how you would like to change, such as temperature, fan speed and print speed.
- Page 30 (Figure 24) 5.2.4 Print online by Cura After parameter settings, customer can print online by Cura with USB connection. Click “File”--->“Print…” enter the printing popup window (Fig. 25). (If a simplified version of printing window appears, please click “File” --->“Preferences…” to choose the ‘Pronterface UI’...
- Page 31 Use tweezers to carefully get rid of the pre-extruded filament. Note: If it fails to connect the printer in the popup “Printing window” (in a case that the “Print” icon is gray and unavailable), check with the COMx or Baudrate in “Machine settings”, and re-open the printing window to proceed.
-
Page 32: Printing
6. Printing Here shows the steps of printing offline (via SD card), print online please refer to 5.2.4. 1. Click “Tools”-->“Preheat”-->“Preheat PLA (for example)”, Fig. 26. (Figure 26) 2. After the pre-heat is finished, please click on Home screen “Tools”-->“Filament”--> “Filament in”(Fig. - Page 33 (Figure 29) 5. ANYCUBIC Mega 3D printer equipped with ANYCUBIC Ultra-base (a novel print platform) which could be used for very long time without adding any masking tape, “hair spray” or glue stick. Customers only have to clean it by alcohol or similar after every few prints.
-
Page 34: Manual Filament Change
7. Manual filament change 1. Feed the filament: click via the Home menu: “Tools”--> “Preheat” --> “Preheat PLA (for example)”. After it reaches to the target temperature, press down the handle at the extruder as shown in Fig. 30, and manually push the filament through the Teflon tubing till the hotend and there should be filament melt through the nozzle. -
Page 35: Resume From Outage
8. Resume from outage ANYCUBIC Mega 3D printer allows resume print job after accidently power loss. * This function only valid when print offline (via SD card only). 1. As shown in Fig. 31, in slicing software (i.e. Cura), it is required to place the model at the rear of platform. - Page 36 2. For the first time of using this function, customers are required to add “G5” to the start.gcode, as shown in Fig. 33. Then, save the model as Gcode file to the SD card by “File”--->“Save GCode…”. Highlight (Figure 33) Type G5 3.
- Page 37 Do not move Z axis after power off otherwise resume will be invalid. ANYCUBIC Mega 3D printer supports resume from outage only when print offline This function is developed based on Cura. We could not guarantee this function compatible with other slicing software.
-
Page 38: Trouble Shooting
9. Trouble shooting 1. Motor shaking or abnormal sound ① The corresponding end stop could not be triggered when Home, check the wirings, and inspect any obstacles by manually moving the corresponding axis ② The motor cable are not connected properly, check each connection and then inspect the cable routing for any faults 2. - Page 39 ③ Check if the bed is proper leveled ④ add a brim or raft to the model in slicing software ⑤ Check the bed temperature matches the filament 6. Warping/curling of the printed object ① Check the bed temperature matches the filament ②...
Need help?
Do you have a question about the i3 MEGA and is the answer not in the manual?
Questions and answers