
Subscribe to Our Youtube Channel
Related Manuals for Belling DF951


Summary of Contents for Belling DF951
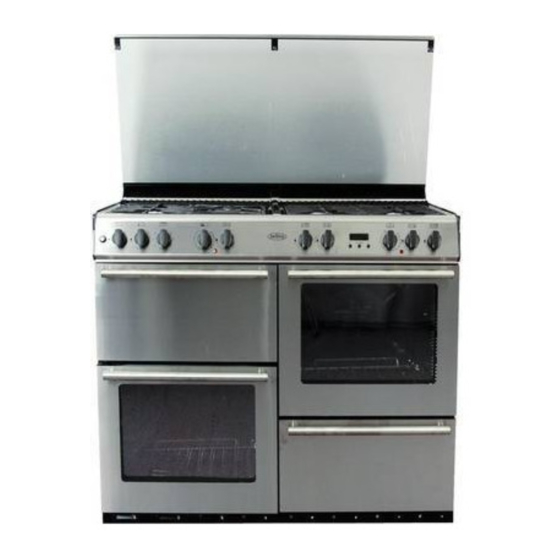
- Page 1 100cm Dual Fuel Range Cooker Gas hob with electric ovens INSTALLATION AND USER INSTRUCTIONS Model: DF951 You must read these instructions prior to using the appliance and retain them for future reference.
- Page 2 IMPORTANT NOTICE Please note the cooling fan fitted to this appliance is an integral part of its safety and functionality. When the appliance is installed care must be taken that the cooling fans perfor- mance is not impeded by any objects coming into contact with it. (Installation pipes, leads etc) Care must also be taken that there is sufficient air flow at the rear of the appliance for the cooling fan to run at its optimum efficiency.
-
Page 3: Table Of Contents
Technical Data ........36 Belling Customer Care ......Back cover Please keep this handbook for future reference, or for anyone else who may use the appliance. -
Page 4: Introduction
British built appliance Your new appliance is designed to be Belling installed free-standing or flush to base We hope the following information units. will help you to quickly familiarise yourself with the features of the Gas &... - Page 5 Introduction Moving the cooker If the ignition fails I Check there is a spark when the Do not attempt to move the cooker by pulling on the doors or handles. Open ignition button is depressed. I If there is no spark, check that the the door and grasp the frame of the cooker, taking care that the door does electricity supply is switched on at...
-
Page 6: Be Safe - Not Sorry
Be Safe - Not Sorry I When cooking heavy items - eg; When you are cooking, keep children away from the vicinity turkeys - do not pull the oven shelf of appliance. out with the item still on the shelf. I Do not use aluminium foil to cover This product is designed as a domestic cooking appliance for the preparation... -
Page 7: Storage Compartment
Storage Compartment Your appliance has a generous storage compartment, located beneath the right-hand side oven. The storage compartment should only be used to store oven furniture. Baking trays and roasting tins may be stored in the compartment. Do not store items with plastic or wooden handles in the compartment, as they may be damaged by heat from the oven. - Page 8 Minute Minder - models with green clock display Initial display Setting the minute minder 1. Press and release the Function Minute Minder button to change the display from clock to minute minder - the Minute Minder LED will flash (top Clock right hand side)..
- Page 9 Minute Minder - models with red clock display Initial display first tone, then release the minus button and press again to listen to the second tone, etc. Releasing the minus button after a tone has sounded will automatically select that tone. Setting the minute minder 1.
-
Page 10: Using The Hob
Using the Hob Ignition Pans Push in and turn the selected control For optimum safety and performance, knob anticlockwise to the large flame we recommend the use of flat bottomed symbol and press the ignition switch (if pans with a base diameter of minimum fitted) until the burner lights. - Page 11 Using the Hob Hob burner guide Burner suitable for Small (2) Simmering, stewing, smaller pans Medium (3) General domestic use, large frying pans, chip pans, griddle cooking Large (1) Boiling, frying, larger pans Wok (1) Wok cooking, larger pans...
-
Page 12: The Fold Down Lid
Using the Hob The fold down lid Caution: Glass lids may shatter when heated. Turn off all the burners before shutting the lid. Any spillage should be removed from the surface of the lid before opening. When opening and closing the lid, use the cooler outer sides of the lid trim. -
Page 13: Using The Grill
Using the Grill aution: Accessible parts may Detachable grill pan handle be hot when the grill is used. grid Young children should be kept away. To switch on the grill Open the top oven / grill door. Turn the grill control clockwise to the required setting. - Page 14 Using the Grill Using the grill Never allow fat to build up in the grill pan, as this creates a fire hazard. The temperature of the grill is variable, and can be adjusted by turning the For best results, preheat the grill for grill control to the required setting.
- Page 15 Using the Grill Grilling guide Grilling times The times given in the grilling guide Grill shelf positions are based on a grill pre-heated at full Shelf positions are counted from the rate. The grilling times given are top down - shelf 1 is the highest. approximate, as differences in thick- ness, size of portion and personal preference will influence timing.
-
Page 16: Using The Ovens
Using the Ovens Caution: Accessible parts may Oven furniture be hot when the oven is used. Baking trays and roasting tins Young children should be kept For best cooked results and even away. browning, the maximum size baking Your range cooker has two electric trays and roasting tins that should be ovens - a left hand side conventional used are as follows;... - Page 17 Using the Ovens Cooking with a conventional Using the zones of heat oven The ‘zones of heat’ are useful as sev- The left hand side oven is a conven- eral dishes requiring different temper- tional oven. atures may be cooked in the oven at the same time.
- Page 18 Using the Ovens Cooking with a fanned oven • There is little flavour transfer in a fanned oven, which means that The right hand side oven is a fanned strong smelling foods can be oven. cooked at the same time as other To switch on, turn the oven control foods.
- Page 19 Using the Ovens Preheating Defrosting times Preheating is not generally necessary Small or thin pieces of frozen fish or when using the fanned oven, as the meat, eg; fish fillets, prawns and oven heats up quickly. However, we mince, will take approximately 1 - 2 do recommend preheating for frozen hours.
- Page 20 Using the Ovens Traditional fruit cakes Cooking frozen & chilled foods It should be remembered that ovens • When cooking frozen or chilled can vary over time, therefore cooking foods, please follow the manufactur- times can vary, making it difficult to be er’s instructions.
- Page 21 Using the Ovens I Remember to place food centrally Trays and shelf positions I If two trays (eg; of small cakes or on the oven shelf and leave at least clear shelf position biscuits) or two items (eg; sponge between each shelf used to allow cakes) are being cooked together free circulation of heat.
- Page 22 Using the Ovens Cooking times and temperature settings Please refer to the conversion guide on page 20. I Remember that the size and type of dish may affect cooking times. I The use of aluminium foil will increase cooking times. I The temperature settings and times given in the baking guides are based on...
- Page 23 Fanned Oven Conversion guide Note: This is a high efficiency oven, For example, an item which would therefore some adjustment will have normally cook at a conventional tem- to be made to conventional cook- perature of 180˚C will now cook at ing temperatures.
-
Page 24: Baking Guide
Using the Ovens Baking guide Dish Recommended Suggested Approximate temperature ˚C shelf cooking time position (preheated oven) Fanned Conventional (counted from bottom up) Scones 7 & 13 8 - 15 Meringues 2 - 3 hrs Cakes Small cakes 7 & 13 15 - 25 mins Whisked sponge 15 - 20 mins... - Page 25 Using the Ovens Baking guide Dish Recommended Suggested Approximate temperature ˚C shelf cooking time position (preheated oven) Fanned Conventional Puddings Rice pudding ⁄ - 2hrs Baked custard 50 - 60 mins Bread & butter 45 - 1hr pudding Fruit crumble 40 mins - 1hr Miscellaneous Yorkshire pudding...
- Page 26 Using the Ovens Roasting guide Frozen poultry must be thoroughly thawed before cooking. The time Roasting times depend on the weight, required depends on the size of the shape and texture of the meat, and of bird - eg; a large turkey may take up course, personal preference.
- Page 27 Using the Ovens Helpful hints for roasting Roast turkey I When cooking stuffed meat or Roasting turkey involves cooking two poultry, calculate the cooking time different types of meat - the delicate from the total weight of the meat light breast meat, which must not be plus the stuffing.
- Page 28 Using the Ovens Slow cooking Cooking times The cooking time varies according to The benefits of slow cooking have the type of food being cooked, and been recognised by cooks for cen- experience will show how long foods turies, and are still appreciated by should be cooked, according to per- cooks today.
- Page 29 Using the Ovens I Do not stuff poultry or rolled joints Hints for slow cooking I ALWAYS ensure that frozen foods when slow cooking, always cook the stuffing separately. - especially meat and poultry - are I When slow cooking, cut root veg- thoroughly thawed before cook- ing.
- Page 30 Maintenance All models with rear lights (If fitted) To replace an oven light bulb Warning: Switch off the electricity supply to the cooker at the socket, to avoid the risk of electric shock. Wait until the oven is cool, then remove the shelves.
- Page 31 Cleaning aution: Any cleaning agent Burner caps and heads used incorrectly may damage Important: Allow burners to cool the appliance. before cleaning. Always let the cooker cool aution: Hotplate burners can be before cleaning. damaged by soaking, automatic Some cooking operations generate dishwashers (or dishwasher powders considerable amount of grease, this / liquids), caustic pastes, hard...
- Page 32 Cleaning Painted, plastic, metal finish & Stainless steel surfaces metal finish parts (where fitted) FASCIA PANEL HANDLES HOB SPILLAGE & & CONTROL KNOBS PROGRAMMER BUTTONS WELL OVEN SIDES DOORS FASCIA & PAINTED METAL DOOR FASCIA PANELS Only use a clean cloth wrung out SIDE PANELS HANDLES in hot soapy water, and dry with a...
- Page 33 Cleaning Glass parts GLASS DOOR PANELS Do not use abrasives or polishes as they will scratch and damage the glass. Use a mild cream cleaner - eg; “Cif”. Rinse away excess cleaner and dry with a soft cloth. Warning: Do not operate the appliance without the glass panel correctly fitted.
-
Page 34: Installation Instructions
Installation Instructions Before start: Please read Ventilation Requirements instructions. Planning your installation will The room containing the appliance should save you time and effort. have an air supply in accordance with Prior to installation, ensure that the local BS 5440: Part 2: 1989: distribution conditions (nature of the gas and •... - Page 35 Installation Instructions Before you start, please read the Cooker dimensions instructions. Planning your installation All sizes are nominal, and some will save you time and effort. variation is to be expected. The ‘depth’ of the cooker, as given below, is to the Whilst every care is taken to eliminate front of the door and excluding knobs burrs and raw edges from this product,...
- Page 36 Installation Instructions Stability bracket 4. Fix the bracket to the floor. If the cooker is fitted with a flexible Measure from floor level to connection, a stability bracket should engagement edge in the back of be fitted to engage in the back of the the cooker and add 3mm.
- Page 37 Installation Instructions Connect to the electricity supply Warning: This appliance must be Brown Live earthed. The appliance must be installed by a Blue Neutral competent electrician using a double pole control unit of 30 ampere minimum capacity with 3mm minimum contact Earth separation at all poles.
-
Page 38: Installation Instructions
Installation Instructions Connect to the gas supply Commissioning The inlet to the cooker is ” BSP ⁄ Burner aeration internal situated at the rear centre. All burners have fixed aeration and no Use a 900mm - 1125mm length of adjustment is possible. flexible connector. -
Page 39: Technical Data
Technical Data Data badge Spark generator Lower part of front frame. Mains powered 7 outlet, controlled by a single switch at the left of the fascia Type of gas to individual electrodes. This appliance is factory set for use on G20 Natural Gas @ 20mbar only as Gas hob stated on the databadge. -
Page 40: Belling Customer Care
Model No Serial No Please ensure you have the above details (Model No and Serial No) to hand when calling Belling Customer Care. They are essential to booking your call. Stoney Lane, Prescot, Merseyside, L35 2XW 08 27258 03 © 03.2008...
Need help?
Do you have a question about the DF951 and is the answer not in the manual?
Questions and answers