Table of Contents
Advertisement
Advertisement
Table of Contents

Subscribe to Our Youtube Channel
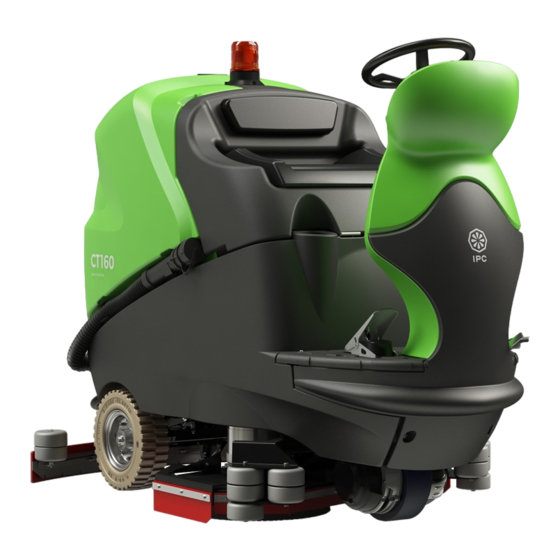
Summary of Contents for IPC Eagle CT160 700
- Page 1 OPERATIONS MANUAL CT160...
-
Page 2: Table Of Contents
INTRODUCTION/GENERAL WARNINGS/SAFETY ________________________________________________________________________________ MACHINE IDENTIFICATION The serial number plate (fig. 1), located at the rear of the machine, contains the following information: • Model code; • Model; • Power supply voltage; • Overall rated power; • Serial number; • Year of manufacture; •... -
Page 3: Introduction/General Warnings/Safety
INTRODUCTION/GENERAL WARNINGS/SAFETY ________________________________________________________________________________ INTRODUCTION This instruction manual is intended to serve as a guide and contains practical information on operation, adjustment and maintenance of your new machine which has been designed and built to ensure maximum performance, comfort and easy work in a wide variety of conditions. Before delivery it has been checked at the factory and by our dealer to guarantee that it is delivered in perfect condition. -
Page 4: Unpacking
INTRODUCTION/GENERAL WARNINGS/SAFETY ________________________________________________________________________________ dispose Special waste. Do not of with ordinary waste. MODIFICATIONS AND IMPROVEMENTS Our company aims to constantly perfect its products and reserves the right to make modifications and improvements when necessary without the obligation to implement them also in machines previously sold. -
Page 5: Technical Specifications
INTRODUCTION/GENERAL WARNINGS/SAFETY ________________________________________________________________________________ TECHNICAL SPECIFICATIONS MODELS 750R Working width (mm) Squeegee width (mm) 1010 1100 1010 Automatic brush change Brush diameter (mm) 355 X 2 435 X 2 460 X 2 150 x 750 Cylindrical brushes Brush rpm 1000 Brush motor power (W) 400 X 2 400 X 2 400 X 2... -
Page 6: Description Of Commands And Control Panel
INTRODUCTION/GENERAL WARNINGS/SAFETY ________________________________________________________________________________ DESCRIPTION OF COMMANDS AND CONTROL PANEL 1=Ignition key 2=Forward-back selection lever 3=Solution flow regulation 4=Brush motor ON-OFF 5=Suction motor ON-OFF 6=Recovery tank overflow level indicator 7=No cleaning solution indicator 8=Brush engagement/release key (not used in mod. with roller head) 9=Work program selection keys and indicators 10=Programming key on display... -
Page 7: Battery
INTRODUCTION/GENERAL WARNINGS/SAFETY ________________________________________________________________________________ BATTERY The machine operates with a 36 Volt battery. Three options are available, depending on the country where the machine is supplied: 1-Battery supplied together with the machine and fitted, filled with acid and ready for use. 2-Battery supplied and fitted dry (i.e. - Page 8 INTRODUCTION/GENERAL WARNINGS/SAFETY ________________________________________________________________________________ PREPARING THE BATTERY CHARGER If you wish to use a battery charger not supplied with the machine, the connector sent with the machine must be fitted on it. For installation of the connector, proceed as follows: remove approx. 13 mm of protective sheath from the red and black cables of the battery charger;...
-
Page 9: Fitting The Squeegee
INTRODUCTION/GENERAL WARNINGS/SAFETY ________________________________________________________________________________ FITTING THE ROLLER BRUSHES ON THE ROLLER HEAD Open the side aperture on the head. Remove the brush compartment cover (2). Insert the cylindrical brush into the two compartments ensuring that it mates correctly with the guide pin on the opposite side. Fit the two brush compartment covers and close the aperture. -
Page 10: Preliminary Operations
INTRODUCTION/GENERAL WARNINGS/SAFETY ________________________________________________________________________________ PRELIMINARY OPERATIONS Fill the tank with water and detergent solution in the quantities and proportions specified on the bottle by the manufacturer. Caution: do not introduce solutions consisting of flammable, explosive or foamed liquids. Insert the ignition key and turn clockwise. The display will show the type of release for 5”, then the battery voltage value and the hour counter will appear. -
Page 11: Description Of Automatic Programs P1- P2- P3
INTRODUCTION/GENERAL WARNINGS/SAFETY ________________________________________________________________________________ DESCRIPTION OF AUTOMATIC PROGRAMS P1- P2- P3 Note: the contents of this chapter can be applied to all the models described in this manual. P1 Light intensity cleaning program for smooth not excessively dirty floors. P2 Medium intensity cleaning program for smooth floors with evident forms of dirt. P3 Very intense work program for very dirty rough floors (concrete and similar). -
Page 12: Using The Machine In Manual Mode
INTRODUCTION/GENERAL WARNINGS/SAFETY ________________________________________________________________________________ USING THE MACHINE IN MANUAL MODE In order to work in manual mode it is not necessary to select any of the automatic work programs (P1, P2, P3); the required value can be set using the buttons as in the attached figure. Key N°5 SUCTION UNIT ON-OFF Key N°4 BRUSH ON-OFF Key N°3 WATER ON-OFF... -
Page 13: Maintenance
INTRODUCTION/GENERAL WARNINGS/SAFETY ________________________________________________________________________________ LEV.6: pump active with work cycle 100% Auto: pump active according to drive work cycle Up to 16% of speed, pump active 18% Up to 32% of speed, pump active 36% Up to 50% of speed, pump active 45% Up to 65% of speed, pump active 60% Up to 80% of speed, pump active 75% Over 80% of speed, pump active 100%... - Page 14 INTRODUCTION/GENERAL WARNINGS/SAFETY ________________________________________________________________________________ MAINTENANCE At the end of the recharge, disconnect the battery from the battery charger and reconnect it to the machine. Close all the 18 battery cells and clean the upper surface of the battery to remove all remains of acid.
-
Page 15: Safety Functions And Troubleshooting
INTRODUCTION/GENERAL WARNINGS/SAFETY ________________________________________________________________________________ SAFETY FUNCTIONS AND TROUBLESHOOTING The machine is provided with some safety functions. Cut-in of the safety functions is shown via descriptions on the display (see table below) that facilitate identification of the faults or possible failures. ref. DISPLAY ERROR CODE BRUSH VACUUM... - Page 16 INTRODUCTION/GENERAL WARNINGS/SAFETY ________________________________________________________________________________ a- battery voltage is ≤ 29V a- charge the battery BATTERY FLAT battery a- battery voltage is ≤ 27V a- check the battery levels and charge the battery BATTERIA ESAURITA battery brush head low a- brushes are worn a- replace the brushes position BRUSHES WORN...


Need help?
Do you have a question about the CT160 700 and is the answer not in the manual?
Questions and answers