Table of Contents
Advertisement
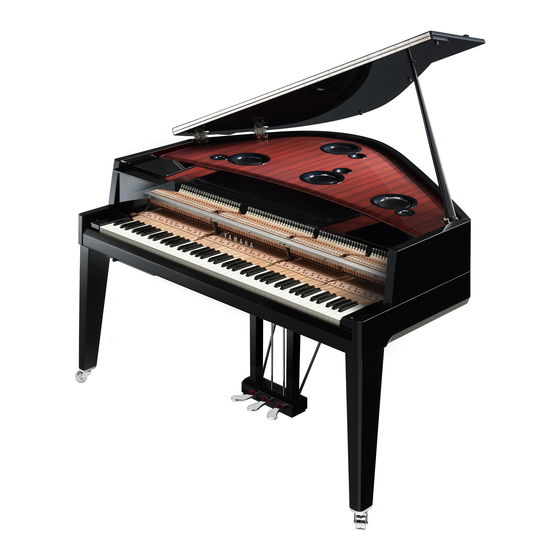
N3X
Owner's Manual
Mode d'emploi
Manual de instrucciones
IMPORTANT – Check your power supply –
Make sure that your local AC mains voltage matches the voltage
specified on the name plate on the bottom panel. In some areas
a voltage selector may be provided on the bottom of the main
keyboard unit near the power cord. Make sure that the voltage
selector is set for the voltage in your area. The voltage selector
is set at 240V when the unit is initially shipped. To change the
setting use a "minus" screwdriver to rotate the selector dial so
that the correct voltage appears next to the pointer on the panel.
Before using this instrument, be sure to read "PRECAUTIONS"
on pages 5–6.
When assembling the unit, consult a qualified AvantGrand
dealer. (Refer to the assembly instructions at the end of this
manual.)
IMPORTANT – Vérifiez votre source d'alimentation –
Vérifiez que la tension de l'alimentation secteur correspond à
celle spécifiée sur la plaque du fabricant, située sur le panneau
inférieur. Les instruments vendus dans certaines régions
disposent d'un sélecteur de tension sur la partie inférieure du
clavier de l'unité principale, à côté du cordon d'alimentation.
Assurez-vous que le sélecteur de tension est réglé sur la tension
utilisée dans votre région. À sa sortie d'usine, le sélecteur est
réglé sur 240 V. Pour modifier ce réglage, utilisez un tournevis
plat et faites tourner le cadran du sélecteur jusqu'à ce que la
valeur correcte apparaisse à côté de l'indicateur sur le panneau.
Avant d'utiliser cet instrument, lisez attentivement la section
« PRÉCAUTIONS D'USAGE » aux pages 5-6.
Lors du montage de l'unité, contactez un revendeur AvantGrand
agréé. (Reportez-vous aux instructions de montage figurant à la
fin de ce manuel.)
IMPORTANTE – Compruebe la fuente de alimentación –
Asegúrese de que la tensión de la red eléctrica local de CA
coincide con la tensión especificada en la placa situada en el
panel inferior. Es posible que en algunas zonas se suministre un
selector de tensión en la parte inferior de la unidad del teclado
principal, junto al cable de alimentación. Asegúrese de que este
selector está ajustado según la tensión de la zona. El selector
de tensión viene ajustado de fábrica para 240 V. Para cambiar
el ajuste, utilice un destornillador de punta normal para girar el
selector hasta que la tensión correcta aparezca al lado del
puntero del panel.
Antes de utilizar el instrumento, lea la sección
"PRECAUCIONES", en las páginas 5-6.
Al montar la unidad, consulte con un concesionario cualificado
de Avant Grand (consulte las instrucciones de montaje al final
de este manual).
EN
FR
ES
Advertisement
Table of Contents

Related Manuals for Yamaha AvantGrand N3X


Summary of Contents for Yamaha AvantGrand N3X
- Page 1 IMPORTANT – Check your power supply – Make sure that your local AC mains voltage matches the voltage specified on the name plate on the bottom panel. In some areas a voltage selector may be provided on the bottom of the main keyboard unit near the power cord.
-
Page 2: Special Message Section
SPECIFICATIONS SUBJECT TO CHANGE: The information contained in this manual is believed to be cor- rect at the time of printing. However, Yamaha reserves the right to change or modify any of the specifications without Model notice or obligation to update existing units. - Page 3 Yamaha Corporation of America or its subsidiaries. devices. Compliance with FCC regulations does not guarantee * This applies only to products distributed by YAMAHA CORPORATION OF AMERICA. (class B) COMPLIANCE INFORMATION STATEMENT...
-
Page 4: Important Safety Instructions
Explanation of Graphical Symbols The lightning flash with arrowhead symbol within an equilateral triangle is intended to CAU T IO N alert the user to the presence of uninsulated RISK OF ELECTRIC SHOCK “dangerous voltage” within the product’s DO NOT OPEN enclosure that may be of sufficient magni- tude to constitute a risk of electric shock to persons. -
Page 5: Precautions
• Only use the voltage specified as correct for the instrument. The required voltage cord from the AC outlet. Then have the instrument inspected by qualified Yamaha is printed on the name plate of the instrument. -
Page 6: Saving Data
Yamaha cannot be held responsible for damage caused by improper use or modifications to the instrument, or data that is lost or destroyed. Always turn the power off when the instrument is not in use. -
Page 7: About Copyrights
• This product incorporates and bundles contents in which Yamaha owns copyrights or with respect to which Yamaha has license to use others' copyrights. Due to copyright laws and other relevant laws, you are NOT allowed to distribute media in which these contents are saved or recorded and remain virtually the same or very similar to those in the product. - Page 8 The sound of several famous grand pianos in a single instrument The AvantGrand N3X puts the sounds of several different renowned grand pianos at your fingertips, including the CFX, Yamaha’s flagship concert grand piano, a Bösendorfer* Imperial, an instrument esteemed by pianists throughout its long history, and more—each with its own distinctive appeal and sonic characteristics.
-
Page 9: Table Of Contents
Online Member Product Registration Power cord The “PRODUCT ID” on the sheet will be needed when you fill out the Bench* User Registration form. * May not be included depending on your area. Check with your Yamaha Warranty* dealer. • 9 Owner’s Manual... -
Page 10: Panel Controls And Terminals
Panel Controls and Terminals Setting Up Overview The jacks and terminals on the underside of the instrument as shown here may seem to be in reverse from your per- spective in front of the instrument. Make sure when using these to carefully check the names as printed on the panel before making connections. - Page 11 Panel Controls and Terminals Control Panel [MASTER VOLUME] control ....page 17 Display ..........See below. [RECORD] button ........ page 35 [PLAY/STOP] button..... pages 32, 35 The control panel is located at [+]/[-] button the bottom left of the instrument. Slide the panel out to use it. [DEMO/SONG] button ...
-
Page 12: Playing The Keyboard
Playing the Keyboard Opening/Closing the Fallboard To open the fallboard, hold the hand grip with both hands, then lift the fallboard slightly, and push it up and back. To close the fallboard, lower the fallboard back in place gently with both hands. CAUTION Be careful to avoid catching your fingers when opening/closing the fallboard. -
Page 13: Opening/Closing The Lid
Playing the Keyboard To lower the music rest: Close the music brace. Pull the music rest toward yourself as far as it will go. When the music rest is at a 35 degree angle, raise it to a 70 degree angle, then pull it toward yourself. -
Page 14: Power Supply
Playing the Keyboard To close the lid Hold the lid stay and carefully raise the lid. Do not hold here. Hold here. Hold the lid in its raised position and lower the lid stay. Carefully lower the lid. Lid stay When using the music rest, lower the music rest (page 13) before going on to the next step. -
Page 15: Turning The Power On/Off
Use only the AC power cord supplied with the instrument. If the supplied power cord is lost or damaged and needs to be replaced, contact your Yamaha dealer. The use of an inappropriate replacement can pose a fire and shock haz-... - Page 16 Playing the Keyboard Turn the switch off to turn the power off. The [POWER] indicator turns off. Slide the control panel back into the bottom of the keyboard after use. CAUTION Even after the power switch is turned off, electricity is still flowing to the instrument at the minimum level. Remove the electric plug from the outlet when the instrument is not to be used for extended periods of time, or during electrical storms.
-
Page 17: Adjusting The Master Volume
Playing the Keyboard Adjusting the Master Volume To adjust the volume level by using the [MASTER VOLUME] control located at the left of the panel while playing the keyboard. Decreases Increases the level. the level. CAUTION Do not use this instrument at a high volume level for a long period of time, or your hearing may be damaged. Intelligent Acoustic Control (IAC) This function automatically adjusts and controls the sound quality according to the overall volume of the instrument. -
Page 18: Using Headphones
Playing the Keyboard Using Headphones Since this instrument is equipped with two [PHONES] jacks, you can connect two sets of standard stereo headphones. If you are using only one set of headphones, insert a plug into either jack; this automatically shuts off the speakers. CAUTION Avoid listening to the instrument at a high volume level through headphones for a long period of time, to prevent hearing damage. -
Page 19: Using The Pedals
Playing the Keyboard Using the Pedals The instrument has three pedals that produce a range of expressive effects similar to those produced by the pedals on an acoustic piano. Damper Pedal (Right) Pressing this pedal will sustain notes longer. Releasing this pedal immediately stops (damps) any sustained notes. -
Page 20: Main Operations
When headphones are connected, this Voice is automatically changed to “Binaural CFX Grand” (below). Yamaha’s CFX flagship concert grand piano sound sampled by Binaural Sampling, the method optimized for headphone use. Listening this through headphones gives the impres-... -
Page 21: Listening To The Voice Demo Songs
No.7, BWV.1058 d. 1 0 Harpsichord 8’+4’ Gigue, Französische Suiten No.5, BWV.816 J.S.Bach d. 0 4 d. 0 5 d. 0 6 d. 0 7 d. 0 8 The Songs are Yamaha’s original pieces (©2016 Yamaha Corporation). • 21 Owner’s Manual... -
Page 22: Using The Metronome
Basic Operations and More Using the Metronome The metronome feature is convenient for practicing with an accurate tempo. 1, 2 Press [METRONOME] to start the metronome. While the metronome sounds, a dot at the right side of the LED display and the lamp of the metronome button flash on and off to the tempo. -
Page 23: Adjusting The Tempo
Basic Operations and More Adjusting the Tempo The playback tempo of Metronome can be adjusted. You can also adjust the playback tempo of MIDI Song (page 31) as well as the playback speed of an Audio Song (page 31) as they are playing. ... -
Page 24: Changing The Touch Sensitivity
Basic Operations and More Changing the Touch Sensitivity You can specify the Touch Sensitivity (how the sound responds to the way you play the keys). While holding down [PIANO/VOICE], press one of the A6–C7 keys. The selected Touch Sensitivity is shown on the display while both controls are held. Highest key (C7) Default setting: 2 (Medium) Display... -
Page 25: Adjusting The Strength Of Vibration (Trs)
Basic Operations and More Adjusting the Strength of Vibration (TRS) This instrument features a special TRS (Tactile Response System) that enables you to feel the natural vibration or resonance of the instrument when you play the keyboard, just as on an actual acoustic piano. You can select the strength of vibration for your taste. -
Page 26: Playing The Realistic Resonance-Enhanced Vrm Voices
Basic Operations and More Playing the Realistic Resonance-enhanced VRM Voices On an actual acoustic piano, if you press the damper pedal and play a key, not only does the string of the pressed key vibrate, it also causes other strings and the soundboard to vibrate, with each influencing the rest, creating a rich and brilliant resonance that sustains and spreads. -
Page 27: Enhancing The Sound With Reverb
Basic Operations and More Enhancing the Sound with Reverb The Reverb effect simulates the natural reverberation of a concert hall. Turning the Reverb on or off Press [REVERB] repeatedly (as necessary). Lights up when REVERB is on. Adjusting the Reverb Depth While holding down [REVERB], press [+] or [-]. -
Page 28: Transposing The Pitch In Semitones
Basic Operations and More Transposing the Pitch in Semitones You can shift the pitch of the entire keyboard up or down in semitones to facilitate playing in difficult key signatures and match the pitch of the keyboard to the range of a singer or other instruments. For example, if “+5”... -
Page 29: Fine-Tuning The Pitch
Basic Operations and More Fine-tuning the Pitch You can fine-tune the pitch of the entire instrument. This function is useful when you play this instrument along with other instruments or recorded music. During the operation described below, you can check the Pitch NOTE 42. -
Page 30: Setting The Scale Tuning
Basic Operations and More Setting the Scale Tuning You can select various scales for the instrument. Equal Temperament is the most common contemporary piano tuning scale. However, history has known numerous other scales, many of which serve as the basis for certain genres of music. -
Page 31: Playing Back Songs
Playing Back Songs This instrument can play back Songs contained in internal memory or USB memory connected to the [USB TO DEVICE] terminal. There are two kinds of Songs that can be played back: MIDI Songs and Audio Songs. Song data formats that can be played MIDI Songs Audio Songs A MIDI Song contains data of your keyboard performance... -
Page 32: Playing Back Songs
Playing Back Songs Playing back Songs To play back a Song on a USB flash drive: Read “About USB Flash Drives” (page 36), then connect the USB flash drive to the [USB TO DEVICE] terminal, and follow the instructions below. While holding down [DEMO/SONG], press [+] or [-] until the NOTE “... - Page 33 Playing Back Songs Adjusting the volume (only for Audio Songs) Setting range: 1–20 Default setting: 16 The volume level of this instrument may be markedly different from that of a commercially available Audio Song or one recorded on another device. To adjust NOTE The playback of Audio Songs is output only the volume of the Audio Song, hold down [DEMO/SONG] and press one of the...
-
Page 34: Recording Your Performance
Recording Your Performance This instrument allows you to record your performance by using one of the following two methods. The recorded performance can be played back as a User Song. MIDI recording With this method, your keyboard performances are recorded and saved to the instrument or USB flash drive as a MIDI Song (via the SMF format 0). -
Page 35: Start Recording
Recording Your Performance Select a Voice (page 20) and other parameters such as Beat Using the Metronome You can use the metronome while record- (page 22) for recording. ing, although the metronome sound will not be recorded. Press [RECORD] to engage the Record mode. The [RECORD] lamp lights up, and the [PLAY/STOP] lamp flashes according to If memory space is running low: An “... -
Page 36: Using Usb Flash Drives
USB flash The instrument does not necessarily support all com- drive. mercially available USB devices. Yamaha cannot guar- Number of USB flash drives that can be used antee operation of USB devices that you purchase. -
Page 37: Formatting Usb Flash Drive
Using USB Flash Drives Formatting USB Flash Drive NOTICE Executing the Format operation will delete all data in the USB flash drive. Before formatting, save important data to a computer or another storage device. Connect the USB flash drive to the [USB TO DEVICE] terminal. While holding [FUNCTION] and [PLAY/STOP], press [RECORD]. -
Page 38: Copying User Songs In The Instrument To Usb Flash Drive
Using USB Flash Drives Copying User Songs in the Instrument to USB Flash Drive You can copy the User Song in the instrument to the USB flash drive. The copied Song is saved as SMF format 0 to the “USER FILES” folder in the USB flash drive, and the file is automatically named as “USERSONG**.MID”... -
Page 39: Deleting A Song File
Using USB Flash Drives Deleting a Song file A User Song can be deleted. If necessary, connect the USB flash drive to the [USB TO NOTE Song Playback is not available after execut- DEVICE] terminal. ing Step 3. Make sure to confirm the to-be- deleted Song before executing Step 3. -
Page 40: Backup Data And Initializing
Backup Data and Initializing Backup Data in Internal Memory The following data, referred to as Backup data, as well as User Song data and External Song data will be maintained even if the power is turned off. • Character Code ............ page 33 •... -
Page 41: Connections
Connections CAUTION Before connecting the instrument to other electronic components, turn off the power to all the components. Before turning the power on or off to all components, set all volume levels to minimum (0). Otherwise, damage to the components, electrical shock, or even permanent hearing loss may occur. -
Page 42: Connecting To A Mixer-Output [L] [R] Jacks (Balanced)
Connections Using an External Stereo System for Playback—AUX OUT [L/L+R] [R] jacks (unbalanced) These jacks let you connect the instrument to external powered speaker systems, for NOTE Use audio cables and adaptor plugs with no playing in larger venues at higher volumes. resistance. -
Page 43: Connecting To A Computer ([Usb To Host] Terminal)
For details on connections, refer to the “iPhone/iPad Connection Manual” on the web- site (page 9). For information about the compatible smart devices and application tools, access the following page: http://www.yamaha.com/kbdapps/ NOTICE Do not place your iPhone/iPad in an unstable position. Doing so may cause the device to fall and result in damage. -
Page 44: Connecting External Midi Devices (Midi [In] [Out] Connectors)
Connections Connecting External MIDI Devices (MIDI [IN] [OUT] connectors) MIDI (Musical Instrument Digital Interface) is a global format standard for NOTE You need a dedicated MIDI cable to make a performance data transmission and reception between electronic musical MIDI connection. instruments. - Page 45 Connections Local Control on/off Normally, playing the keyboard will control the internal tone generator. This situation is called “Local Control ON.” If you want to use the keyboard only for controlling an external MIDI instrument, turn off Local Control. With this setting, this instrument will produce no sound even if you play the keyboard.
-
Page 46: Appendix
(page 37) and connect to the instrument again. A malfunction has occurred in the instrument. Contact your nearest Yamaha dealer or authorized dis- tributor. -
Page 47: Troubleshooting
• The USB flash drive is not compatible with the instrument. Only use the USB (stopped). flash drive whose compatibility has been confirmed by Yamaha (page 36). Mechanical noise is heard during The keyboard mechanism of this instrument simulates the keyboard mechanism performance. -
Page 48: Preset Song List
Preset Song List Display Song Name Composer P. 0 1 Prelude op.3-2, Morceaux de fantaisie S.Rakhmaninov P. 0 2 Mädchens Wünsch, 6 Chants polonaise F.Liszt P. 0 3 Sonate für Klavier Nr.14 “Mondschein” , op.27-2 L.v.Beethoven P. 0 4 Sonate für Klavier Nr.5, K.283 W.A.Mozart P. -
Page 49: Assembling The Unit
Assembling the Unit When assembling the unit, consult a qualified AvantGrand dealer. CAUTION • Be careful not to confuse parts, and be sure to install all parts in the correct orientation. Please assemble in accordance with the sequence given below. •... - Page 50 Assembling the Unit Attach and securely tighten the right Attach and securely tighten the left front front leg and the rear leg with the bolts. leg with the bolts while holding the piano firmly. ×6 ×5 ×6 CAUTION Do not hold the control panel. Using excessive force on the panel can result in damage to the instrument.
-
Page 51: Connect The Pedal Cord
Assembling the Unit Connect the pedal cord. 8-1 Make sure the pedal cord is clipped into the cord holder. 8-2 Insert the pedal cord plug into the pedal jack. Connect the power cord. 9-1 Set the voltage selector and insert the power cord plug to the [AC IN] connector. 9-2 Attach the cord holders to the instrument, then clip the power cord into the holder. -
Page 52: Specifications
Wireless MIDI Adaptor (MD-BT01/UD-BT01) * The contents of this manual apply to the latest specifications as of the publishing date. To obtain the latest manual, access the Yamaha website then download the manual file. Since specifications, equipment or separately sold accessories may not be the same in every locale, please check with your Yamaha dealer. -
Page 53: Index
Index AC IN ........10, 14 Initialization ........40 Scale ........... 30 Accessories Intelligent Acoustic Control Song ........9 ..........31 Assembly (IAC) Song Category List ........49 ...........17 ....31 Audio recording iPhone/iPad Specifications ......34 .........43 ......52 Audio Song iPhone/iPad Connection Manual Stereophonic Optimizer .........31 .... -
Page 54: Quick Operation Guide
On/OFF On/OFF On/OFF On/OFF On/OFF Default On/OFF On/OFF... - Page 55 MEMO • 55 Owner’s Manual...
- Page 56 MEMO 56 • N3X...
- Page 57 Information for users on collection and disposal of old equipment: This symbol on the products, packaging, and/or accompanying documents means that used electrical and electronic products should not be mixed with general household waste. For proper treatment, recovery and recycling of old products, please take them to applicable collection points, in accordance with your national legislation.
- Page 59 New Zealand Tel: +359-2-978-20-25 Tel: +90-212-999-8010 Tel: +64-9-634-0099 COUNTRIES AND TRUST TERRITORIES IN PACIFIC OCEAN http://asia.yamaha.com Head Office/Manufacturer: Yamaha Corporation 10-1, Nakazawa-cho, Naka-ku, Hamamatsu, 430-8650, Japan DMI15 (For European Countries) Importer: Yamaha Music Europe GmbH Siemensstrasse 22-34, 25462 Rellingen, Germany...
- Page 60 Yamaha Global Site http://www.yamaha.com/ Yamaha Downloads http://download.yamaha.com/ Manual Development Department © 2016 Yamaha Corporation Published 08/2016 POAP*.*- **A0 Printed in Vietnam ZT86740...
Need help?
Do you have a question about the AvantGrand N3X and is the answer not in the manual?
Questions and answers