Table of Contents
Advertisement
Quick Links
Advertisement
Table of Contents
Troubleshooting

Related Manuals for Emerson Liebert ITA 5kVA


Summary of Contents for Emerson Liebert ITA 5kVA
- Page 1 ® ™ Liebert User Manual – 5-6kVA UPS...
-
Page 3: Safety Precautions
7. The life of the battery module will be shortened with the rise of the ambient temperature. To ensure normal UPS operation and enough back-up time, the battery module should be replaced periodically. Only the Emerson-authorized technicians are permitted to replace the battery module. - Page 4 Conformity and standards 1. The UPS complies with 2006/95/EC (LV Safety) and 2004/108/EC (EMC), and with the following product standards for UPS: IEC62040-1: 2008 General and safety requirements IEC62040-2: EMC requirements, Class C2 compliant IEC62040-3: Performance requirements and test methods 2.
-
Page 5: Table Of Contents
Contents Chapter 1 Product Introduction ............................1 1.1 Features................................1 1.2 Model Configurations ............................1 1.3 Appearance And Components ..........................2 1.3.1 Appearance ............................... 2 1.3.2 Components .............................. 2 1.4 Operating Principle ............................... 3 ... - Page 6 3.4.1 Connecting I/O Cables..........................27 3.4.2 Connecting Parallel Cables ........................28 3.5 Setting Parallel Address............................28 3.6 Commissioning Parallel System.......................... 29 3.6.1 Check Before Startup ..........................29 3.6.2 Startup Commissioning For Parallel System ................... 29 ...
- Page 7 Chapter 7 Maintenance And Troubleshooting ........................45 7.1 Fan Maintenance ..............................45 7.2 Battery Maintenance ............................45 7.3 Cleaning UPS ..............................46 7.4 Checking UPS Status ............................46 7.5 Checking UPS Functions ............................ 46 7.6 Troubleshooting ..............................
-
Page 9: Chapter 1 Product Introduction
ITA 5kVA and 6kVA UPS (UPS for short) is an intelligent online UPS system with sine wave output developed ® by Emerson Network Power Co., Ltd (Emerson for short). The UPS offers reliable and high quality AC power to the precision instrument. -
Page 10: Appearance And Components
Chapter 1 Product Introduction Product Size (W × H × D, Model Type Net weight Description number unit: mm) Configured with battery modules. Standard model UHA1R-0060 01200456 17kg 435 × 85 × 640 See 8.2 Battery Module for the LCD Standard structure and connection of the UHA1R-0060 01200858... -
Page 11: Operating Principle
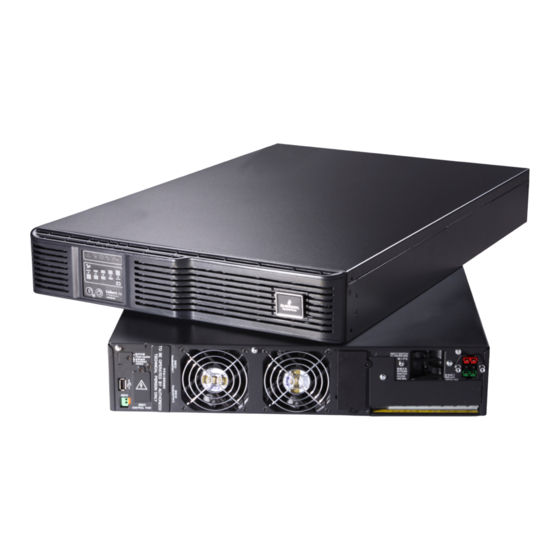
Chapter 1 Product Introduction Parallel port (With protective cover) DIP switch (With protective cover) Input MCB Battery port USB port Ventilation hole 10A charger Intelligent card slot I/O terminal block (With protective cover) (With protective cover) control port Figure 1-3 UPS rear panel Note Non-authorized personnel are prohibited from opening the UPS chassis cover. -
Page 12: Normal Mode
Chapter 1 Product Introduction Bypass input ~ - Main input Output - ~ - - Normal mode Bypass mode Battery mode Maintenance Bypass mode Figure 1-5 Operation schematic diagram For the LED indicators introduced in this section, refer to 4.1.1 UPS State Indicators. 1.5.1 Normal Mode When the mains input is normal, the load is supplied with voltage-stabilizing and frequency-stabilizing power by the mains after processing of the rectifier and the inverter, and meanwhile, the charger is charging the battery, the... -
Page 13: Battery Mode
Chapter 1 Product Introduction Note In case of mains failure or mains voltage out of range (120Vac ~ 253Vac/265Vac/276Vac) in Bypass mode, the UPS will turn off and stop the output. 1.5.3 Battery Mode Upon mains failure, rectifier overload or mains voltage out of range (120Vac ~ 276Vac), the rectifier and the internal charger will stop running, and the battery will supply power to the load through the inverter. -
Page 14: Maintenance Bypass Mode
Note When the UPS has malfunctions and cannot working normally, please get in touch with the nearest Emerson branch office or local service center. It is prohibited to repair the UPS by yourself, otherwise the personnel injury and damage to the equipment will occur. - Page 15 Chapter 1 Product Introduction 5kVA 6kVA Item Standard model Long back-up model Standard model Long back-up model UHA1R-0050 UHA1R-0050L UHA1R-0060 UHA1R-0060L Conduction emission IEC/EN 62040-2 Immunity I ≤ 16A, IEC/EN61000-3-3; 16A < I ≤ 75A, IEC/EN61000-3-11 I ≤ 16A, IEC/EN61000-3-2; 16A < I ≤ 75A, IEC/EN61000-3-12 Harmonic current YD/T1095-2001 level 2 15% Surge protection...
-
Page 16: Chapter 2 Single Ups Installation And Commissioning
1. The UPS should be installed by a qualified engineer according to the information contained in this chapter. If any problem is found, please get in touch with Emerson local service center immediately. 2. The UPS shall not be powered on without approval of the commissioning engineer. - Page 17 Chapter 2 Single UPS Installation And Commissioning General view 200mm Wall Wall 500mm Cabinet Cabinet 200mm Top view Front view Figure 2-6 Installation clearances Note 1. The UPS should be installed only on the concrete surface or other non-flammable surfaces. 2.
-
Page 18: Installation Tools
2.3.1 Battery Input If the battery module option is provided by Emerson, the battery module has a built-in overcurrent protective device. Otherwise, the external battery cabinet should equip a DC compatible circuit breaker to provide overcurrent protection for the UPS and its batteries. - Page 19 Chapter 2 Single UPS Installation And Commissioning Remove the fixing screws on the display panel Fixing screws (2 pcs) 90° Rotate the display panel 90°counter clockwise A amplified Tighten the fixing screws on the display panel Figure 2-7 Adjusting the display panel Note 1.
-
Page 20: Rack Installation
Chapter 2 Single UPS Installation And Commissioning Figure 2-9 Removing the plastic panel 3. Take out the support bases from the accessories, assemble a pair of support bases together through the fastenings, as shown in Figure 2-5, and put them onto the flat installation table. Figure 2-10 Installing the support base 4. - Page 21 Chapter 2 Single UPS Installation And Commissioning 2. Take out the brackets and six M4 × 10 screws from the accessories, and fix the two brackets onto the two sides of the front panel of the UPS using the screws through installation hole 1, as shown in Figure 2-8. Installation hole 1 Screw Installation...
- Page 22 Chapter 2 Single UPS Installation And Commissioning Guide rail screw (4 pcs) Guide rail Guide rail holder Square hole Figure 2-16 Installing the guide rail Note 1. The guide rail holder must be close to the front of the rack. 2.
-
Page 23: Connecting Power Cables
Chapter 2 Single UPS Installation And Commissioning Battery module Figure 2-19 Installing the UPS with battery modules 2.5 Connecting Power Cables I/O cables, battery cables and 10A charger cables (optional) are required for connection. When connecting the cables, you should follow the local wiring regulations, take the environment situation into account, and refer to Table 3B of IEC60950-1. -
Page 24: Connecting I/O Cables
Chapter 2 Single UPS Installation And Commissioning 2.5.1 Connecting I/O Cables The power cables of the UPS should be connected through the I/O terminal block located on the UPS rear panel. Remove the protective cover A of the I/O terminal block shown in Figure 2-15 to reveal the I/O terminal block. Figure 2-20 Protective cover A of the I/O terminal block Figure 2-16 gives the terminal layout of the I/O terminal block. - Page 25 Chapter 2 Single UPS Installation And Commissioning Cable entry hole (6 pcs,with plate ) Figure 2-23 Protective cover B of the I/O terminal block Before installing the protective cover B of the I/O terminal block, remove the iron plates on the cable entry holes, and install the bushings (label: 21101494, accessories).
-
Page 26: Connecting Battery Cables
Chapter 2 Single UPS Installation And Commissioning 6. Connect the main input live line (phase A, phase B and phase C), N line and PE line respectively to the input live line terminal (U), input live line terminal (V), input live line terminal (W), input neutral line terminal and input ground line terminal of the UPS I/O terminal block. - Page 27 Chapter 2 Single UPS Installation And Commissioning Black Yellow Figure 2-27 Battery cable A The connection procedures are as follows: 1. Make sure that all the external I/O MCBs of the UPS are open. 2. Confirm with a voltmeter that no DC voltage is present on the battery ports shown in Figure 1-3 on the rear panel of the UPS.
- Page 28 Chapter 2 Single UPS Installation And Commissioning Paralleled address Input switch Battery port 230/400Vac-40A 192Vdc 27A Control port Battery input Battery cabinet Figure 2-30 Battery cable connection for long back-up UPS Connecting the long back-up UPS and the battery module When you need to connect the long back-up UPS and the battery module, a battery cable A (standard UPS accessory) is necessary, as shown in Figure 2-22.
-
Page 29: Connecting 10A Charger Cables
Chapter 2 Single UPS Installation And Commissioning Paralleled address Input switch Battery port 230/400Vac-40A 192Vdc 27A Control port Battery cable A Accessory cable of the battery module Accessory cable of the battery module Figure 2-31 Cable connection for the long back-up UPS and the battery module Note 1. - Page 30 Chapter 2 Single UPS Installation And Commissioning Control port charger Paralleled address Input switch Battery port 230/400Vac -40A 192Vdc 27A Control port Control port of 10A charger Figure 2-32 10A charger cable connection 3. Use a screwdriver to tighten the fixing screws of the cable ports. Note 1.
-
Page 31: Single Ups Commissioning
Chapter 2 Single UPS Installation And Commissioning 2.6 Single UPS Commissioning 2.6.1 Check Before Startup 1. Check and confirm that the power distribution mode of the UPS and the POD (if configured) is correct, that the connection of the power cables and signal cables is correct and there is no short circuit. 2. -
Page 32: Battery Mode Startup
Chapter 2 Single UPS Installation And Commissioning Figure 2-35 Indicators status 3. Press the ON/SILENCE key for more than one second, and wait for thirty seconds, the UPS will enter the inverter standby mode automatically, at this time, the inverter indicator blinks. After the UPS has output, the inverter indicator will turn on, as shown in Figure 2-31. - Page 33 Chapter 2 Single UPS Installation And Commissioning Figure 2-37 Indicators status Liebert ITA 5kVA And 6kVA UPS User Manual ®...
-
Page 34: Chapter 3 Parallel Ups Installation And Commissioning
Chapter 3 Parallel UPS Installation And Commissioning Chapter 3 Parallel UPS Installation And Commissioning The UPS parallel system provides the user with N + 1 (1 ≤ N ≤ 3) parallel configuration, N stands for the basic parallel sets, 1 stands for the redundant sets. The parallel power distribution unit (POD for short) which can provide safe and reliable power distribution function is compulsory for the UPS parallel system. -
Page 35: Connecting Cables
1-out. Using the parallel POD power distribution In the UPS parallel system, it is recommended to use POD provided by Emerson to perform power distribution. Refer to Liebert ITA 5kVA And 6kVA UPS Parallel Power Distribution Unit User Manual for the power cable connection. -
Page 36: Connecting Parallel Cables
Figure 3-40 Parallel cable connection schematic diagram of 3 + 1 parallel system Note The parallel cables provided by Emerson must be used for the parallel system. 3.5 Setting Parallel Address The parallel addresses for all UPSs in the parallel system should be set. The parallel addresses can be set through the DIP switch on the rear panel of the UPS (see Figure 1-3). -
Page 37: Commissioning Parallel System
Chapter 3 Parallel UPS Installation And Commissioning Warning 1. The parallel address for each UPS must be unique. 2. The default setting of all the DIP switches are OFF. However, you should set the DIP switch position for the parallel system according to the descriptions listed in Table 3-1. - Page 38 Chapter 3 Parallel UPS Installation And Commissioning thirty seconds, after the UPS has output, the inverter indicator will turn on. Measure that the inverter output voltage is normal. 2) Close the input MCB, external input MCB, output MCB and battery MCB of the second UPS (if POD is configured, close the corresponding input MCB and output MCB of the POD).
-
Page 39: Chapter 4 Display Panel
Chapter 4 Display Panel Chapter 4 Display Panel This chapter introduces the functions and use of the components on the UPS display panel, and provides LED display information, control keys, indicators and LCD display information, including LCD screen types, detailed menu messages, prompt windows message and UPS alarm list. -
Page 40: Ups Load Battery Capacity And Fault Orientation Indicator
Chapter 4 Display Panel 4.1.2 UPS Load Battery Capacity And Fault Orientation Indicator The UPS load battery capacity and fault orientation indicator indicates the load situation of the UPS. In Battery mode, it indicates battery capacity. Upon UPS failure, it works with the UPS state indicators to indicate the fault type of the UPS. -
Page 41: Control Keys
Chapter 4 Display Panel 4.1.3 Control Keys The two control keys include ON/SILENCE key and OFF key. Their functions are given in Table 4-3. Table 4-12 Functions of the control keys Control key Function 1. Starting the inverter: Pressing and holding this key for one second starts the inverter. 2. - Page 42 6kVA UPS is shown in Figure 4-3, the interface of the 5kVA UPS is the same as the interface shown in Figure 4-3 except the capacity. LIEBERT ITA 6KVA UPS EMERSON NETWORK POWER CO.,LTD. Figure 4-43 Power-on interface 2. Menu interface The menu interface includes running interface, alarm message interface and setting interface, the main menu interface is shown in Figure 4-4.
- Page 43 Chapter 4 Display Panel Ensabled Default EODStartup Disabled System Ensabled ECO function Disabled Default Default Output voltage Disabled Default 3-month Self-test cycle 6-month Setting 9-month 12-month Horizontal Default Installation mode vertical Chinese Default Language English Resume default Have resumed default Return Setting menu Alarm message...
-
Page 44: Chapter 5 Ups Operation Instructions
Chapter 5 UPS Operation Instructions Chapter 5 UPS Operation Instructions This chapter describes UPS check before power-on, and the UPS power-on, turning on and routine operation procedures. During the operation, the buzzer alarm may appear, at this point, press the ON/SILENCE button for one second to silence the audible alarm, and press this button for one second again to resume the alarm beep. -
Page 45: Turning On Ups
Chapter 5 UPS Operation Instructions 5.3 Turning On UPS After the UPS power-on, press the ON/SILENCE key for more than one second. After about 30 seconds, the UPS will transfer to Normal Standby mode automatically and the INVERTER indicator will blink. When the UPS has output, the INVERTER indicator will turn on, as shown in Figure 5-2. -
Page 46: Battery Manual Self-Test
Chapter 5 UPS Operation Instructions to remind you to inspect the battery connection. At this moment, the UPS cannot start up. After the battery connection fault is removed, press and hold the ON/SILENCE key for more than four seconds to silence the alarm and start up the UPS. -
Page 47: Turning Off Ups
Chapter 5 UPS Operation Instructions turn on when the battery self-test starts; upon battery fault (battery not connected or battery failure), the FAULT indicator will turn on and the BATTERY indicator will blink, as shown in Figure 5-5. Note 1. The battery state information will be refreshed after each time of battery self-test. Confirm the battery fault information of the self-test upon battery undercharge by conducting another time of self-test after the battery has been fully charged. -
Page 48: Powering Off Ups
Chapter 5 UPS Operation Instructions Turning off UPS from Bypass mode Press and hold the OFF key for ten seconds, then the UPS stops output and enters standby state. At this moment the UPS is not powered off completely. If you need to power off the UPS completely, disconnect the mains input of the UPS. -
Page 49: Transferring Ups To Fault State From Output Short Protection
Chapter 5 UPS Operation Instructions obstacle at the airduct or increase the clearance between the UPS and the wall. After the UPS is cooled, connect it to the mains and restart it. 5.7.6 Transferring UPS To Fault State From Output Short Protection If the UPS load is short connected, the UPS will terminate output, the FAULT indicator will turn on, the yellow indicator of the load indicator will blink and the UPS will beep for a long time. -
Page 50: Auto Restart
Chapter 5 UPS Operation Instructions Figure 5-53 Configuration of the single UPS with external maintenance bypass For the UPS system which requires the power distribution to be accomplished by user, if you need to isolate the UPS from AC power, disconnect the external input MCB. Warning Cut off the maintenance power to prevent physical injury. -
Page 51: Chapter 6 Communication
(SPM), and other intelligent devices produced by Emerson with network communication capability. The SIC card can also be used with the Network Shutdown program designed by Emerson to provide safe automatic shutdown function for the computer, thus protecting data and reducing loss. -
Page 52: Rs232 Card
Refer to the corresponding user manual for the installation and operation guide. 6.2.4 RS232 Card RS232 card should be used together with Liebert ITA series UPS of Emerson. It only supports RS232 protocol ® communication, and the maximum length of communication cable cannot exceed 15 meters. -
Page 53: Chapter 7 Maintenance And Troubleshooting
Emerson is not liable for the environment results caused by failure to comply with the notices in this section or to use the waste battery recycle system provided by Emerson. -
Page 54: Cleaning Ups
7.6 Troubleshooting In the event of UPS abnormity and fault, shoot the trouble according to the instructions in Table 7-1. If the fault persists, seek technical support and service from the local service center of Emerson. Table 7-15 Troubleshooting table... - Page 55 BUS VOLT When reporting UPS fault to Emerson or dealer, please inform the UPS model and machine number (the bar code on the rear panel of the UPS). If the UPS is a long back-up UPS, you should also provide battery configuration information.
-
Page 56: Chapter 8 Options
Chapter 8 Options Chapter 8 Options This chapter introduces the options of the UPS product. 8.1 Option List The options are listed in Table 8-1. Table 8-16 Option list Name Model Remark ROHS U16-07C1 Battery module with built-in 16-cell 12V batteries ROHS You need to select a battery cabinet with two layers U20-24C2... -
Page 57: Appearance Of Battery Module
Chapter 8 Options Table 8-17 Battery module options Model Name Description Built-in 16-cell 12V 7.2A batteries, used to prolong the system running time. Note: It is recommended to extend four battery modules, at least two. The U16-07C1 Battery module (2U) accessory of the battery module is a cable, used to connect the extended battery module Note... -
Page 58: Back-Up Time Of Standard Battery Module For Single Ups
Chapter 8 Options Battery fuse box Ventilation hole Battery port 1 Battery port 2 保险 F32AH 400Vdc 注意:为避免着火的危险,请用同种容量和型号的保险替换 CAUTION-For Continued Protection Against Risk of F ire , Replace Only With Fuse of T he Sa me Type and Rating . Figure 8-57 Rear panel of the battery module 8.2.3 Back-Up Time Of Standard Battery Module For Single UPS In battery mode, the back-up time of a standard battery module (7AH/192V) upon full load is five minutes... -
Page 59: 1-In 1-Out 3 + 1 Parallel Pod
Chapter 8 Options Maintenance bypass MCB UPS1 input MCB UPS1 output MCB (with protective cover) UPS2 input MCB UPS2 output MCB Figure 8-59 Operation panel of the 1-in 1-out 1 + 1 parallel POD The rear panel of the 1-in 1-out 1 + 1 parallel POD is shown in Figure 8-6. POD I/O terminal bolck 16A output socket (2 pcs) UPS1 I/O port... -
Page 60: 3- In 1-Out 3 + 1 Parallel Pod
Chapter 8 Options 10A output socket 16A output socket POD I/O terminal block (with protective cover) (4 rows) (3 pcs) UPS1 I/O port External 10A charger port UPS2 I/O port UPS3 I/O port External 10A charger port UPS4 I/O port Figure 8-63 Rear panel of the 1-in 1-out 3 + 1 parallel POD 8.3.3 3- In 1-Out 3 + 1 Parallel POD The appearance of the 3-in 1-out 3 + 1 parallel POD is show in Figure 8-10. -
Page 61: Output Power Distribution Pod
Chapter 8 Options Maintenance bypass MCB UPS1 input MCB UPS2 output MCB UPS2 input MCB UPS1 output MCB (with protective cover) UPS3 input MCB UPS4 input MCB UPS3 output MCB UPS4 output MCB Figure 8-65 Operation panel of the 3-in 1-out 3 + 1 parallel POD The rear panel of the 3-in 1-out 3 + 1 parallel POD is shown in Figure 8-12. -
Page 62: Complete Set Of Cables
Chapter 8 Options Figure 8-67 Appearance of the output power distribution POD The operation panel of the output power distribution POD is shown in Figure 8-14. Output 220Vac 10A socket Output 220Vac 16A socket Input MCB Input port Figure 8-68 Operation panel of the output power distribution POD 8.4 Complete Set Of Cables 8.4.1 Parallel Communication Cables The communication cable is compulsory in parallel system. -
Page 63: Communication Options And Monitoring Options
Chapter 8 Options Table 8-22 Guide rail for rack installation Model Name Description Appearance A set of guide rail includes a left guide rail and a right guide rail, and its bearing is 50kg. Guide rail for rack Use the guide rail in the rack installation. It is UF-RMKIT2438 installation applicable to the various server cabinets with... -
Page 64: Lcd Display Panel Assembly
Chapter 8 Options The appearance of the 10A charger is shown in Figure 8-15. Display panel Ventilation hole Figure 8-69 Appearance of 10A charger The rear panel of the 10A charger is shown in Figure 8-16. Control port AC input Input switch Battery port Ventilation hole... -
Page 65: Uf-Bso-0050 Ita Ups Battery Shared Module
Chapter 8 Options 3. Use a screwdriver to remove the two M3 × 8 screws, which fix the LED display panel and the UPS chassis. Pull out the LED display panel and cables from the chassis, as shown in Figure 8-18 (b). Disconnect the three cables connecting to the LED display panel, and remove the LED display panel. - Page 66 Chapter 8 Options Table 8-25 Description of battery shared module Dimension Model Name Description Weight (Height × Width × Depth) When a battery string of large capacity supplies Battery shared UF-BSO-0050 power to several 5kVA UPSs at the same time, 377mm ×...
-
Page 67: Appendix 1 Glossary
Appendix 1 Glossary Appendix 1 Glossary Alternating current Cross-sectional area Direct current Digital signal processor Electromagnetic compatibility Electromagnetic interference Electrostatic discharge Economic End-of-discharge Field lighting power system Input/output Miniature circuit breaker Protective earth Power factor correction Parallel power distribution unit RCCB Residual current circuit breaker Residual current detector... - Page 68 Network Power service technicians. While every precaution has been taken to ensure the accuracy and completeness of this literature, Emerson Network Power assumes no responsibility and disclaims all liability for damages resulting from use of this information or for any errors or omissions.
Need help?
Do you have a question about the Liebert ITA 5kVA and is the answer not in the manual?
Questions and answers