Table of Contents
Advertisement
Quick Links
Advertisement
Table of Contents

Subscribe to Our Youtube Channel
Related Manuals for Nuvico CF-ED2N


Summary of Contents for Nuvico CF-ED2N
-
Page 2: Disclaimer
NUVICO. • NUVICO makes no warranties for damages resulting from corrupted or lost data due to a mistaken operation or malfunction of the Speed Dome Cameras, peripheral devices, or unapproved/unsupported devices. -
Page 3: Warning And Caution
Warning and Caution WARNING TO REDUCE THE RISK OF FIRE OR ELECTRIC SHOCK, DO NOT EXPOSE THIS PRODUCT TO RAIN OR MOISTURE. DO NOT INSERT ANY METALLIC OBJECTS THROUGH THE VENTILATION GRILLS OR OPENINGS ON THE EQUIPMENT. CAUTION The lightning flash with arrowhead symbol, within an equilateral triangle, is intended to alert the user to the presence of uninsulated “dangerous voltage”... -
Page 4: Fcc Compliances Statement
FCC Compliances Statement FCC INFORMATION: THIS EQUIPMENT HAS BEEN TESTED AND FOUND TO COMPLY WITH THE LIMITS FOR A CLASS A DIGITAL DEVICE, PURSUANT TO PART 15 OF THE FCC RULES. THESE LIMITS ARE DESIGNED TO PROVIDE REASONABLE PROTECTION AGAINST HARMFUL INTERFERENCE WHEN THE EQUIPMENT IS OPERATED IN A COMMERCIAL ENVIRONMENT. -
Page 5: Important Safeguards
Important Safeguards 1. Read these instructions. 2. Heed all warnings. 3. Follow all instructions. 4. Do not use this equipment near water. 5. Clean only with dry cloth. 6. Do not block any ventilation openings. Install in accordance with the manufacturer's instructions. -
Page 6: Introduction
Introduction ABOUT THIS MANUAL Thank you for purchasing NUVICO Fixed Camera. Our Fixed Cameras are all equipped with high resolution 1/3” Interline transfer CCD Imager for enhanced low light sensitivity. Super 700 TV Lines combined with ICR-filter, HLC (High Light Compensation), and, ATR (Adaptive Tone Reproduction) feature. -
Page 7: Table Of Contents
Table of Contents Disclaimer ..........................3 Warning and Caution ......................4 FCC Compliances Statement....................5 Important Safeguards ......................6 Introduction........................... 7 Table of Contents ......................... 8 Contents Verification ......................9 Camera Overview ....................... 10 Installing Auto Iris Lens ..................... 11 OSD Menu Tables (1) ...................... -
Page 8: Contents Verification
Contents Verification Installation of the camera must be performed by qualified service personnel in accordance with all local and national electrical and mechanical codes. Before installing the camera, please make sure that all of the following items are included in the box. -
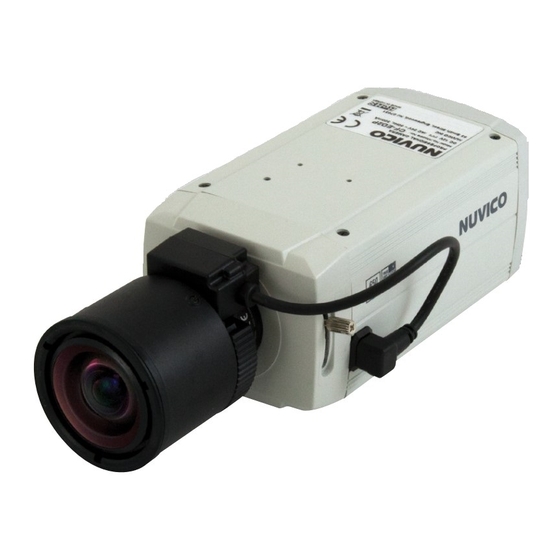
Page 9: Camera Overview
Camera Overview Left Button Up Button Enter Button Right Button Down Button Power Indicator Video Output Connector (BNC) AC/DC Compatible Input Terminal REAR VIEW... -
Page 10: Installing Auto Iris Lens
Installing Auto Iris Lens The lens is not supplied with this camera. Purchase a lens suitable for your requirements. This cameras is compatible with C-and CS-mount type lens. Notes ● For using main functions it is recommended to use Auto Iris Lens with DC type. ●... -
Page 11: Osd Menu Tables (1)
OSD Menu Tables (1) SETUP MENU (page 1) LENS [LENS] [SHUTTER/AGC] SHUTTER/AGC WHITE BAL AUTO AUTO BACKLIGHT MANUAL MANUAL PICT ADJUST MOTION DET RETURN RETURN NEXT (page2) EXIT SAVE ALL [WHITE BALANCE] [BACKLIGHT] PUSH USER 1 USER 2 ANTI CR MANUAL PUSH LOCK RETURN... -
Page 12: Osd Menu Tables (2)
OSD Menu Tables (2) SETUP MENU (page 2) [PRIVACY] [DAY/NIGHT] PRIVACY DAY/NIGHT AUTO COLOR CAMERA ID » AREA SEL LANGUAGE » COLOR CAMERA RESET » TRANSP » MOSAIC BACK (page 1) EXIT SAVE ALL RETURN RETURN [NR] [CAMERA ID] NR MODE Y LEVEL C LEVEL RETURN... -
Page 13: Osd Menu Controls & Navigation
OSD Menu Controls & Navigation OSD MENU CONTROLS (ON-SCREEN-DISPLAY) Enter Key - Used to access SETUP MENU mode. Up / Down Key - Used to scroll through the desired sub-menu selection and to move the cursor up or down during the OSD menu. Left / Right Key - Used to adjust the desired menu selection, and to move the cursor left or right during the OSD menu. -
Page 14: Osd Menu Terms & Settings
OSD Menu Terms & Settings 1. LENS This function is used to set the lens type which attached to fixed camera. 1.1 AUTO Select the AUTO and the camera will continuously monitor changes in the lighting intensity and automatically adjust the Iris to the most optimal level. TYPE Select the DC type only. -
Page 15: White Bal (White Balance Control)
OSD Menu Terms & Settings 2.2 MANUAL The Shutter and AGC can be selected manually according to user preference. MODE SHUT+AGC only. SHUTTER The shutter can be set to user preference. The shutter options between 1/60, 1/100, 1/250, 1/500, 1/1000, 1/2000, 1/4000 and 1/10000. The AGC can be set to user preference. -
Page 16: Backlight (Backlight Compensation)
OSD Menu Terms & Settings 3.3 USER1 / USER 2 This functions is used to adjust the blue (B-GAIN) and red (R-GAIN) gain. B-GAIN The option ranges from 0 to 255. R-GAIN The option ranges from 0 to 255. 3.4 ANTI CR (ANTI COLOR ROLLING) Set to this mode if color rolling is observed. -
Page 17: Atr (Adaptive Tone Reproduction)
OSD Menu Terms & Settings 6. ATR (ADAPTIVE TONE REPRODUCTION) The ATR feature improves the visibility of the entire picture by providing the optimum gradation compensation for the image with both low-luminance areas and high-luminance areas existing in the same picture. 6.1 LUMINANCE Set luminance level between LOW, MID and HIGH. -
Page 18: Privacy (Privacy Zone Masking)
OSD Menu Terms & Settings 8. PRIVACY (PRIVACY ZONE MASKING) This function is used to mask specific areas within the frame of the camera to be concealed. PRIVACY PRIVACY 8.1 AREA SEL (1~4) Select up to 4 separate area. AREA AREA SEL Note: Set BOTTOM and RIGHT first IIIIIIIIII000... -
Page 19: Nr (Noise Reduction)
OSD Menu Terms & Settings DAY->NIGHT This level determines the threshold level of the darkness before switching from Day mode to Night mode. NIGHT->DAY This level determines the threshold level of the darkness before switching from Night mode to Day mode. 9.2 COLOR The camera is always in color mode even during night-time operation. -
Page 20: Camera Id
OSD Menu Terms & Settings 11. CAMERA ID This function is used to enable the camera title to easily identify between the many other cameras that may be connected to your DVRs. Navigate by up / down / left / right button in rear and select the character using ENTER key. -
Page 21: Memo
MEMO... - Page 22 MEMO...
- Page 23 MEMO...
- Page 24 50303194A...
Need help?
Do you have a question about the CF-ED2N and is the answer not in the manual?
Questions and answers