Table of Contents
Advertisement
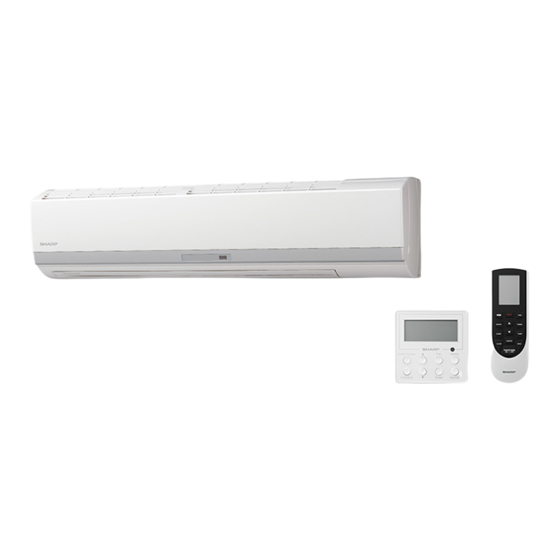
MODELS
In the interests of user-safety (Required by safety regulations in some countries) the set should be restored to its
original condition and only parts identical to those specified should be used
[1] SPECIFICATION ---------------------------------------- 2
[2] EXTERNAL DIMENSION ----------------------------- 3
----------------------------------------- 4
[1] WIRING DIAGRAM ------------------------------------- 4
[2] CONTROL UNIT PWB WRING ---------------------- 5
[1] Remote Control Introduction ------------------------- 6
------------------------------------ 10
[1] Error Code List ----------------------------------------- 10
SERVICE MANUAL
SPLIT TYPE AIR CONDITIONERS
INDOOR UNIT
AY-X36RU
CONTENTS
----------------------------- 2
----------------------------- 6
This document has been published to be used for after sales service only.
The contents are subject to change without notice.
1
OUTDOOR UNIT
AE-X36RU
[2] Troubleshooting for Main Malfunction ----------- 14
[3] Troubleshooting for Normal Malfunction --------- 29
[1] Refrigerant System Diagram ---------------------- 31
[2] PERFORMANCE CURVES ------------------------ 31
[1] INDOOR UNIT ----------------------------------------- 33
[2] OUTDOOR UNIT -------------------------------------- 36
AY-X36RU
AE-X36RU
S0402AYX6RCU/c
------------------------------ 31
------------------------ 33
Advertisement
Table of Contents
Troubleshooting

Related Manuals for Sharp AY-X36RU


Summary of Contents for Sharp AY-X36RU
-
Page 1: Table Of Contents
AY-X36RU AE-X36RU SERVICE MANUAL S0402AYX6RCU/c SPLIT TYPE AIR CONDITIONERS INDOOR UNIT OUTDOOR UNIT AY-X36RU AE-X36RU MODELS In the interests of user-safety (Required by safety regulations in some countries) the set should be restored to its original condition and only parts identical to those specified should be used... -
Page 2: Product Specification
AY-X36RU AE-X36RU PRODUCT SPECIFICATION [1] SPECIFICATION MODEL INDOOR UNIT OUTDOOR UNIT ITEMS AY-X36RU AE-X36RU Rated cooling capacity (Min. - Max.) Btu/h 33600 ( 7400 - 36000 ) Rated heating capacity (Min. - Max.) Btu/h 34600 ( 15000 - 36000 ) -
Page 3: External Dimension
AY-X36RU AE-X36RU [2] EXTERNAL DIMENSION Indoor Unit 53.1 (1350) 10.0 (253) 2.2 (56) 3.64 (92.5) Unit: inch (mm) Thickness: 0.9 (22.5) Thickness: 0.93 (23.5) Outdoor Unit 14.6 (371) 36 (914.1) 38.6 (980) 16.7 (424.2) 24 (609.6) Unit: inch (mm) -
Page 4: Electric Circuit
AY-X36RU AE-X36RU ELECTRIC CIRCUIT [1] WIRING DIAGRAM Instruction Symbol Symbol Color or Name Symbol Symbol Color or Name White Brown Yellow Blue Black YEGN Yellow/Green Orange Violet Jumper cap Green COMP Compressor NOTE: Jumper cap is used to determine fan speed and the swing angle of horizontal lover for this model. -
Page 5: Control Unit Pwb Wring
AY-X36RU AE-X36RU [2] CONTROL UNIT PWB WRING INDOOR 1 Interface of fan motor 2 Interface of communication 3 Power supply neutral wire 4 Fuse 5 Power supply live wire 6 Interface of live wire for health function 7 Interface of wired controller... -
Page 6: Function And Control
AY-X36RU AE-X36RU FUNCTION AND CONTROL [1] Remote Control Introduction Buttons on the Remote Control 1 ON/OFF Button 2 MODE Button 3 FAN Button 4 SWING Button 5 TURBO FAN Button Button 7 SLEEP Button ON/OFF MODE 8 TEMP Button 9 COMFORT Button... -
Page 7: Sleep Button
AY-X36RU AE-X36RU ● When selecting heating mode, the air conditioner operates under heat mode. Heat indicator " " on indoor unit is ON. Press "▲" or "▼" button to adjust set temperature. Press "FAN" button to adjust fan speed. Press "SWING" button to adjust fan blowing angle. - Page 8 AY-X36RU AE-X36RU 9. COMFORT button Press this button to start COMFORT function and " " will be displayed on the remote controller. After this function is set, the remote controller will send the detected ambient temperature to the controller and the unit will automatically adjust the indoor temperature according to the detected temperature.
-
Page 9: Lock Function
AY-X36RU AE-X36RU ● Under °F temperature display, the remote controller will display 46°F heating. 3. Lock function Press "▲" and "▼" simultaneously to turn on or turn off lock function. When lock function is on, " " icon is displayed on remote controller. -
Page 10: Troubleshooting
AY-X36RU AE-X36RU TROUBLESHOOTING [1] Error Code List Display Method of Indoor Unit Display Method of Outdoor Unit Indicator has 3 kinds of display Indicator Display (during blink- Malfunction status and during blinking, ON Dual 8 ing, ON 0.5s and OFF 0.5s) - Page 11 AY-X36RU AE-X36RU Display Method of Indoor Unit Display Method of Outdoor Unit Indicator has 3 kinds of display Indicator Display (during blink- Malfunction status and during blinking, ON Dual 8 ing, ON 0.5s and OFF 0.5s) A/C status Possible Causes 0.5s and OFF 0.5s...
- Page 12 AY-X36RU AE-X36RU Display Method of Indoor Unit Display Method of Outdoor Unit Indicator has 3 kinds of display Indicator Display (during blink- Malfunction status and during blinking, ON Dual 8 ing, ON 0.5s and OFF 0.5s) A/C status Possible Causes 0.5s and OFF 0.5s...
- Page 13 AY-X36RU AE-X36RU Display Method of Indoor Unit Display Method of Outdoor Unit Indicator has 3 kinds of display Indicator Display (during blink- Malfunction status and during blinking, ON Dual 8 ing, ON 0.5s and OFF 0.5s) A/C status Possible Causes 0.5s and OFF 0.5s...
-
Page 14: Troubleshooting For Main Malfunction
AY-X36RU AE-X36RU [2] Troubleshooting for Main Malfunction Malfunction of Temperature Sensor F1, F2 Main detection points: ● Is the wiring terminal between the temperature sensor and the controller loosened or poorly contacted? ● Is there short circuit due to trip-over of the parts? ●... - Page 15 AY-X36RU AE-X36RU Malfunction of Blocked Protection of IDU Fan Motor H6 Main detection points: ● SmoothlyIs the control terminal of PG motor connected tightly? ● SmoothlyIs the feedback interface of PG motor connected tightly? ● The fan motor can’t operate ●...
- Page 16 AY-X36RU AE-X36RU Malfunction of Protection of Jumper Cap C5 Main detection points: ● Malfunction Is there jumper cap on the mainboard? ● Is the jumper cap inserted correctly and tightly? ● The jumper is broken? ● Detection circuit of the mainboard is defined abnormal?
- Page 17 AY-X36RU AE-X36RU Malfunction of Zero-crossing Inspection Circuit Malfunction of the IDU Fan Motor U8 The zero-cross detection circuit of the main board is defined abnormal. Replace the main board.
- Page 18 AY-X36RU AE-X36RU Capacitor charge fault (Fault with outdoor unit) (AP1 the control panel of the outdoor unit) Main Check Points: ● Use AC voltmeter to check if the voltage between terminal L and N on the wiring board is within 210VAC~240VAC.
- Page 19 AY-X36RU AE-X36RU IPM Protection, Out-of-step Fault, Compressor Phase Overcurrent (AP1: the control panel of the outdoor unit) Main Check Points: ● If the connection between control panel AP1 and compressor COMP is secure? If loose? If the connection is in correct order? ●...
- Page 20 AY-X36RU AE-X36RU High temperature and overload protection diagnosis (AP1: the control board of the outdoor unit) Mainly detect: ● Is outdoor ambient temperature in normal range? ● Are the outdoor and indoor fans operating normally? ● Is the heat dissipation environment inside and outside the unit is good?
- Page 21 AY-X36RU AE-X36RU Start-up failure (AP1: the control board of the outdoor unit) Mainly detect: ● Whether the compressor wiring is connected correct? ● Is compressor broken? ● Is time for compressor stopping enough? Power on the unit Restart it up after...
- Page 22 AY-X36RU AE-X36RU Out of step diagnosis for the compressor (AP1: the control board of the outdoor unit) Mainly detect: ● Whether the system pressure is too high? ● Whether the input voltage is too low? Out of step occurs in...
- Page 23 AY-X36RU AE-X36RU Overload and air exhaust malfunction diagnosis (AP1: the control board of the outdoor unit) Mainly detect: ● Wether the PMV is connected well or not? Is PMV damaged? ● Is refrigerant leaked? 20 minutes after the complete unit is...
- Page 24 AY-X36RU AE-X36RU Power factor correct or (PFC) fault (a fault of outdoor unit) (AP1: the control board of the outdoor unit) Mainly detect: ● Check if the reactor (L) of the outdoor unit and the PFC capacitor are broken Start...
- Page 25 AY-X36RU AE-X36RU Communication malfunction: (AP1: the control board of the outdoor unit) Mainly detect: ● Is there any damage for the indoor unit mainboard communication circuit? Is communication circuit damaged? ● Detect the indoor and outdoor units connection wire and indoor and outdoor units inside wiring is connect well or not, if isthere...
- Page 26 AY-X36RU AE-X36RU Communication malfunction:(AP1: the control board of the outdoor unit) Mainly detect: Detect the indoor and outdoor units connection wire and indoor and outdoor units inside wiring is connect well or not, If is there any damage? Is there any damage for the indoor unit mainboard communication circuit? Is communication circuit damaged?
- Page 27 AY-X36RU AE-X36RU High-pressure Protection High-pressure protection Use pressure gauge to Measure if the pressure switch Replace the mainboard of measure if the pressure is is normal outdoor unit really high? Check if the operation mode of Set the correct operation...
- Page 28 AY-X36RU AE-X36RU Malfunction of Over current Protection E5 Main detection points: ● EliminatedIs the supply voltage unstable with big fluctuation? ● Is the supply voltage too low with overload? ● Hardware trouble? Troubleshooting for E5 malfunction Is the supply voltage unstable...
-
Page 29: Troubleshooting For Normal Malfunction
AY-X36RU AE-X36RU [3] Troubleshooting for Normal Malfunction Air conditioner can’t be started up Possible Causes Discriminating Method (Air conditioner Status) Troubleshooting Confirm whether it’s due to power failure. If yes, No power supply, or poor con- After energization, operation indicator isn’t bright wait for power recovery. - Page 30 AY-X36RU AE-X36RU ODU Fan Motor Can’t Operate Possible causes Discriminating method (air conditioner status) Troubleshooting Wrong wire connection, or Check the wiring status according to circuit dia- Connect wires according to wiring diagram to poor connection. gram. make sure all wiring terminals are connected firmly.
-
Page 31: Refrigeration Cycle
AY-X36RU AE-X36RU REFRIGERATION CYCLE [1] Refrigerant System Diagram Outdoor unit Indoor unit Gas pipe side Valve 4-Way valve Di s charge Heat Accumlator Suction exchanger Compressor (evaporator) Heat exchanger Liquid pipe (condenser) side Valve Strainer Electron Strainer expansion valve COOLING... -
Page 32: Capacity Variation Ratio According To Temperature
AY-X36RU AE-X36RU 2. Capacity Variation Ratio According to Temperature Cooling Heating Conditions Condition Indoor: DB 80.6°F WB66.2°F Indoor:DB 70°F Indoor air flow: Super High Indoor air flow: Super High Pipe length : 24.6ft Pipe length:24.6ft Outdoor temp. (˚F) Outdoor temp. (˚F) 3. -
Page 33: Disassembly Procedure
AY-X36RU AE-X36RU DISASSEMBLY PROCEDURE Be sure to turn off the circuit breaker before disassembly procedure. When reassembling the unit after repairing, be sure to install screws to their original positions. The screws used are not the same in specifications such as corrosion-resistant treatment, tip shape and length. - Page 34 AY-X36RU AE-X36RU Remove the temperature sensor and the earth 2) Remove the seven (7) screws connecting the front case. wire. Screw 1) Pull out the indoor temperature sensor. 2) Remove the earth screw, and then remove the earth wire. Earth screw 3) Remove the front case.
- Page 35 AY-X36RU AE-X36RU Remove the connection pipe between indoor Remove the fixing plate of motor. and outdoor units. Remove the two (2) screws on the fixing plate of motor, and then remove the fixing plate of motor. Separate the connection pipe betweenindoor and outdoor units.
-
Page 36: Outdoor Unit
AY-X36RU AE-X36RU [2] OUTDOOR UNIT PROCEDURE 1. Remove the six (6) screws fixing the terminal cover. 5. Remove the seven (7) screws fixing the front panel. 2. Remove the two (2) screws fixing the pipe cover. 6. Remove the eleven (11) screws fixing the right side panel. - Page 37 AY-X36RU AE-X36RU 7. Remove the three (3) screws fixing the control box cover. 9-4. Disconnect the three (3) connectors after removing the lock part. 8. Cut the three (3) fixing bands. 10. Remove the nine (9) screws fixing the PWB.
- Page 38 AY-X36RU AE-X36RU 13. Remove the three (3) screws fixing the control box assembly. 18. Remove the four (4) screws fixing the reactor box. 19. Cut the four (4) fixing bands. 14. Remove the four (4) screws fixing the heat sink.
- Page 39 AY-X36RU AE-X36RU 23. Disconnect the three (3) terminals (compressor lead wire) 27. Remove the nut fixing the propeller fan. and the two (2) terminals (thermistor lead wire). 28. Loosen the fixing band fixing the lead wire. 24. Unhook the hook of the spring fixing the compressor heater assembly.
- Page 40 AY-X36RU AE-X36RU Position of the thermistors. 31. Remove the two (2) screws fixing the motor angle. White 32. Remove the four (4) screws fixing the fan motor. Yellow 33. Remove the three (3) screws fixing the heater cover. Black 34. Remove the sixteen (16) screws fixing the heater assembly.
-
Page 41: Parts List
AYX36RU PartsGuide PARTS LIST SPLIT TYPE ROOM AIR CONDITIONER INDOOR UNIT OUTDOOR UNIT MODELS AY-X36RU AE-X36RU CONTENTS INDOOR UNIT INDEX OUTDOOR UNIT HOW TO ORDER REPLACEMENT PARTS To have your order filled promptly and correctly, please furnish the following information. - Page 42 AYX36RU [1] INDOOR UNIT...
- Page 43 AYX36RU PRICE PART PARTS CODE DESCRIPTION RANK MARK RANK [1] INDOOR UNIT 9JX20012712-L2 Front Panel Assy 9JX24212120 Stand Bar 9JX11122106 Filter Sub-Assy 9JX20022159 Front Case Sub-assy 9JX10512166 Upper Guide Louver 9JX10512167 Lower Guide Louver 9JX10542704 Axile Bush 9JX10512169 Air Louver 2 9JX10512168 Air Louver 1 9JX10582086...
- Page 44 AYX36RU [2] OUTDOOR UNIT...
- Page 45 AYX36RU PRICE PART PARTS CODE DESCRIPTION RANK MARK RANK [2] OUTDOOR UNIT 9JX01473050 Front Grill 9JX0143500401P Cabinet 9JX01305086P Front Side Plate 9JX10335014 Axial Flow Fan 9JX06813401 Drainage hole Cap 9JX02803026P Chassis Sub-assy 9JX06123401 Drainage Connecter 9JX00205275 Compressor 9JX7651873209 Electrical Heater(Compressor) 9JX4300040029 Magnet Coil 9JX03123890...
- Page 46 AYX36RU INDEX PRICE PART PRICE PART PARTS CODE PARTS CODE RANK MARK RANK RANK MARK RANK 9JX4003800101 1-57 [ 9 ] 9JX4201026902 1-38 9JX00205275 9JX01100100191 1-21 9JX4300040029 2-10 9JX43130192 2-22 9JX01163491 2-18 9JX49010055 1-58 9JX01175037 2-19 9JX49013046 2-31 9JX01233134 2-35 9JX01252398 1-23 9JX51029945432...
Need help?
Do you have a question about the AY-X36RU and is the answer not in the manual?
Questions and answers