Advertisement
Table of Contents
- 1 Table of Contents
- 2 Safety Precautions
- 3 Name and Features of each Part
- 4 Suggestions
- 5 Setting the Clock
- 6 Cook Control
- 7 Cooking Rice
- 8 Cooking with Cuchen
- 9 Vegetable Soup
- 10 Preset
- 11 Keeping Warm
- 12 Care and Maintenance
- 13 Troubleshooting
- 14 Troubleshooting before Contacting the Service Center
- Download this manual
Cuchen IH Electric Pressure Rice Cooker – User Manual
●
Read this manual carefully before use to ensure the proper use of your Cuchen electric pressure rice cooker.
●
Once you have finished reading it, keep the manual at a place where other people would be able to find it easily.
With Cuchen, quality is always priority number one.
1
WHA-VE0601GD Series ENG-0308.indd 1
2013-03-19
1:12:13
Advertisement
Table of Contents

Related Manuals for Cuchen IH VE06 Series


Summary of Contents for Cuchen IH VE06 Series
- Page 1 Cuchen IH Electric Pressure Rice Cooker – User Manual ● Read this manual carefully before use to ensure the proper use of your Cuchen electric pressure rice cooker. ● Once you have finished reading it, keep the manual at a place where other people would be able to find it easily.
- Page 2 Thank you for purchasing a Cuchen electric pressure rice cooker. In order to ensure proper use and maintenance of this product, please read and follow the instructions contained in this docu- ment carefully. Also, refer to this document if you experience issues or problems while using the product.
-
Page 3: Table Of Contents
Operating Instructions Suggestions …………………………………………………… 09 Setting the Clock ……………………………………………… 10 Cook Control ………………………………………………… 11 Cooking Rice ………………………………………………… 13 Cooking with Cuchen ………………………………………… 15 Preset ……………………………………………………… Steam and Slow/Preset …………………………………… Volume Control/Auto Clean ………………………………… Keeping Warm ………………………………………………… 21 Care and Maintenance ………………………………………... -
Page 4: Safety Precautions
Safety Precautions ※ Information contained in this section serves to protect the user’s safety and prevent damage to property. ※ Carefully read and follow all safety precautions. Danger Risk of severe injury or even death is assumed if the instructions are not followed. Warning Risk of serious injury or property damage is assumed if the instructions are not followed. - Page 5 Before Use Installation Install the product on an even Be cautious against tripping Do not drop or give shock to the Secure at least 1.64yd of surface and protect the on the power cord and product or the inner pot. clearance above the product.
- Page 6 Safety Precautions During Use Contact the service center if the Do not overfill the inner pot. Do not place magnetic objects Remove the collected water from inner pot’s coating has been on top of the lid, or use the inside the cooker after each use. The rice may not cook properly and damaged or peeled.
-
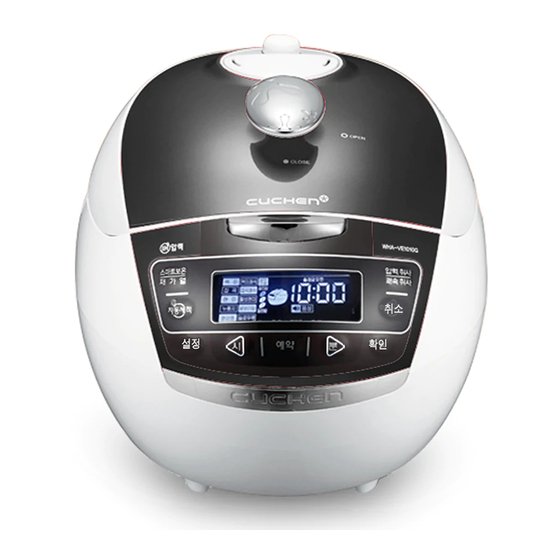
Page 7: Name And Features Of Each Part
Name and Features of Each Part Front and Inside Pressure Cap Auto Pressure Regulator Regulates the cooker ’s internal (Steam Vent) pressure. Automatically discharges pressure from inside the cooker. Lid Lock Handle Steam Cap Pressure Packing Forms a tight seal to prevent steam from escaping Safety Sensor inside the cooker. - Page 8 Name and Features of Each Part Controls / Display AUTO CLEAN Button CANCEL Button Used to disable all the features. Used to select Auto Clean/Sterilization. To use the Sterilization feature, press the AUTO CLEAN button twice in PRESSURE/QUICK Button succession. Used to start cooking in each of the menus.
-
Page 9: Suggestions
Suggestions ● Cooking flavorful rice starts from using the right amount of water. - 4 Servings of Plain Rice - Water Level Type of Rice Cooking old rice or Cooking fresh/soaked rice or to get fluffy rice to get an hard-boiled result Old Rice Slightly above the scale Slightly below the scale... -
Page 10: Setting The Clock
The battery’s lifecycle is approximately 3 years. This figure can vary depending on the product’s specifications. ▶ Melanoizing Cooking rice with a Cuchen electric pressure rice cooker leaves rice at the bottom of the pot slightly brown in color. This is known as melanoizing and adds savory flavor and aroma to the cooked rice. -
Page 11: Cook Control
Cook Control 3 Pressure Settings ※ These 3 pressure settings are enabled in PLAIN mode only. ※ While cooking is in progress, the three pressure settings are disabled. The rice cooker may release steam while operating in this mode. This is the result of the cooker regulating its internal Caution pressure, and is completely normal. - Page 12 Cook Control Fine-Tuning (MIXED Mode – 2 minutes for Soak and 2°C for Heat) ※ Fine-tuning is disabled in the Preset option. ※ Fine-tuning is enabled in PLAIN, MIXED, BROWN, BARLEY, and NURUNGJI modes only. Press the SET button three times. This will activate Press the HOUR/MENU or MIN/MENU button to the fine-tuning mode, as indicated by a message.
-
Page 13: Cooking Rice
Cooking Rice Instructions Plug in the cooker, close the lid, and turn the Lid Use the HOUR/MENU and MIN/MENU buttons to select a cooking mode. Lock to the Lock position. Make sure the pressure packing is seated properly and that the ●... - Page 14 Cooking Rice Instructions Menu PLAIN PLAIN MIXED BROWN GABA MIXED BARLEY STEAM SLOW NURUNGJI QUICK QUICK STICKY Misc. Category 2 Servings 2 Servings 2 Servings 2 Servings 2 Servings 2 Servings 2 Servings 2 Servings 2 Servings Servings 6 Servings 5 Servings 4 Servings 4 Servings...
-
Page 15: Cooking With Cuchen
Cooking with Cuchen Create amazing dishes with Cuchen! Five-Grain Rice Cook in MIXED mode Ingredients: 2 cups of sticky rice and black bean ● 1/2 cup of red bean, 1/2 tablespoon of salt, 1 cup of waxy sorghum+glutinous millet+glutinous Chinese millet... - Page 16 Cooking with Cuchen Cook in SLOW Mode Jujube Tea Ingredients: 180g of jujubes, ginger, and honey (sugar) ● Directions ● 1. Thoroughly rinse and tear the jujubes, and slice the ginger. Place the jujubes in the inner pot, along with little bit of the ginger.
-
Page 17: Vegetable Soup
Operating Instructions Cook in SLOW Mode Pumpkin Porridge Ingredients: 1kg of peeled pumpkin, 3/4 to 1 cup of sticky rice powder, white sugar, and fine salt ● Directions ● 1 Dice the pumpkin into cubes and add to the inner pot along with the sticky rice powder. Add water (2 1/2 to 3 measuring cups for 6- to 7-serving pots and fill to the 8-serving level if using a 10-serving pot). -
Page 18: Preset
Preset Using PRESET (PLAIN Mode for 9:50am) Check to see if the clock setting is correct. For instructions on setting the time, see p.10. If the current clock setting is incorrect, the preset time will not be accurate. Turn the Lock Lid to the Lock position and press the PRESET button. - Page 19 Cooking and Preset in STEAM and SLOW Modes Instructions for Cooking (40 minutes of STEAM) Use the HOUR/MENU or MIN/MENU button and select STEAM or SLOW. Press OK button to confirm. STEAM SLOW Time Setting 10 minutes to 90 minutes 1 hour to 12 hours 50 minutes Hour Decrease by 5 minutes.
- Page 20 Voice Adjustment/Auto Clean Voice Control Press the SET button four times. Four Times Adjust the volume using the HOUR/MENU and MIN/MENU buttons and press OK button. Volume can be set to OFF to 4. The volume can be adjusted from OFF to Level 4. Setting the volume to OFF effectively turns off the voice navigation feature and ※...
-
Page 21: Keeping Warm
Keeping Warm Preset Warm (Warm until 6:50am) Press the SET button 7 times to access the Preset Warm mode. Use the HOUR/MENU or MIN/MENU to enable or disable Preset Warm and press OK button. Enabling Preset Warm gives you the option to change the timer setting. ●... - Page 22 Keeping Warm Adjusting Warming Temperature Settings Press the SET button 5 times to access the Temperature Setting mode. Use the HOUR/MENU or MIN/MENU to set the desired warming temperature. The temperature may be set to between 69°C and 77°C. ●...
-
Page 23: Care And Maintenance
Care and Maintenance Cleaning Unplug the power cord before cleaning. Do not spray water directly on the product and do not use benzene or thinner to clean. Failure to keep the cooker clean is one of the causes of rice taking on a smell while being kept warm. Inner Pot Inner Pot Lid and Pressure Packing Do not use a rough or metallic scrubber, a rough brush, or abrasives. - Page 24 Care and Maintenance Cleaning the Pressure Nozzle Pressure Cap/Pressure If the pressure regulation nozzle’s Regulation Nozzle packing is out of place (as shown in the diagram), steam will be allowed to seep If water has collected here, through. Make sure the packing is soak it up using a dry kitchen properly seated in place.
- Page 25 Operating Instructions Cleaning the Clean Cover After washing the clean cover, make sure to dry it completely before attaching it back on. Not keeping the clean cover clean is one of the causes of rice taking on a smell while being kept warm. ●...
- Page 26 Care and Maintenance From the back of the clean cover, insert the clean cover handle at the center in the direction of the arrow. Rear When attaching the packing to the clean cover, have the clean cover facing you so that the writing is clearly visible and insert the packing into the clean cover from one section ①.
-
Page 27: Troubleshooting
Troubleshooting before Contacting the Service Center Check the information below before contacting the service center: A fully functional cooker may appear to be malfunctioning if you are not familiar with the cooker’s usage or due to easily correctable causes. If you are experiencing a problem with the product’s use, troubleshoot by referencing the information below. - Page 28 Troubleshooting before Contacting the Service Center Problem Check Troubleshooting These error messages indicate a problem Please contact the service center. with the temperature sensor. shown on the display. This is called melanoizing effect and actually the result of added rice flavor and aroma. 8.
- Page 29 MEMO WHA-VE0601GD Series ENG-0308.indd 29 2013-03-19 1:13:15...
- Page 30 MEMO WHA-VE0601GD Series ENG-0308.indd 30 2013-03-19 1:13:15...
- Page 31 WHA-VE0601GD Series ENG-0308.indd 31 2013-03-19 1:13:15...
- Page 32 WHA-VE0601GD Series ENG-0308.indd 32 2013-03-19 1:13:15...
Need help?
Do you have a question about the IH VE06 Series and is the answer not in the manual?
Questions and answers