Table of Contents
Advertisement
Available languages
Available languages
This guide was created for common use for multiple products and may contain images or contents that are different from the product purchased. /
VES1000 Series_ENG+CHS.indb 1
VES1000 Series_ENG+CHS.indb 1
ELECTRIC IH PRESSURE
Prior to using your Cuchen Electric Pressure Rice Cooker,
please read this User's Guide to ensure proper use of this product.
After reading it, keep it in a place where users of the product can always see it.
You can access more information about Cuchen rice
This guide is subject to change according to the company's circumstances.
CUCHEN
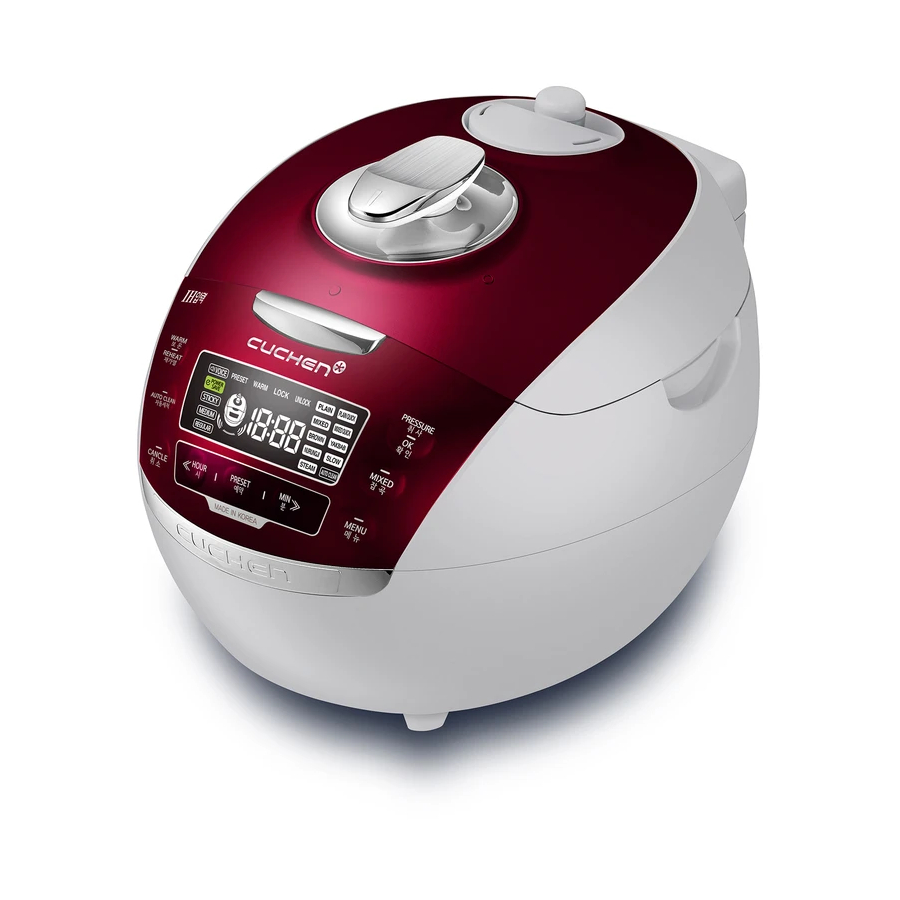
RICE COOKER
[US] VES100 Series
cookers by using the QR code.
This User's Guide includes a product warranty. /
US-VES100-V2
2021-06-10
2021-06-10
6:21:03
6:21:03
Advertisement
Chapters
Table of Contents

Related Manuals for Cuchen VES100 Series


Summary of Contents for Cuchen VES100 Series
- Page 1 RICE COOKER [US] VES100 Series Prior to using your Cuchen Electric Pressure Rice Cooker, please read this User’s Guide to ensure proper use of this product. After reading it, keep it in a place where users of the product can always see it.
- Page 2 Thank you for purchasing our Cuchen IH Electric Pressure Rice Cooker. Be sure to read the User’s Guide for proper use and maintenance of the product. Refer to this User’s Guide when a trouble occurs while using the product. Please keep this guide in a safe place because it contains the product warranty.
-
Page 3: Table Of Contents
Contents Before Use Safety instructions ………………………… 4 Part Names and Functions ……………… 8 Taking Care of the Product ……………… 10 Using the Product How to Make Delicious Rice …………… 16 3-step Rice Taste Control Using Pressure … 17 Delicate Rice Taste Control ……………… 18 How to Cook Rice …………………………... -
Page 4: Safety Instructions
Important Safety Precautions ※ T he purposes of these precautions are to protect your safety and prevent property damages. ※ C arefully read the cautions to use the product correctly. Danger If the instructions are not followed, severe injury or even death may occur. Warning If the instructions are not followed, serious injury or property damage may occur. Caution If the instructions are not followed, minor injury or property damage may occur. Power Supply This product is only for 120V. Do not use the product with any other Be sure to remove any water from your hands Plug the product into an outlet of 120V with... -
Page 5: Before Use
Before Use Installation Do not use the product near a heat source such as direct sunlight, Do not install or clean the product in a sink, bathroom or other gas stove, lighter, heating appliance, and furnace. places where water can enter. Danger There is a danger of electric leak, electric shock, Electric leak, electric shock or fire may occur. - Page 6 Important Safety Precautions During Use Never use the product without the inner pot. Do not touch the inside of the inner pot, Do not use a deformed inner pot. pressure weight, clean cover, etc. during or after Only use a genuine, dedicated inner pot. There is a danger of electric shock or fire.
- Page 7 Before Use During Use To wash the inner pot, soak it in water sufficiently before cleaning, Scrubbers for Cleaning Inner Pot and do not use a coarse scrubber, metallic scrubber, brush or abrasive May Be Used May Not Be Used Caution as it may peel off the coating on the inside and outside of the pot.
-
Page 8: Part Names And Functions
Part Names and Functions Part Names and Functions Front/Internal Parts Pressure weight Automatic steam exhaust unit Adjusts the inner pressure of the (steam outlet) inner pot to keep it consistent. The built-in automatic steam exhaust unit automatically discharges steam from the inner pot. Steam cap Lid handle Safety sensor Pressure packing Seals the inner pot so that steam does not Detects the temperature inside the... - Page 9 Before Use Before Use Control/Display [Auto Clean] button [Pressure/OK] button • Used to start cooking for each menu item. Use it for auto-cleaning. • Press the [Pressure/OK] button twice in rapid succession to start Quick Cooking which cooks rice in a shortened amount of time.
-
Page 10: Taking Care Of The Product
Taking Care of the Product Taking Care of the Product How to Clean the Clean Cover After cleaning the clean cover, be sure to dry it before attaching it to the lid. • If you do not clean the clean cover, it will cause an odor during warming. (Unplug the product and let the main body cool down before cleaning it.) •... - Page 11 Before Use Before Use To mount the outer packing on the clean cover, position the packing so that the letters on it are upright, fix the groove on the packing into the clean cover starting at ① and secure it in place by pressing it in a circle in the direction of ②.
- Page 12 Taking Care of the Product Taking Care of the Product How to Replace Pressure Packing • The packing is designed to prevent leakage of steam and is designed not to easily fall out, but you can pull it out with some force by hands. When necessary, you can remove it for cleaning. •...
- Page 13 Before Use Before Use Using a pen with a cap, press and rub the pressure packing in the direction of the arrow (A→ B) as shown in the figure to complete the attachment. Refer to [Pressure Packing Cross Section] below. The attachment is completed correctly.
- Page 14 Taking Care of the Product Taking Care of the Product How to Clean Unplug the product before cleaning it. Do not sprinkle water on it or wipe it with benzene, thinner, etc. If you do not thoroughly clean the product, there may be odors during warming. Inner pot Inner pot lid, pressure packing Do not use a coarse scrubbier, metallic scrubber,...
- Page 15 Before Use Before Use How to Clean a Clogged Pressure Nozzle If the packing of the pressure control nozzle is out of place as If there is stagnant shown in the figure, secure it water, wipe it off back in place to prevent steam with a well leakage. wrung-out cloth. Steam exhaust unit Steam cap Pressure weight/ Pressure control nozzle ● You can use Auto Clean Mode to clean the steam exhaust unit and remove foreign matters from it. (See page 24.) How to Clean the Steam Cap Remove the steam cap...
-
Page 16: How To Make Delicious Rice
How to Make Delicious Rice How to Make Delicious Rice ● Delicious rice starts with good water control! - Based on 4 servings of white rice - When cooking old rice When cooking new Water Adjustment Rice Type or making soft-boiled rice or soaked rice or When cooking old rice Higher than the mark rice making hard-boiled rice When cooking new rice Lower than the mark When cooking soaked rice Lower than the mark To make hard-boiled rice Lower than the mark... -
Page 17: 3-Step Rice Taste Control Using Pressure
Melanoising phenomenon • The Cuchen electric pressure cooker may produce slightly burnt rice with a pale brown color on the bottom. This phenomenon is called "melanoising," which gives rice savory fragrance and flavor. Note that, for preset cooking when the rice has been sitting on the bottom for a while, fine starch that settles on the bottom of the inner pot may intensify melanoising than for normal cooking. -
Page 18: Delicate Rice Taste Control
Delicate Rice Taste Control Delicate Rice Taste Control ※ The Delicate Rice Taste Control function is available for cooking STICKY, MEDIUM, REGULAR, mixed grains, brown rice, and scorched rice. In standby mode, press [MENU] button to select Press and hold the [MENU] button for 3 seconds with the desired menu item selected desired menu. -
Page 19: How To Cook Rice
How to Cook Rice How to Cook Rice How to Cook Scoop an exact amount of rice for the number of Plug in the product, close the lid, and turn servings using the measuring cup and wash it. the lid handle to the lock position. •... - Page 20 How to Cook Rice How to Cook Rice ● Select the desired menu item using the [MENU] Settling in steam button. Every time you press the [Menu] button, it selects a menu item in the order of White Sticky Rice→ White Medium Rice→ White Regular Rice→ White Rice Quick→...
- Page 21 Using the Product Using the Product Cooking Time by Menu Item Classification Servings Cooking Time Foods Menu Plain rice, potato black sesame rice, aster Sticky 2 ~ 10 servings Approx. 28~41 minutes saesongi rice, sweet pumpkin rice, bean sprouts Rice rice, seafood rice in hot pot White Rice Plain rice, spicy stir-fried octopus with rice, herb...
-
Page 22: How To Preset
How to Preset How to Preset Presetting Cooking Time Set the lid handle to the lock position and press the [Preset] Flash Flash button. To change the menu item, press the [Menu] button to select the item. • If you press the [Preset] button without setting the lid handle to the lock position, the preset function will not start. -
Page 23: Steam/Slow Cook
Steam/Slow Cook Steam/Slow Cook How to Cook (when cooking Steam for 30 minutes) Select Steam with the [Menu] button and press the [Pressure/OK] button. Every time you press the [Menu] button, it selects a menu item in the order of White Sticky Rice→ White Medium Rice→ White Regular Rice→ White Rice Quick→... -
Page 24: How To Auto Clean
How to Auto Clean How to Auto Clean How to Auto Clean You can keep the rice cooker clean by using Auto Clean Mode. It is a function to eliminate odors by removing foreign matters and to suppress bacteria growth. Use the measuring cup and the Auto Clean water scale of the inner pot to pour in water. -
Page 25: During Warming
During Warming During Warming Cautions during Warming Stir the rice and collect it in the center. To prevent rice near to the surfaces of the inner pot from drying, stir the rice and gather it toward the center. Do not let the rice touch the inner pot lid. - Page 26 During Warming During Warming How to Adjust the Warming Temperature and Heating Level Press and hold the [Warm/Reheat] button for 3 seconds to enter Warming Temperature Setting Mode. Set the desired temperature using the [Hour] and [Min] buttons. • The default temperature is 74°C. • The temperature can be changed within 69 ~ 78°C. •...
-
Page 27: Voice Guide Setting
Voice Guide Setting Voice Guide Setting Voice Guide Setting Press and hold the [Cancel] button for more than 3 seconds in Standby Mode. Press [Cancel] button for more than 3 seconds in standby mode to enter voice control mode. If you press the [Cancel] button during cooking, rice water may spew out. So, adjust the voice volume after cooking is finished. -
Page 28: Cooking Guide
Cooking Guide Cooking Guide Ingredients: rice, water ● ● How to Cook 1. Put the right amount of rice in the measuring cup according to the number of servings. 2. Rinse the rice thoroughly until the rice water becomes clear. 3. Put the washed rice into the inner pot and pour the right amount of water for the number of servings using the scale. Plain rice (white rice) 4. Put the inner pot in the cooker and close the lid. 5. Select White Rice in the menu and press the [Pressure/OK] button to start cooking. 6. When cooking is completed, stir the rice well. ※ Press the [Menu] button to select the desired taste, and then press the [Pressure/OK] button. Ingredients: rice, water ●... - Page 29 Using the Product Using the Product Ingredients: rice, various grains, water ● ● How to Cook 1. Measure rice and grains (rice to grains ratio of about 7:3) using the measuring cup. 2. Rinse the rice and grains thoroughly until the rice water becomes clear. 3. Put the washed rice and grains into the inner pot and pour the right amount of water for the number of servings using the scale. Mixed Grains Quick 4. Put the inner pot in the cooker and close the lid. 5. Select Mixed Grains Quick in the menu and press the [Pressure/OK] button to start cooking. 6. When cooking is completed, stir the rice well. ※ Soak beans in lukewarm water for at least 15 minutes. ※...
- Page 30 Cooking Guide Cooking Guide Ingredients: 2 cups of glutinous rice, ½ cup each of green kernel black ● beans (black beans) and red beans, ½ tablespoon of salt, 1 cup of glutinous sorghum + glutinous foxtail millet + glutinous Chinese millet, 3 cups of water + remaining water after boiling red beans ●...
- Page 31 Using the Product Using the Product Ingredients: 800g of chicken, 4 cloves of garlic, ¾ cup of glutinous rice, ● 1 ~ 2 roots of fresh ginseng, 2 jujubes, 4 cups of water, a little salt and pepper ● How to Cook 1. Cut the both sides of the chicken 's stomach and make a hole.
- Page 32 Cooking Guide Cooking Guide Ingredients: 800g of pork, 1 green onion, 1 ginger root, 5 cloves of garlic, ● 3 cups of water ● How to Cook 1. Remove fat from the pork and put it in the inner pot with the chopped green onion, ginger, and garlic and pour 3 cups of water. 2. Put the inner pot in the cooker and close the lid. 3. Select Steam in the menu, set the time to 50 minutes, and start cooking by pressing the [Pressure/OK] button. Boiled Pork ※ Depending on the characteristics of ingredients such as meat juice and salt, there may be partial scorching.
- Page 33 Using the Product Using the Product Ingredients: onions, 100g of potatoes, 60g of carrots, 70g of ● mushrooms, 200g of beef sirloin, 160g of cream soup powder, a little olive oil and salt, 8 cups of water (1200g) How to Cook ●...
-
Page 34: Read This Before Contacting The Service Center
Read this before contacting the service center Read this before contacting the service center Please check the following before contacting the service center. A fully functional cooker may appear to malfunction if you are not familiar with the cooker’s use or due to easily correctable causes. In that case, check the following and you might be able to solve simple issues without having to contact the service center. - Page 35 Using the Product Using the Product Problems Check the following. Solutions 8. The bottom of the This is called the melanoizing effect and Set the heating temperature of the rice takes on a adds savory flavor and aroma to the Finetuning function to -2°C or 0°C. (Refer to yellowish tinge.
- Page 36 VES1000 Series_ENG+CHS.indb 36 VES1000 Series_ENG+CHS.indb 36 2021-06-10 2021-06-10 6:21:53 6:21:53...
- Page 37 CUCHEN IH压力电饭煲 [US] VES100 Series 请务必详细阅读本使用说明书,正确使用"CUCHEN"压力电饭煲。 阅读后,请将其保管在用户随手可及处。 有关CUCHEN电压力锅的更多信息, 请访问QR码。 本使用说明书内含质量保证书。/ 本说明书为通用版,因此其中包含的图片及内容可能会与您购买的产品有所不同。 / 本说明书可能会因公司情况变化发生变更。 US-VES100-V2 VES1000 Series_ENG+CHS.indb 1 VES1000 Series_ENG+CHS.indb 1 2021-06-10 2021-06-10 6:21:54 6:21:54...
- Page 38 托盘 请勿将本品用于烹饪指定菜单以外的食物(豆类、红豆、番茄、粉状食品等)。 蒸气排放口可能堵塞,造成爆炸或燃烧的危险。 注意 加热方式 IR/IH 电饭锅的电子诱导加热 (IH) 方式是在底面和侧面缠绕铜线,发送强电流,在线缆周围形成磁力线, 对锅内进行加热的方式,可以令每一粒米均匀煮熟,做出有光泽且美味的饭。 * 在煮饭或保温中运行 IH,发出共振音(“叮~”声),此为正常产品。 产品规格 产品名称 IH 压力电饭煲 [US] VES100 Series 额定电压及频率 120 V~,60 Hz 额定功率 1 400 W 最大煮饭容量 1.8 L (10人份) 调节装置压力/安全装置压力 88.3 kPa/166.7 kPa 产品尺寸(长×宽×高) 406 x 307 x 296 mm 重量...
- Page 39 目录 使用前 安全注意事项…………………………… 各部分名称及功能……………………… 产品清洁方法…………………………… 10 使用 如何煮出美味的饭……………………… 16 3 阶压力调节饭味功能 ……………… 17 细微饭味调节功能……………………… 18 煮饭方法………………………………… 19 预约方法………………………………… 22 特色营养炖 / 慢炖煮饭方法 ………… 23 自动清洗方法…………………………… 24 保温过程中……………………………… 25 语音调节功能…………………………… 27 烹饪指南………………………………… 28 故障申报前 诊断故障………………………………… 33 环保清单………………………………… 35 VES1000 Series_ENG+CHS.indb 3 VES1000 Series_ENG+CHS.indb 3 2021-06-10 2021-06-10...
-
Page 40: 安全注意事项
安全注意事项 ※ 为保证用户的安全,防止财产损失。 ※ 请详阅注意事项,正确使用产品。 危险 不遵守指示内容可能导致重伤甚至死亡 警告 不遵守指示内容可能导致严重受伤和物质损失 注意 不遵守指示内容可能导致轻微受伤和物质损失 关于电源 本产品是 120V~ 专用产品。 请不要使用交流 120V以外的电源。 将电源插头插入或拔出插座时,请保持手部 没有沾水。 请务必将其插入额定电流为 15A 以上的 使用变压器可能导致触电、火灾。 危险 120V 专用插座。 不使用额定专用插座, 用湿手触碰电源插头和 有可能发生触电或火灾 插座时,有触电危险。 危险。 请使用 15A 以上的电源 延长线。 请勿拉拽电源线,务必抓住电源插头拔下。 请勿任意连接或加工电源插头。 请勿反复插拔电源插头。 冲击可能导致触电和火 有触电、火灾的危险。 有触电、火灾的危险。... - Page 41 使用前 关于安装 请勿将本产品放在有光线直射的地方或燃气灶、打火机、电热器具、 请不要将产品安装在洗手池、浴室等容易进水之处。 炉子等靠近热源的地方使用。 危险 有漏电、触电、变色、变形的危险。 有漏电、触电、火灾的危险。 请勿将电源线放在靠近热源的地方。 产品进水时,请停止使用, 因热源造成电源线损伤时, 拔出电源插头后,联系 A/S 客服中心。 有可能发生触电或火灾危险。 使用时,请与音响、电视等家电保持 2米以上的距离。 请不要在产品附近使用或保管可 请不要将产品安装在灰尘多,或 请勿将本产品放置在米桶或多功能搁板上。 燃性气体和易燃物。 有化学物质之处。 夹在缝隙中的电源线可能导致火灾和触电。 蒸汽排出时,多功能米桶和多功 有火灾的危 可能导致触电、火灾、产品性能 能搁板可能造成机身损伤或诱发 险。 下降。 火灾、触电。 请不要将产品安装在倾斜处,并 请注意防止手脚及其他物体绊到 请防止产品、内锅掉落,或对其 请将产品安装在距上方物体有 对其过度施加压力,或冲击。 电源线,导致产品掉落。 加以冲击。 1.5m 以上空间的场所。 注意 可能导致受...
- Page 42 安全注意事项 使用中 禁止在没有内锅的情况下使用。 煮饭和烹饪过程中或完成后,因内锅内部和 请勿使用已变形的内锅或专用内锅以外的其 压力阀、清洁盖等处温度过热,请勿用手触 他产品。 可能导致触电和火灾。 警告 碰。 已放入米和水时,请务 可能因高温造成烫伤的 可能会导致火灾及故 必与 A/S 服务中心联 危险。 障,同时存在爆炸的危 系,确认有无异常后再 压力阀掀开,蒸汽排 险。 使用。 出,能造成烫伤。 内锅变形或掉落时,请 使用专用内锅 使用专用内锅 联系 A/S 客服中心。 请勿将装饰罩、抹布或其他物品放在锅盖上 没有内锅的状态下,请勿放入清洁盖、金属 请勿在煮饭中拔下电源插头或按下其他按 使用。 性物质等进行使用。 钮。 产品火灾、变形或受压 可能导致触电和火灾。 可能导致故障。 可能造成爆炸危险。 (特别,注意儿童) 请勿在煮饭状态下或煮饭刚结束后,将脸或...
- Page 43 使用前 使用中 洗刷内锅时,经水充分泡后,内锅内外侧的镀膜可能会脱落,因此 内锅清洗用洗碗刷分类 请勿使用粗糙的洗碗布、金属性洗碗布、毛刷和抛光剂等擦拭。 可以使用 不可使用 注意 超细纤维洗碗刷 钢丝球 尤其,请勿为了内锅表面的光泽而使用研磨 海绵洗碗刷 绿色洗碗刷 剂、牙膏、其他抛光剂等进行擦拭。 可能导致变色或涂层脱落。 网眼洗碗刷 洗碗刷专用烧焦的锅 请勿握住内锅手柄提起产品。握 清洁产品表面(尤其是金属部 烹饪(使用营养蒸、万能粥功 产品置于米桶或多功能架板上 住内锅手柄提起产品会有锅盖弹 分)及清洁盖时,请勿使用粗糙 能)后,请务必清洁本产品。 时,请在煮饭时抽出架板。 起的危险。 的洗碗刷、金属洗碗刷、刷子、 烹饪后立即煮饭或保温会有异味 排放的蒸气可能损坏米桶和架 研磨剂等。 可能导致产品故障,破损和伤 混入饭内。请将内锅、清洁盖和 板。 害。 可能导致产品损坏和变形。 压力圈等擦拭干净后使用。 请勿向产品内喷放杀虫剂或化学物质等。 请将内锅手柄对准机体上的嵌入 请勿将外部表面上粘有饭粒、异 槽,然后将内锅放入机体。 物的内锅放入机体。...
-
Page 44: 各部分名称及功能
各部分名称及功能 各部分名称及功能 正面/内部名称 压力阀 自动蒸汽调节装置(蒸气排放口) 调整内锅内部压力。 带有自动蒸汽排放装置,可以自动 排放内锅蒸汽。 蒸汽盖 锅盖连接手柄 安心传感器 压力圈 感应内锅内部温度。 保持密封,防止内锅内部的蒸气漏 出。压力圈的使用寿命根据使用次数 约为1~3年,建议定期更换后使用。 压力盖 压力圈为消耗品,请通过 A/S 客服中 心或大型超市购买进行更换。 清洁盖 清洁盖手柄 清洁盖压力圈 内锅手柄 打开锅盖按钮 按下按钮,打开锅盖。 接水槽 请在煮饭完毕后把水倒掉,并拆下 操作部分/标识部分 接水槽进行清洁。 有可操作产品所有 用厨房专用的中性洗涤剂和海绵, 功能的按钮。 彻底清洗拆下的接水槽。 内锅 特殊镀层,不易脱落、不易粘锅。 自动温度传感器 煮饭或保温时,感应温度。 电源插头 配件... - Page 45 使用前 使用前 操作屏/显示屏 [自动清洗]按钮 [煮饭/确认] 按钮 用于自动清洗。 • 用于开始各菜单的煮饭。 • 连续按下两次[煮饭/确认]按钮运行快速煮饭,缩短煮 饭时间。煮饭前先泡米后使用快速煮饭时饭味更佳。 快速煮饭仅使用于“白米”、“杂粮”菜单。 对准“白米”或“杂粮”相应菜单的水位线进行煮饭。 [保温/再加热]按钮 • 用于保温和再加热。 • 用于进入调节保温温度。 [杂粮]按钮 用于选择杂粮菜单。 [取消]按钮 • 用于取消所有功能。 [菜单]按钮 • 用于进入语音调节功 用于选择菜单和调节饭味。 [预约]按钮 能。 用于预约煮饭。 [时]按钮 [分]按钮 • 预约时/设置时间时 “时”增加 • 预约时/设置时间时 “分”增加 • 用于在细微调节饭味模式下设置泡米时间。 •...
-
Page 46: 产品清洁方法
产品清洁方法 产品清洁方法 清洁盖清洗方法 清洁盖清洗后,必须晾干后才能安装到锅盖上。 • 如不清洗,保温过程中可能会出现异味。(请务必拔下电源插头,待产品冷却后进行清洗。) • 请用干布擦拭机体和锅盖。请勿使用苯、辛那水等。 • 使用过程中,米汤可能会粘附在清洁盖、锅盖和内锅内部产生淀粉膜,但并不影响清洁卫生。 • 煮饭中,因内部水分的蒸发,锅盖侧面可能会漏出微蒸汽。 握住清洁盖手柄,并沿箭头方向拉动即可方便地取下进行 清洗。 清洗清洁盖时,如图所示按下正面的清洁盖手柄环部 取下,再取下外侧密封圈。 请经常用厨房专用中性洗涤剂和海绵清洗,并用干布 擦干。 请在清洁盖背面,沿箭头方向按下清洁盖手柄的中央部位 嵌入。 在背上 VES1000 Series_ENG+CHS.indb 10 VES1000 Series_ENG+CHS.indb 10 2021-06-10 2021-06-10 6:22:29 6:22:29... - Page 47 使用前 使用前 安装清洁盖外侧密封圈时,保持清洁盖上的字朝向正面, 将密封圈槽从外侧某一部分 (①) 嵌入清洁盖,再沿 ② 号方向旋转一圈安装密封圈。 (密封圈正面部位(前面)的‘正面’字样自下而上地显示。) 在压力锅盖上安装清洁盖时,握住清洁盖手柄,沿箭头方 向对准压力锅盖中央的支架后用力按压。 清洁盖组装时,注意事项 • 必须确认清洁盖的正面和背面。 • 请不要将螺丝和其他物品,放入清洁盖的孔内。 正确的安装方法 [清洁盖正面] [清洁盖背面] 保证文字端正的显示,可以在正面看到清洁盖手 字样方向颠倒,可以看见清洁盖手柄部分的孔, 柄,并且密封圈部分的“正面”字样位于清洁盖 垫圈翼部可以贴紧压力锅盖部分。 文字的中央。 文字完好地显示 注意:如果没有安装清洁盖,可能导致摩擦噪音并引起压力锅盖涂层面的脱落。 VES1000 Series_ENG+CHS.indb 11 VES1000 Series_ENG+CHS.indb 11 2021-06-10 2021-06-10 6:22:30 6:22:30...
- Page 48 产品清洁方法 产品清洁方法 压力圈的替换方法 • 为防止漏气,密封圈被固定而不易脱落。但用手握住密封圈用力拉拽可将其取下,必要时可取下进行清洗。 • 密封圈属消耗品。漏气时,请取下密封圈进行清洗,按下列方法装上密封圈后进行确认。若之后仍出现漏气现 象,请在代理店或 A/S 服务中心购买密封圈后进行替换。 • 压力圈的使用寿命根据使用次数约为1~3年,建议定期更换后使用。压力圈由硅胶构成。 如图,请用手按住并拖拽来取下压力圈。 将压力圈的对齐标示部分和压力锅盖的对齐标示部分 如图所示对齐插入。 1 外侧嵌入凸起 2 内侧嵌入凸起 • 压力圈插入顺序 4 处对齐标示部分均已插入的状态。请按号码顺序进 行对齐。 对准压力圈 4 处显示部分 对准压力锅盖 4 处显示部分 VES1000 Series_ENG+CHS.indb 12 VES1000 Series_ENG+CHS.indb 12 2021-06-10 2021-06-10 6:22:31 6:22:31...
- Page 49 使用前 使用前 请用带帽的笔,按照图中箭头方向按揉压力圈的按压部 (A→B 顺序),已完成插入。请参考如下[压力圈截面]。 正常完成附着的状态。 正确的安装方法 错误的组装方法 顺序 [压力圈截面] • 若未正常附着,使用中的蒸 汽泄漏会使米饭夹生或造成 烫伤。使用前请检查是否正 常附着。 内侧按压部 * 请首先插入“A”部分后,再插入“B”部分。 注意:清洗密封圈后,必须遵守以上内容才可以防止蒸汽泄漏。 VES1000 Series_ENG+CHS.indb 13 VES1000 Series_ENG+CHS.indb 13 2021-06-10 2021-06-10 6:22:31 6:22:31...
- Page 50 产品清洁方法 产品清洁方法 清洁方法 请拔下电源插头后清洗,而且不要直接喷水或用苯、辛那水等擦拭产品。 未清洁产品时,会在保温时产生异味。 内锅 内锅盖、压力圈 禁止使用粗糙的洗碗布、金属性洗碗布、毛刷和 请将软布用温水沾湿,拧干后擦拭异物。清洁压 抛光剂等擦拭。因为可能导致内锅内外涂层脱 力圈能有效保持产品性能,并抑制异味的产生。 落,所以请使用厨房专用洗涤剂和软布,海绵等 使用后无需取下压力圈,但请使用干净的布 擦拭。 擦拭。 尤其,请勿为了内锅表面的光泽而使用研磨 剂、牙膏、其他抛光剂等进行擦拭。可能导 致变色或涂层脱落。 锅体内部 接水槽 请取出内锅,并将底部沾有的异物清除后, 请分离接水槽后,进行清洗。用厨房专用的中性 再使用。自动温度传感器或地板上有异物 洗涤剂和海绵,彻底清洗拆下的接水槽。 时,无法感应温度,从而导致米饭夹生、异 常操作和火灾。请使用拧干的软布来擦拭自 动温度传感器金属板,避免损伤。 请不要在煮饭或保温刚结束后触摸(清 洁)。有烫伤的危险。 配件 请将配件清洗干净,并晾干后,再进行保管。 VES1000 Series_ENG+CHS.indb 14 VES1000 Series_ENG+CHS.indb 14 2021-06-10 2021-06-10 6:22:31 6:22:31...
- Page 51 使用前 使用前 压力喷嘴阻塞时的清洁方法 如图所示,压力调节喷嘴的压力 圈脱落时,会出现蒸气泄漏, 有积水时,请用拧干的 请将压力圈安装在喷嘴上。 软布擦拭。 蒸汽排放装置 蒸汽盖 压力阀/压力调节喷嘴 ● 可用自动清洗模式清除蒸气排放装置的异物,并同时进行清洗。(请参考第24页。) 蒸汽盖清洗方法 如图所示地取下蒸 将位于正面的手柄 气排放帽。 向①的方向按下, 然后沿②的方向取 下经常清洗。 组装蒸气排放帽 将蒸气排放帽安装 时,请对准①的 于产品时,先将蒸 孔,然后沿箭头方 气排放帽安装至锅 向按压并套紧。 盖,然后按下①将 其牢牢固定。 注意:煮饭刚结束后蒸气排放帽会烫,请不要触摸。会导致烫伤。 VES1000 Series_ENG+CHS.indb 15 VES1000 Series_ENG+CHS.indb 15 2021-06-10 2021-06-10 6:22:32 6:22:32...
-
Page 52: 如何煮出美味的饭
如何煮出美味的饭 如何煮出美味的饭 ● 美味的饭从调节水量开始! - 白米4人份量标准 - 米的种类 调水 用陈米煮饭或做 用新米、泡好的米 软饭时 煮饭或做硬饭时 用陈米煮饭时 比刻度多 用新米煮饭时 比刻度少 用泡好的米煮饭时 比刻度少 做硬饭时 比刻度少 做软饭时 比刻度多 用免洗米煮饭时,请按人数份量对准刻度标准。 比刻度多 比刻度少 (免洗米:洗好的米) ● 保温时,如果有异味 - 请经常进行清洗。尤其,盖部清洁状态不佳,可能会导致细菌 繁殖,保温时可能会出现异味。 粘到饭粒或异物 - 未经清洗直接使用内锅及配件容易导致饭粒变质和细菌繁殖, 时,请用拧去水的 进而产生异味。此时,请在内锅中加入水和醋的混合物,选择 抹布擦干净。 尤其要经常清 自动清洗功能,最后洗净。 洗蒸汽排放... -
Page 53: 阶压力调节饭味功能
※ 3 阶压力调节饭味仅在白米模式下可用。按菜单按钮可选择各种饭味对应的模式(偏软饭 → 标准饭 → 普通饭)。使用调节饭味功能时,会在煮饭过程中排出蒸气,该现象属于调节内锅内部压力的正 常操作。(请按个人口味选用适当的调节饭味。) ※ 正在煮饭时不能使用调节饭味功能。 偏软饭 通过增加高压煮出黏稠柔软的饭。 初始状态下亮起。 标准饭 兼备黏软和粒粒爽口的饭味。 普通饭 和压力电饭煲相比,能煮出和普通电饭煲一 样不软不硬的饭。 使用调节饭味功能时,会在煮饭过程 正在煮饭 中排出蒸气,该现象属于调节内锅内 部压力的正常操作。 注意 黑化现象 • 用CUCHEN压力电饭煲煮出的饭底层略焦,呈浅褐色。即为“黑化 (Melanoizing) 现象”,做出的饭喷香美 味,味香纯正。预约煮饭时,长时间浸泡米粒会使淀粉成分沉积于内锅底部,此时的黑化现象将比一般煮饭严 重,敬请参考。 VES1000 Series_ENG+CHS.indb 17 VES1000 Series_ENG+CHS.indb 17 2021-06-10 2021-06-10 6:22:32 6:22:32... -
Page 54: 细微饭味调节功能
细微饭味调节功能 细微饭味调节功能 ※ 细微调节饭味功能适用于白米、杂粮、糙米、锅巴煮饭。 ※ 无法在预约模式下使用细微调节饭味功能。 请使用[菜单]按钮选择菜单。 在所需菜单中按住[菜单]按钮3秒钟,即可 显示设置的浸泡时间和加热温度。 白米的细微调节饭味要在选择3阶段压力饭味的状 态下设置浸泡时间和加热温度才可正确设置成功。 初始设定的泡米时间为0分,加热温度为0度 闪烁 闪烁 闪烁 闪烁 请使用[时]按钮选择泡米时间。 请使用[分]按钮选择加热温度。 泡米时间可选为 0、2、4、6、8 分钟。(用初始设 加热温度可选择 -2、0、2、4 度。(以初始设置 定的泡米时间煮饭时请选择0分钟,如需延长泡米 的加热温度煮饭时选择 0 度,提高或降低加热温 时间请在2分钟、4分钟、6分钟、8分钟中选一。) 度时选择 2、4 度或 -2 度。) 延长泡米时间有助于米粒吸收水分,饭味更加松 煮饭前选择煮沸温度,可以调节做出喷香或普通 软。 的饭味。 延长泡米时间时煮饭时间随之延长,此时米中的 提升温度时煮饭时间随之延长,此时米中的水溶 水溶性淀粉涌出沉淀,黑化现象比一般煮饭严... -
Page 55: 煮饭方法
煮饭方法 煮饭方法 煮饭方法 请根据人数使用计量杯取米后洗净。 请插入电源插头并关闭锅盖,然后将锅盖结 合手柄旋至‘锁定’位置。 • 请时刻确认压力圈是否套牢以及压力阀是否水 平。 • 未对准“锁定”位置按下[煮饭/确认]按钮时不 会运行。 • 请务必清除温度传感器上粘有的异物。 • 请将内锅周围的水分完全擦干后放入煲体。 一杯为 1 人份。 请按照人数加水至相应的刻度线。 例)做4人份白米饭时 做4人份白米饭时 将4杯米洗净并放入内锅,然后添水至白米刻度4 即可。 • 和压力电饭煲相比,能煮出和普通电饭煲一样不软不硬的饭。 偏硬饭菜单 • 兼备黏软和粒粒爽口的饭味。 标准饭菜单 • 连续按下两次[煮饭/确认]按钮运行快速煮饭,缩短煮饭时间。 白米/杂粮煮饭 • 建议6人份量以下时,使用快速煮饭功能,煮熟的程度可能不如正常煮饭。 • 快速煮饭仅使用于白米/杂粮菜单。 • 在糙米菜单中按下[煮饭/确认]按钮运行糙米煮饭。 糙米煮饭 VES1000 Series_ENG+CHS.indb 19 VES1000 Series_ENG+CHS.indb 19 2021-06-10... - Page 56 煮饭方法 煮饭方法 ● 请用[菜单]按钮选择所需的菜单。 焖饭 每按一次[菜单]按钮,就会以白米偏软 → 白 米标准饭 → 白米普通饭 → 白米快速 → 杂 粮 → 杂粮快速 → 糙米 → 夜宵 → 锅巴 → 慢炖 → 营养美味蒸的顺序反复选择。 闪烁 闪烁 ● 煮饭结束 请在煮饭结束后立即将饭搅拌均匀。 不加搅拌直接放置时,饭会变硬变色并产生 异味。 请按下[煮饭/确认]按钮。 煮饭后缓慢开启锅盖的现象属于保护安全的 按下[煮饭/确认]按钮开始煮饭,显示剩余时 正常运行。 间。 以最大容量煮饭时压力阀可能无法旋转,并...
- Page 57 使用 使用 各菜单煮饭时间 分类 煮饭量 煮饭时间 烹饪种类 菜单名 约28分钟 ~ 约41分钟 米饭、土豆黑芝麻饭、蹄叶杏鲍菇饭、南瓜糯米饭、 偏软 2人份~10人份 饭 豆芽饭、海鲜锅饭 白米 约35分钟 ~ 约47分钟 米饭、鱿鱼盖饭、山菜拌饭、咖喱饭、烤牛肉盖饭、 其他 2人份~8人份 油豆腐寿司、紫菜包饭、辣白菜炒饭 约18分钟 ~ 约29分钟 白米快速 米饭 2人份~6人份 约49分钟 ~ 约64分钟 糙米 2人份~6人份 糙米饭 约38分钟 ~ 约45分钟 杂粮 2人份~6人份...
-
Page 58: 预约方法
预约方法 预约方法 预约煮饭 将锅盖手柄对准锁定后,按下[预约]按钮。若欲更改菜单, 闪烁 闪烁 请按[菜单]按钮选择菜单。 • 将锅盖结合手柄未对准锁定位置时,按下[预约]按钮将无法执 行预约。 设置预约时间。 闪烁 闪烁 • 时:可以1小时为单位调节 • 分:可以10分钟为单位调节 • 显示的时间表示到预约结束为止的剩余时间。 • 预约煮饭结束后,系统会保存最后设定的预约时间。 按下[煮饭/确认]按钮。 • 预约时间和“预约”标示为持续亮起状态,则表示预约进行中。 • 预约时间是煮饭结束的时间。 • 预约煮饭结束的时间,随饭量和菜单, 可能会产生约30分钟的差异。 可能在预约煮饭完成时间前提前结束。 各菜单可预约的时间 可预约的菜单 可预约的时间 1小时 ~ 12小时50分钟 白米、杂粮、糙米、锅巴 ※ 白米快速、杂粮快速无法执行预约。 预约煮饭时注意事项 •... -
Page 59: 特色营养炖 / 慢炖煮饭方法
营养美味蒸 / 慢炖煮饭方法 营养美味蒸 / 慢炖煮饭方法 煮饭方法 (营养炖30分钟煮饭时) 利用[菜单]按钮选择营养美味蒸,然后按下[煮饭/确认]按钮。 每按一次[菜单]按钮,就会以白米偏软 → 白米标准饭 → 白米普通 饭 → 白米快速 → 杂粮 → 杂粮快速 → 糙米 → 夜宵 → 锅巴 → 慢炖 → 营养美味蒸的顺序反复选择。 闪烁 闪烁 利用[时]或[分]按钮选择所需时间,然后按下[煮饭/确认] 按钮。 营养美味蒸 慢炖 15 ~ 90 分钟 1小时... -
Page 60: 自动清洗方法
自动清洗方法 自动清洗方法 自动清洗方法 使用自动清洗功能即可保持电饭煲清洁。清除异物、去除异味以及抑制细菌生成。 请使用计量杯加水至内锅自动清洗的水位刻度。 将内锅放入电饭煲后,盖上锅盖,并将手柄对准锁定位置。 • 盖上锅盖之前,请确认是否已安装清洁盖。 在待机状态时,按下[自动清洗]按钮。 • 自动清洗将持续16分钟。 • 自动清洗结束后,转换为待机状态。 自动清洗注意事项 • 请按照自动清洗水位线刻度倒入水。 • 切勿加入干净的水以外的洗涤剂、肥皂、洗洁剂、其他药品等。 • 排放蒸汽时请勿让面部、身体等接触蒸汽排放口。 VES1000 Series_ENG+CHS.indb 24 VES1000 Series_ENG+CHS.indb 24 2021-06-10 2021-06-10 6:22:34 6:22:34... -
Page 61: 保温过程中
保温过程中 保温过程中 保温时注意事项 请将饭搅匀后,堆积到中间。 请将饭由下至上地搅匀后堆积到中间, 以防内锅周围的饭干燥。 请不要使饭接触内锅锅盖。 保温时,请不要将饭勺放在锅内。 将饭勺放在锅内保温时,饭可能变硬、变色或产生异味。 木制饭勺等可能导致细菌繁殖并导致异味。 保温时间以12小时以内为宜。 保温超过12个小时时,香甜的饭味消失,并且可能会变色或产生异味。 保温时,请盖紧锅盖。 保温功能仅适用于白米。杂粮、糙米等应在煮饭后立即食 用,不宜保温。 尤其是压力饭,从特性上来看比普通饭锅的饭更快变色。 需要长时间(12小时以上)保温时,请盛在其他容器中冷冻保管。 下次食用时,请只取所需份量放入微波炉适当加热食用。 参考 VES1000 Series_ENG+CHS.indb 25 VES1000 Series_ENG+CHS.indb 25 2021-06-10 2021-06-10 6:22:35 6:22:35... - Page 62 保温过程中 保温过程中 保温温度及加热量调节方法 长按[保温/在加热]按钮3秒,进入保温温度设置模式。 使用[时]或[分]按钮,设置所需温度。 • 基本设定温度为74度。 • 温度变更范围为69~78度。 • 饭较凉或有馊味时,请将控制温度提高2~3度。 • 饭发黄时,请将控制温度降低2~3度。 按下[烹饪/确认]按钮,设置保温温度并进入保温加热量调节模式。 使用[时]或[分]按钮,设置保温加热量。 • 默认加热量为0度。 • 加热量变更范围为-2~5度。 • 锅盖上凝结的水较多时,请选择1~2的加热量。 • 内锅边缘溢饭现象严重或有馊味时,请选择-2~-1的加热量。 按下[烹饪/确认]按钮的话,保温加热量设置就完成了。 设置完成前按[取消]按钮或不按按钮超过15秒时,切换为更改前设置项目。 再加热模式 将保温中的饭变成像新做的一样,热气腾腾。 在保温状态下,按下[保温/再加热]按钮,开始再加热。 • 再加热只在保温模式下工作。 • 再加热结束后,转换为保温状态。 • 再加热过程中,再次按下[保温/再加热],即可取消再加热, 并转为保温。 • 再加热结束后,请立即食用。 • 除了白米以外的菜单(杂粮、糙米等),应在煮饭结束后立即食用,再加热时,可能会变色或有异味。 参考 •...
-
Page 63: 语音调节功能
语音调节功能 语音调节功能 语音调节功能 请在待机状态时,按[取消]按钮3秒以上。在待机状态下, 长按3秒[取消]按钮,可设置调节音量功能。 煮饭过程中按[取消]按钮,饭水可能会溢出来,请在结束煮饭后 调整音量。 只能在待机状态下设定语言和调节语音。 按[时]按钮,选择指示语言(韩语、中文)。 • 1 - 韩语,2 - 中文 • 每按一次[时]按钮,就会以2 → 1 → 2反复选择韩语、中 文。 按[分]按钮,可以选择音量。 • 可以设置0~4阶段音量。设置为0时,解除语音功能,显示屏上 的语音导航图标就会消失。 • 每按一次[分]按钮,就会以2 → 3 → 4 → 0 → 1 → 2的顺 序反复选择。 按下[烹饪/确认]按钮的话,语音设置就完成了。 •... -
Page 64: 烹饪指南
烹饪指南 烹饪指南 ● 材料:大米、水 烹饪方法 ● 1. 请用计量杯量取所需人数份量的米。 2. 请将量取的米淘洗干净。 3. 请将洗净的米放入内锅,然后加水至人数份量对应的白米水量刻度位置。 4. 请将内锅放入电饭煲内,并盖好锅盖。 5. 请在菜单中选择白米后,按下[煮饭/确认]按钮,进行烹饪。 米饭(白米) 6. 烹饪结束后,请将饭搅拌均匀。 ※ 按[菜单]按钮,按个人喜好选择饭味,按[煮饭/确认]按钮。 ● 材料:大米、水 烹饪方法 ● 1. 请用计量杯量取所需人数份量的米。 2. 请将量取的米淘洗干净。 3. 请将洗净的米放入内锅,然后加水至人数份量对应的白米水量刻度位置。 4. 请将内锅放入电饭煲内,并盖好锅盖。 5. 请在菜单中选择白米快速后,按下[煮饭/确认]按钮,进行烹饪。 白米快速 6. 烹饪结束后,请将饭搅拌均匀。 材料:大米、各种杂粮、水 ● ●... - Page 65 使用 使用 ● 材料:大米、各种杂粮、水 烹饪方法 ● 1. 请用计量杯量取所需人数份量的大米和杂粮(大米和杂粮比例约为7:3)。 2. 请将量取的大米和杂粮淘洗干净。 3. 请将洗好的大米和杂粮放入内锅后,加水至杂粮水量刻度位置。 4. 请将内锅放入电饭煲内,并盖好锅盖。 5. 请在菜单中选择杂粮快速后,按下[煮饭/确认]按钮,进行烹饪。 杂粮快速 6. 烹饪结束后,请将饭搅拌均匀。 ※ 将豆子在温水中浸泡15分钟以上。 ※ 请将所有杂粮按适当比例进行烹饪。 材料:大米、水 ● ● 烹饪方法 1. 请用计量杯量取所需人数份量的米。 2. 请将量取的米淘洗干净。 3. 请将洗净的米放入内锅,然后加水至人数份量对应的白米水量刻度位置。 4. 请将内锅放入电饭煲内,并盖好锅盖。 5. 请在菜单中选择锅巴饭后,按下[煮饭/确认]按钮,进行烹饪。 锅巴 6. 烹饪结束后,请将饭搅拌均匀。 材料:糙米、水...
- Page 66 烹饪指南 烹饪指南 材料:糯米2杯、黑豆•红豆各 ½ 杯、食盐 ½ 大匙、黏高粱+糯谷+糯黄米=1杯、水+ ● 煮红豆的水=3杯 ● 烹饪方法 1. 将糯米、黏高粱、糯谷、糯黄米、黑豆分别洗净捞出。 2. 将豆洗净后放入小锅内加冷水用大火煮沸,倒掉第一遍汤水后重新加入足量冷水, 煮至红豆即将绽开为止。 3. 将准备好的糯米和杂粮放入内锅,混入煮红豆的水,加盐,添水至杂粮刻度3。 五谷饭 4. 请将内锅放入电饭煲内,并盖好锅盖。 5. 请在菜单中选择杂粮后,按下[煮饭/确认]按钮,进行烹饪。 6. 烹饪结束后,请将饭搅拌均匀。 ※ 将豆子在温水中浸泡15分钟以上。 ※ 请将所有杂粮按适当比例进行烹饪。 ● 材料:大米4杯、豆芽200g、碎牛肉150g 调味酱:酱油5大匙、辣椒粉1大匙、芝麻盐2小匙、葱末1大匙、蒜末1小匙、香油1 ● 小匙 烹饪方法 ● 1. 请将豆芽掐须洗净后控水。 2. 将洗净的大米放入内锅,添水至白米刻度4,然后放入豆芽和肉。 3.
- Page 67 使用 使用 ● 材料:大枣200g,生姜少许,蜂蜜(糖)少许 烹饪方法 ● 1. 请将洗净撕好的大枣和切好的少许生姜一同放入内锅,加水至白米8人份刻度的位 置。 2. 请将内锅放入电饭煲内,并盖好锅盖。 3. 请在菜单中选择慢炖,并将时间设成8 ~ 10小时,再按下[煮饭/确认]按钮。 4. 烹饪结束后如不需汤料,请用筛网将其捞出。 大枣茶 5. 请根据个人口味,在熬好的大枣茶中加入适量蜂蜜和糖。 材料:桂皮45g、生姜50g、黄糖、点缀(柿饼)少许 ● ● 烹饪方法 1. 请将去皮切片的生姜和桂皮放入内锅,加水至白米10人份刻度的位置。 2. 请将内锅放入电饭煲内,并盖好锅盖。 3. 请在菜单中选择慢炖,并将时间设成8 ~ 10小时,再按下[煮饭/确认]按钮。 4. 烹饪结束后加入黄糖调整甜度并放凉。 5. 根据个人口味放入柿饼或松子。 水正果 ※ 请将柿饼放置到松软可口。 ● 材料:猪肉800g、大葱1根、姜1块、蒜5瓣、水3杯...
- Page 68 烹饪指南 烹饪指南 材料:南瓜 ½ 个、糯米粉 ½ 杯、水 2 ½ 杯、食盐、蜂蜜各少许 ● 烹饪方法 ● 1. 请将洗净去瓤后剥皮的南瓜放入内锅,然后添加 ½ 杯水, 在营养炖模式下蒸20分钟。 2. 请将蒸好的南瓜捣碎备用。 3. 请在2杯水中加少许糯米粉并搅拌至无凝块,然后加入捣碎的南瓜均匀混合, 再放入内锅。 南瓜粥 4. 请将内锅放入电饭煲内,并盖好锅盖。 5. 请在菜单中选择慢炖,并将时间设成2小时,再按下[煮饭/确认]按钮。 6. 请在煮饭结束后根据个人口味加入适量的食盐和蜂蜜轻搅。 ※ 加水量超出标准值时,排出蒸气的同时可能会溢出米汤,敬请注意。 ● 材料:洋葱、土豆100g、胡萝卜60g、洋香菇70g、牛里脊200g、奶油羹粉160g、橄 榄油•盐少许、水8杯(1200g) ● 烹饪方法 1. 洋葱、土豆、胡萝卜、牛里脊切碎,洋菇切片。 2. 在切片的材料中放入少许橄榄油和盐翻炒。 3.
-
Page 69: 诊断故障
诊断故障 诊断故障 在联系客服中心前请查看以下信息。 产品故障可能不是由于简单的原因造成的,但是如果您不熟悉电饭煲的使用也可能造成电饭煲无 法正常工作。请参照以下信息检查故障,您可能无需联系服务中心便可以解决一些简单的问题。 如果问题仍然存在,请联系客服中心。 问题 检查 解决方法 1. 偶尔不能 电源插头是否插入? 插入电源线。 煮饭。 在煮饭的过程中是否停电? 如果供电中断一段较长的时间,则需 要重新开始。 煮饭时间 在煮饭过程中不要按其他按钮。 您是否在煮饭的过程中按了[取消]按 太长。 钮? 2. 水在煮饭 压力帽是否倾斜? 拧正压力帽。 时溢出。 是否使用量杯? 您加的水量是否合适? 您的模式选择是否正确? 3. 米饭太硬 您加的水量是否合适? 使用合适的标度,根据所需米饭的数 量加入适量的水。 或者没烧 去除自动温度感应器上的碎屑。 内胆底部是否有碎屑? 熟 4. 盖的侧面 压力密封周围是否粘有饭粒?... - Page 70 诊断故障 诊断故障 问题 检查 解决方法 温度感应器出现异常。 联系客服中心。 显示 8. 如果米饭底 饭特有的香味和口感的现象(烧焦现 在调节饭味功能,选择加热温度为 象),为了使米饭更加可口而设计。 -2℃ 或者 0℃。 部偏黄色 (参照第 18 页) 9. 煮饭或保温 是否在煮饭过程中,有风声 那是因为送风机散去电饭煲内热而发 (“嗡”)的声音? 出的声音。 这是正常现象。 的时候有 是否在煮饭或者保温过程中有 在煮饭或者保温过程中,发出“吱” 响声 “吱”的声音? 的声音,这是IH压力电饭煲操作的声 音。 这是正常现象。 10. 米饭在保温 您是否保温超过12个小时? 不要对米饭保温时间超过12个小时。 时产生异味 (参照第...
-
Page 71: 环保清单
环保清单 环保清单 VES1000 Series_ENG+CHS.indb 35 VES1000 Series_ENG+CHS.indb 35 2021-06-10 2021-06-10 6:22:37 6:22:37... - Page 72 MEMO CJE-NB1001_Series.indd 18 2019-10-18 4:49:36 VES1000 Series_ENG+CHS.indb 36 VES1000 Series_ENG+CHS.indb 36 2021-06-10 2021-06-10 6:22:37 6:22:37...
- Page 73 MEMO CJE-NB1001_Series.indd 18 2019-10-18 4:49:36 VES1000 Series_ENG+CHS.indb 37 VES1000 Series_ENG+CHS.indb 37 2021-06-10 2021-06-10 6:22:37 6:22:37...
- Page 74 MEMO CJE-NB1001_Series.indd 18 2019-10-18 4:49:36 VES1000 Series_ENG+CHS.indb 38 VES1000 Series_ENG+CHS.indb 38 2021-06-10 2021-06-10 6:22:37 6:22:37...
- Page 75 고장신고 전에 확인 하십시오 고장신고 전에 확인 하십시오 현상 확인해주십시오. 조치방법 8. 밥의 밑면에 누런 밥 특유의 향기와 맛을 내는 현상 (멜라노이징 미세밥맛 조절 기능에서 가열온도를 -2℃ 빛깔이 나타날 때 현상)으로 맛있는 밥이 되도록 설계되어 있기 또는 0℃로 선택하십시오.(18쪽 참조) 때문입니다. 9. 취사나 보온 시 이상한 취사 시 바람부는 소리("붕")가 나지 않습니까? 내부...
- Page 76 고장신고 전에 확인 하십시오 고장신고 전에 확인 하십시오 A/S를 요청하시기 전에 아래의 사항을 확인해 주십시오. 제품의 고장은 아니지만 사용법에 익숙하지 않거나 사소한 원인으로 전기압력밥솥이 정상적으로 작동하지 않을 수 있습니다. 이런 때에는 다음의 사항에 대해 점검하신다면 A/S 고객센터의 도움 없이도 간단한 문제는 해결할 수 있습니다. 아래의 항목에 대해...
- Page 77 요리 안내 요리 안내 재료 : 단호박 ½개, 찹쌀가루 ½ 컵, 물 2½컵, 소금·꿀 약간 ● 조리방법 ● 1. 단호박은 깨끗이 씻어 속을 파내고, 겉껍질은 벗겨내어 내솥에 물 ½컵을 넣고 영양찜 모드로 20분 쪄주십시오. 2. 찐 단호박은 으깨어 주십시오. 3. 물 2컵에 찹쌀가루를 조금씩 넣어가며 덩어리가 생기지 않게 풀어준 후 으깬 단호박에 넣어 골고루 섞어 내솥에 넣어 주십시오. 단호박죽 4. 내솥을 밥솥에 넣고 뚜껑을 닫아 주십시오. 5. 메뉴의 슬로우쿡을 선택한 후 시간을 2시간으로 설정한 뒤 [취사/확인] 버튼을 눌러 요리하여 주십시오. 6. 요리가 완료되면 기호에 맞게 소금과 꿀을 넣고 가볍게 저어 주십시오. ※ 기준치 이상으로 물을 넣으면 증기 배출 시 밥물이 넘칠 수 있으니 주의하여 주십시오. 재료...
- Page 78 사용하기 사용하기 재료 : 대추 200g, 생강 약간, 꿀(설탕) 약간 ● 조리방법 ● 1. 내솥에 잘 씻어 찢어놓은 대추와 썰은 생강 약간을 넣고 물을 백미 8인분 눈금까지 채워 주십시오. 2. 내솥을 밥솥에 넣고 뚜껑을 닫아 주십시오. 3. 메뉴의 슬로우쿡을 선택한 후 시간을 8~10시간으로 선택한 뒤 [취사/확인] 버튼을 눌러 요리하여 주십시오. 대추차 4. 요리가 완료되면 건더기가 필요 없는 경우 체에 걸러 주십시오. 5. 잘 우러난 대추차에 기호에 맞게 꿀이나 설탕을 넣어 주십시오. 재료 : 통계피 45g, 생강 50g, 황설탕, 고명(곶감잣) 약간 ● 조리방법 ● 1. 내솥에 껍질을 벗겨 얇게 썬 생강과 계피를 넣고 물을 백미 10인분 눈금까지 채워 주십시오.
- Page 79 요리 안내 요리 안내 재료 : 찹쌀 2컵, 서리태(검정콩)·붉은 팥 ½컵씩, 소금 ½큰술, ● 차수수+차조+찰기장 = 1컵, 물+팥 삶은 물 = 3컵 ● 조리방법 1. 찹쌀, 차수수, 차조, 찰기장, 서리태는 각각 깨끗이 씻어 체에 받쳐 주십시오. 2. 팥은 깨끗이 씻어 센 불에 삶아 첫물을 따라 버리고 다시 찬물을 넉넉히 넣어 팥알이 터지기 직전까지 삶아 주십시오. 3. 내솥에 준비한 찹쌀과 잡곡을 담고 팥 삶은 물에 섞어 소금간을 한 뒤 잡곡 오곡밥 물눈금 3까지 물을 부어 주십시오. 4. 내솥을 밥솥에 넣고 뚜껑을 닫아 주십시오. 5. 메뉴의 잡곡을 선택하여 [취사/확인] 버튼을 눌러 취사하여 주십시오. 6. 취사가 완료되면 밥을 잘 섞어 주십시오. ※ 콩은 미지근한 물에 15분 이상 불려 주십시오. ※...
- Page 80 사용하기 사용하기 재료 : 쌀, 여러가지 잡곡, 물 ● 조리방법 ● 1. 쌀과 잡곡을(쌀과 잡곡의 비율 약 7:3) 인분 수에 맞게 계량컵으로 계량하여 주십시오. 2. 쌀과 잡곡을 섞어 깨끗이 씻어 물이 맑아질 때까지 헹구어 주십시오. 3. 내솥에 씻은 쌀과 잡곡을 담고 인분 수에 맞는 잡곡 물 눈금까지 물을 부어 주십시오. 잡곡쾌속 4. 내솥을 밥솥에 넣고 뚜껑을 닫아 주십시오. 5. 메뉴의 잡곡쾌속을 선택하여 [취사/확인] 버튼을 눌러 취사하여 주십시오. 6. 취사가 완료되면 밥을 잘 섞어 주십시오. ※ 콩은 미지근한 물에 15분 이상 불려 주십시오. ※ 모든 잡곡은 적정 비율로 맞추어 요리하여 주십시오. 재료...
- Page 81 요리 안내 요리 안내 재료 : 쌀, 물 ● 조리방법 ● 1. 쌀을 인분 수에 맞게 계량컵으로 계량하여 주십시오. 2. 분량의 쌀을 깨끗이 씻어 물이 맑아질 때까지 헹구어 주십시오. 3. 내솥에 씻은 쌀을 담고 인분 수에 맞는 백미 물 눈금까지 물을 부어 주십시오. 4. 내솥을 밥솥에 넣고 뚜껑을 닫아 주십시오. 5. 메뉴의 백미를 선택하여 [취사/확인] 버튼을 눌러 취사하여 주십시오. 쌀밥(백미) 6. 취사가 완료되면 밥을 잘 섞어 주십시오. ※ [메뉴] 버튼을 눌러 기호에 맞는 밥맛을 선택하여 [취사/확인] 버튼을 눌러 주십시오. 재료 : 쌀, 물 ●...
- Page 82 음성 조절 기능 음성 조절 기능 음성 조절 기능 대기 상태에서 [취소] 버튼을 3초 이상 누르십시오. 대기 상태에서 [취소] 버튼을 3초 이상 누르면 음성 조절 모드로 진입합니다. 취사 중 [취소] 버튼을 누르면 밥물이 뿜어져 나올 수 있으므로 취사가 끝난 후 음성 조절을 하십시오. 언어...
- Page 83 보온 중에 보온 중에 보온 온도 및 가열량 조절 방법 [보온/재가열] 버튼을 3초 동안 길게 누르면 보온 온도설정 모드로 진입합니다. [시] 또는 [분] 버튼으로 원하는 온도를 설정하십시오. • 기본 설정 온도는 74도 입니다. • 온도는 69~78도까지 변경 가능합니다. • 밥이 차갑거나 쉰냄새가 발생시 제어 온도를 2~3도 높여주십시오. •...
- Page 84 보온 중에 보온 중에 보온할 때 주의사항 밥을 섞어 가운데로 모아 주십시오. 내솥의 주변에 있는 밥의 건조를 막기 위해 밥을 아래 위로 잘 섞어서 밥을 가운데로 모아 주십시오. 밥이 내솥 뚜껑에 닿지 않도록 하십시오. 보온 시 주걱을 넣어두지 마십시오. 주걱을 넣어둔 채로 보온을 하게 되면 밥이 굳고 변색이 되며 냄새가...
- Page 85 자동세척 방법 자동세척 방법 자동세척 방법 자동세척 모드를 이용하면 밥솥의 깨끗함을 유지할 수 있습니다. 이물질을 제거하여 냄새를 없애주고 세균발생을 억제하는 기능입니다. 계량컵을 이용하여 내솥의 자동세척 물눈금에 맞춰 물을 넣어 주십시오. 내솥을 밥솥에 넣은 후, 뚜껑을 닫고 손잡이를 돌려 잠금에 맞춰 주십시오. •...
- Page 86 영양찜 / 슬로우쿡 취사 방법 영양찜 / 슬로우쿡 취사 방법 취사 방법 (영양찜 30분 취사 시) [메뉴] 버튼으로 영양찜을 선택한 후 [취사/확인] 버튼을 누르십시오. [메뉴] 버튼을 누를때마다 백미 찰진밥 → 백미 중간밥 → 백미 일반밥 → 백미쾌속 → 잡곡 → 잡곡쾌속 → 현미 → 약식 → 누룽지 → 슬로우쿡 → 영양찜...
- Page 87 예약 방법 예약 방법 예약 취사하기 뚜껑 결합 손잡이를 잠금으로 맞추고 [예약] 버튼을 누르십시오. 깜빡 깜빡 메뉴 변경을 원하시면 [메뉴] 버튼을 눌러 메뉴를 선택하십시오. • 뚜껑 결합 손잡이를 잠금으로 맞추지 않고 [예약] 버튼을 누르면 예약이 되지 않습니다. 예약 시간 맞추는 방법. 깜빡...
- Page 88 사용하기 사용하기 메뉴별 취사 시간 구분 취사량 취사시간 요리종류 메뉴명 쌀밥, 감자흑임자밥, 취나물 새송이밥, 단호박 찰밥, 콩나물밥, 찰진밥 2인분 ~ 10인분 약 28분 ~ 약 41분 해물솥밥 백미 쌀밥, 낙지덮밥, 나물비빔밥, 카레라이스, 쇠고기 불고기 덮밥, 기타 2인분 ~ 8인분 약 35분 ~ 약 47분 유부초밥, 김밥, 김치볶음밥...
- Page 89 밥 짓는 방법 밥 짓는 방법 ● [메뉴] 버튼으로 원하시는 메뉴를 선택하십시오. 뜸들이기 [메뉴] 버튼을 누를때마다 백미 찰진밥 →백미 중간밥 → 백미 일반밥 →백미쾌속 → 잡곡 → 잡곡쾌속 → 현미 → 약식 →누룽지 → 슬로우쿡 → 영양찜 순으로 반복 선택됩니다. 깜빡...
- Page 90 밥 짓는 방법 밥 짓는 방법 취사 방법 계량컵으로 인분수만큼 정확히 담아 전원플러그를 꽂은 후 뚜껑을 닫고, 뚜껑 결합 씻어 주십시오. 손잡이를 돌려 잠금에 맞춰 주십시오. • 압력패킹이 바르게 끼워졌는지 압력추가 수평인지 항상 확인하십시오. • 잠금으로 맞추지 않고 [취사/확인] 버튼을 누르면 작동되지...
- Page 91 미세 밥맛 조절 기능 미세 밥맛 조절 기능 ※ 미세 밥맛 조절 기능은 백미, 잡곡, 현미, 누룽지 취사 시 사용 가능합니다. ※ 미세 밥맛 조절 기능은 예약 모드 시 사용할 수 없습니다. 대기상태에서 [메뉴]버튼을 눌러 원하시는 메뉴를 원하는 메뉴에서 [메뉴] 버튼을 3초간 누르면 선택합니다.
- Page 92 3단계 압력 밥맛 조절 기능 3단계 압력 밥맛 조절 기능 3단계 압력 밥맛 조절 기능 ※ 3단 압력 밥맛 조절은 백미 모드에서만 가능합니다. 메뉴 버튼을 누르면 각각의 밥맛에 해당하는 모드를(찰진밥 → 중간밥 → 일반밥) 선택할 수 있습니다. 밥맛 조절을 하여 취사도중 증기 배출현상이 나타나는 것은 내솥의 내부 압력을 맞추기 위한...
- Page 93 맛있는 밥을 지으려면 맛있는 밥을 지으려면 ● 맛있는 밥은 알맞은 물 조절로부터! - 백미 4인분 기준 - 쌀의 종류 물 조절 묵은쌀, 진밥을 햅쌀, 불린 쌀, 지을 경우 된밥을 지을 경우 묵은쌀로 밥을 지을 때 눈금보다 많게 햅쌀로 밥을 지을 때 눈금보다 적게 불린 쌀로 밥을 지을 때 눈금보다 적게 된밥을 지을 때 눈금보다 적게 진밥을...
- Page 94 사용하기 전에 사용하기 전에 압력 노즐 막힘 청소 방법 그림과 같이 압력조절노즐의 패킹이 이탈되어 있는 경우 증기가 물이 고여있는 경우에는 누설될 수 있으니 패킹을 노즐에 물을 꼭 짠 행주로 안착하십시오. 닦으십시오. 증기배출장치 스팀캡 압력추/압력조절노즐 ● 자동세척 모드를 이용하여 증기배출 장치의 이물질을 제거 및 세척할 수 있습니다. (24쪽을 참조하십시오.) 주의 : 취사 직후에는 스팀캡이 뜨거우므로 만지지 마십시오. 스팀캡 청소 방법 화상을 입을 수 있습니다. 스팀캡을 그림과 전면에 있는 같이 떼어 냅니다. 손잡이를...
- Page 95 제품 손질 방법 제품 손질 방법 청소 방법 전원플러그를 뺀 후, 청소하고 물을 직접 뿌리거나 벤젠, 신나 등으로 제품을 닦지 마십시오. 청소를 깨끗이 하지 않으면 보온 중 냄새가 나는 원인이 됩니다. 내솥 내솥 뚜껑, 압력 패킹 거친 수세미, 금속성 수세미, 솔, 연마제 등은 행주를...
- Page 96 사용하기 전에 사용하기 전에 뚜껑이 있는 펜을 이용하여 압력패킹의 누름부(A → B 순서)를 그림의 화살표 방향으로 문질러 삽입을 완료해 주십시오. 아래의 [압력패킹 단면]을 참조 바랍니다. 정상적으로 부착이 완료된 상태입니다. 올바른 조립 방법 잘못된 조립 방법 서 [압력 패킹 단면] • 잘못 부착을 하였을 경우 사용 중 증기 누설에 의하여 밥이 설익거나 화상의 우려가 있습니다. 바르게 부착되었는지 확인 후 사용하시기 바랍니다. 내측 누름부 * 'A'부를 먼저 삽입 후 'B'부를 삽입해 주십시오. 주의 : 패킹은 청소 후 위 내용을 지켜야 증기 누설을 방지할 수 있습니다.
- Page 97 제품 손질 방법 제품 손질 방법 압력패킹 교체 방법 • 패킹은 김이 새는 것을 방지하기 위하여 잘 빠지지 않도록 되어 있으나, 손으로 잡고 힘주어 당기면 뺄 수 있으며 필요 시 빼서 청소하면 됩니다. • 패킹은 소모품입니다. 김이 샐 경우는 패킹을 빼내어 청소를 하시고 아래와 같은 방법으로 패킹을 끼우신 후 확인해 주십시오.
- Page 98 사용하기 전에 사용하기 전에 클린커버 외측 패킹을 장착시킬 경우 클린커버의 글자가 똑바로 보이게 하여 외측 한 부분(①)부터 패킹의 홈을 클린커버에 끼운 후 ②번 방향으로 한 바퀴 돌리면서 패킹을 장착합니다. (패킹 전면부(앞면)에는 '전면'이라는 글씨가 아래 위로 표시되어 있습니다.) 압력뚜껑에 클린커버를 장착 시에는 클린커버 손잡이를 잡고 화살표...
- Page 99 제품 손질 방법 제품 손질 방법 클린커버 청소 방법 클린커버를 세척한 후에는 반드시 건조하여 뚜껑에 장착하십시오. • 청소를 하지 않으면 보온 중에 냄새가 나는 원인이 됩니다.(반드시 전원 플러그를 빼고 본체에 열이 식고 난 후 청소하십시오.) • 본체 및 뚜껑은 물기를 제거한 행주로 닦으십시오. 벤젠, 신나 등은 사용하지 마십시오. •...
- Page 100 사용하기 전에 사용하기 조작부 / 표시부 [자동세척] 버튼 [취사/확인] 버튼 자동세척을 할 경우 사용합니다. • 각 메뉴의 취사 시작 시 사용합니다. • [취사/확인] 버튼을 연속으로 두 번 누르면 쾌속 취사로 작동하여 밥짓는 시간이 단축됩니다. 취사 전 쌀을 불린 다음 쾌속으로 취사하면 한층 더 맛있는 밥을...
- Page 101 각 부분의 이름 및 기능 각 부분의 이름 및 기능 전면 / 내부 이름 압력추 자동증기조절장치(증기배출구) 내솥 내부의 압력을 일정하게 자동증기배출 장치가 내장되어 있어 조절합니다. 내솥의 증기를 자동으로 배출합니다. 스팀캡 뚜껑 결합 손잡이 안심 센서 압력 패킹 내솥 내부의 온도를 감지합니다. 내솥 내부의 증기가 밖으로 새지 않게 밀폐시켜줍니다.
- Page 102 사용하기 전에 사용 중에 내솥을 세척하실 때는 물에 충분히 불린 다음 세척하고, 내솥 내외측의 내솥 세척용 수세미 구분 코팅이 벗겨질 수 있으므로 거친 수세미, 금속성 수세미, 솔, 연마제 등은 사용 가능 사용 불가능 주 의 사용하지 마십시오. 극세사 수세미 철 수세미 특히 내솥 표면의 광택을 내기 위하여 연마제, 스폰지 수세미 녹색 수세미 치약, 기타 광택제 등을 사용하여 닦지 말아 주십시오. 망사 수세미 탄 냄비 수세미 변색이나 코팅이 벗겨질 수 있습니다. 내솥 손잡이를 잡고 제품을 들어...
- Page 103 안전을 위한 주의사항 사용 중에 내솥 없이 절대 사용하지 마십시오. 취사 및 요리 진행 중이거나 완료 직후에는 내솥 내솥이 변형되었거나, 전용 내솥이 아닌 것을 내부 및 압력추, 클린커버 등이 뜨거우므로 손을 사용하지 마십시오. 감전 및 화재의 원인이 됩니다. 경 고 대지 마십시오. 쌀과 물을 넣었을 고열에 의한 화상의 화재 및 고장의 원인 또는 경우에는 반드시 A/S 위험이 있습니다. 폭발의 위험이 있습니다. 고객센터에 이상 유무를 압력추가 젖혀져 증기 내솥이...
- Page 104 사용하기 전에 설치관련 제품을 직사 광선이 쬐는 곳, 가스레인지, 라이터, 전열기구, 풍로 등 열원 제품을 싱크대, 목욕탕 등 물이 들어갈 수 있는 곳에 설치하거나 닦지 가까이에서 사용하지 마십시오. 마십시오. 위 험 전기 누전, 감전, 변색, 변형의 위험이 있습니다. 전기누전 및 감전, 화재의 위험이 있습니다. 전원 코드를 열원 가까이 두지 마십시오. 열원에 제품에 물이 들어간 경우에는 사용을 중지하고 의해 코드가 손상될 경우 감전 및 화재의 위험이 전원...
- Page 105 안전을 위한 주의사항 ※ 사용자의 안전을 지키고 재산상의 손해를 막기 위한 내용입니다. ※ 주의사항을 잘 읽고 올바르게 사용하십시오. 위험 지시한 내용이 지켜지지 않으면 사망 또는 중대한 상해가 예상되는 경우 경고 지시한 내용이 지켜지지 않으면 상당한 신체 상해 또는 물적 손해가 예상되는 경우 주의 지시한 내용이 지켜지지 않으면 경미한 신체 상해 또는 물적 손해가 예상되는 경우 전원관련 본 제품은 120V~ 전용입니다. 교류 120V 이외에는 사용하지 마십시오. 전원 플러그를 콘센트에서 꽂거나, 제거할 반드시 정격 15A 이상의 120V 전용 콘센트에 시에는 반드시 손의 물기를 제거하십시오. 변압용 트랜스 사용 시 감전, 화재의 원인이 될 수 위 험 꽂으십시오.
- Page 106 차 례 사용하기 전에 안전을 위한 주의사항 ……………………… 각 부분의 이름 및 기능 ……………………… 8 제품 손질 방법 ……………………………… 10 사용하기 맛있는 밥을 지으려면 ……………………… 16 3단계 압력 밥맛 조절 기능 ……………… 17 미세 밥맛 조절 기능 …………………………18 밥 짓는 방법 ………………………………… 19 예약...
- Page 107 저희 쿠첸 IH 전기압력밥솥을 사용해 주셔서 감사합니다. 제품의 올바른 사용과 유지를 위해 사용설명서를 반드시 읽어보시기 바랍니다. 제품의 사용 중 문제가 발생했을 때 사용설명서를 참고하시기 바라며 사용설명서에는 제품보증서가 포함되어 있으므로 잘 보관해 주시기 바랍니다. ※ 제품 밑에 스테인레스판, 깔판, ※ 밥솥을 가전제품(김치냉장고, ※ 내솥이 변형되었거나, 방석, 전기장판, 철판, 은박지, 식기세척기, 전자렌지, 냉장/ 해당제품의 전용내솥이...
- Page 108 쿠첸 IH 전기압력밥솥 [US] VES100 Series "쿠첸" 전기압력밥솥을 바르게 사용하기 위해 사용전에 본 사용설명서를 반드시 읽어 주십시오. 읽고 난 뒤에는 제품을 사용하는 사람이 항상 볼 수 있는 곳에 보관해 주십시오. 쿠첸 밥솥에 대해 자세한 내용은 QR 코드로 접속해서 확인해보세요. 본 사용설명서에는 제품 보증서가 포함되어 있습니다. / 본 설명서는 공용으로 제작되어 구입한 제품과 다른 이미지나 내용이 포함되어 있을 수 있습니다.
Need help?
Do you have a question about the VES100 Series and is the answer not in the manual?
Questions and answers