Table of Contents
Advertisement
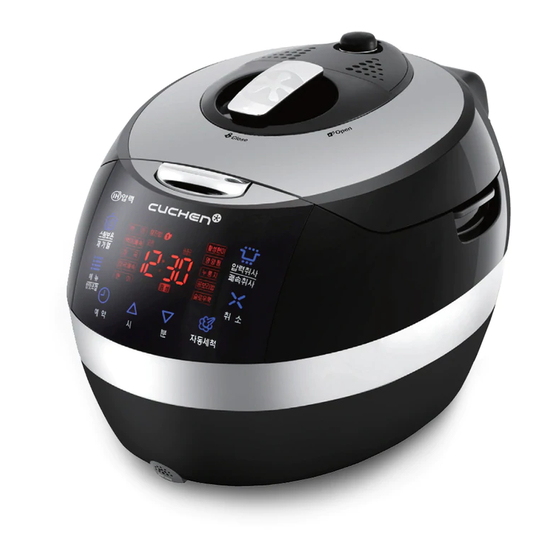
Cuchen IH Electric Pressure Rice Cooker
User Manual
■ Read this manual carefully before using your Cuchen electric pressure rice cooker.
■ After reading, store this manual at a place where it would be available to everyone.
With Cuchen, quality is always priority number one.
WHA-LX1000iD_ENG.indd 2
2017-06-21
3:51:01
Advertisement
Table of Contents

Related Manuals for Cuchen WHA-LX1000iDUS Series


Summary of Contents for Cuchen WHA-LX1000iDUS Series
- Page 1 Cuchen IH Electric Pressure Rice Cooker User Manual ■ Read this manual carefully before using your Cuchen electric pressure rice cooker. ■ After reading, store this manual at a place where it would be available to everyone. With Cuchen, quality is always priority number one. WHA-LX1000iD_ENG.indd 2 2017-06-21 3:51:01...
- Page 2 There is a risk of fire or deformation. It may cause fire or product malfunction. Platter ※ Do not cook the food other than designated menus.(beans, red beans, tomatoes, flour, etc.) - The steam vent may be clogged, posing a risk of explosion or burn. Product Specifications IH Electric Pressure Rice Cooker Product WHA-LX1000iDUS Series Rated Voltage & Frequency 120 V~ / 60 Hz Rated Power Consumption 1400 W (Cooking) / 100 W (Keep Warm) Max. Cooking Capacity 1.8 L (10 Servings) Regulator Pressure/ 88.3 kPa / 166.7 kPa Safety Device Pressure Demension (W x D x H) 411(W)×298(D)×286(H)(mm) (16.18x11.73x11.26(inch))
-
Page 3: Table Of Contents
Contents Before Getting Safety Precautions ........4 Started Parts and Features ........8 Operating Care and Maintenance ......10 Instructions To Cook Tasty Rice ........14 Taste Control ..........16 Cooking Rice ........... 18 Preset Timer ..........20 Steam and Slow/Preset ......21 Keeping Warm ......... 22 Voice Adjustment/Auto Clean ....24 Key Backlight ........... 25 Recipes ............ 26 Troubleshooting Please troubleshoot before contacting the service center........ -
Page 4: Safety Precautions
Safety Precautions ※ Information contained in this section serve to protect the user’s safety and prevent damage to property. ※ Carefully read and follow all safety precautions. Danger Risk of severe injury or even death is assumed if the instructions are not followed. Warning Risk of severe injury or even death is assumed if the instructions are not followed. Caution Risk of slight injury or property damage is assumed if the instructions are not followed. Power This product is rated for 120 V~. Do not plug in if the power plug Do not touch the power plug with Plug this device into a 120 V outlet is damaged or the power outlet wet hands. - Page 5 Before Getting Started Before Getting Started Installation Avoid exposure to direct sunlight and heat-radiating Do not use or store combustible gases or inflammable appliances. materials in the product’s vicinity. DANGER There is risk of fire, There is risk of fire. deformation, and discoloration. Do not install the product where water might make its Do not install the product in areas with a high level way into the product (in or near a sink, in the bathroom, of dust or where chemicals are stored.
- Page 6 Safety Precautions During Use Do not use the product on top of Do not disassemble, repair, or modify Do not clog the product’s inlets a mat, pillow, or electric blanket. the product on your own. or other openings with debris. If clogged, unplug the power cord DANGER May cause...
- Page 7 Before Getting Started Contact the service center if the Do not overfill the inner pot. Do not place magnetic objects on inner pot’s coating has been top of the lid or use the cooker May prevent the content from being damaged or peeled. in the vicinity of highly magnetic cooked properly, cause water to spill objects.
-
Page 8: Parts And Features
Parts and Features Exterior and Interior Auto Pressure Regulator Pressure Cap (steam vent) Regulates the cooker’s internal Automatically discharges pressure. pressure from inside the cooker. Lid Lock Handle Steam Cap Safety Sensor Monitors the temperature inside Pressure Packing the cooker. Forms a tight seal to prevent steam from inside the Clean Cover Detachment cooker escaping. The pressure packing should be button replaced once a year. Press the button to detach the ※ Replacement pressure packings are available clean cover. for purchase from the service center. - Page 9 Before Getting Started Controls/Display MENU/TASTE CONTROL CANCEL button button Used to disable all the features. Used to operate the menus PRESSURE/QUICK button and to perform taste control. • Used to start cooking in each of the menus. • Quickly press the PRESSURE/QUICK button twice to cook in QUICK mode. This will lead to a reduction in cooking duration. STEAM WARM/REHEAT Soak rice in water before cooking, and cook the rice in QUICK button mode. Then, you will be able to serve much tastier rice. Used to enter STEAM WARM ※ QUICK is enabled in Plain and Mixed menus only. Fill the or REHEAT mode. water using the scale for Plain or Mixed to cook rice in QUICK mode. PRESET button AUTO CLEAN button Used to enter Preset or Preset Used to enter Auto Clean mode. Warm mode. MIN button HOUR button Used to change the clock, preset time, or preset warm time. Used to change the clock, preset time, or preset warm time.
-
Page 10: Care And Maintenance
Care and Maintenance Cleaning the Clean Cover After washing the clean cover, ensure to dry it completely before attaching it back on. • Not keeping the clean cover clean is one of the causes of rice taking on a smell while being kept warm. (Pull out the power cord first and allow the cooker to cool before cleaning.) • Clean the main unit and the lid, in particular, the inner packing of the clean cover using a wrung out kitchen towel. Do not use benzene or thinner to clean. • It’s possible for a film of starch from the rice to form on the clean cover, the lid, and the inner pot. This however does not pose any health risks. Hold the pressure packing of the clean cover and press the white Clean Cover rectangular button at the upper part of the clean cover to detach Pressure Packing Detachment Button the packing. Then, clean the pressure packing. (Detach the pressure packing after the main unit cools.) White Rectangular Clean Cover Detachment Button Use a neutral kitchen detergent and a sponge to frequently clean the cover. Allow to dry and then wipe off excess moisture with a dry kitchen towel. Using your fingers, push the packing in all the Packing Bump way around during cleaning. Then, use the cooker. If the pressure packing is detached from the clean cover, attach the packing by fitting into the six bumps of the clean cover. (For information on Cover Bump the method of attaching the pressure packing, see p.11.) Hold the inner packing and pull it Clean the inner packing with the kitchen detergent and out to the arrow direction to detach sponge, wipe off excess moisture from the packing, and the packing. Then, clean it. - Page 11 Operating Instructions Proper Assembly Text shown right side up <Clean Cover – Rear> <Clean Cover – Front> The texts are shown backward. The texts should be shown properly, and the bumps of ※ Do not insert screws or any other foreign object into the pressure packing and clean cover should be located the hole. correctly. ※ Carefully examine the clean cover to determine which side is the front and which is the back. Caution: If the pressure packing/inner packing is not properly attached, it may cause steam escaping. Detachment and Attachment of the Pressure Packing Detachment of the Pressure Packing Hold the outer part or the stainless steel and outer part of the clean cover first and pull out the packing slowly to detach the packing.
- Page 12 Care and Maintenance Cleaning U nplug the power cord before cleaning. Do not spray water directly on the product and do not use benzene or thinner to clean. F ailure to keep the cooker clean is one of the causes of rice taking on a smell while being kept warm. Inner Pot Inner Pot Lid and Pressure Packing Do not use a rough or metallic scrubber or brush Take a dish towel, soaked in water and then wrung or harsh abrasives. These products can strip or out, and wipe off debris and buildup. Keeping the damage the coating. Use a dish detergent with pressure packing clean maintains the product’s soft cloth or a sponge to clean. performance and helps keep the rice smelling fresh. Do not use abrasives, toothpaste, or any type of polish to bring gloss to surface of the inner pot. Do not detach the pressure packing to clean. Doing so can discolor or damage the coating. Instead, simply wipe it clean using a clean dish towel. Inside of the Main Unit Water Collector Take out the inner pot and remove all debris and Detach the water collector and clean.
- Page 13 Operating Instructions Cleaning the Pressure Nozzle If the pressure regulation Pressure Cap/ nozzle’s packing is out of place (as shown in the Pressure Regulation Nozzle diagram), steam will be If water has collected allowed to seep through. here, soak it up using a Steam Cap Make sure the packing is dry kitchen towel. properly seated in place. Steam Vent ※ These parts become very hot. Do not touch immediately after cooking. Use the Auto Clean feature to clean debris and buildup from the steam vent. (See p.24.) ※ The steam cap becomes very hot. Do not touch immediately after cooking. Cleaning the Steam Cap You may get burned. Take extra caution. Detach the steam Press down on the cap as shown in the clip on the front in diagram.
-
Page 14: To Cook Tasty Rice
To Cook Tasty Rice ● Tasty rice starts from controlling the amount of - 4 Servings of Plain Rice - water used! Cooking old rice or to Cooking fresh/soaked get a fluffy result rice or to get an hard- Type of Rice Water Level boiled result Old Rice Slightly above the scale. Fresh Rice Slightly below the scale. PLAIN PLAIN PLAIN GABA GABA GABA PLAIN PLAIN PLAIN GABA GABA GABA BROWN... - Page 15 Press the HOUR or MIN button for at least one second. Press the HOUR or MIN button to set time. Press the HOUR button to change the hour setting in 1-hour increments. Verify the AM/PM setting. Press the MIN button to change the minute setting in 1-minute increments. ※ If you press the HOUR or MIN button for at least one second, the displayed time will continue to change in the unit of minute or hour. If you do not press the HOUR or MIN button after time change, the current time will be automatically set in 15 seconds. Blinking ※ Even if you press the PRESS/QUICK or STEAM WARM/REHEAT button regardless of whether the key backlight is in a normal state or not, the current time setting will be completed. ※ Pressing CANCEL within 15 seconds of applying the new setting will cancel the change and restore the previous time setting. X Power Outage Compensation Cuchen electric pressure rice cookers feature a power outage compensation function that automatically stores the cooker’s status information. In the event of a power outage, this feature makes sure the operation that was taking place is resumed once the power is restored. X Lithium Ion Battery Cuchen electric pressure rice cookers feature a lithium battery that powers the power outage compensation feature and the clock. The battery’s lifecycle can vary depending on the product’s specifications. WHA-LX1000iD_ENG.indd 15 2017-06-21 3:51:20...
-
Page 16: Taste Control
Use the MENU/TASTE CONTROL button to select the mode for the taste of polished rice. The rice cooker may release steam while operating in this mode. This is the result of the cooker regulating its internal pressure, and is completely normal. (Adjust the rice texture setting according to your preference.) ※ Cook control cannot be used while cooking is already in progress. Perfectly Cooked Produces perfectly cooked rice. Ideal for making rice rolls and sushi. A Right Balance of Sticky and Perfectly Cooked Produces a blend of sticky rice and perfectly cooked rice. Iron Pot-Style Sticky Rice Produces sticky and plump rice like you would by cooking in an iron pot. The rice cooker may release steam while operating in this mode. Cooking This is the result of the cooker regulating its internal pressure, and is completely normal. WARNING X Melanoizing Cooking rice with a Cuchen electric pressure rice cooker leaves rice at the bottom of the pot slightly brown in color. This is known as melanoizing and adds savory flavor and aroma to the cooked rice. If using the timer to cook, starch released from the rice can settle to the bottom of the pot and lead to more evident melanoizing effect. WHA-LX1000iD_ENG.indd 16 2017-06-21 3:51:20... - Page 17 Operating Instructions Fine-Tuning ※ Fine-tuning is available for Plain, Brown, Mixed, Nurungji, and Barley modes only. ※ Fine-tuning is disabled if the Preset option has been selected. Press the MENU/TASTE CONTROL Press and hold the MENU/TASTE CONTROL button for three seconds under the desired menu to button to select the desired menu. display the current Soak and Heat settings. ※ You must first select from the three available pressure settings and then fine-tune the Soak ※ Default settings are 0 minutes and 0°C, and Heat settings. respectively. Blinking Blinking Blinking Press the HOUR button to select the Press the MIN button to select the desired soak time. desired heating temperature. ※ Select from 0 minutes, 2 minutes, 4 minutes, 6 ※ Available heating temperature settings are minutes, and 8 minutes. (To cook using the default -2°C, 0°C, 2°C, and 4°C. (To cook using the soak time setting, select 0 minutes. Otherwise, select default heating temperature setting, select 0°C. 2 minutes, 4 minutes, 6 minutes, or 8 minutes.) Otherwise, select 2°C, 4°C, or -2°C.) ※ Increasing the soak time allows the rice to absorb ※...
-
Page 18: Cooking Rice
Cooking Rice Instructions Plug in the cooker, close the lid, and turn the Use the MENU/TASTE CONTROL button to Lid Lock to the Lock position. select the desired menu. • Ensure that the pressure packing is seated properly Whenever you press the MENU/TASTE CONTROL and that the pressure cap is perpendicular. button, PLAIN STICKy->PLAIN Medium->PLAIN • Pressing the PRESSURE/QUICK button while not REGULAR->PLAIN QUICK->MIXED->MIXED QUICK having the Lid Lock in the Lock position will not ->BROWN->GABA-> STEAM->NURUNGjI- start cooking the rice. >BARLEy-> SLOW will be repeatedly selected in • If the surface of the temperature sensor has debris, sequence. remove it. Blinking • Ensure that the outer surface of the inner pot is dry Blinking before placing it inside the cooker. ※ Make sure that the clean cover is attached properly before closing the lid. If the clean cover is not attached, the product does not recognize the Lid Lock and its cooking function does not start. Once finished cooking, the cooker will Press the PRESSURE/QUICK button. - Page 19 Operating Instructions Cooking Times by Mode Mode PLAIN PLAIN MIXED BROWN GABA MIXED BARLEy RUNG STEAM SLOW QUICK QUICK Sticky Misc. Category Servings 2 to 10 2 to 8 2 to 6 2 to 6 2 to 6 2 to 6 2 to 6 2 to 6 2 to 10 Approx. For detailed cooking 2 hours Approx. Approx. Approx. Approx. Approx. Approx.
-
Page 20: Preset Timer
Preset Timer Using Preset (When current time is 8:00 PM and the cooker is preset to the Plain Sticky menu at 9:00 AM) Check to see if the clock setting is correct. For instructions on setting the time, see p.15. If the current clock setting is incorrect, the preset timer will not be accurate. Turn the Lid Lock to the Lock position, and select the MENU/TASTE Blinking Blinking CONTROL button. Then, press the PRESET button to set the preset time. PRESET mode cannot be selected if the Lid Lock is not in the Lock position. Make sure that the clean cover is attached properly before closing the lid. If ※ the clean cover is not attached, the product does not recognize the Lid Lock and its Preset Timer function does not work. Setting the Preset Time. Press the PRESSURE/QUICK or PRESET Example) C urrent time is 8:00 PM and you wish to have the rice button. -
Page 21: Steam And Slow/Preset
Steam and Slow/Preset Operating Instructions Instructions for Cooking (40 minutes of Steam) Press the MENU button. Blinking Select STEAM or SLOW. Use the HOUR or MIN button to select the Steam or Slow cooking duration. STEAM SLOW Time Setting 10 mins to 90 mins 1:00 to 12:50 Increase by 5 Increase by 1 hour. Hour minutes. Decrease by 5 Increase by 10 minutes. minutes. Press the PRESSURE/QUICK button. Once cooking starts in STEAM or SLOW mode, the cooker will display the remaining cooking time. Preset (Steam at 4:30pm) Press the PRESET button and then the HOUR or MIN Blinking button. -
Page 22: Keeping Warm
Keeping Warm Preset Warm (Preset warm at 6:50 AM in Sticky mode) Check to see if the clock setting is correct. Press the STEAM WARM button and then the PRESET button for at least one second to enter Preset Warm mode. Use the HOUR or MIN button to set the preset warm Blinking completion time. • If preset warm is enabled by using the key backlight feature, only the button in use will be highlighted. Blinking Press the STEAM WARM or PRESET button for many Blinking seconds or do not press a button for at least seven seconds to automatically enter Preset Warm mode. • Preset Warm mode will end at the preset time. Blinking • If you have made a mistake with the completion time setting, press the CANCEL button and start over again. ※ Preset Warm keeps the rice at a low temperature until the preset time, at which point the warming temperature is increased to prevent the rice from discoloring and drying out. ※ Increasing the warming temperature at the preset time protects against discoloration and keeps the flavors locked in. - Page 23 Operating Instructions Adjusting Temperature Setting Press the STEAM WARM/REHEAT button for at least five seconds to enter warming temperature setting mode. Use the HOUR or MIN button to set the desired Blinking warming temperature. • The default temperature is 74 °C. • The temperature may be set to between 69 °C and 77 °C. Blinking • If the rice is cold or smells sour, increase the setting by 2°C or 3°C. • If the rice turns yellow, lower the setting by 2°C or 3°C. Press the STEAM WARM/REHEAT button or do not Blinking press the button for at least 10 seconds to set warming temperature. Blinking Reheat (for heating rice that’s being kept warm) Press the STEAM WARM/REHEAT button while the rice is being kept warm to start reheating. Reheating can only be performed while rice is being kept warm and will produce rice that’s as hot as freshly cooked rice. It is recommended to serve reheated rice right away and to continue to keep it warm.
-
Page 24: Voice Adjustment/Auto Clean
Voice Adjustment/Auto Clean Volume Control Press and hold the CANCEL button for at least three seconds. Press and hold the CANCEL button for at least three seconds in standby to enable the volume control feature. ※ If you press the CANCEL button during cooking, water in the rice cooker may get out of Blinking it. Thus, perform volume control after cooking is completed. Use the HOUR or MIN button to set volume. If you do not press any buttons for at least seven seconds, automatically volume control will be enabled. Blinking Press the HOUR button to turn up the volume. Press the MIN button to turn down the volume. ※ Volume can be set to 0 to 4. If the volume is set to 0, the voice feature will be disabled and the Voice Navigation icon of the display will disappear. ※ Volume setting is enabled only in standby mode. ※ The initial setting is 2. ※ Press the PRESSURE/QUICK button regardless of whether the key backlight is in a normal state or not to perform volume setting. Auto Clean ※ A UTO CLEAN mode helps keep the rice cooker clean. This feature removes debris and buildup and prevents germs from spreading. Use the measuring cup to insert water into the inner pot by the Auto Clean scale. Insert the inner pot into the rice cooker. Close the lid, and turn the Lid Lock to the Lock position. ※ Make sure that the clean cover is attached properly before closing the lid. If the clean cover is not attached, the product does not recognize the Lid Lock and its Auto Clean function does not start. -
Page 25: Key Backlight
Key Backlight ※ This feature enables the key backlight to turn off when the rice cooker does not need to be used. ※ If you press a button when the backlight is turned off, the backlight of every key will turn on again. In this case, the pressed button will be disabled. ※ The backlight of only the buttons used in Preset and Preset Warm modes turns on and guides you through the buttons. ※ In about 10 seconds after Cooking, Preset Timer, Keep Warm, Preset Warm, Warm/Reheat, or Auto Clean mode starts, the key backlight will display the current operation status. (See the figures below.) Usual Sleep Mode ※ If the rice cooker is not operated for the given amount of time while the power cord of the rice cooker is connected, the rice cooker will switch to Sleep mode. ※ If the lid of the rice cooker is open or close in Sleep mode, the mode will be disabled. Cooking Preset Timer Mode Setting ※ In order to enable Preset Timer mode, flash the [Menu], [Hour], [Minute], and [Cooking] Blinking keys by following a message. Then, turn on the [Preset] and [Cancel] keys by following a Blinking message. Blinking Preset Timer Mode Keep Warm Mode Preset Warm Setting Blinking Blinking... -
Page 26: Recipes
Recipes Five-Grain Rice Cook in MIXED Mode ● Ingredients: 2 cups of sticky rice, 1/2 cup of black bean, 1/2 cup of red bean, 1/2 tablespoon of salt, 1 cup of waxy sorghum+glutinous millet+glutinous Chinese millet (1 part each), and 3 cups of water used to boil the red beans and regular water ● Directions 1. Wash and set aside the sticky rice, glutinous millet, and glutinous Chinese millet. 2. Wash the red beans thoroughly and place them in a pot. Add cold water to the pot. Boil the beans, drain them, add cold water to them, and boil them again. Cook until the beans are about to burst. Set aside the water used to boil the red beans. 3. Soak the waxy sorghum in warm water for twenty minutes. Scrub to peel the skin off and rinse until the water runs clear (not red). 4. Add the ri c e and grai n s to the i n ner pot. Di l u te the red bean water wi t h regul a r water and add to the pot. Add sal t . 5. Place the inner pot inside the rice cooker, and close the lid. 6. Select Mixed using the MENU button, and start cooking. -
Page 27: Vegetable Soup
Operating Instructions jujube Tea Cook in SLOW Mode ● Ingredients: 6 to 7 Servings 1 80g of jujubes, ginger, and a small amount of honey (sugar) Servings 2 00g of jujubes, ginger, and a small amount of honey (sugar) ● Directions 6 to 7 Servings 6 Servings of Plain Rice 1. Thoroughly rinse and tear the jujubes, and 10 Servings 8 Servings of Plain Rice slice the ginger. Place the jujubes in the inner pot, along with little bit of the ginger. Fill the pot with water and cook for 8 to 10 hours in SLOW mode. 2. You may choose to strain out the bits of jujubes and ginger. 3. Add honey or sugar to the brewed jujube tea depending on your taste. Fruit Punch Cook in SLOW Mode 6 to 7 Servings ● Ingredients: 30g of whole cinnamon, 40g of ginger, brown rice, and a small amount of dried persimmon and pine nuts 10 Servings... -
Page 28: Please Troubleshoot Before Contacting The Service Center
Please troubleshoot before contacting the service center. Check the information below before contacting the service center. A fully functional cooker may appear to be malfunctioning if you are not familiar with the cooker’s use or due to easily correctable causes. Troubleshoot by referencing the information below, and it might be possible to solve simple issues without having to contact the service center. If the problem persists, then contact the service center. Problem Check Solution • Is the power cord plugged in? Plug in the power cord securely. • Has the power gone out while If the power has gone out for an cooking? extended duration of time, start over 1. Unable to cook. again. • Did you press the CANCEL button Takes too long to or any other button while cooking Do not press any other button while cook. - Page 29 Troubleshooting Troubleshooting Problem Check Solution is shown on the • Did you set the preset time to Automatically the preset time is adjusted to greater than 13 hours? 13 hours, and Preset Timer mode starts. display. • These error messages indicate Please contact the service center. a problem with the temperature message is sensor. shown. 9. If the bottom of • This is called the melanoizing Set Cook Control’s Heat setting to -2°C effect and actually the result of or 0°C (see p.17). the rice takes on a adding flavor to the rice. yellowish tinge. • Have you chosen PLAIN mode and set Cook Control’s Heat setting to between 2°C and 4°C?
- Page 30 MEMO WHA-LX1000iD_ENG.indd 30 2017-06-21 3:51:28...
- Page 31 MEMO MEMO WHA-LX1000iD_ENG.indd 31 2017-06-21 3:51:28...
- Page 32 • Cannot be liable for any problem if using the part other than the one from CUCHEN. • The specifications of this product can be changed to improve functions without notice and may differ from the actual product. WHA-LX1000iD_ENG.indd 1 2017-06-21 3:51:00...
- Page 33 WHA-LX1000ID_KOR.indd 2 2017-06-21 3:52:36...
- Page 34 ※ 지정된 메뉴 이외에 기타 음식물(콩, 팥, 토마토, 밀가루 등)을 임의로 삶거나 조리하지 마십시오. - 자동 증기 배출구의 막힘으로 인해 폭발 및 화상의 위험이 있습니다. 제품규격 제품명 IH 전기압력밥솥 WHA-LX1000iDUS Series 정격전압 및 주파수 120 V~/ 60 Hz 1400 W (취사시) / 100 W (보온시) 정격...
- Page 35 ............사용하기 전에 안전을 위한 주의사항 ..........각 부분의 이름 및 기능 ................제품손질 방법 ............사용하기 맛있는 밥을 지으려면 ............현재시각 맞추는 방법 ................ 밥맛 조절 기능 ................밥 짓는 방법 ................예약취사 방법 ......영양찜 슬로우쿡 취사/예약방법 ..................보온중에...
- Page 36 WHA-LX1000ID_KOR.indd 4 2017-06-21 3:52:42...
- Page 37 WHA-LX1000ID_KOR.indd 5 2017-06-21 3:52:43...
- Page 38 제공되는 요리 방법 외 잡곡류 등을 적정 비율 이상으로 사용하여 취사하지 마십시오. 신체상해의 위험 및 고장의 원인이 됩니다. 취사중 부득이하게 뚜껑을 열어야 할 경우 [취소] 버튼을 눌러 밥솥 내부의 증기를 완전히 배출시킨 후 뚜껑을 여십시오. WHA-LX1000ID_KOR.indd 6 2017-06-21 3:52:46...
- Page 39 WHA-LX1000ID_KOR.indd 7 2017-06-21 3:52:48...
- Page 40 클린커버를 장착하지 않으면 제품이 작동하지 않습니다. WHA-LX1000ID_KOR.indd 8 2017-06-21 3:52:49...
- Page 41 WHA-LX1000ID_KOR.indd 9 2017-06-21 3:52:50...
- Page 42 클린커버를 장착하지 않으면 핸들 잠금이 인식 되지 않으며, 취사 기능 및 자동세척 기능이 작동하지 않습니다. WHA-LX1000ID_KOR.indd 10 2017-06-21 3:52:53...
- Page 43 WHA-LX1000ID_KOR.indd 11 2017-06-21 3:52:55...
- Page 44 WHA-LX1000ID_KOR.indd 12 2017-06-21 3:52:56...
- Page 45 WHA-LX1000ID_KOR.indd 13 2017-06-21 3:52:57...
- Page 46 WHA-LX1000ID_KOR.indd 14 2017-06-21 3:52:57...
- Page 47 WHA-LX1000ID_KOR.indd 15 2017-06-21 3:52:58...
- Page 48 WHA-LX1000ID_KOR.indd 16 2017-06-21 3:52:59...
- Page 49 WHA-LX1000ID_KOR.indd 17 2017-06-21 3:52:59...
- Page 50 뚜껑을 닫기 전에 클린커버가 장착되어 있는지 확인하세요. 클린커버가 장착되어 있지 않으면 핸들 잠금이 인식되지 않으며, 취사 기능이 작동하지 않습니다. WHA-LX1000ID_KOR.indd 18 2017-06-21 3:53:00...
- Page 51 WHA-LX1000ID_KOR.indd 19 2017-06-21 3:53:00...
- Page 52 뚜껑을 닫기 전에 클린커버가 장착되어 있는지 확인하세요. 클린커버가 장착되어 있지 않으면 핸들 잠금이 인식되지 않으며, 예약취사 기능이 작동하지 않습니다. WHA-LX1000ID_KOR.indd 20 2017-06-21 3:53:01...
- Page 53 WHA-LX1000ID_KOR.indd 21 2017-06-21 3:53:02...
- Page 54 WHA-LX1000ID_KOR.indd 22 2017-06-21 3:53:03...
- Page 55 WHA-LX1000ID_KOR.indd 23 2017-06-21 3:53:03...
- Page 56 뚜껑 결합 손잡이가 잠금으로 닫혔을 때만 재가열이 진행되며 열렸을 때는 경고음이 울린 후 보온이 계속 진행됩니다. (클린커버가 장착되어 있지 않으면 핸들 잠금이 인식되지 않으며, 재가열이 작동하지 않습니다.) WHA-LX1000ID_KOR.indd 24 2017-06-21 3:53:04...
- Page 57 WHA-LX1000ID_KOR.indd 25 2017-06-21 3:53:04...
- Page 58 오곡밥 잡곡 모드에서 취사 ● 재료 : 찹쌀 2컵, 서리태(검정콩)•붉은 팥 ½컵씩, 소금 ½큰술, 차수수+차조+찰기장 합해 1컵, 물+팥 삶은 물 합해 3컵 ● 조리방법 1 찹쌀, 차조, 찰기장 서리태는 각각 깨끗이 씻어 건진다. 2 팥은 깨끗이 씻어 냄비에 담고 찬물을 부어 센불에 후루룩 삶아 첫물을 따라 버리고 다시 찬물을...
- Page 59 대추차 슬로우쿡 모드에서 취사 ● 재료 : 6~7인용 대추 180g, 생강, 꿀(설탕) 약간 백미 6인분 눈금 6~7인용 10인용 대추 200g, 생강, 꿀(설탕) 약간 10인용 백미 8인분 눈금 ● 조리방법 1 내솥에 잘 씻어 찢어 놓은 대추와 썰은 생강 약간을 함께 넣고물을내솥에표와같이 채우고메뉴를슬로우쿡으로선택한후요리시간을8~10시간으로설정하고취사한다.
- Page 60 WHA-LX1000ID_KOR.indd 28 2017-06-21 3:53:07...
- Page 61 클린커버의 결합 상태를 반드시 확인하세요. WHA-LX1000ID_KOR.indd 29 2017-06-21 3:53:07...
- Page 62 WHA-LX1000ID_KOR.indd 30 2017-06-21 3:53:08...
- Page 63 WHA-LX1000ID_KOR.indd 31 2017-06-21 3:53:08...
- Page 64 WHA-LX1000ID_KOR.indd 1 2017-06-21 3:52:35...
Need help?
Do you have a question about the WHA-LX1000iDUS Series and is the answer not in the manual?
Questions and answers
How to change voice from Korea to English