Table of Contents
Advertisement
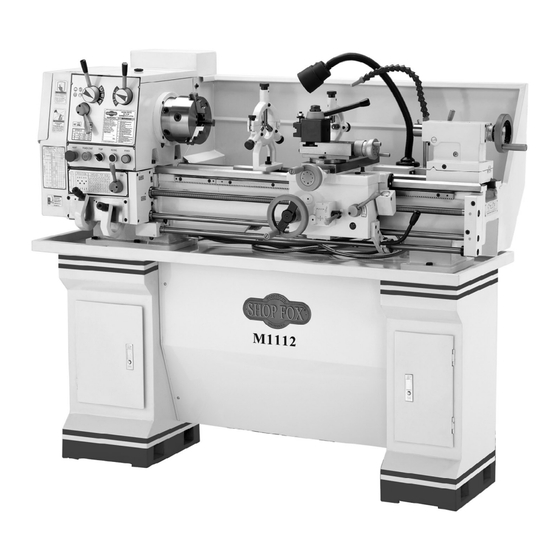
MODEL M1112 12" X 36"
GUNSMITHING LATHE
OWNER'S MANUAL
Phone: (360) 734-3482 • Online Technical Support: tech-support@shopfox.biz
COPYRIGHT © NOVEMBER 2007 BY WOODSTOCK INTERNATIONAL, INC. REVISED APRIL 2008.
WARNING: NO PORTION OF THIS MANUAL MAY BE REPRODUCED IN ANY SHAPE OR FORM WITHOUT
THE WRITTEN APPROVAL OF WOODSTOCK INTERNATIONAL, INC.
Printed in China
#10091CR
Advertisement
Table of Contents

Related Manuals for Shop fox M1112


Summary of Contents for Shop fox M1112
- Page 1 MODEL M1112 12" X 36" GUNSMITHING LATHE OWNER'S MANUAL Phone: (360) 734-3482 • Online Technical Support: tech-support@shopfox.biz COPYRIGHT © NOVEMBER 2007 BY WOODSTOCK INTERNATIONAL, INC. REVISED APRIL 2008. WARNING: NO PORTION OF THIS MANUAL MAY BE REPRODUCED IN ANY SHAPE OR FORM WITHOUT THE WRITTEN APPROVAL OF WOODSTOCK INTERNATIONAL, INC.
-
Page 3: Table Of Contents
Spindle Spider .................... 27 Cutting Shallow Tapers with Tailstock ..............36 Drilling with Tailstock ................... 36 Gap Piece Removal ..................37 Model M1112 Lathe Accessories ................ 38 MAINTENANCE ....................39 General Maintenance ..................39 General Cleaning ..................39 General Lubrication ..................39 Coolant System ................... - Page 4 SERVICE ......................42 Half-Nut Adjustment ..................45 M1112 Main Electrical Box Wiring Diagram ............50 Headstock Shifters and Change Gears ..............57 PARTS ......................58 Headstock Gearing and Control Panel ............... 59 Quick Change Gearbox .................. 61 Apron Assembly ................... 63 Saddle and Cross Feed ..................
-
Page 5: Introduction
INTRODUCTION Woodstock Technical Support Your new SHOP FOX Model M1112 Lathe has been specially designed to provide many years of trouble- ® free service. Close attention to detail, ruggedly built parts and a rigid quality control program assure safe and reliable operation. -
Page 6: Specifications
M1112 12" x 36" Gunsmithing Lathe MACHINE SPECIFICATIONS Phone #: (360) 734-3482 • Online Tech Support: tech-support@shopfox.biz • Web: www.shopfox.biz MODEL M1112 12" X 36" GUNSMITHING LATHE Product Dimensions: Overall Weight with Stand ....................1213 lbs. Overall Length/Width/Height with Stand ..............61 "... - Page 7 M1112 12" x 36" Gunsmithing Lathe Operation Information (continued) Maximum Tool Bit Size ....................⁄ " Compound Travel ......................3 ⁄ " " Carriage Travel ......................29 ⁄ " Cross Slide Travel ......................6 Headstock Information: Spindle Bore ......................1 ⁄ " Spindle Taper ......................MT #5 Number of Spindle Speeds ....................
-
Page 8: Controls And Features
M1112 12" x 36" Gunsmithing Lathe Controls and Features Model M1112 lathe. A. Quick Change Gearbox Levers Q. Compound Rest Handwheel B. Feed Rod Lever R. Tailstock Spindle and Center C. Emergency Stop/RESET Button Tailstock Spindle Lock Lever D. POWER START Button T. -
Page 9: Safety
M1112 12" x 36" Gunsmithing Lathe SAFETY READ MANUAL BEFORE OPERATING MACHINE. FAILURE TO FOLLOW INSTRUCTIONS BELOW WILL RESULT IN PERSONAL INJURY. Indicates an imminently hazardous situation which, if not avoided, WILL result in death or serious injury. Indicates a potentially hazardous situation which, if not avoided, COULD result in death or serious injury. - Page 10 M1112 12" x 36" Gunsmithing Lathe 12. Do not force tool. The machine will do a safer and better job at the rate for which it was designed. 13. Use correct tool. Do not force machine or attachment to do a job for which it was not designed.
-
Page 11: Additional Safety Instructions For Lathes
M1112 12" x 36" Gunsmithing Lathe Additional Safety Instructions for Lathes READ and understand this USE this and other machinery with caution entire instruction manual and respect. Always consider safety first, before using this machine. as it applies to your individual working Serious personal injury conditions. -
Page 12: Avoiding Potential Injuries
M1112 12" x 36" Gunsmithing Lathe Avoiding Potential Injuries Figure 3. Always wear face and eye protection Figure 1. Always protect the bed ways, and when using lathes. unplug the lathe when retooling the lathe. Figure 4. Never use hands to stop or slow the Figure 2. -
Page 13: Electrical
Run" portion of this manual. 220V Operation 6-15P 6-15R The Model M1112 is wired for 220V single-phase operation. Figure 6. 6-15 plug and receptacle. We recommend connecting this machine to a dedicated circuit with a verified ground, using the circuit size given below. -
Page 14: Set Up
M1112 12" x 36" Gunsmithing Lathe SET UP Inventory Main Components (Figure 7) If any parts are missing, find the part num- A. 6" Three-Jaw Chuck w/Jaws ......1 ber in the back of this manual and contact B. Steady Rest ..........1 Woodstock International, Inc. -
Page 15: Uncrating And Lifting
M1112 12" x 36" Gunsmithing Lathe Uncrating and Lifting The Model M1112 lathe has been carefully crated. If you notice the lathe has been damaged, contact your SHOP FOX authorized dealer immediately. ® To lift and move the lathe, do these steps: 1. -
Page 16: Cleaning Machine
M1112 12" x 36" Gunsmithing Lathe Cleaning Machine The ways and other unpainted parts of your lathe are coated with a waxy grease that protects them from corrosion during shipment. Clean this grease off with a ALWAYS work well- solvent cleaner or citrus-based degreaser. DO NOT use... -
Page 17: Mounting To Shop Floor
M1112 12" x 36" Gunsmithing Lathe Mounting to Shop Floor Although not required, we recommend that you NOTICE mount your new machine to the floor. Because this is an optional step and floor materials may vary, floor Anchor studs are stronger and more mounting hardware is not included. - Page 18 M1112 12" x 36" Gunsmithing Lathe Test Run & Break-In The purpose of the test run and break-in is to make sure NOTICE the lathe and safety features operate correctly, and that the lathe can enter service quickly without bearing NEVER shift lathe gears when lathe damage if heavy work loads are immediately anticipated.
- Page 19 M1112 12" x 36" Gunsmithing Lathe 8. Push the POWER START button, then move 10. Return the spindle rotation ON/OFF lever the spindle rotation ON/OFF lever (Figure 13) to STOP, reset the emergency stop button, down until the chuck turns. The top of the restart the lathe, and let the lathe run for a chuck should turn toward you.
- Page 20 M1112 12" x 36" Gunsmithing Lathe Tailstock The tailstock alignment was set at the factory with the headstock. However, we recommend that you take the time to ensure that the tailstock is aligned to your own desired tolerances. To align the tailstock, do these steps: 1.
- Page 21 M1112 12" x 36" Gunsmithing Lathe 8. Loosen the tailstock lock lever and adjust the tailstock offset by the amount of the taper by turning the adjustment set screw (Figure 19). Turn another 0.010'' off of the stock and check for taper.
-
Page 22: Operations
Page 16 before using this lathe for any cutting or threading operations; otherwise, gear box damage may occur. The Model M1112 will perform many types of operations Always wear safety goggles when oper- that are beyond the scope of this manual. Many of these ating this lathe. - Page 23 M1112 12" x 36" Gunsmithing Lathe Mounting Chuck or Faceplate The Model M1112 is shipped with the 3-jaw chuck installed. This is a scroll-type chuck, meaning that all three jaws move in unison when adjusted. The 4-jaw chuck, on the other hand, features independent jaws.
- Page 24 M1112 12" x 36" Gunsmithing Lathe To install a chuck, do these steps: 1. DISCONNECT LATHE FROM POWER! Camlock Stud 2. Place a piece of plywood across the lathe bed, wipe clean the spindle nose taper (Figure 24) and the mating surface on the chuck with a rag.
- Page 25 M1112 12" x 36" Gunsmithing Lathe To load a workpiece, do these steps: 1. With the chuck key, open the jaws so the workpiece lays flat against the chuck face and jaw step or fits in the through hole. For jaw and work holding options, see Figure 26.
-
Page 26: Swapping Jaws
M1112 12" x 36" Gunsmithing Lathe Swapping Jaws The three-jaw scroll chuck has removable hardened steel jaws (Figure 27). The outside of the jaws are used to hold the workpiece from the outer diameter. Numbered from 1–3, the jaws must be used in the matching numbered jaw guides, see (Figure 28). -
Page 27: Four-Jaw Chuck
M1112 12" x 36" Gunsmithing Lathe Four-Jaw Chuck Four-jaw chucks feature hardened steel jaws that are adjusted independently. Each jaw can be removed from the chuck body and reversed. Independent jaw adjustment and re versal allows for a wide range of work holding versatility. -
Page 28: Faceplate
M1112 12" x 36" Gunsmithing Lathe 7. Make fine adjustments by slightly loosening one jaw and tightening the opposing jaw until the workpiece is precisely aligned. 8. Use a dial indicator to fine-tune your adjustments (see Figure 32), and use a lower RPM when machining heavy eccentric workpieces. -
Page 29: Centers
M1112 12" x 36" Gunsmithing Lathe Centers A tailstock center supports stock that is too long to be supported by the chuck alone. The tailstock barrel and live center have an MT#3 taper. Included with this lathe is an MT#3 to MT#5 spindle sleeve. If you need to install a center in the spindle when using the faceplate, you can do so by using this adapter sleeve. -
Page 30: Steady Rest
M1112 12" x 36" Gunsmithing Lathe Steady Rest The steady rest supports long, small diameter stock that otherwise could not be turned because of deflection. The steady rest fingers are fitted with bearings that maintain consistent non-wearing support throughout the cut. The steady rest can also be used in place of the tailstock to allow for cutting tool access at the end of your workpiece. -
Page 31: Feed Direction Lever
M1112 12" x 36" Gunsmithing Lathe Feed Direction Lever NOTICE NEVER attempt to shift a lever while the lathe is run- ning! And when shifting a lever, NEVER force it. If the lever will not engage, rotate the chuck by hand while keeping light pressure on the lever. -
Page 32: Gearbox Levers
M1112 12" x 36" Gunsmithing Lathe Gearbox Levers NOTICE NEVER attempt to shift a lever while the lathe is run- ning! And when shifting a lever, NEVER force it. If the lever will not engage, rotate the chuck by hand while keeping light pressure on the lever. - Page 33 M1112 12" x 36" Gunsmithing Lathe Carriage/Cross Feed Lever Longitudinal and cross slide powered motions are controlled by the carriage/cross feed lever. The lever pivots through two stops that require moving the lever left and right as well as up and down. Moving this lever upward activates the automatic longitudinal feed.
- Page 34 M1112 12" x 36" Gunsmithing Lathe While other thread pitches may be achieved, the Model M1112 is designed so that gear changes are not needed for cutting inch threads. However, you will have to move the feed direction lever to the direction of thread you want to cut, and then move the feed rod lever to the right.
- Page 35 M1112 12" x 36" Gunsmithing Lathe 4. In the “Combination of Gears” column (Figure 48) are 3 small columns. The numbers below F and G represent the number of gear teeth on a change gear. Find the required change gears that have the corresponding number of teeth as stated in the chart to the left of the desired pitch.
-
Page 36: Carriage Handwheels
M1112 12" x 36" Gunsmithing Lathe Carriage Handwheels Carriage Handwheel The carriage handwheel (Figure 49) moves the carriage Compound left or right along the bed. This manual control is Slide necessary when setting up the machine for turning Handwheel Cross Slide... -
Page 37: Tailstock Handwheel
M1112 12" x 36" Gunsmithing Lathe Tailstock The tailstock (Figure 51) serves many functions. The primary use is for holding centers and drill chucks. The Tailstock barrel has a Morse taper 3 bore and is imprinted with Handwheel graduations in millimeters and inches. -
Page 38: Cutting Shallow Tapers With Tailstock
M1112 12" x 36" Gunsmithing Lathe Cutting Shallow Tapers with Tailstock The tailstock can be offset to cut a shallow taper on a shaft or barrel. Offset To set up the tailstock to cut tapers, do these steps: Adjustment 1. Lock the tailstock in position. -
Page 39: Gap Piece Removal
M1112 12" x 36" Gunsmithing Lathe Gap Piece Removal The Model M1112 comes equipped with a gap piece NOTICE below the spindle that can be removed for turning large diameter parts or when using a large diameter faceplate. The gap piece is installed, then ground... -
Page 40: Model M1112 Lathe Accessories
Includes ten C-2 grade bits and ten C-6 grade bits for cutting steel and alloys. The Model M1068 Shop Fox Live Center Set. A super blend of quality and convenience, this MT#3 Live Center Set offers seven interchange- able tips. -
Page 41: Maintenance
M1112 12" x 36" Gunsmithing Lathe MAINTENANCE General Maintenance Before every use, check for loose mounting bolts, chuck mounting, safety feature operation, worn or damaged electrical cords, and any other condition that could hamper the safe operation of this machine. - Page 42 M1112 12" x 36" Gunsmithing Lathe Slides and Ways Wipe the ways with a clean rag and apply oil before Lead Screw and after each use. Apply oil to the bedways and other Feed Rod bare metal parts to also protect the lathe from rust and pitting.
-
Page 43: Coolant System
M1112 12" x 36" Gunsmithing Lathe Coolant System To maintain the coolant system, do these steps: 1. DISCONNECT THE LATHE FROM POWER! Drain 2. Remove the drain plug from the tank, drain the Pump Tube coolant out, and discard properly as hazardous waste. -
Page 44: Service
M1112 12" x 36" Gunsmithing Lathe SERVICE Troubleshooting Review the troubleshooting and procedures in this section to fix your machine if a problem develops. If you need replacement parts or you are unsure of your repair skills, then feel free to call our Technical Support at (360) 734-3482. -
Page 45: Troubleshooting
M1112 12" x 36" Gunsmithing Lathe Troubleshooting Operation and Work Results Symptom Possible Cause Possible Solution Entire machine 1. Workpiece is unbalanced. 1. Reinstall workpiece so it is as centered with the vibrates exces- spindle bore as possible. sively upon 2. - Page 46 Over-tightening may cause premature wear. Set Screw There are three areas with gib adjustments on the Model M1112: the cross-slide gib, the compound slide gib, and the saddle gib. Figure 60. Adjusting the cross-slide gib. Cross Slide Gib The gib on the cross-slide (Figure 60) is adjusted by the two screws located at each end.
-
Page 47: Half-Nut Adjustment
M1112 12" x 36" Gunsmithing Lathe Saddle Gib and Saddle Lock The saddle is supplied with a square head bolt (Figure Saddle Lock 62) on the front right hand side of the slide. This bolt Bolt locks the saddle in place for increased rigidity when making face cuts. - Page 48 M1112 12" x 36" Gunsmithing Lathe Adjusting/Replacing V-Belts To replace or adjust the V-belts, do these steps: 1. DISCONNECT LATHE FROM POWER! 2. Open the change gear access door. 3. Loosen four motor mount bolts (Figure 64) and replace the belts as a matched set if required.
-
Page 49: Spindle Bearing Preload
M1112 12" x 36" Gunsmithing Lathe Spindle Bearing Preload This lathe is shipped from the factory with the spindle bearing preload adjusted. If the spindle ever develops a bit of end-play and the workpiece finish suffers, you can adjust the bearing preload to remove the end-play and improve the workpiece finish. - Page 50 M1112 12" x 36" Gunsmithing Lathe 7. Place a wooden block over the outboard end of the spindle, hit it soundly with a small sledge or heavy dead blow hammer. Your goal is to slide the spindle forward just enough to introduce spindle end-play that you can feel by hand.
- Page 51 M1112 12" x 36" Gunsmithing Lathe 12. Without causing the inner spanner nut to 3. Set the spindle speed to its highest setting. tighten any further, install and tighten the 4. Connect the lathe to power and turn the outer spanner nut against the inner nut.
-
Page 52: M1112 Main Electrical Box Wiring Diagram
M1112 12" x 36" Gunsmithing Lathe M1112 Main Electrical Box Wiring Diagram Main Electrical Box To Work Lamp Power Supply To Spindle Motor To Pump Motor To Control Panel To Spindle ON/OFF Switch Page 56 Page 56 Page 53 Page 55 Page 52... - Page 53 M1112 12" x 36" Gunsmithing Lathe Motor Thermal Pump Thermal Control System Overload Relay 2A, 110V Fuse Overload Relay System Transformer Pump Contactor KM1 Motor Direction A Contactor Work Lamp 5A 24V KM2 Motor Fuse Direction B Contactor Motor Inch/Jog Contactor Figure 71.
- Page 54 M1112 12" x 36" Gunsmithing Lathe Emergency Power Pump Inch/Jog Power Stop Button Button Switch Button Lamp Figure 72. Control panel wiring. To Main Electrical Page 50 -52-...
- Page 55 M1112 12" x 36" Gunsmithing Lathe Figure 73. Spindle motor wiring. To Main Electrical Page 50 -53-...
- Page 56 M1112 12" x 36" Gunsmithing Lathe Figure 74. Spindle ON/OFF switch Figure 75. Spindle ON/OFF switch (Left side view). (Right side view). To Main Electrical Page 50 -54-...
- Page 57 M1112 12" x 36" Gunsmithing Lathe Figure 76. Pump wiring. To Main Electrical Page 50 -55-...
- Page 58 M1112 12" x 36" Gunsmithing Lathe Figure 77. Work lamp wiring. To Main Electrical Page 50 To Main Electrical Page 50 -56-...
-
Page 59: Headstock Shifters And Change Gears
M1112 12" x 36" Gunsmithing Lathe Headstock Shifters and Change Gears -57-... -
Page 60: Parts
M1112 12" x 36" Gunsmithing Lathe Headstock Shifters and Change Gear Parts PART # DESCRIPTION PART # DESCRIPTION 1000 XPSB77M CAP SCREW M12-1.75 X 30 1049 XM11121049 BUSHING 1001 XPS12M PHLP HD SCR M3-.5 X 6 1050 XM11121050 SHIFTING ARM... -
Page 61: Headstock Gearing And Control Panel
M1112 12" x 36" Gunsmithing Lathe Headstock Gearing and Control Panel -59-... - Page 62 M1112 12" x 36" Gunsmithing Lathe Headstock Gearing and Control Panel Parts PART # DESCRIPTION PART # DESCRIPTION 1101 XPR56M EXT RETAINING RING 45MM 1141 XPSB80M CAP SCREW M3-.5 X 8 1102 XM11121102 GEAR 36T 1142 XM11121142 SPINDLE 1103 XM11121103...
-
Page 63: Quick Change Gearbox
M1112 12" x 36" Gunsmithing Lathe Quick Change Gearbox -61-... - Page 64 M1112 12" x 36" Gunsmithing Lathe Quick Change Gearbox Parts PART # DESCRIPTION PART # DESCRIPTION 2301 XM11122301 LEAD SCREW 2341 XM11122341 GEAR 16T 2302 XPRP10M ROLL PIN 5 X 36 2342 XM11122342 GEAR 32T 2304 XP8103 THRUST BEARING 8103...
-
Page 65: Apron Assembly
M1112 12" x 36" Gunsmithing Lathe Apron Assembly -63-... - Page 66 M1112 12" x 36" Gunsmithing Lathe Apron Assembly Parts PART # DESCRIPTION PART # DESCRIPTION 2401 XM11122401 HANDLE 2434 XPW03M FLAT WASHER 6MM 2402 XM11122402 HANDWHEEL 2435 XPSB29M CAP SCREW M6-1 X 40 2403 XM11122403 GRADUATED DIAL 2436 XM11122436 SHAFT...
-
Page 67: Saddle And Cross Feed
M1112 12" x 36" Gunsmithing Lathe Saddle and Cross Feed -65-... - Page 68 M1112 12" x 36" Gunsmithing Lathe Saddle and Cross Feed Parts PART # DESCRIPTION PART # DESCRIPTION 2501 XM11122501 SADDLE 2522 XM11122522 SLIDE PLATE 2502 XPS59M PHLP HD SCR M3-.5 X 14 2523 XM11122523 SLIDE PLATE 2503 XM11122503 WIPER 2524...
-
Page 69: Compound Rest
M1112 12" x 36" Gunsmithing Lathe Compound Rest Compound Rest Parts PART # DESCRIPTION PART # DESCRIPTION 2601 XM11122601 SPECIAL SCREW 2612 XM11122612 BRACKET 2602 XM11122602 2613 XP8101 THRUST BEARING 8101 2603 XM11122603 COMPOUND SLIDE 2614 XM11122614 GRADUATED DIAL 2604 XPN02M HEX NUT M10-1.5... -
Page 70: Tailstock Assembly
M1112 12" x 36" Gunsmithing Lathe Tailstock Assembly Tailstock Parts PART # DESCRIPTION PART # DESCRIPTION 3702 XPK136M KEY 8 X 8 X 30 3717 XM11123717 LOCK SCREW 3703 XM11123703 QUILL 3718 XM11123718 LOCK SHAFT 3704 XM11123704 TAILSTOCK 3719 XM11123719... -
Page 71: Bed And Motor Parts
M1112 12" x 36" Gunsmithing Lathe Bed and Motor Parts -69-... -
Page 72: Cabinet Parts
M1112 12" x 36" Gunsmithing Lathe Cabinet Parts -70-... - Page 73 M1112 12" x 36" Gunsmithing Lathe Bed, Motor, and Cabinet Parts PART # DESCRIPTION PART # DESCRIPTION 3801 XPVA32 V-BELT A-32 4L320 3816 XPSB70M CAP SCREW M10-1.5 X 45 3802 XPSS05M SET SCREW M5-.8 X 10 3817 XM11123817 THREADED TAPER PIN...
-
Page 74: Spindle Switch Control Rod Assembly
M1112 12" x 36" Gunsmithing Lathe Spindle Switch Control Rod Assembly Spindle Switch Control Rod Assembly PART # DESCRIPTION PART # DESCRIPTION 4901 XM11124901 BRACKET 4911 XM11124911 HANDLE 4902 XPSB25M CAP SCREW M6-1 X 11 4912 XM11124912 BRACKET 4903 XM11124903... -
Page 75: Coolant System And Lamp
M1112 12" x 36" Gunsmithing Lathe Coolant System and Lamp Coolant System and Lamp Parts PART # DESCRIPTION PART # DESCRIPTION 5501 XM11125501 COOLANT TANK 5508 XPS11M PHLP HD SCR M6-1 X 16 5502 XM11125502 COOLANT PUMP ASSEMBLY 5511 XM11125511... -
Page 76: Lathe Accessories
M1112 12" x 36" Gunsmithing Lathe Lathe Accessories Lathe Accessories Parts PART # DESCRIPTION PART # DESCRIPTION 6401 XM11126401 4-JAW UNIVERSAL CHUCK 8" 6425 XM11126425 STANDARD DEAD CENTER MT#3 6401-1 XM11126401-1 4-JAW CHUCK, JAW 6426 XM11126426 ARBOR B16-MT#3 6402 XM11126402 FACEPLATE 10"... -
Page 77: Main Electrical Box
M1112 12" x 36" Gunsmithing Lathe Main Electrical Box 6502 6503 6501 6504 6510 6505 6506 6507 6508 6509 Main Electrical Box Parts PART # DESCRIPTION PART # DESCRIPTION 6501 XM11126501 TRANSFORMER, JBK5-100VATH 6506 XM11126506 CONTACTOR: 110V COIL, 6502 XM11126502... -
Page 78: Follow Rest And Steady Rest
M1112 12" x 36" Gunsmithing Lathe Follow Rest and Steady Rest Follow Rest and Steady Rest Parts PART # DESCRIPTION PART # DESCRIPTION 7301 XM11127301 KNURLED KNOB 7314 XPN09M HEX NUT M12-1.75 7302 XPSS02M SET SCREW M6-1 X 6 7315... -
Page 79: Label Placement
M1112 12" x 36" Gunsmithing Lathe Label Placement Safety labels warn about machine hazards and how to prevent machine damage or injury. The owner of this machine MUST maintain the original location and readability of all labels on this machine. If any label is removed or becomes unreadable, REPLACE that label before allowing the machine to enter service again. - Page 80 M1112 12" x 36" Gunsmithing Lathe Notes...
-
Page 81: Warranty Registration
2. How long have you been a woodworker/metalworker? _____ 0-2 Years _____ 2-8 Years ____ 8-20 Years _____ 20+ Years 3. How many of your machines or tools are Shop Fox ® _____ 0-2 _____ 3-5 ____ 6-9 _____ 10+ 4. - Page 82 FOLD ALONG DOTTED LINE Place Stamp Here WOODSTOCK INTERNATIONAL INC. P.O. BOX 2309 BELLINGHAM, WA 98227-2309 FOLD ALONG DOTTED LINE TAPE ALONG EDGES--PLEASE DO NOT STAPLE...
Need help?
Do you have a question about the M1112 and is the answer not in the manual?
Questions and answers