Table of Contents
Advertisement
Quick Links
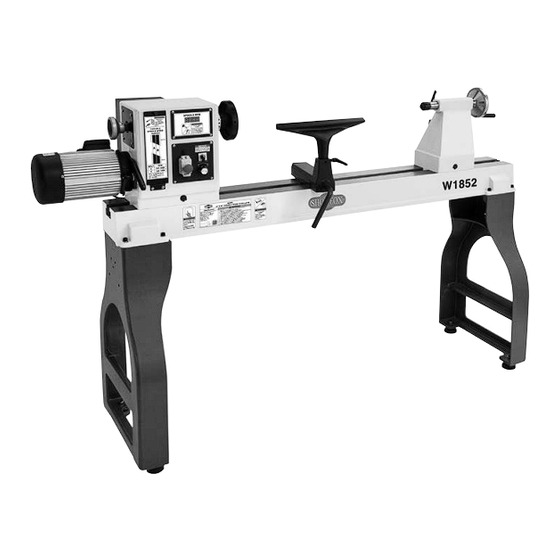
MODEL W1852
22" X 42" VARIABLE-SPEED
WOOD LATHE
OWNER'S MANUAL
(FOR MODELS MANUFACTURED SINCE 11/17)
Phone: (360) 734-3482 • Online Technical Support: techsupport@woodstockint.com
COPYRIGHT © SEPTEMBER, 2017 BY WOODSTOCK INTERNATIONAL, INC., REVISED JANUARY, 2018 (HE)
WARNING: NO PORTION OF THIS MANUAL MAY BE REPRODUCED IN ANY SHAPE OR FORM WITHOUT
THE WRITTEN APPROVAL OF WOODSTOCK INTERNATIONAL, INC.
V1.01.18
#19053JH Printed in China
Advertisement
Table of Contents

Related Manuals for Shop fox W1852


Summary of Contents for Shop fox W1852
- Page 1 MODEL W1852 22" X 42" VARIABLE-SPEED WOOD LATHE OWNER'S MANUAL (FOR MODELS MANUFACTURED SINCE 11/17) Phone: (360) 734-3482 • Online Technical Support: techsupport@woodstockint.com COPYRIGHT © SEPTEMBER, 2017 BY WOODSTOCK INTERNATIONAL, INC., REVISED JANUARY, 2018 (HE) WARNING: NO PORTION OF THIS MANUAL MAY BE REPRODUCED IN ANY SHAPE OR FORM WITHOUT THE WRITTEN APPROVAL OF WOODSTOCK INTERNATIONAL, INC. V1.01.18 #19053JH Printed in China...
- Page 2 This manual provides critical safety instructions on the proper setup, operation, maintenance, and service of this machine/tool. Save this document, refer to it often, and use it to instruct other operators. Failure to read, understand and follow the instructions in this manual may result in fire or serious personal injury—including amputation, electrocution, or death.
-
Page 3: Table Of Contents
Contents INTRODUCTION........2 ACCESSORIES........38 Contact Info ........2 MAINTENANCE........40 Manual Accuracy ........2 General .......... 40 Machine Specifications ......3 Cleaning & Protecting ......40 Identification ........5 Lubrication ........40 Controls & Components ......6 Tailstock ......... 40 SAFETY..........7 SERVICE.......... -
Page 4: Introduction
Model W1852 (For Machines Mfd. Since 11/17) INTRODUCTION Woodstock.Technical.Support This machine has been specially designed to provide many years of trouble-free service. Close attention to detail, ruggedly built parts and a rigid quality control program assure safe and reliable operation. -
Page 5: Machine Specifications
Inverter (VFD) Type..................Delta VFD‐M Inverter (VFD) Size....................3 HP Motors Main Horsepower....................3 HP Phase....................3‐Phase Amps......................8A Speed....................1725 RPM Type.................... TEFC Induction Power Transfer ..................Belt Drive Bearings..............Sealed & Permanently Lubricated Model W1852 Machine Specifications, Page 1 of 3... - Page 6 Warranty ....................... 2 Years Approximate Assembly & Setup Time ..............1 Hour Serial Number Location ..................ID Label ISO 9001 Factory ....................Yes Certified by a Nationally Recognized Testing Laboratory (NRTL) .......... No Model W1852 Machine Specifications, Page 2 of 3...
-
Page 7: Identification
Model W1852 (For Machines Mfd. Since 11/17) Identification Become familiar with the names and locations of the controls and features shown below to better understand the instructions in this manual. Spindle RPM Spindle Quill Lock Lever Belt Access Readout Direction Switch... -
Page 8: Controls & Components
Model W1852 (For Machines Mfd. Since 11/17) Controls.&.Components Refer to Figures.1–3 and the following descriptions to become familiar with the basic controls and components of this machine. Understanding these items and how they work will help you understand the rest of the manual and stay safe when operating this machine. -
Page 9: Safety
Model W1852 (For Machines Mfd. Since 11/17) SAFETY SAFETY For.Your.Own.Safety, Read.Manual.Before.Operating.Machine The. purpose. of. safety. symbols. is. to. attract. your. attention. to. possible. hazardous. conditions.. This. manual.uses.a.series.of.symbols.and.signal.words.intended.to.convey.the.level.of.importance.of.the. safety.messages..The.progression.of.symbols.is.described.below..Remember.that.safety.messages.by. themselves. do. not. eliminate. danger. and. are. not. a. substitute. for. proper. accident. prevention. mea- sures—this.responsibility.is.ultimately.up.to.the.operator! - Page 10 Model W1852 (For Machines Mfd. Since 11/17) WEARING.PROPER.APPAREL..Do not wear FORCING.MACHINERY..Do not force machine. It clothing, apparel, or jewelry that can become will do the job safer and better at the rate for entangled in moving parts. Always tie back which it was designed.
-
Page 11: Additional Safety For Wood Lathes
Model W1852 (For Machines Mfd. Since 11/17) Additional.Safety.for.Wood.Lathes MAIN.INJURY.HAZARDS:.Death.or.crushing.injury.from.getting.entangled.in.rotating.spindle.or. workpiece;.death,.blindness,.or.broken.bones.from.being.struck.by.a.workpiece.that.breaks. apart.or.comes.loose.during.rotation,.turning.tool.kickback,.or.flying.wood.chips..To.minimize. your.risk.of.these.hazards,.always.heed.the.following.warning.information: INTEGRITY.OF.STOCK. Verify each workpiece is EYE/FACE.PROTECTION. Always wear a face free of knots, splits, nails, or foreign material shield and safety glasses when operating lathe. to ensure it can safely rotate on spindle without breaking apart or causing turning tool PROPER.APPAREL. -
Page 12: Glossary Of Terms
Model W1852 (For Machines Mfd. Since 11/17) Glossary.of.Terms The following is a list of common definitions, terms and phrases used throughout this manual as they relate to this wood lathe and woodworking in general. Become familiar with these terms for assembling, adjust- ing or operating this machine. -
Page 13: Electrical
Model W1852 (For Machines Mfd. Since 11/17) ELECTRICAL Circuit.Requirements This machine must be connected to the correct size and type of power supply circuit, or fire or electrical damage may occur. Read through this section to determine if an The. machine. must. be. properly. set. up. -
Page 14: Grounding Requirements
Model W1852 (For Machines Mfd. Since 11/17) Grounding.Requirements This machine MUST be grounded. In the event of certain types of malfunctions or breakdowns, grounding provides a path of least resistance for electric current to travel—in The. machine. must. be. properly. set. up. -
Page 15: Setup
Model W1852 (For Machines Mfd. Since 11/17) SETUP Unpacking This machine has been carefully packaged for safe This machine presents transportation. If you notice the machine has been serious injury hazards damaged during shipping, please contact your authorized to untrained users. Read Shop Fox dealer immediately. -
Page 16: Inventory
Model W1852 (For Machines Mfd. Since 11/17) Inventory The following is a list of items shipped with your machine. Before beginning setup, lay these items out and inventory them. Note: If you cannot find an item on this list, carefully check around/inside the machine and packaging materials. -
Page 17: Hardware Recognition Chart
Model W1852 (For Machines Mfd. Since 11/17) Hardware.Recognition.Chart USE THIS CHART TO IDENTIFY HARDWARE DURING THE INVENTORY/ASSEMBLY ⁄ " ⁄ " ⁄ " PROCESS. ⁄ " ⁄ " ⁄ " ⁄ " ⁄ " ⁄ " ⁄ " ⁄ "... -
Page 18: Cleaning Machine
Model W1852 (For Machines Mfd. Since 11/17) Cleaning.Machine To prevent corrosion during shipment and storage of your machine, the factory has coated the bare metal surfaces of your machine with a heavy-duty rust prevention compound. Gasoline.and.petroleum. products.have.low.flash. If you are unprepared or impatient, this compound can points.and.can.explode. -
Page 19: Machine Placement
Model W1852 (For Machines Mfd. Since 11/17) Machine.Placement Weight.Load Physical.Environment Refer to the Machine.Specifications for the The physical environment where your machine is weight of your machine. Make sure that the operated is important for safe operation and the surface upon which the machine is placed will longevity of its components. -
Page 20: Anchoring To Floor
Model W1852 (For Machines Mfd. Since 11/17) Anchoring.to.Floor Number.of.Mounting.Holes........4 Diameter.of.Mounting.Hardware......⁄ " Anchoring machinery to the floor prevents tipping or shifting and reduces vibration that may occur during operation, resulting in a machine that runs slightly quieter and feels more solid. -
Page 21: Assembly
Model W1852 (For Machines Mfd. Since 11/17) Assembly Before beginning the assembly process, refer to Items. Needed.for.Setup and gather everything you need. Ensure all parts have been properly cleaned of any heavy-duty rust-preventative applied at the factory (if applicable). Be sure to complete all steps in the assembly procedure prior to performing the Test.Run. - Page 22 Model W1852 (For Machines Mfd. Since 11/17) 6.. Remove top hex nut from feet, insert feet in leg mounting holes (see Figure.13), then thread top hex nut back on. DO NOT tighten hex nuts yet. 7.. Remove supporting block and repeat Steps.5–6 on other leg.
-
Page 23: Test Run
Model W1852 (For Machines Mfd. Since 11/17) Test.Run Once assembly is complete, test run the machine to ensure it is properly connected to power and safety components are functioning properly. Serious. injury. or. death. can. result. from. using. this. machine. BEFORE. -
Page 24: Operations
Model W1852 (For Machines Mfd. Since 11/17) OPERATIONS General This machine will perform many types of operations that are beyond the scope of this manual. Many of these operations can be dangerous or deadly if performed incorrectly. The instructions in this section are written with the understanding that the operator has the necessary knowledge and skills to operate this machine. -
Page 25: Workpiece Inspection
Model W1852 (For Machines Mfd. Since 11/17) Workpiece.Inspection Some workpieces are not safe to turn or may •. Large/Loose Knots:.Loose knots can require modification before they can be made become dislodged during the turning safe to turn. operation. Large knots can cause a workpiece to completely break in half Before.turning,.get.in.the.habit.of.inspecting. -
Page 26: Selecting Turning Tools
Model W1852 (For Machines Mfd. Since 11/17) Selecting.Turning.Tools Lathe tools come in a variety of shapes and sizes, and usually fall into five major categories. Gouges—Mainly used for rough cutting, detail • cutting, and cove profiles. The rough gouge is a... -
Page 27: Adjusting Headstock
Model W1852 (For Machines Mfd. Since 11/17) Adjusting.Headstock The Model W1852 headstock is equipped with a cam- action clamping system to secure it to the lathe bed. When the lever is tightened, a locking plate lifts up underneath the bed and secures the headstock in place. -
Page 28: Adjusting Tool Rest
Model W1852 (For Machines Mfd. Since 11/17) Adjusting.Tool.Rest The tool rest assembly consists of two components: the tool rest base (or banjo) and the tool rest. The tool rest base moves forward/backward and along the length of the Improperly. supported. or. positioned. -
Page 29: Installing/Removing Headstock Center
Model W1852 (For Machines Mfd. Since 11/17) Installing/Removing. Headstock.Center The included spur center installs in the headstock spindle with an MT#2 tapered fit. Installing.Headstock.Center Center 1.. DISCONNECT MACHINE FROM POWER! 2. Make sure mating surfaces of center and spindle are free of debris and oily substances before inserting center to ensure a good fit and reduce runout. -
Page 30: Installing/Removing Tailstock Center
Model W1852 (For Machines Mfd. Since 11/17) Installing/Removing. Tailstock.Center The included live center installs into the tailstock quill with an MT#2 tapered fit. Installing.Tailstock.Center Handwheel Quill Lock Handle 1. Loosen quill lock handle, and rotate handwheel until quill extends about 1", as shown in Figure.24. -
Page 31: Installing Faceplate
Model W1852 (For Machines Mfd. Since 11/17) Headstock Faceplate Installing.Faceplate Tool.Needed. Faceplate Set Hex Wrench 4mm ..........1 Screw (1 of 2) To.install.faceplate,.do.these.steps: 1. DISCONNECT MACHINE FROM POWER! 2.. Insert indexing pin into an indexing hole and rotate spindle until pin engages to prevent spindle from turning while you tighten faceplate, as shown in Figure.26. -
Page 32: Changing Speed Ranges
Model W1852 (For Machines Mfd. Since 11/17) Changing Speed Ranges Changing.Speed.Ranges The Model W1852 pulley belt configurations provide two speed ranges (see Figure 28). Spindle = High Range Note:.To maximize spindle torque, use low spindle speed 330-3200 RPM range for spindle speeds of 1200 RPM or less. - Page 33 Model W1852 (For Machines Mfd. Since 11/17) 3. Loosen belt tension lock handle (see Figure.30). Belt Tension 4. Use belt tension lever (see Figure.30) to lift motor Lever assembly all the way up, then re-tighten belt tension lock handle—this will hold motor in place while you change belt position.
-
Page 34: Using Indexing Feature
Model W1852 (For Machines Mfd. Since 11/17) Using.Indexing.Feature Indexing on a lathe is typically used for workpiece layout Indexing and other auxiliary operations that require equal distances Inner around the workpiece circumference, such as clock faces Indexes or inlays. By inserting the indexing pin into one of the four outer... -
Page 35: Spindle Turning
Model W1852 (For Machines Mfd. Since 11/17) Spindle.Turning Spindle turning is the operation performed when a workpiece is mounted between the headstock and the tailstock, as shown in Figure 35. Bowls, table legs, tool handles, and candlesticks are typical projects where this operation is used. - Page 36 Model W1852 (For Machines Mfd. Since 11/17) 6. Drive spur center into end center mark of workpiece with a wood mallet to embed it at least ⁄ " into workpiece, as shown in Figure.38. 7. With workpiece still attached, insert spur center ¼"...
-
Page 37: Faceplate Turning
Model W1852 (For Machines Mfd. Since 11/17) Spindle.Turning.Tips: • When turning the lathe ON, stand away from the path of the spinning workpiece until the spindle reaches full speed and you can verify that the workpiece will not come loose. - Page 38 Model W1852 (For Machines Mfd. Since 11/17) 3. Thread and secure faceplate onto headstock spindle Correct Incorrect (refer to Installing.Faceplate.on Page.29). — If wood screws cannot be placed in workpiece, face- plate can be mounted to a backing block attached to workpiece (see Mounting the Workpiece to a Backing Block).
-
Page 39: Outboard Turning
Model W1852 (For Machines Mfd. Since 11/17) Outboard.Turning Outboard turning is a variation of faceplate turning and is accomplished with the headstock positioned so the faceplate is not directly over the bed, allowing a larger When.outboard.turning,.ALWAYS.use.a. turning capacity than the swing specification of the lathe. -
Page 40: Accessories
Model W1852 (For Machines Mfd. Since 11/17) ACCESSORIES The following wood lathe accessories may be available through your local Woodstock International Inc. Dealer. If you do not have a dealer in your area, these products are also available through online deal- ers. - Page 41 Model W1852 (For Machines Mfd. Since 11/17) The.D4058.3-Pc..HSS.Lathe.Chisel.Set.is ideal for bowl turning and detail work. Each chisel measures roughly 16" long, with 10" ash han- dles, and the high-speed steel blades measure a full ⁄ " thick! The set includes one round, one curved, and one 90° corner chisel. Chisel set is protected in a fitted wooden box.
-
Page 42: Maintenance
Except for the live center, thoroughly clean all of the Cleaning the Model W1852 is relatively easy. Vacuum excess unpainted parts with mineral spirits and wood chips and sawdust, and wipe off the remaining dust apply a thin coat of light machine oil to with a dry cloth. -
Page 43: Service
Model W1852 (For Machines Mfd. Since 11/17) SERVICE General This section covers the most common service adjustments or procedures that may need to be made during the life of your machine. If you require additional machine service not included in this section, please contact Woodstock International Technical Support at (360) 734-3482 or send e-mail to: techsupport@woodstockint.com. -
Page 44: Changing/Tensioning Belt
Model W1852 (For Machines Mfd. Since 11/17) Changing/Tensioning.Belt Over time, the belt will slightly wear and stretch, eventu- ally losing its efficiency of transmitting power, and will require re-tensioning. A new belt typically has a break-in period and should be checked/re-tensioned after the first 16 hours of belt life, as it will stretch during this time. -
Page 45: Troubleshooting
Model W1852 (For Machines Mfd. Since 11/17) Troubleshooting The following troubleshooting tables cover common problems that may occur with this machine. If you need replacement parts or additional troubleshooting help, contact our Technical Support. Note: Before contacting Tech Support, find the machine serial number and manufacture date, and if available, your original purchase receipt. - Page 46 Model W1852 (For Machines Mfd. Since 11/17) Operation PROBLEM POSSIBLE.CAUSE CORRECTIVE.ACTION Bad surface 1. Spindle speed wrong. 1. Adjust for appropriate spindle speed. finish. 2. Dull tooling or wrong tool selection. 2. Sharpen tooling or select a better tool for intended operation.
-
Page 47: Electrical Safety Instructions
Model W1852 (For Machines Mfd. Since 11/17) Electrical.Safety.Instructions These pages are current at the time of printing. However, in the spirit of improvement, we may make changes to the electrical systems of future machines. Compare the manufacture date of your machine to the one stated in this manual, and study this section carefully. -
Page 48: Electrical Components
Model W1852 (For Machines Mfd. Since 11/17) Electrical.Components Read Page 45 STOP Before Wiring Figure.48. RPM readout display board and control panel wiring. Figure.49..Inverter box and motor box locations. -46-... -
Page 49: Wiring Diagram
Model W1852 (For Machines Mfd. Since 11/17) Wiring.Diagram Ground 6-20 Plug (As Recommended) Read Page 45 POWER INVERTER STOP DELTA Before VFD022M21A Wiring +10V RPM Sensor RPM Readout Board Brake B1 B2 Power Inverter Box 080307 (Viewed from Rear) Spindle Direction Switch... -
Page 50: Parts
Model W1852 (For Machines Mfd. Since 11/17) PARTS Main 13 14 1-12 1-11 1-10 -48-... - Page 51 Model W1852 (For Machines Mfd. Since 11/17) Main.Parts.List REF PART # DESCRIPTION REF PART # DESCRIPTION X1852001 MOTOR 3HP 240V 3-PH X1852047 RPM SENSOR BRACKET X1852001-1 MOTOR FAN COVER X1852048 PHLP HD SCR M4-.7 X 8 X1852001-2 MOTOR FAN X1852049...
-
Page 52: Labels & Cosmetics
Model W1852 (For Machines Mfd. Since 11/17) Labels.&.Cosmetics Safety.labels.warn.about.machine.hazards.and.how.to.prevent.serious.personal.injury..The.owner. of.this.machine.MUST.maintain.the.original.location.and.readability.of.all.labels.on.this.machine.. If.any.label.is.removed.or.becomes.unreadable,.REPLACE.that.label.before.allowing.machine.to. be.operated.again..Contact.us.at.(360).734-3482.or.www.woodstockint.com.to.order.new.labels.. REF PART # DESCRIPTION REF PART # DESCRIPTION X1852201 SPINDLE SPEED CHART X1852207 SHOP FOX WHITE PAINT X1852202 ELECTRICITY LABEL X1852208 EYE/FACE INJURY HAZARD LABEL X1852203 SPINDLE RPM LABEL... - Page 53 Model W1852 (For Machines Mfd. Since 11/17)
- Page 54 Fold along dotted lIne place stamp Here Woodstock international inc. p.o. box 2309 bellingham, Wa 98227-2309 Fold along dotted lIne tape along edges--please do not staple...
-
Page 55: Warranty
Woodstock International, Inc. will repair, replace, or arrange for a dealer refund, at its expense and option, the Shop Fox machine or machine part proven to be defective for its designed and intended use, provided that the original owner returns the product prepaid to an authorized warranty or repair facility as designated by our Bellingham, Washington office with proof of their purchase of the product within two years, and provides Woodstock International, Inc.
Need help?
Do you have a question about the W1852 and is the answer not in the manual?
Questions and answers
was turning at 320 RPM on an out of balance blank, after I had turned some I tied to up the rpms and it started to shake. so I turned it down and to neutral. now it will not run the lights are on but the Moter will not turn. can you tell me what I need to do to get it to run?
To get the Shop Fox W1852 motor running again after it stopped while turning at high RPM, follow these steps:
1. Clear all setup tools away from the machine.
2. Connect the machine to the power supply.
3. Set the spindle direction switch to neutral or "O" position and turn the speed control knob fully counterclockwise.
4. Squeeze the tab on the bottom of the Emergency Stop button, lift the button to open the switch cover, and press the green ON button to start the machine.
If the machine does not start, ensure the Emergency Stop button safety feature is not engaged.
This answer is automatically generated