Advertisement
Advertisement
Table of Contents

Related Manuals for Pakedge WK-1-O


Summary of Contents for Pakedge WK-1-O
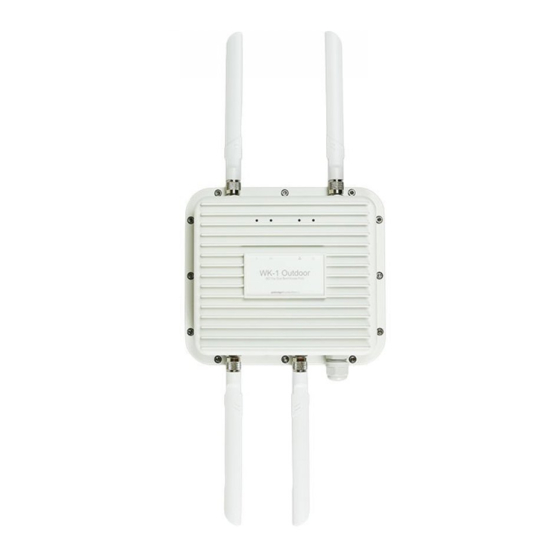
- Page 1 QUICK START GUIDE WK-1-O Access Point 802.11ac Dual Band Access Point Version 1.1...
-
Page 2: Table Of Contents
Contents Package contents WK-1-O mounting options Powering up the access point Configuring the hardware Step 1: Logging in Step 2: Radio Step 3: Creating security profiles Step 4: Configuration Guest network Technical Support... -
Page 3: Package Contents
• Powered by PoE+ System requirements • Windows or Mac PC with an Ethernet interface WK-1-O default settings • Operation mode: Access point • IP Address: IP will be automatically assigned by router if a DHCP server is detected or, if no DHCP server is detected, the default IP address will be automatically set to 192.168.1.250. -
Page 4: Wk-1-O Mounting Options
WK-1-O mounting options Pole mount... - Page 5 Wall mount NOTE: Refer to the user manual for more detailed information regarding the installation and configuration of the access point.
-
Page 6: Powering Up The Access Point
Powering up the access point The access point can be powered via PoE+. See below for examples: Power using a PoE+ Injector Laptop Laptop WK-1-O Ethernet cable Tablet Panel PoE+ Injector Ethernet cable Switch Smartphone... - Page 7 The Wireless Access Point should now be up and running under its default settings. It does not need to be configured to be functional. To make changes to the SSID and security settings, you need to access the WK-1-O using a web browser. Laptop...
-
Page 8: Configuring The Hardware
In the password box, type pakedgea and click Login. NOTE: If your computer is not set to the default IP scheme of the WK-1-O (192.168.1.X), you must first configure the TCP/IP settings on your computer to log in to the WK-1-O through a web... - Page 9 Using Windows 10 1 Under Control Panel, Network and Internet, click View Network Status and Tasks. 2 On the left panel, click Change Adapter Settings, right-click Local Area Connection, then click Properties. 3 Select Internet Protocol Version 4 (TCP/IPv4), then click Properties. 4 Select Use the Following IP Address and enter the following information: IP address: 192.168.1.10...
- Page 10 Using OS X 1 Under System Preference, click Network. 2 On the left panel, click Ethernet (or Thunderbolt Ethernet on newer Macs), then select Manually from the drop-down menu. 3 Enter the following information: IP Address: 192.168.1.10 Subnet Mask: 255.255.255.0 Additional settings can be left blank.
- Page 11 The following page will display when logged in:...
- Page 12 You can use the Where’s My WAP (WMW) software, which is free to download from the Dealer Portal section of the Pakedge website. This application will automatically scan the network for any Pakedge access point. Once the application finds the access points, you will have the option to change their IP addresses by clicking on the pencil icon.
- Page 13 After you are logged in to the AP, hover over Network and click LAN. NOTE: The default IP Setting on the WK-1-O is DHCP. If you want to assign a static IP to the WK, select Static IP from drop-down menu and fill in the IP address, subnet mask, and gateway...
-
Page 14: Step 2: Radio
The first tab under Wireless is Radio. By default, the WK-1-O operates in Access Point Mode. The mode can be set for either the 2.4 or the 5 GHz band. The available modes for the WK-1-O are: Access Point, WDS Root Access Point, WDS Repeater and WDS Bridge. - Page 15 Access Point mode In Access Point Mode, the WK-1-O broadcasts both 2.4 GHz and 5 GHz signals to stations that support 802.11ac. Laptop Laptop WK-1-O Tablet Panel Smartphone Ethernet cable...
-
Page 16: Wds Bridge Mode
In WDS Bridge Mode, you can connect the WK-1-O to a client by its Ethernet port. The WK-1-O will receive the wireless signal from an access point and send the signal, through its Ethernet port, to the client. A separate WK-1-O must be in WDS Root Access Point mode for this setting to operate. - Page 17 WDS Repeater mode WDS Repeater Mode can be used to connect two WK-1-O access points wirelessly and extend your wireless network coverage. A separate WK-1-O must be in WDS Root Access Point mode for this setting to operate. WK-1-O Laptop...
-
Page 18: Step 3: Creating Security Profiles
Step 3: Creating security profiles The next tab over is Security Profiles. You can change the Profile Name and security settings for 2.4 GHz and 5 GHz, then click Apply to finalize the changes. - Page 19 The most secure and common mode is WPA2-PSK. This setting is known to be the most secure and is compatible with all the latest devices. NOTE: When choosing the security settings, consider your client devices. Older laptops or phones do not support WPA2 security. Also, some devices are only compatible with certain security types. You may want to reference your device specifications.
-
Page 20: Step 4: Configuration
Step 4: Configuration In this section, you can change the SSID name by applying the security profile that was set up in Step 3, “Creating Security Profiles.” By default, the SSID is Pakedge2.4-1 and Pakedge5-1. You will have the option to change the Wireless Name (SSID) and add security profiles by selecting the options from the drop-down menu. -
Page 22: Guest Network
Guest network This will allow you to set up a guest network. Please see manual for further details. -
Page 24: Technical Support
(650) 385-8703 For non-technical inquires: customerservice@pakedge.com (650) 385-8701 For regulatory information: www.pakedge.com/regulatory pakedgedevice&software inc 3847 Breakwater Avenue, Hayward, CA 94545-3606 Main: (650) 385-8700 Fax: (650) 685-5520 www.pakedge.com sales@pakedge.com ©2016 Pakedge Device & Software Inc. All rights reserved. DOC-00235-B 2016-07-22 MS...
Need help?
Do you have a question about the WK-1-O and is the answer not in the manual?
Questions and answers