Table of Contents
Advertisement
Advertisement
Table of Contents

Related Manuals for Aleko FG300NOR


Summary of Contents for Aleko FG300NOR
- Page 1 VER 17a...
-
Page 2: Table Of Contents
Table of Contents Safety Installation Information .......................... 1 FG300NOR Parts List ............................2 FG550NOR Parts List ............................3 Optional Accessories Parts List........................4 Tools Needed: ..............................4 Technical Specifications & Features ........................ 5 Installation Overview ............................6 Preparation for Installation ..........................7 Install the Gate Opener on the Gate ........................ -
Page 3: Safety Installation Information
use on any pedestrian gate. Pedestrians must be Safety Installation Information supplied with a separate pedestrian access. 1. READ and FOLLOW all instruction. For an installation utilizing non-contact sensors The gate opener is intended for use with Class I (safety sensors), see product manual on the vehicular swing gates. -
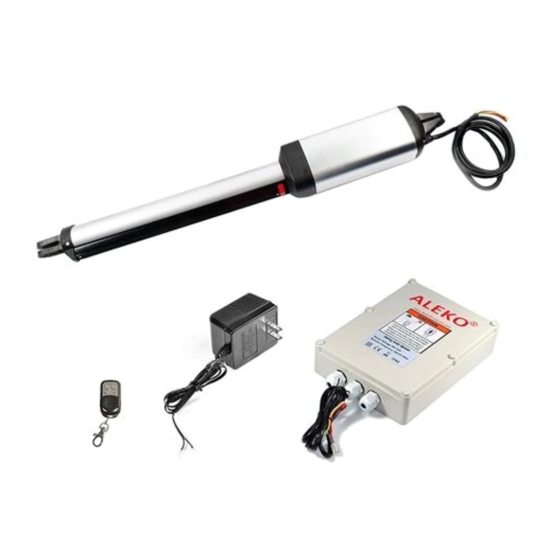
Page 4: Fg300Nor Parts List
13. To AVOID damaging gas, power, or other underground utility lines, contact underground utility locating companies BEFORE digging. SAVE INSTRUCTION. 14. Do not permit children to play on or around the gate and keep all controls out of their reach. FG300NOR Parts List... -
Page 5: Fg550Nor Parts List
FG550NOR Parts List... -
Page 6: Optional Accessories Parts List
Optional Accessories Parts List Tools Needed: Power Drill Tape Measure Open End Wrenches — 14# &17# or Adjustable Wrenches Wire Strippers C-Clamps — small, medium, and large Level Hacksaw or Heavy Duty Bolt Cutters Phillips Screwdriver An extra person will be helpful... -
Page 7: Technical Specifications & Features
Technical Specifications & Features Specifications FG300NOR FG550NOR Input: 120V/60Hz or 230V/50Hz Motor voltage: 24VDC Power: Current: 1.5A Actuator speed: 16mm/s Max. actuator travel: 285mm 385mm ℃ ℃ (-4°F to 122°F) Ambient Temperature: -20 ~ +50 Protection class: IP44 Features: Soft start and soft stop... -
Page 8: Installation Overview
Installation Overview... -
Page 9: Preparation For Installation
Preparation for Installation There are two installation types for the gate opener, Pull-to-Open and Push-to-Open. In the Push-to-Open installation, gate opens out from the property. A Push-To-Open Bracket (PSO part) is required to be used for each gate. NOTE: Ensure the gate does not open into public areas. The gate opener is mounted to the gate and to the gate post. - Page 10 Push-to-Open Installation — Gate in Closed position (Moving-Rod is retracted) 1. Insert the M10 x 30 bolt through the center hole of the post bracket and post pivot bracket as shown. Place a ¢10 washer , ¢10 lock washer and M10 nut on the bottom of the bolt and hand tighten. 2.
- Page 11 3. Open the release hole plug on the top of the gate opener, insert the release key, and turn the key 90° clockwise. This releases the motor and allows the push-pull rod to be manually extended and retracted. To restore normal operation, turn the key 90° counterclockwise. 4.
- Page 12 5. Make sure that there is a minimum clearance of 2.5cm between the gate and the opener and that the opener and the Post Pivot Bracket are not binding in both the gate-open and gate-closed positions. If there is not at least 2.5cm of clearance or if the opener and the Post Pivot Bracket are binding, rotate the Post Pivot Bracket and/or move the Post Bracket Assembly to obtain the minimum clearance and eliminate the binding.
- Page 13 6. Sign the bolt-hole point on the gate bracket and gate. Do this by placing a punch or a sign in the middle of each bolt slot on the post bracket assemblies and gate bracket. allows slight adjustments to the post bracket. Then remove the post bracket and gate bracket by taking off the C-clamps.
-
Page 14: Mounting Of The Control Box
12. Open the release hole plug on the top of the gate opener, insert the release key, and turn the key 90° counterclockwise. This restores normal operation. Mounting of the control box Remove the cover of the control box and use 4 deck screws(not provided) to install the control box. Ensure the control box is installed in a secure surface and at least 100 cm (40 inches) above the ground to protect it from rain, snow, etc. - Page 15 wired to “BAT-” (#16) terminal. AC transformer should be wired to the “AC24V”(#11,#12) terminals of the control board, no matter the polarity. The length of the wire of the transformer is 1.5m(5’). So if the distance between the outlet and the control box is longer than that, you should use an extended wire to connect the transformer to the control board.
-
Page 16: Connection Of The Control Board
Connection of the control board... - Page 17 1. Actuator Insert the stripped cable wires into the appropriate terminals on the opener terminals block. The red wire should be inserted into the “+MOTOR” terminal(#17), the black wire into “MOTOR-” terminal (#18), the blue wire into “DLMT” terminal(#19), the green wire into “COM” terminal(#20), and the yellow wire into “ULMT” terminal (#21). 2.
-
Page 18: How To Program The Remote To The Opener
The RED wire of the wired keypad should be connected into the “#15” terminal. The BLACK wire of the wired keypad should be connected into the “#16” terminal. The PURPLE wire of the wired keypad should be connected into the “#5” terminal. The BLUE wire of the wired keypad should be connected into the “#4”... -
Page 19: Setting Of The Control Board
and then press the “PIN” to confirm the new setting, CODE LED will flash for 3 seconds and then be OFF which indicates the password has been changed successfully. You can press “PIN” “6 digits new password” and then press “OK” to confirm to operate the opener. NOTE: Every step for pressing button during program must be finished within 1 second to ensure successful programming. - Page 20 DIP Switch #2: Auto close function enabled/disabled ON – Auto close function enabled OFF – Auto close function disabled Set the switch #2 to ON to enable the auto close function. Factory default setting is OFF. DIP Switch #3: Photocell function enabled/disabled ON –...
-
Page 21: Trouble Shooting
Trouble Shooting Have a multimeter to check voltage and continuity. Use caution when checking high voltage terminals. Symptom Possible Solution(s) The opener does not run. Power LED flash 1. Battery is over-dsiacharge. Check the voltage of the battery. The voltage slowly(flash once per of the battery should above 22V to make the gate opener work normally. - Page 22 7106 S 220th St, Kent WA 98032 USA sales@alekoproducts.com ©2017-2020 ALEKO All Rights Reserved...
Need help?
Do you have a question about the FG300NOR and is the answer not in the manual?
Questions and answers