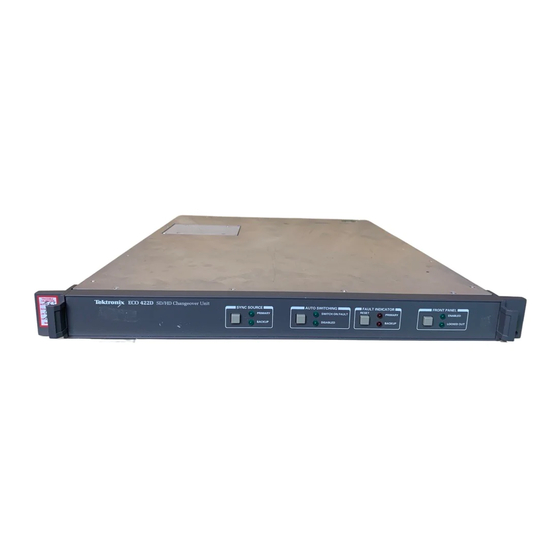
Tektronix ECO422D Instruction Manual
Sd/hd changeover unit signal generators
s/n c050000 and above
Hide thumbs
Also See for ECO422D:
- Instruction manual (167 pages) ,
- Technical reference (142 pages) ,
- Installation and safety instructions (36 pages)
Table of Contents
Advertisement
Quick Links
Download this manual
See also:
Instruction Manual
Advertisement
Table of Contents

Related Manuals for Tektronix ECO422D


Summary of Contents for Tektronix ECO422D
- Page 1 Instruction Manual ECO422D SD/HD Changeover Unit S/N C050000 and above 077-0354-00 *P077035400* 077035400...
- Page 3 Instruction Manual ECO422D SD/HD Changeover Unit S/N C050000 and above 077-0354-00 Warning The servicing instructions are for use by qualified personnel only. To avoid personal injury, do not perform any servicing unless you are qualified to do so. Refer to all safety summaries prior to performing service.
- Page 4 Copyright © Tektronix. All rights reserved. Licensed software products are owned by Tektronix or its subsidiaries or suppliers, and are protected by national copyright laws and international treaty provisions. Tektronix products are covered by U.S. and foreign patents, issued and pending. Information in this publication supercedes that in all previously published material.
- Page 5 Warranty 2 Tektronix warrants that this product will be free from defects in materials and workmanship for a period of one (1) year from the date of shipment. If any such product proves defective during this warranty period, Tektronix, at its option, either will repair the defective product without charge for parts and labor, or will provide a replacement in exchange for the defective product.
-
Page 7: Table Of Contents
........3- - 2 ECO422D Option ELSW Block Level Description ..... . - Page 8 ........... A- - 1 Index ECO422D SD/HD Changeover Unit Instruction Manual...
- Page 9 ......... 1- -2 Figure 1- -3: Rear panel of the ECO422D ..... . .
- Page 10 ......1- -6 Table 1- -3: Truth table for ECO422D switching ....
-
Page 11: General Safety Summary
Do Not Operate With Suspected Failures. If you suspect there is damage to this product, have it inspected by qualified service personnel. Do Not Operate in Wet/Damp Conditions. Do Not Operate in an Explosive Atmosphere. Keep Product Surfaces Clean and Dry. ECO422D SD/HD Changeover Unit Instruction Manual... - Page 12 WARNING indicates an injury hazard not immediately accessible as you read the marking. CAUTION indicates a hazard to property including the product. Symbols on the Product. The following symbols may appear on the product: CAUTION WARNING Protective Ground Refer to Manual High Voltage (Earth) Terminal ECO422D SD/HD Changeover Unit Instruction Manual...
- Page 13 Use Care When Servicing With Power On. Dangerous voltages or currents may exist in this product. Disconnect power, remove battery (if applicable), and disconnect test leads before removing protective panels, soldering, or replacing components. To avoid electric shock, do not touch exposed connections. ECO422D SD/HD Changeover Unit Instruction Manual...
- Page 14 Service Safety Summary viii ECO422D SD/HD Changeover Unit Instruction Manual...
- Page 15 H Corrective maintenance information H Replaceable Electrical Parts lists all replaceable parts in the ECO422D. H Replaceable Mechanical Parts lists all replaceable parts in the ECO422D to a module level. Parts are identified on an indexed illustration to make them easier to identify.
-
Page 16: Table I: Product Documentation
The following table lists the documentation that is available for the product and shows where you can find it: in a printed manual, on the product documentation CD- -ROM, or on the Tektronix Web site at www.tektronix.com. Table i: Product documentation... - Page 17 Operating Basics...
-
Page 19: Figure 1- 1: Front-Panel Controls
Primary or Backup input). It can be manually changed using the Sync Source button. (If the ECO422D is in Normal mode, this is only true when the other input is good or both inputs are bad. Refer to User Configuration Switch (S14- -8) on page 1- -4.) Only one of these LEDs can be on. -
Page 20: Figure 1- 2: Default Position Of The User Configuration And Mode Switches
S11), which is allowed to be combined with either of the user-defined levels. BACK FRONT (SWITCHES SHOWN IN DEFAULT POSITION) Figure 1- 2: Default position of the user configuration and mode switches 1- 2 ECO422D SD/HD Changeover Unit Instruction Manual... -
Page 21: Table 1- 1: Factory Settings Of Channel Configuration Switches (S1 - S11)
Serial Digital Video (Component) 9 / S9 Serial Digital Video (Component) 10 / S10 Serial Digital Audio 11 / S11 Serial Digital Audio User Configuration Switch (S14- 8) - closed- - Normal- 1- 3 ECO422D SD/HD Changeover Unit Instruction Manual... - Page 22 For Normal operation, the user cannot switch to a bad signal whether the instrument is in manual or auto switch mode. For example, the ECO422D is in manual mode and the Primary signal is bad, while the Backup signal is good. If the user presses the Sync Source button, the output will be the Backup signal.
-
Page 23: Figure 1- 3: Rear Panel Of The Eco422D
Operating Basics Connectors Figure 1- -3 shows the layout of the rear panel of the ECO422D. Channel 1 Channel 2 Channel 3 Channel 4 Channel 5 Channel 6 Channel 7 Channel 8 Channel 9 Channel 10 Channel 11 Figure 1- 3: Rear panel of the ECO422D... -
Page 24: Figure 1- 4: Remote Connector Pins
Operating Basics Output. Signal output. It is either from the Primary or the Backup source. How the ECO422D is configured determines under what conditions the source changes. Backup. Input from the backup sync generator. This should be the same signal type as its Primary signal pair. -
Page 25: Figure 1- -5: Wiring Required To Conform With Smpte
Fault Reporting - - and + It is normally open, indicating that everything is good. It will close in the cases of: loss of power to the ECO422D or one (or more) input signals are bad. The fault is latched and will remain until the fault is cleared. -
Page 26: State Machine Description 1
State Machine Description Table 1- -3 is a truth table that gives the various states the ECO422D outputs based on the state of the inputs. Note that Primary is set to check a given level. -
Page 27: Table 1- 3: Truth Table For Eco422D Switching
Operating Basics Table 1- 3: Truth table for ECO422D switching Power User config Switch O auto O manual " " " " " " " " " " " " " " " " " " 1- 9 ECO422D SD/HD Changeover Unit Instruction Manual... -
Page 28: Figure 1- -6: Setup For Adjusting R265 (The User Level For
1). 3. Set all S14 switches “closed.” 4. Set the ECO422D to Primary Sync Source. 5. Set the ECO422D Auto Switching to “Switch on Fault.” 6. Set the step attenuator to 0 dB of attenuation. 1- 10 ECO422D SD/HD Changeover Unit Instruction Manual... -
Page 29: Figure 1- 7: Selection Switches And User Level Control Locations
10. Set the step attenuator to 3 dB of attenuation (or whatever attenuation is required for your application). 11. Check to see that the sync source has not changed to Backup and no faults are on the Primary channel. 1- 11 ECO422D SD/HD Changeover Unit Instruction Manual... - Page 30 Operating Basics 12. Slowly adjust R265 until the ECO422D switches to the Backup sync source and a fault occurs on the Primary channel. Press Reset to verify that the fault is still preset. If the Primary fault indicator LED goes out, continue adjusting the potentiometer.
- Page 31 Specifications...
-
Page 33: Introduction 2
Specifications Introduction The items listed in the following tables describe the performance of the ECO422D Changeover Unit. Performance Requirements are generally quantita- tive and can be tested by a Performance Verification procedure contained in the service part of this manual. -
Page 34: Table 2- 1: General Characteristics
- - 45 dB to 30 MHz Channels 7- - 11 - - 60 dB to 10 MHz - - 30 dB to 200 MHz - - 15 dB to 360 MHz 2- 2 ECO422D SD/HD Changeover Unit Instruction Manual... - Page 35 Channels 4- - 6 Approximately 4 ns (refer to (Opt. ELSW Only) Input signal) In the frequency range of 10 MHz to 1.5 GHz, the instrument approximates less than 20 meters of Belden 1694A cable. 2- 3 ECO422D SD/HD Changeover Unit Instruction Manual...
-
Page 36: Figure 2- 1: Typical Eye-Pattern Of 20 M Of Belden 1694A Cable
Specifications Figure 2- 1: Typical eye-pattern of 20 m of Belden 1694A cable Figure 2- 2: Typical eye-pattern of Channels 1- 6 HD output (Channels 1- 3 with Opt. ELSW) 2- 4 ECO422D SD/HD Changeover Unit Instruction Manual... -
Page 37: Table 2- 2: Signal Loss Detection
Attenuation approximately x5 Analog tri-level sync 400 to 565 mV 475 mV (between 3 and 6 dB down) Performance is verified indirectly by completing Performance Verification steps 2- 5 & 10- 11. 2- 5 ECO422D SD/HD Changeover Unit Instruction Manual... -
Page 38: Table 2- 3: Power Supply
Supplemental information Rackmount Dimensions Height 1.734 inches (4.4 cm) Width 19.0 inches (48.3 cm) Length 22.1 inches (56.1 cm) Net Weight 10.8 lbs (4.9 kg) Shipping Weight 18 lbs, 5 oz (8.3 kg) 2- 6 ECO422D SD/HD Changeover Unit Instruction Manual... -
Page 39: Table 2- 5: Environmental Characteristics
1.33 GRMS. One hour per axis. Second Manual Handling (Shock) Drop on all sides once from a height of 24 inches. Drop on the bottom from a height of 48 inches. 2- 7 ECO422D SD/HD Changeover Unit Instruction Manual... - Page 40 Specifications 2- 8 ECO422D SD/HD Changeover Unit Instruction Manual...
- Page 41 WARNING The following servicing instructions are for use only by qualified personnel. To avoid injury, do not perform any servicing other than that stated in the operating instructions unless you are qualified to do so. Refer to all safety summaries before performing any service.
- Page 43 Theory of Operation...
-
Page 45: Logic Conventions 3
Theory of Operation This section provides information on how the ECO422D circuitry works, in order to troubleshoot the instrument. Logic Conventions Signal names are all capital letters. For example, SIGNAL. An active low signal (normally denoted by an overscore) is a signal name enclosed in parentheses. -
Page 46: Figure 3- 1: Eco422D Block Diagram
Latch Flag other channels Figure 3- 1: ECO422D Block diagram The Primary and Backup signals for each channel enter through the BNCs and are applied directly to a Relay, where one signal is switched through to the rear-panel Output and the other terminates in 75 Ω. The rest of the circuitry determines which signal goes to the Output. -
Page 47: Figure 3- 2: Eco422D Option Elsw Block Diagram
Primary indicator Other latch primary flag channels Reference Reset Voltage voltage Backup fault selector generator indicator Backup Other Other latch channels backup flag channels Figure 3- 2: ECO422D Option ELSW Block diagram 3- 3 ECO422D SD/HD Changeover Unit Instruction Manual... - Page 48 The replacement fuse on the power supply should be a 3.15 A, 250 V fuse. The Main board fuse requirement is listed in Replace- able Mechanical Parts. 3- 4 ECO422D SD/HD Changeover Unit Instruction Manual...
- Page 49 Performance Verification...
-
Page 51: Calibration Data Report 4
In addition, it can be used as a short-form Performance Check for those familiar with the Performance Verification Procedure. Only steps that have numeric Performance Requirements are included in this report form. (Some steps have been omitted.) 4- 1 ECO422D SD/HD Changeover Unit Instruction Manual... - Page 52 5 dB down Backup NTSC Serial Digital Composite switch at 2 dB down switch at 5 dB down Switch - - Primary Certificate number is not provided, unless “Certificate of Traceability” is issued. 4- 2 ECO422D SD/HD Changeover Unit Instruction Manual...
-
Page 53: Performance Verification
Serial Digital 270 Mb/s Switch - - switch at 2 dB down switch at 5 dB down Backup NTSC Serial Digital Composite switch at 2 dB down switch at 5 dB down Switch - - Primary 4- 3 ECO422D SD/HD Changeover Unit Instruction Manual... - Page 54 Serial Digital 270 Mb/s Switch - - switch at 2 dB down switch at 5 dB down Backup NTSC Serial Digital Composite switch at 2 dB down switch at 5 dB down Switch - - Primary 4- 4 ECO422D SD/HD Changeover Unit Instruction Manual...
- Page 55 Serial Digital Audio Switch - - Primary switch at 2 dB down switch at 4 dB down Serial Digital Audio Switch - - Backup switch at 2 dB down switch at 4 dB down 4- 5 ECO422D SD/HD Changeover Unit Instruction Manual...
- Page 56 PAL Black Burst Switch - - Backup switch at 2 dB down switch at 4 dB down Serial Digital 270 Mb/s Switch - - switch at 2 dB down switch at 5 dB down Primary 4- 6 ECO422D SD/HD Changeover Unit Instruction Manual...
-
Page 57: Equipment Required 4
1 GHz bandwidth, for example, a TDS7000 Series oscilloscope; Example waveform monitor: 1745A Waveform Monitor.) 75 Ω terminations. (Example: Tektronix part number 011-0163-00 for serial digital video or 011-0102-01 for analog and audio) 75 Ω Cables. (Example: Tektronix part number 012-0074-00) -
Page 58: Performance Verification Procedure 4
Set all switches on S1 through S11 to “open” to disable switches on all channels. Power the ECO422D on. (No inputs or outputs are required at this point.) Wait for the power-on delay to complete (over 4 minutes). With the addition of S13 the power-on delay is adjustable, from no delay to over seven minutes (see page 1- -4). -
Page 59: Figure 4- 1: Setup To Check Black Burst Levels
75 Ω termination ECO422D Figure 4- 1: Setup to check Black Burst levels Set the ECO422D to “Primary” Sync Source and Auto Switch “Switch on Fault.” Add attenuation, 0.5 dB at a time, to the Primary input signal until the signal source switches to the Backup. - Page 60 Switch between 2 and 4 dB down from nominal Connect the equipment as shown in Figure 4- -1, except swap the Primary and Backup input signals at the ECO422D so that the step attenuator is on the Backup channel. Set the Channel Configuration switches to Disabled (signal not checked) for all channels (set all the DIP switches on S1 through S11 to “open”).
- Page 61 Switch between 2 and 4 dB down from nominal Connect the equipment as shown in Figure 4- -1, except swap the Backup and Primary input signals at the ECO422D, so that the step attenuator is on the Backup input signal.
- Page 62 6. Check the NTSC & PAL Black Burst for Channels 2 - - 11 Switch between 2 and 4 dB down from nominal Repeat the four previous procedures for Channels 2 - - 11 of the ECO422D. Move the cables from Channel 1 to the channel under test. Replace the switch setting for S1 as given in the following Table.
- Page 63 CHECK - - that there are no errors shown for either the Primary or Backup ECO422D sync sources. Set the ECO422D (using the front panel) to “Primary” Sync Source and Auto Switch “Switch on Fault.” Add attenuation, 0.5 dB at a time, to the Primary input signal until the signal source switches to Backup.
- Page 64 Primary. CHECK - - that the Primary signal still shows an error and automatically switches back to Backup. If the ECO422D does not continue to show the Primary signal in error after the reset, continue adding attenuation until the Primary signal switches to Backup again.
- Page 65 Switch between 2 and 5 dB down from nominal Repeat the previous two procedures for Channels 2 through 11 of the ECO422D, for standard instruments (exclude Channels 4 through 6 if Opt. ELSW is installed). Move the cables from Channel 1 to the channel under test.
- Page 66 CHECK - - that there are no errors shown for either the Primary or Backup ECO422D sync sources. Set the ECO422D to “Primary” Sync Source and Auto Switch to “Switch on Fault.” Add attenuation, 0.5 dB at a time, to the Primary input signal until the signal source switches to Backup.
- Page 67 Backup. CHECK - - that the Backup signal still shows an error and automatically switches back to Primary. If the ECO422D does not continue to show the Backup signal in error after the reset, continue adding attenuation until the Backup signal switches to Primary again.
-
Page 68: Figure 4- 4: Setup To Check The Serial Audio Levels
CHECK - - that there are no errors shown for either the Primary or Backup ECO422D sync sources. Set the ECO422D to “Primary” Sync Source and Auto Switch to “Switch on Fault.” Add attenuation, 0.5 dB at a time, to the Primary input signal until the signal source switches to Backup. - Page 69 Primary. CHECK - - that the Primary signal still shows an error and automatically switches back to Backup. If the ECO422D does not continue to show the Primary signal in error after the reset, continue adding attenuation until the Primary signal switches to Backup again.
- Page 70 Switch between 2 and 4 dB down from nominal Repeat the previous two procedures for Channels 2 through 11 of the ECO422D, for standard instruments (exclude Channels 4 through 6 if Opt. ELSW is installed). Move the cables from Channel 1 to the channel under test.
- Page 71 Primary. CHECK - - that the Primary signal still shows an error and automatically switches back to Backup. If the ECO422D does not continue to show the Primary signal in error after the reset, continue adding attenuation until the Primary signal switches to Backup again.
- Page 72 Performance Verification CHECK - - that the Backup signal still shows an error and automatically switches back to Primary. If the ECO422D does not continue to show the Backup signal in error after the reset, continue adding attenuation until the Backup signal switches to Primary again.
- Page 73 Adjustment Procedure...
-
Page 75: Adjustment Procedure
Adjustment Procedure The only adjustments required for the ECO422D are the user-defined threshold levels. Adjusting the User-Defined Threshold Levels The user-defined threshold levels are the two levels available from User Configuration switches SX- -6 (R266) and SX- -7 (R265). They are available so that the user can check the levels of signals other than the five predefined levels. - Page 76 Adjustment Procedure 5- 2 ECO422D SD/HD Changeover Unit Instruction Manual...
- Page 77 Maintenance...
-
Page 79: Service Options 6
H Read the Operating Basics section Preventive Maintenance Preventive maintenance consists of cleaning, inspecting, checking performance, activating the switch-over relays, and readjusting the ECO422D on a regular schedule. The inspection and cleaning schedule should be established based on the amount of use and the surrounding environment of the ECO422D. - Page 80 12 months. This will help to ensure maximum performance and assist in locating defects that may not be apparent during regular operation. The Performance Verification and Adjustment Procedures are included in this manual. 6- 2 ECO422D SD/HD Changeover Unit Instruction Manual...
-
Page 81: Table 6- 1: Static-Sensitive Components
600 to 800 V Low-frequency Linear Microcircuits 400 to 1000 V Low-power Schottky TTL 900 V TTL (least sensitive) 1200 V NOTE. Static discharges of less than 2 kV are seldom felt. 6- 3 ECO422D SD/HD Changeover Unit Instruction Manual... -
Page 82: Corrective Maintenance 6
Make sure to check the internal fuse if the instrument will not power on. The replacement fuse on the power supply should be a 3.15 A, 250 V fuse. The Main board and rear panel fuse requirements are listed in Replaceable Mechanical Parts. 6- 4 ECO422D SD/HD Changeover Unit Instruction Manual... - Page 83 This does not apply to the three Option ELSW channels, which are buffered. To avoid this problem, work on an output only when the ECO422D is not in operation. Disconnect the output cable from the ECO422D before working on the cable, and verify proper termination before reconnecting the cable to the ECO422D.
-
Page 84: Tektronix Service Offerings 6
The services include a range of calibration, repair, upgrade, and installa- tion services that are performed on- -site or at a Tektronix service depot. In addition replacement parts are available for self- -service customers. - Page 85 Service Centers Tektronix maintains service centers worldwide. These centers provide calibration and repair services for Tektronix instruments. They can be contacted through your Tektronix field office or representative. You can also find service and support information at: http://www.tektronix.com/serviceandsupport Not all service centers are equipped to repair or calibrate all instruments; please be prepared to provide the instrument model and serial number when calling for assistance.
-
Page 86: Table 6- 2: Chassis Replacement Tools List
1/4 in. nut driver 1/4 in. open ended wrench Removing Components Perform the following steps to remove parts from an ECO422D chassis that you From the Chassis will use to assemble in a new chassis: NOTE. Keep the parts and mounting hardware together as you disassemble the old chassis. - Page 87 Remove all of the nuts from the top row of BNCs on the rear panel. NOTE. The top and bottom rows of BNCs use different nuts to attach the connectors to the rear panel. Keep the nuts from the two rows separated to avoid mixing them. 6- 9 ECO422D SD/HD Changeover Unit Instruction Manual...
- Page 88 BNCs clear both the rear panel and the chassis clips. Make sure BNCs clear clips Make sure BNCs clear rear panel Remove board this way e. Keep the spacer plate that goes between the BNCs and the rear panel. 6- 10 ECO422D SD/HD Changeover Unit Instruction Manual...
-
Page 89: Table 6- 3: Tightening Specifications For Chassis Components
Keep the electrical shield that is under the Main board. 10. Remove the connector plug from the line filter on the rear panel. Installing Components in Perform the following steps to install the parts from the old ECO422D chassis the Chassis into the new chassis. - Page 90 The spring on each track should be installed toward the rear of the chassis. 3. Install the line filter: a. Connect the line-filter cable to the line filter as shown in the following figure. 6- 12 ECO422D SD/HD Changeover Unit Instruction Manual...
- Page 91 Place the connector plug you removed from the old chassis on the line filter, and then attach the plug to the chassis as shown in the following figure. 6- 13 ECO422D SD/HD Changeover Unit Instruction Manual...
- Page 92 Push the screw through the bottom of the chassis and install the hex nut as shown in the following figure. 4. Install the remote connector on the rear panel as shown in the following figure. 6- 14 ECO422D SD/HD Changeover Unit Instruction Manual...
- Page 93 Install the handles on the sides of the chassis. The right- -side handle has a hole at the bottom for securing the instrument in an equipment rack as shown in the following figure. 6- 15 ECO422D SD/HD Changeover Unit Instruction Manual...
- Page 94 Keeping the Main board level, slide the board toward the rear of the instrument until the BNCs clear both the chassis clips and the rear panel. c. Install the six retaining screws in the Main board as shown in the following figure. 6- 16 ECO422D SD/HD Changeover Unit Instruction Manual...
- Page 95 Attach the Main board to the rear panel using the lock washers and hex nuts. First install the nuts on the three BNCs shown in the following figure, and then attach the remaining BNCs. 6- 17 ECO422D SD/HD Changeover Unit Instruction Manual...
- Page 96 Install the hex nuts so that the flat side is facing the rear panel of the instrument. e. Attach the Connector board to the rear panel using the lock washers and hex nuts. 6- 18 ECO422D SD/HD Changeover Unit Instruction Manual...
- Page 97 Maintenance 8. Install the Power Supply assembly: a. Install the Power Supply assembly, including the plastic electrical shield, into the chassis as shown in the following figure. 6- 19 ECO422D SD/HD Changeover Unit Instruction Manual...
- Page 98 Maintenance b. Connect the cable from the line filter to the Power Supply as shown in the following figure. 6- 20 ECO422D SD/HD Changeover Unit Instruction Manual...
- Page 99 9. Install the top cover. Verifying Instrument After you replace instrument components, verify the operation of the instrument Operation by performing the Performance Verification procedure located in this manual. 6- 21 ECO422D SD/HD Changeover Unit Instruction Manual...
-
Page 100: Repackaging Instructions
Repackaging Instructions Identification Tag If the instrument is to be shipped to Tektronix Service Center for service or repair, attach a tag to the instrument showing: 1. Owner (with complete address) and the name of the person at your firm that can be contacted. -
Page 101: Replaceable Electrical Parts 7
Replaceable Electrical Parts... -
Page 103: Replaceable Electrical Parts
Replaceable Electrical Parts Refer to the Mechanical Parts List chapter for a complete listing and description of replaceable parts for the ECO422D. 7- 1 ECO422D SD/HD Changeover Unit Instruction Manual... - Page 104 Replaceable Electrical Parts 7- 2 ECO422D SD/HD Changeover Unit Instruction Manual...
- Page 105 Replaceable Mechanical Parts...
- Page 107 This section contains a list of the components that are replaceable for the ECO422D. Use this list to identify and order replacement parts. Parts Ordering Information Replacement parts are available from or through your local Tektronix, Inc., Field Office or representative. Changes to Tektronix instruments are sometimes made to accommodate improved components as they become available and to give you the benefit of the latest circuit improvements.
- Page 108 Mounting Parts always appear in the same indentation as the Item it mounts, while the detail parts are indented to the right. Indented items are part of and included with, the next higher indentation. Mounting parts must be purchased separately, unless otherwise specified. 8- 2 ECO422D SD/HD Changeover Unit Instruction Manual...
- Page 109 220- - 0497- - 00 NUT,PLAIN,HEX:0.5- - 28 X 0.562 HEX,BRS CD PL - - 28 210- - 1039- - 00 WASHER,LOCK:0.521 ID,INT,0.025 THK,SST - - 29 337- - 4008- - 01 SHIELD,ELEC:ECO422D ECO422D SD/HD Changeover Unit Instruction Manual 8- 3...
- Page 110 174- - 3370- - 01 CA ASSY,SP:DESCRETE;PSC,6,18 AWG,12.0 L,0.156 CTR,1X6,0.156 CTR,RCPT,W/FRICTION LOCK BOTH ENDS,GOLD PL (W21) (CONNECTS FROM A2J21 TO A4J2) 335- - 1453- - 00 MARKER IDENT; ECO422D ELSW CONN; SAFETY CONTROLLED (OPTION ELSW ONLY) 8- 4 ECO422D SD/HD Changeover Unit Instruction Manual...
- Page 111 161- - 0154- - 00 CA ASSY,PWR:3,1.0MM SQ,250V/10A,2.5 METER,STR, (SWISS OPTION A5 ONLY) 161- - A008- - 00 CA ASSY, PWR:THREE 2.0MM SQ, 125V, 15A, 12M L W/HOLDER &LATCH;SAFETY CONTROLLED (JAPAN OPTION A6 ONLY) ECO422D SD/HD Changeover Unit Instruction Manual 8- 5...
- Page 112 Replaceable Mechanical Parts 8- 6 ECO422D SD/HD Changeover Unit Instruction Manual...
- Page 113 ECO422D...
- Page 115 Appendices...
- Page 117 Appendix A: Options This section describes the instrument options available for the ECO422D Changeover Unit. Option ELSW Option ELSW provides electronic switching on channels four, five, and six, instead of the mechanical relay switching used in the standard instrument. This enhancement provides faster, glitch- -free switching for analog sync signals.
- Page 118 Appendix A: Options A- 2 ECO422D SD/HD Changeover Unit Instruction Manual...
- Page 119 Index...
- Page 121 Indicators, 1- - 1 Reference level adjustments, 1- - 4 Remote connector, 1- - 6 Remove/replace procedures, 6- - 8 Repackaging, 6- - 22 Replaceable Parts, electrical. See See Replaceable Parts, Mechanical Index- 1 ECO422D SD/HD Changeover Unit Instruction Manual...
- Page 122 2- - 7 general characteristics, 2- - 2 mechanical, 2- - 6 power supply, 2- - 6 User thresholds, 1- - 10 signal loss, 2- - 5 State machine, 1- - 8 Index- 2 ECO422D SD/HD Changeover Unit Instruction Manual...
Need help?
Do you have a question about the ECO422D and is the answer not in the manual?
Questions and answers