
Subscribe to Our Youtube Channel
Related Manuals for Daikin RMXS-L Series


Summary of Contents for Daikin RMXS-L Series
- Page 1 SiUS181631EA Service Manual Multi-Split Type Air Conditioners RMXS-L Series [Applied Models] ● Inverter Multi : Heat Pump...
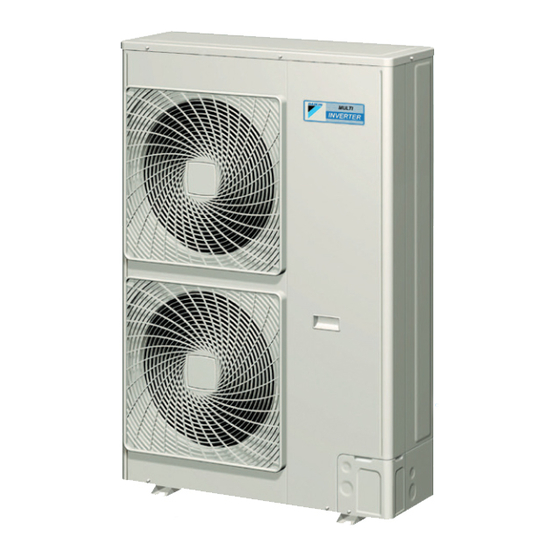
- Page 2 SiUS181631EA Multi-Split Type Air Conditioners RMXS-L Series Heat Pump Outdoor Unit RMXS48LVJU Branch Provider (BP) Unit BPMKS048A2U BPMKS049A3U Indoor Unit CTXG09QVJUW FDXS09LVJU FVXS09NVJU FFQ09Q2VJU CTXG09QVJUS FDXS12LVJU FVXS12NVJU FFQ12Q2VJU CTXG12QVJUW CDXS15LVJU FVXS15NVJU FFQ15Q2VJU CTXG12QVJUS CDXS18LVJU FVXS18NVJU FFQ18Q2VJU CTXG18QVJUW CDXS24LVJU CTXG18QVJUS CTXS07JVJU...
-
Page 3: Table Of Contents
SiUS181631EA 1. Introduction ....................vii 1.1 Safety Considerations ................. vii 1.2 Icons Used ....................ix 1.3 Legends......................ix Part 1 List of Functions ..............1 1. Functions..................... 2 1.1 Outdoor Unit ....................2 1.2 Indoor Unit....................3 Part 2 Specifications ............... 9 1. - Page 4 SiUS181631EA Part 5 Functions and Control............50 1. Operation Mode ..................52 2. Basic Control.....................53 2.1 Normal Operation ..................53 2.2 Compressor PI Control................53 2.3 Electronic Expansion Valve PI Control............54 2.4 Cooling Operation Fan Control..............55 3. Special Control..................56 3.1 Startup Control ...................
- Page 5 SiUS181631EA 8. FFQ Series Function .................98 8.1 Temperature Control .................. 98 8.2 Airflow Direction Control................99 8.3 Fan Speed Control for Indoor Unit ............. 99 8.4 Program Dry Operation ................100 8.5 Clock and Calendar Setting (With Wired Remote Controller BRC1E73) ..........101 8.6 Schedule TIMER Operation (With Wired Remote Controller BRC1E73) ..........
- Page 6 SiUS181631EA 3. Error Codes and Description..............194 4. Troubleshooting for CTXG, CTXS, FTXS, CDXS, FDXS, FVXS Series.................... 196 4.1 Indoor Unit PCB Abnormality ..............196 4.2 Freeze-up Protection Control/Heating Peak-cut Control ......198 4.3 Indoor Fan Motor or Related Abnormality ..........199 4.4 Thermistor or Related Abnormality............
- Page 7 SiUS181631EA 7.17 Outdoor Unit PCB Abnormality..............245 7.18 Radiation Fin Temperature Rise .............. 246 7.19 Inverter Compressor Abnormality............. 247 7.20 Inverter Current Abnormality ..............248 7.21 Compressor Start-up Error ............... 249 7.22 High Voltage of Capacitor in Main Inverter Circuit ........250 7.23 Radiation Fin Thermistor Abnormality ............
-
Page 8: Safety Considerations
Introduction SiUS181631EA 1. Introduction Safety Considerations Read these SAFETY CONSIDERATIONS carefully before • If refrigerant gas is discharged during repair work, performing any repair work. Comply with these safety do not touch the discharged refrigerant gas. The symbols without fail. Meanings of DANGER, WARNING, refrigerant gas could result in frostbite. - Page 9 SiUS181631EA Introduction • When relocating the equipment, check if the new Damaged cable and wires could result in an installation site has sufficient strength to withstand electrical shock or fire. the weight of the equipment. If the installation site • Do not use a joined power cable or an extension does not have sufficient strength and the equipment cord, or share the same power outlet with other is not properly secured, the equipment may fall and...
- Page 10 Introduction SiUS181631EA Icons Used The following icons are used to attract the attention of the reader to specific information. Icon Type of Description Information Warning A Warning is used when there is danger of personal injury. Warning Caution A Caution is used when there is danger that the reader, through incorrect manipulation, may damage equipment, lose data, get Caution an unexpected result or have to restart (part of) a procedure.
-
Page 11: Part 1 List Of Functions
SiUS181631EA Part 1 List of Functions 1. Functions..................... 2 1.1 Outdoor Unit ....................2 1.2 Indoor Unit....................3 List of Functions... -
Page 12: Functions
Functions SiUS181631EA 1. Functions Outdoor Unit Category Functions Category Functions Basic Inverter (with inverter power control) Health & Air-purifying filter — Functions Cleanliness Operation limit for cooling Refer to Air-purifying filter with photocatalytic — P. 287 deodorizing function Operation limit for heating PAM control —... -
Page 13: Indoor Unit
SiUS181631EA Functions Indoor Unit Category Functions Category Functions Basic Inverter (with inverter power control) Health & Air-purifying filter — Functions Cleanliness Operation limit for cooling — Air-purifying filter with photocatalytic — deodorizing function Operation limit for heating — PAM control —... - Page 14 Functions SiUS181631EA Category Functions Category Functions Basic Inverter (with inverter power control) Health & Air-purifying filter — — Functions Cleanliness Operation limit for cooling — — Air-purifying filter with photocatalytic — deodorizing function Operation limit for heating — — PAM control —...
- Page 15 SiUS181631EA Functions Category Functions Category Functions Basic Inverter (with inverter power control) Health & Air-purifying filter — Functions Cleanliness Operation limit for cooling — Air-purifying filter with photocatalytic — deodorizing function Operation limit for heating — PAM control — Titanium apatite deodorizing filter Compressor Oval scroll compressor —...
- Page 16 Functions SiUS181631EA Category Functions Category Functions Basic Inverter (with inverter power control) Health & Air-purifying filter — — Functions Cleanliness Operation limit for cooling — — Air-purifying filter with photocatalytic — — deodorizing function Operation limit for heating — — PAM control —...
- Page 17 SiUS181631EA Functions Category Functions Category Functions Basic Inverter (with inverter power control) Health & Air-purifying filter — Functions Cleanliness Operation limit for cooling — Air-purifying filter with photocatalytic — deodorizing function Operation limit for heating — PAM control — Titanium apatite deodorizing filter Compressor Oval scroll compressor —...
- Page 18 Functions SiUS181631EA Category Functions Category Functions Basic Inverter (with inverter power control) Health & Auto cleaning filter — — Functions Cleanliness Operation limit for cooling — — Air-purifying filter with photocatalytic — — deodorizing function Operation limit for heating — —...
-
Page 19: Part 2 Specifications
SiUS181631EA Part 2 Specifications 1. Specifications ....................10 1.1 Outdoor Unit ....................10 1.2 Branch Provider (BP) Unit ................11 1.3 Indoor Unit....................12 Specifications... -
Page 20: Specifications
Specifications SiUS181631EA 1. Specifications Outdoor Unit 60 Hz, 208 - 230 V Model RMXS48LVJU Cooling Capacity Btu/h 48,000 Heating Capacity Btu/h 54,000 ★ 3.0 ~ 3.9 ★ Btu/W·h 9.3 ~ 10.3 ★ SEER 14.1 ~ 18.8 ★ HSPF 9.6 ~ 11.3 Casing Color Ivory White Heat Exchanger... -
Page 21: Branch Provider (Bp) Unit
SiUS181631EA Specifications Branch Provider (BP) Unit 60 Hz, 208 - 230 V Model BPMKS048A2U BPMKS049A3U Power Consumption Running Current 0.05 0.05 Refrigerant Type R-410A Dimensions (H × W × D) in. (mm) 7-1/16 × 11-9/16 [26-11/16]* × 13-3/4 (180 × 294 [678]* × 350) Packaged Dimensions (H ×... -
Page 22: Indoor Unit
Specifications SiUS181631EA Indoor Unit 1.3.1 CTXG Series 60 Hz, 208 - 230 V CTXG09QVJUW CTXG09QVJUS Model Cooling Heating Cooling Heating Rated Capacity 9 kBtu/h Class 9 kBtu/h Class Front Panel Color White Silver 279 (7.9) 367 (10.4) 279 (7.9) 367 (10.4) 212 (6.0) 265 (7.5) 212 (6.0) - Page 23 SiUS181631EA Specifications 60 Hz, 208 - 230 V CTXG18QVJUW CTXG18QVJUS Model Cooling Heating Cooling Heating Rated Capacity 18 kBtu/h Class 18 kBtu/h Class Front Panel Color White Silver 364 (10.3) 438 (12.4) 364 (10.3) 438 (12.4) 286 (8.1) 350 (9.9) 286 (8.1) 350 (9.9) Airflow Rate...
- Page 24 Specifications SiUS181631EA 1.3.2 CTXS, FTXS Series 60 Hz, 208 - 230 V CTXS07JVJU CTXS09HVJU Model Cooling Heating Cooling Heating Rated Capacity 7 kBtu/h Class 9 kBtu/h Class Front Panel Color White White 388 (11.0) 400 (11.3) 388 (11.0) 400 (11.3) 335 (9.5) 357 (10.1) 335 (9.5)
- Page 25 SiUS181631EA Specifications 60 Hz, 208 - 230 V FTXS09LVJU FTXS12LVJU Model Cooling Heating Cooling Heating Rated Capacity 9 kBtu/h Class 12 kBtu/h Class Front Panel Color White White 381 (10.8) 420 (11.9) 403 (11.4) 438 (12.4) 279 (7.9) 321 (9.1) 307 (8.7) 335 (9.5) Airflow Rate...
- Page 26 Specifications SiUS181631EA 60 Hz, 208 - 230 V FTXS24LVJU Model Cooling Heating Rated Capacity 24 kBtu/h Class Front Panel Color White 643 (18.2) 699 (19.8) 494 (14.0) 572 (16.2) Airflow Rate (m³/min) 350 (9.9) 445 (12.6) 328 (9.3) 403 (11.4) Type Cross Flow Fan Motor Output...
- Page 27 SiUS181631EA Specifications 1.3.3 CDXS, FDXS Series 60 Hz, 208 - 230 V FDXS09LVJU FDXS12LVJU Model Cooling Heating Cooling Heating Rated Capacity 9 kBtu/h Class 12 kBtu/h Class External Static Pressure inAq (Pa) 0.12 (30) 0.12 (30) 305 (8.6) 305 (8.6) 305 (8.6) 305 (8.6) 280 (7.9)
- Page 28 Specifications SiUS181631EA 60 Hz, 208 - 230 V CDXS24LVJU Model Cooling Heating Rated Capacity 24 kBtu/h Class External Static Pressure inAq (Pa) 0.16 (40) 565 (16.0) 565 (16.0) 523 (14.8) 523 (14.8) Airflow Rate (m³/min) 477 (13.5) 477 (13.5) 395 (11.2) 395 (11.2) Type Sirocco Fan...
- Page 29 SiUS181631EA Specifications 1.3.4 FVXS Series 60 Hz, 208 - 230 V FVXS09NVJU FVXS12NVJU Model Cooling Heating Cooling Heating Rated Capacity 9 kBtu/h Class 12 kBtu/h Class Front Panel Color White White 290 (8.2) 311 (8.8) 300 (8.5) 332 (9.4) 230 (6.5) 244 (6.9) 237 (6.7) 258 (7.3)
-
Page 30: Ffq Series
Specifications SiUS181631EA 1.3.5 FFQ Series 60 Hz, 208 - 230 V FFQ09Q2VJU FFQ12Q2VJU Model Cooling Heating Cooling Heating Rated Capacity 9 kBtu/h Class 12 kBtu/h Class Model BYFQ60B3W1 BYFQ60B3W1 Color White White Decoration Panel Dimensions in. (mm) 2-3/16 × 27-9/16 × 27-9/16 (55 × 700 × 700) 2-3/16 ×... -
Page 31: Part 3 Printed Circuit Board Connector Wiring Diagram
SiUS181631EA Part 3 Printed Circuit Board Connector Wiring Diagram 1. Outdoor Unit....................22 1.1 RMXS48LVJU .................... 22 2. Branch Provider (BP) Unit.................25 2.1 BPMKS048A2U, BPMKS049A3U .............. 25 3. Indoor Unit....................26 3.1 CTXG09/12/18QVJUW(S)................26 3.2 CTXS07JVJU, CTXS09/12HVJU ............... 28 3.3 CTXS07LVJU, FTXS09/12LVJU ..............30 3.4 FTXS15/18/24LVJU ................... -
Page 32: Outdoor Unit
Outdoor Unit SiUS181631EA 1. Outdoor Unit RMXS48LVJU Main PCB (A1P) 1) X5A Connector to service PCB (A2P) 2) X11A Connector for outdoor temperature thermistor 3) X12A Connector for thermistors (suction pipe 1, suction pipe 2, outdoor heat exchanger, discharge pipe) 4) X13A Connector for thermistors (subcooling outlet, liquid pipe) 5) X17A... - Page 33 SiUS181631EA Outdoor Unit X106A X107A X111A X66A X37A X81A X22A X21A X13A X11A X12A X18A X17A X32A X25A X26A X27A X28A 2P294944-17 Printed Circuit Board Connector Wiring Diagram...
- Page 34 Outdoor Unit SiUS181631EA Service PCB (A2P) 1) X205A Connector for main PCB (A1P) 2) H1P - H8P LED for service monitor (orange) 3) BS1 - BS5 Push button switch (mode, set, return, test, reset) 4) DS1 DIP switch for cool/heat selector H7P H8P X205A 2P174185-1...
-
Page 35: Branch Provider (Bp) Unit
SiUS181631EA Branch Provider (BP) Unit 2. Branch Provider (BP) Unit BPMKS048A2U, BPMKS049A3U PCB ASSY 1) X20A Connector for bypass electronic expansion valve 2) X21A - X23A Connector for electronic expansion valve for room A, B, C (X23A for room C: BPMKS049A3U only) 3) X90A Connector for thermistors 4) F2U... -
Page 36: Indoor Unit
Indoor Unit SiUS181631EA 3. Indoor Unit CTXG09/12/18QVJUW(S) Control PCB (A1P) 1) S21 Connector for centralized control (HA) 2) S25 Connector for INTELLIGENT EYE sensor PCB (A3P) 3) S32 Indoor heat exchanger thermistor 4) S41 Connector for swing motors 5) S42 Connector for reduction motor (front panel mechanism) and limit switch 6) S46 Connector for display/signal receiver PCB (A2P) - Page 37 SiUS181631EA Indoor Unit Display/Signal Receiver PCB 1) S51 Connector for control PCB (A1P) (A2P) 2) S52 Connector for room temperature thermistor 3) S1W Indoor unit ON/OFF button 4) H1P LED for operation (multi-color) 5) H2P LED for INTELLIGENT EYE (green) 6) JA Address setting jumper ∗...
-
Page 38: Ctxs07Jvju, Ctxs09/12Hvju
Indoor Unit SiUS181631EA CTXS07JVJU, CTXS09/12HVJU Control PCB (PCB1) 1) S1 Connector for DC fan motor 2) S6 Connector for swing motor (horizontal blades) 3) S8 Connector for swing motor (vertical blades) 4) S21 Connector for centralized control (HA) 5) S26 Connector for buzzer PCB (PCB3) 6) S28 Connector for signal receiver PCB (PCB2) - Page 39 SiUS181631EA Indoor Unit Signal Receiver PCB (PCB2) 1) S29 Connector for control PCB (PCB1) 2) SW1 (S1W) Indoor unit ON/OFF button 2P290430-1 Buzzer PCB (PCB3) 1) S27 Connector for control PCB (PCB1) 2) S38 Connector for display PCB (PCB4) 3) RTH1 (R1T) Room temperature thermistor RTH1 2P290430-1...
-
Page 40: Ctxs07Lvju, Ftxs09/12Lvju
Indoor Unit SiUS181631EA CTXS07LVJU, FTXS09/12LVJU Control PCB (PCB1) 1) S1 Connector for DC fan motor 2) S21 Connector for centralized control (HA) 3) S25 Connector for INTELLIGENT EYE sensor PCB (PCB4) 4) S32 Indoor heat exchanger thermistor 5) S41 Connector for swing motors 6) S46 Connector for display PCB (PCB3) 7) S47... - Page 41 SiUS181631EA Indoor Unit Signal Receiver PCB (PCB2) 1) S48 Connector for control PCB (PCB1) 3P210728-1 Display PCB (PCB3) 1) S49 Connector for control PCB (PCB1) 2) SW1 Indoor unit ON/OFF button 3) LED1 (H1P) LED for operation (green) 4) LED2 (H2P) LED for timer (yellow) 5) LED3 (H3P) LED for INTELLIGENT EYE (green)
-
Page 42: Ftxs15/18/24Lvju
Indoor Unit SiUS181631EA FTXS15/18/24LVJU Control PCB (PCB1) 1) S1 Connector for DC fan motor 2) S21 Connector for centralized control (HA) 3) S25 Connector for INTELLIGENT EYE sensor PCB (PCB4) 4) S32 Indoor heat exchanger thermistor 5) S41 Connector for swing motors 6) S46 Connector for display PCB (PCB3) 7) S47... - Page 43 SiUS181631EA Indoor Unit Signal Receiver PCB (PCB2) 1) S48 Connector for control PCB (PCB1) 3P224121-1 Display PCB (PCB3) 1) S49 Connector for control PCB (PCB1) 2) SW1 Indoor unit ON/OFF button 3) LED1 (H1P) LED for operation (green) 4) LED2 (H2P) LED for timer (yellow) 5) LED3 (H3P) LED for INTELLIGENT EYE (green)
-
Page 44: Fdxs09/12Lvju, Cdxs15/18/24Lvju
Indoor Unit SiUS181631EA FDXS09/12LVJU, CDXS15/18/24LVJU Control PCB (A1P) 1) S1 Connector for AC fan motor 2) S7 Connector for AC fan motor (Hall IC) 3) S21 Connector for centralized control (HA) 4) S26 Connector for display/signal receiver PCB (A2P) 5) S32 Connector for indoor heat exchanger thermistor 6) H1, H2, H3 Connector for terminal strip... - Page 45 SiUS181631EA Indoor Unit Display/Signal Receiver PCB 1) S1 Connector for control PCB (A1P) (A2P) 2) SW1 (S1W) Indoor unit ON/OFF button 3) LED2 (H2P) LED for timer (yellow) 4) LED3 (H3P) LED for operation (green) 5) RTH1 (R1T) Room temperature thermistor LED3 LED2 RTH1...
-
Page 46: Fvxs09/12/15/18Nvju
Indoor Unit SiUS181631EA FVXS09/12/15/18NVJU Control PCB (PCB2) 1) S1 Connector for DC fan motor 2) S21 Connector for centralized control (HA) 3) S26 Connector for service PCB (PCB3) 4) S32 Indoor heat exchanger thermistor 5) S41 Connector for lower air outlet motor 6) S42 Connector for swing motor 7) S46... - Page 47 SiUS181631EA Indoor Unit Sensor PCB (PCB1) 1) S49 Connector for control PCB (PCB2) 2) RTH2 (R1T) Room temperature thermistor RTH2 3P191450-1 Service PCB (PCB3) 1) S27 Connector for control PCB (PCB2) 2) SW2 (S2W)-4 Switch for upward airflow limit setting ∗...
-
Page 48: Ffq09/12/15/18Q2Vju
Indoor Unit SiUS181631EA FFQ09/12/15/18Q2VJU Control PCB (A1P) 1) X15A Connector for float switch 2) X16A Connector for room temperature thermistor (suction air thermistor) 3) X17A, X18A Connector for indoor heat exchanger thermistor 4) X20A Connector for DC fan motor 5) X24A Connector for transmitter board (A2P) (when the wireless remote controller (option) is used) 6) X25A... -
Page 49: Wired Remote Controller
SiUS181631EA Wired Remote Controller 4. Wired Remote Controller BRC1E73 PCB ASSY 1) P1, P2 Terminal for indoor unit 2) R4T Room temperature thermistor 2P298037-7 Printed Circuit Board Connector Wiring Diagram... -
Page 50: Wireless Remote Controller Kit
Wireless Remote Controller Kit SiUS181631EA 5. Wireless Remote Controller Kit BRC082A41W, BRC082A42W(S) Transmitter Board (A2P) 1) X1A Connector for receiver (A3P) 2) X2A Connector for control PCB (A1P) 3) SS1 MAIN/SUB setting switch ∗ Refer to page 149 for details. 4) SS2 Address setting switch ∗... -
Page 51: Part 4 Refrigerant Circuit
SiUS181631EA Part 4 Refrigerant Circuit 1. Refrigerant Circuit ..................42 1.1 Outdoor Unit ....................42 1.2 Branch Provider (BP) Unit ................43 2. Functional Parts Layout ................44 3. Refrigerant Flow for Each Operation Mode..........46 3.1 Cooling Operation ..................46 3.2 Heating Operation ..................47 3.3 Cooling Oil Return Operation .............. -
Page 52: Refrigerant Circuit Part
Refrigerant Circuit SiUS181631EA 1. Refrigerant Circuit Outdoor Unit No. in Symbol Name Major Function diagram The compressor is operated on frequencies between 36 Hz and 195 Hz by using the Compressor motor inverter. (31 steps) Since the system is of air heat exchanging type, the fan is operated at 8-step rotation Fan motor speed by using the inverter. -
Page 53: Branch Provider (Bp) Unit
SiUS181631EA Refrigerant Circuit Branch Provider (BP) Unit No. in Symbol Name Major Function diagram Electronic expansion valve Among EVA, EVB and EVC, the electronic expansion valve of operating room is called (for operating room) EVU. Electronic expansion valve Among EVA, EVB and EVC, the electronic expansion valve of stopping room is called (for non-operating room) EVT. -
Page 54: Functional Parts Layout
Functional Parts Layout SiUS181631EA 2. Functional Parts Layout Front View Y2S: Solenoid valve (hot gas bypass) (Connector: black) L1R: Reactor lead wire (High voltage) Y2S: Solenoid valve (hot gas bypass) lead wire (Connector: black) S1NPH: High pressure sensor (High voltage) (Connector: red) Y1S: Four way valve lead wire Y1S: Four way valve... - Page 55 SiUS181631EA Functional Parts Layout Back View R6T : Thermistor (subcooling heat exchanger gas pipe) (Marking : white) R3T : Thermistor (suction pipe 1) (Marking : red) R5T : Thermistor (suction pipe 2) (Marking : green) R1T : Thermistor (outdoor temperature) (Marking : yellow) R4T : Thermistor (outdoor heat exchanger)
-
Page 56: Refrigerant Flow For Each Operation Mode
Refrigerant Flow for Each Operation Mode SiUS181631EA 3. Refrigerant Flow for Each Operation Mode Cooling Operation Refrigerant Circuit... -
Page 57: Heating Operation
SiUS181631EA Refrigerant Flow for Each Operation Mode Heating Operation Refrigerant Circuit... -
Page 58: Cooling Oil Return Operation
Refrigerant Flow for Each Operation Mode SiUS181631EA Cooling Oil Return Operation Refrigerant Circuit... -
Page 59: Heating Oil Return Operation & Defrost Operation
SiUS181631EA Refrigerant Flow for Each Operation Mode Heating Oil Return Operation & Defrost Operation Refrigerant Circuit... -
Page 60: Part 5 Functions And Control
SiUS181631EA Part 5 Functions and Control 1. Operation Mode ..................52 2. Basic Control.....................53 2.1 Normal Operation ..................53 2.2 Compressor PI Control................53 2.3 Electronic Expansion Valve PI Control............54 2.4 Cooling Operation Fan Control..............55 3. Special Control..................56 3.1 Startup Control ................... 56 3.2 Oil Return Operation .................. - Page 61 SiUS181631EA 7.12 POWERFUL Operation ................87 7.13 Multi-Monitor Lamp/TIMER Lamp .............. 88 7.14 Clock Setting ....................89 7.15 WEEKLY TIMER Operation ............... 90 7.16 Other Functions..................96 8. FFQ Series Function .................98 8.1 Temperature Control .................. 98 8.2 Airflow Direction Control................99 8.3 Fan Speed Control for Indoor Unit .............
-
Page 62: Operation Mode
Operation Mode SiUS181631EA 1. Operation Mode Operation in stop mode Indoor unit stop or Indoor unit thermostat ON thermostat OFF Malfunction/Standby Restart standby Pressure (Compressor stop) equalization prior to startup Malfunction/ Standby Indoor unit stop or thermostat OFF Startup control •... -
Page 63: Basic Control
SiUS181631EA Basic Control 2. Basic Control Normal Operation Cooling Operation Actuator Operation Remarks Used for high pressure protection control, low pressure protection control, discharge pipe Compressor Compressor PI control temperature protection control, and compressor operating frequency upper limit control with inverter protection control. -
Page 64: Electronic Expansion Valve Pi Control
Basic Control SiUS181631EA Step Full-load Unload Step Full-load Unload 36.0 Hz 110.0 Hz 39.0 Hz 116.0 Hz 43.0 Hz 122.0 Hz 47.0 Hz 128.0 Hz 52.0 Hz 134.0 Hz 52.0 Hz 57.0 Hz 140.0 Hz 57.0 Hz 64.0 Hz 146.0 Hz 62.0 Hz 71.0 Hz 152.0 Hz... -
Page 65: Cooling Operation Fan Control
SiUS181631EA Basic Control Cooling Operation Fan Control In cooling operation with low outdoor temperature, cooling operation fan control provides the adequate amount of circulating air with liquid pressure secured by high pressure control using the outdoor fan. When the outdoor temperature is ≥ 20°C (68°F), the fan operates in STEP 7 or higher. When the outdoor temperature is ≥... -
Page 66: Special Control
Special Control SiUS181631EA 3. Special Control Startup Control Startup control equalizes the pressure in the front and back of the compressor before the startup of the compressor, thus reducing startup loads. Furthermore, the inverter is turned ON to charge the capacitor. -
Page 67: Oil Return Operation
SiUS181631EA Special Control Oil Return Operation In order to prevent the compressor from running out of oil, the oil return operation is conducted to recover oil flown out from the compressor to the system side. 3.2.1 Oil Return Operation in Cooling Operation Conditions to start Oil return operation in cooling operation is started referring to the following conditions: Cumulative oil feed rate... - Page 68 Special Control SiUS181631EA 3.2.2 Oil Return Operation in Heating Operation Conditions to start Oil return operation in heating operation is started referring to the following conditions: Integrated amount of displaced oil Timer setting (Make this setting so as to start the oil return operation when the initial cumulative operating time reaches 2 hours after power supply is turned ON and then every 8 hours.) The integrated amount of displaced oil is derived from Tc, Te, and the compressor load.
-
Page 69: Defrosting Operation
SiUS181631EA Special Control Defrosting Operation The defrosting operation is performed to solve frost on the outdoor unit heat exchanger when heating, in order to recover heating capacity. Conditions to start The defrosting operation is started referring to the following conditions: Outdoor heat exchanger heat transfer co-efficiency Outdoor heat exchanger temperature (Tb) Timer (2 hours at the minimum) -
Page 70: Restart Standby
Special Control SiUS181631EA 3.4.1 Pump-down Residual Operation in Cooling Operation Pump-down residual operation Actuator Step 1 Step 2 Compressor 124 Hz Full load 52 Hz Full load Outdoor fan Fan control Fan control Four way valve (Y1S) Main electronic expansion valve (Y1E) 480 pulse 240 pulse Subcooling electronic expansion valve (Y3E) -
Page 71: Protection Control
SiUS181631EA Protection Control 4. Protection Control High Pressure Protection Control Outline High pressure protection control is used to prevent the activation of protection devices due to an abnormal increase of high pressure and to protect compressors against the temporary increase of high pressure. -
Page 72: Low Pressure Protection Control
Protection Control SiUS181631EA Low Pressure Protection Control Outline Low pressure protection control is used to protect compressors against the temporary decrease of low pressure. Cooling Operation Low pressure not limited Pe: Low pressure sensor detection value < 0.25 MPa (84 ftAq) >... -
Page 73: Discharge Pipe Temperature Protection Control
SiUS181631EA Protection Control Discharge Pipe Temperature Protection Control Outline Discharge pipe temperature protection control protects the compressor internal temperature against a malfunction or temporary increase of discharge pipe temperature. Compressor Discharge pipe temperature protection control not limited HTdi > 115˚C (239˚F) Tp >... -
Page 74: Inverter Protection Control
Protection Control SiUS181631EA Inverter Protection Control Outline Inverter overcurrent protection control and inverter fin temperature control are performed to prevent tripping due to a malfunction, temporary inverter overcurrent, or radiation fin temperature increase. Inverter overcurrent protection control Not limited Inverter current ≤ 23.8 A &... -
Page 75: Freeze-Up Protection Control
SiUS181631EA Protection Control Freeze-up Protection Control Outline According to the freeze prevention status sent from the BP unit, the compressor output frequency is regulated to decrease compressor capacity in order to prevent the indoor heat exchanger from freezing. Details Zones are divided based on the freeze prevention status signal sent from the BP unit (indoor unit), and the freeze prevention control prevents freezing of the indoor unit. -
Page 76: Dew Condensation Prevention Control
Protection Control SiUS181631EA Dew Condensation Prevention Control Outline According to the dew condensation prevention status sent from the BP unit, the compressor output frequency is regulated to decrease compressor capacity in order to prevent the indoor unit from dew condensation. Details Zones are divided based on the dew condensation prevention status signal sent from the BP unit (indoor unit), and the dew condensation prevention control prevents dew condensation of the... -
Page 77: Other Control
SiUS181631EA Other Control 5. Other Control Demand Control In order to lower power consumption, the capacity of the outdoor unit is forcibly lowered using the Demand 1 Setting. To operate the unit with this mode, additional setting of Constant Demand Setting is necessary. Demand 1 setting Setting Standard for upper limit of power consumption... -
Page 78: Branch Provider (Bp) Unit Control
Branch Provider (BP) Unit Control SiUS181631EA 6. Branch Provider (BP) Unit Control Branch Provider (BP) Unit Command Conversion 1. ∆ D (room thermistor temperature − target temperature) signals from BP units are converted to a capacity up/down signal. ∆ D signals from BP units are used as the capacity up/down signal in frequency commands (excludes during POWERFUL operation). -
Page 79: Branch Provider (Bp) Unit Electronic Expansion Valve Control
SiUS181631EA Branch Provider (BP) Unit Control Branch Provider (BP) Unit Electronic Expansion Valve Control This function provides instructions regarding the absolute flow rate, relative flow rate and fully closing from the outdoor unit to the BP unit in order to ensure outdoor unit compressor safety and optimum refrigerating cycle of the system. - Page 80 Branch Provider (BP) Unit Control SiUS181631EA 6.2.3 Full Closing of Electronic Expansion Valves Outline The electronic expansion valves are initialized when the power is turned on. Details The following processes are conducted. 1. Conducts P1 pulses close when power is turned on, and sets current opening to 0 pulse (fully closing process).
-
Page 81: Sh Control In Cooling Operation
SiUS181631EA Branch Provider (BP) Unit Control SH Control in Cooling Operation Outline This function ensures appropriate refrigerant distribution when many indoor units are operating in cooling operation. Details The heat exchanger temperatures and gas pipe temperatures of operating indoor units are detected by the gas pipe thermistors, and the flow rates of the electronic expansion valve are corrected so as to adjust the difference between the heat exchanger temperature and gas pipe temperature of each indoor unit (hereafter referred to as SH) close to the target values. -
Page 82: Sc Control In Heating Operation
Branch Provider (BP) Unit Control SiUS181631EA SC Control in Heating Operation Outline This function ensures appropriate refrigerant distribution when many indoor units are operating in heating operation. Details The heat exchanger temperatures and liquid pipe temperatures of operating indoor units are detected by the liquid pipe thermistors, and the flow rates of the electronic expansion valve are corrected so as to adjust the difference between the heat exchanger temperature and liquid pipe temperature of each indoor unit (hereafter referred to as SC) close to the target values. -
Page 83: Ctxg, Ctxs, Ftxs, Cdxs, Fdxs, Fvxs Series Functions
SiUS181631EA CTXG, CTXS, FTXS, CDXS, FDXS, FVXS Series Functions 7. CTXG, CTXS, FTXS, CDXS, FDXS, FVXS Series Functions Temperature Control Definitions of The definitions of temperatures are classified as following. Temperatures Room temperature: temperature of lower part of the room Set temperature: temperature set by remote controller Room thermistor temperature: temperature detected by room temperature thermistor Target temperature: temperature determined by microcomputer... - Page 84 CTXG, CTXS, FTXS, CDXS, FDXS, FVXS Series Functions SiUS181631EA Heating During heating operation, the large flap directs airflow downward to spread the warm air to the entire room. Wide-Angle The louvers, made of elastic synthetic resin, provide a wide range of airflow that guarantees Louvers comfortable air distribution.
- Page 85 SiUS181631EA CTXG, CTXS, FTXS, CDXS, FDXS, FVXS Series Functions FVXS Series Flap (up and down) Cooling/Dry Heating Upward airflow limit (R6831) (R6829) Upward airflow limit (R6832) (R6830) 3-D Airflow CTXG, CTXS, FTXS Series Alternative repetition of vertical and horizontal swing motions enables uniform air-conditioning of the entire room.
- Page 86 CTXG, CTXS, FTXS, CDXS, FDXS, FVXS Series Functions SiUS181631EA Airflow Selection FVXS Series Setting Airflow direction can be set with the airflow selection switch. Open the front panel Open the front panel. Air is blown from the upper outlet only. The blow pattern is automatically decided depending on mode and conditions.
-
Page 87: Fan Speed Control For Indoor Unit
SiUS181631EA CTXG, CTXS, FTXS, CDXS, FDXS, FVXS Series Functions Fan Speed Control for Indoor Unit Outline Phase control and fan speed control contains 9 steps: LLL, LL, SL, L, ML, M, MH, H, and HH. The airflow rate can be automatically controlled depending on the difference between the room thermistor temperature and the target temperature. -
Page 88: Program Dry Operation
CTXG, CTXS, FTXS, CDXS, FDXS, FVXS Series Functions SiUS181631EA COMFORT CTXG, CTXS-L, FTXS-L Series AIRFLOW The fan speed is automatically controlled within the following steps. Cooling Operation L tap ~ MH tap (same as AUTOMATIC) Heating In order to obtain a comfortable airflow, the fan speed may be set to a rate different from automatic fan speed control. -
Page 89: Automatic Operation
SiUS181631EA CTXG, CTXS, FTXS, CDXS, FDXS, FVXS Series Functions Automatic Operation Outline Automatic Cooling/Heating Function When the automatic operation is selected with the remote controller, the microcomputer automatically determines the operation mode as cooling or heating according to the room temperature and the set temperature at start-up. -
Page 90: Thermostat Control
CTXG, CTXS, FTXS, CDXS, FDXS, FVXS Series Functions SiUS181631EA CDXS, FDXS, FVXS series Cooling Operation Target temperature + 2.5˚C (+4.5˚F) Target temperature – 2.0˚C (–3.6˚F) Target temperature + 1.5˚C (+2.7˚F) = Thermostat OFF = Thermostat OFF Target temperature – 3.0˚C (–5.4˚F) Heating Operation (R22000) Ex: When the target temperature is 25°C (77°F) -
Page 91: Night Set Mode
SiUS181631EA CTXG, CTXS, FTXS, CDXS, FDXS, FVXS Series Functions CTXS-L, FTXS series Room thermistor temperature – target temperature Zone A 2.0˚C (3.6˚F) 2.0˚C (3.6˚F) Zone B 1.5˚C (2.7˚F) Zone C 1.0˚C (1.8˚F) 0.5˚C (0.9˚F) (R24033) CTXS-J, CTXS-H, CDXS, FDXS, FVXS series Room thermistor temperature –... -
Page 92: Econo Operation
CTXG, CTXS, FTXS, CDXS, FDXS, FVXS Series Functions SiUS181631EA ECONO Operation Applicable CTXG09/12/18QVJUW(S) CTXS07LVJU Models FTXS09/12/15/18/24LVJU FDXS09/12LVJU CDXS15/18/24LVJU FVXS09/12/15/18NVJU Outline ECONO operation reduces the maximum operating current and the power consumption. This operation is particularly convenient for energy-saving. It is also a major bonus when breaker capacity does not allow the use of multiple electrical devices and air conditioners. - Page 93 SiUS181631EA CTXG, CTXS, FTXS, CDXS, FDXS, FVXS Series Functions If this button is pressed in POWERFUL operation, the POWERFUL operation is canceled and this function becomes effective. HOME LEAVE button is ineffective in dry operation and fan operation. End of Function The function ends when HOME LEAVE button is pressed again during HOME LEAVE operation or when POWERFUL button is pressed.
-
Page 94: 2-Area Intelligent Eye Operation
CTXG, CTXS, FTXS, CDXS, FDXS, FVXS Series Functions SiUS181631EA 7.10 2-Area INTELLIGENT EYE Operation Applicable CTXG09/12/18QVJUW(S) Models Outline The following functions can be performed by the microcomputer with a motion sensor. 1. Reduction of the capacity when there is nobody in the room in order to save electricity (energy saving operation) 2. - Page 95 SiUS181631EA CTXG, CTXS, FTXS, CDXS, FDXS, FVXS Series Functions 2. Motions (in cooling) within within 20 min. 20 min. within 20 min. 20 min. Human detection signal ↑ ↑ ↑ Reset Reset Reset 1 ~ 2˚C (1.8 ~ 3.6 ˚F) Target temperature Remote controller Sensor button...
-
Page 96: Intelligent Eye Operation
CTXG, CTXS, FTXS, CDXS, FDXS, FVXS Series Functions SiUS181631EA 7.11 INTELLIGENT EYE Operation Applicable CTXS07JVJU CTXS09/12HVJU Models CTXS07LVJU FTXS09/12/15/18/24LVJU Outline The microcomputer detects the presence of humans in the room with a motion sensor and reduces the capacity when there is nobody in the room in order to save electricity. Details 1. -
Page 97: Powerful Operation
SiUS181631EA CTXG, CTXS, FTXS, CDXS, FDXS, FVXS Series Functions When there is no signal from the motion sensor in 20 minutes, the microcomputer judges that nobody is in the room and operates the unit at a temperature shifted from the target temperature. -
Page 98: Multi-Monitor Lamp/Timer Lamp
CTXG, CTXS, FTXS, CDXS, FDXS, FVXS Series Functions SiUS181631EA 7.13 Multi-Monitor Lamp/TIMER Lamp Applicable CTXG09/12/18QVJUW(S) Models Features Current operation mode is displayed in color of the lamp of the indoor unit. Operating status can be monitored even in automatic operation in accordance with the actual operation mode. Multi-monitor lamp/ TIMER lamp (R19925) -
Page 99: Clock Setting
SiUS181631EA CTXG, CTXS, FTXS, CDXS, FDXS, FVXS Series Functions 7.14 Clock Setting ARC452 Series The clock can be set by taking the following steps: 1. Press CLOCK button. ARC466 Series → is displayed. MON and blink. 2. Press SELECT ▲ or SELECT ▼ button to set the clock to the current day of the week. 3. -
Page 100: Weekly Timer Operation
CTXG, CTXS, FTXS, CDXS, FDXS, FVXS Series Functions SiUS181631EA 7.15 WEEKLY TIMER Operation Applicable CTXG09/12/18QVJUW(S) CTXS07LVJU Models FTXS09/12/15/18/24LVJU FVXS09/12/15/18NVJU Outline Up to 4 timer settings can be saved for each day of the week (up to 28 settings in total). The 3 items: ON/OFF, temperature, and time can be set. - Page 101 SiUS181631EA CTXG, CTXS, FTXS, CDXS, FDXS, FVXS Series Functions To use WEEKLY TIMER operation Setting mode • Make sure the day of the week and time are set. If not, set the day of the week and time. program 1 program 2 program 3 program 4...
-
Page 102: Functions And Control
CTXG, CTXS, FTXS, CDXS, FDXS, FVXS Series Functions SiUS181631EA Press to select the desired time. • The time can be set between 0:00 and 23:50 in 10-minute intervals. • To return to the ON/OFF TIMER mode setting, press • Proceed to STEP when setting the OFF TIMER. - Page 103 SiUS181631EA CTXG, CTXS, FTXS, CDXS, FDXS, FVXS Series Functions Copy mode • A reservation made once can be copied to another day of the week. The whole reservation of the selected day of the week will be copied. program 1 program 2 program 3 program 4 [Monday]...
- Page 104 CTXG, CTXS, FTXS, CDXS, FDXS, FVXS Series Functions SiUS181631EA Confirming a reservation • The reservation can be confirmed. Setting Displays Normal Confirmation Press • The day of the week and the reservation number of the current day will be displayed. Press to select the day of the week and the reservation number to be confirmed.
- Page 105 SiUS181631EA CTXG, CTXS, FTXS, CDXS, FDXS, FVXS Series Functions To delete reservations An individual reservation Press • The day of the week and the reservation number will be displayed. Press to select the day of the week and the reservation number to be deleted. Press •...
-
Page 106: Other Functions
CTXG, CTXS, FTXS, CDXS, FDXS, FVXS Series Functions SiUS181631EA 7.16 Other Functions 7.16.1 Hot-Start Function In order to prevent the cold air blast that normally occurs when heating operation starts, the temperature of the indoor heat exchanger is detected, and the airflow is either stopped or significantly weakened resulting in comfortable heating. - Page 107 SiUS181631EA CTXG, CTXS, FTXS, CDXS, FDXS, FVXS Series Functions FVXS Series ON/OFF button (R23926) 7.16.4 Auto-restart Function If a power failure (even a momentary one) occurs during the operation, the system restarts automatically in the same conditions as before when the power supply is restored to the conditions prior to the power failure.
-
Page 108: Ffq Series Function
FFQ Series Function SiUS181631EA 8. FFQ Series Function Temperature Control Definitions of The definitions of temperatures are classified as following. Temperatures Room temperature: temperature of lower part of the room Set temperature: temperature set by remote controller Room thermistor temperature: temperature detected by room temperature thermistor Target temperature: temperature determined by microcomputer Target temperature Room thermistor temperature... -
Page 109: Airflow Direction Control
SiUS181631EA FFQ Series Function Airflow Direction Control Outline There are two types of airflow direction settings. Automatic swing setting The flaps automatically oscillate up and down. Indoor unit (Automatic swing) (Automatic swing) (R24069) Airflow direction fixed setting You can select from one of the fixed directions. The display of the remote controller and the actual angle of the flap do not match. -
Page 110: Program Dry Operation
FFQ Series Function SiUS181631EA Program Dry Operation Outline Program dry operation removes humidity while preventing the room temperature from lowering. Since the microcomputer controls both the temperature and airflow rate, the temperature adjustment and FAN setting buttons are inoperable. Details The microcomputer automatically sets the temperature and airflow rate. -
Page 111: Clock And Calendar Setting (With Wired Remote Controller Brc1E73)
SiUS181631EA FFQ Series Function Clock and Calendar Setting (With Wired Remote Controller BRC1E73) Press Menu/OK button to display the main menu screen. Press buttons to select Clock & Calendar on the main menu screen. Press Menu/OK button to display the clock &... - Page 112 FFQ Series Function SiUS181631EA Select Hour with buttons. Change the hour with buttons. Holding down the button causes the number to change continuously. Select Minute with buttons. Change the minute with buttons. Holding down the button causes the number to change continuously. Press Menu/OK button.
-
Page 113: Schedule Timer Operation (With Wired Remote Controller Brc1E73)
SiUS181631EA FFQ Series Function Schedule TIMER Operation (With Wired Remote Controller BRC1E73) Outline Day settings are selected from 4 patterns: 7Days Weekday/Sat/Sun Weekday/Weekend Everyday Up to 5 actions can be set for each day. Details Set the startup time and operation stop time. Startup time, cooling and heating temperature setpoints can be configured. - Page 114 FFQ Series Function SiUS181631EA Daily Patterns The schedule screen will appear. Press buttons to select Daily Patterns on the schedule screen. The daily patterns screen will appear when Menu/OK button is pressed. Press buttons to select 7 Days Weekday/Sat/Sun Weekday/Weekend Everyday the daily patterns screen.
- Page 115 SiUS181631EA FFQ Series Function Press buttons to move the highlighted item and press buttons to configure ON/OFF/-- settings. --, ON, or OFF changes in sequence when buttons are pressed. ON: The temperature setpoints can be configured. OFF: The setback temperature setpoints can be configured.
- Page 116 FFQ Series Function SiUS181631EA Enabling or disabling the schedule Display the schedule screen. Press buttons to select Enable / Disable on the schedule screen. Press Menu/OK button to display the enable/disable screen. Press buttons to select Enable Disable on the enable/disable screen.
-
Page 117: Setback Function (With Wired Remote Controller Brc1E73)
SiUS181631EA FFQ Series Function Setback Function (With Wired Remote Controller BRC1E73) The Setback function can be used to maintain the space temperature in an assigned range for an unoccupied period. The setback icon flashes on the LCD of wired remote controller when the unit is turned on by the setback control. - Page 118 FFQ Series Function SiUS181631EA 8.8.2 If the Float Switch is OFF with the Thermostat ON in Cooling Operation ∗2 ∗1 ∗4 ∗3 Float switch 5 sec. 5 sec. Thermostat (running) Error display Drain pump 5 min. 5 sec. 5 min. 5 sec.
-
Page 119: Hot Start Control (In Heating Operation Only)
SiUS181631EA FFQ Series Function 8.8.4 If the Float Switch Turns OFF and ON Continuously, or the Float Switch Turns OFF While AF Displayed ∗1 ∗2 ∗3 Float Switch 5 sec. 5 sec. 5 sec. 5 sec. 5 sec. Thermostat (running) Error Display Drain Pump 5 min. -
Page 120: Presence And Floor Sensors (Option)
FFQ Series Function SiUS181631EA 8.10 Presence and Floor Sensors (Option) Outline With the human presence signal and the floor temperature signal from the optional sensor kit, the system provides the energy saving control, or the comfortable temperature control and airflow direction control preventing the direct draft to the human. - Page 121 SiUS181631EA FFQ Series Function 2. Auto-setback by sensor (with presence sensor) After pre-determined time has elapsed without detection of human presence, the unit automatically shifts the target temperature gradually for energy saving. The target temperature displayed on the remote controller remains same as the initial set value during the above change of target temperature.
- Page 122 FFQ Series Function SiUS181631EA 3. Auto-off by sensor (with presence sensor) After pre-determined time has elapsed without detection of human presence, the unit automatically stops operation. The auto-off time can be set between 1- 24 hours by the hour. Once the unit stops operation by auto-off function, the system would not restart even if the human is detected again.
-
Page 123: Other Functions
SiUS181631EA FFQ Series Function 8.11 Other Functions 8.11.1 Signal Receiving Sign When the indoor unit receives a signal from the remote controller, the unit emits a signal receiving sound. 8.11.2 Auto-restart Function If a power failure (even a momentary one) occurs during the operation, the system restarts automatically in the same conditions as before when the power supply is restored to the conditions prior to the power failure. -
Page 124: Part 6 Test Operation And Field Settings
SiUS181631EA Part 6 Test Operation and Field Settings 1. Test Operation ..................115 1.1 Procedure and Outline ................115 1.2 Operation when Power is Turned On ............117 1.3 Branch Provider (BP) Unit ................ 118 1.4 CTXG, CTXS, FTXS, CDXS, FDXS, FVXS Series ........120 1.5 FFQ Series .................... -
Page 125: Test Operation
SiUS181631EA Test Operation 1. Test Operation Procedure and Outline Follow the following procedure to conduct the initial test operation after installation. 1.1.1 Check Work Prior to Turn Power Supply On Is the power supply single-phase 208 ~ 230 V, 60 Hz? Check the below items. - Page 126 Test Operation SiUS181631EA 1.1.3 Check Operation * During check operation, mount front panel to avoid the misjudging. * Check operation is mandatory for normal unit operation. (When the check operation is not executed, alarm code U3 is displayed.) The test operation is started automatically.
-
Page 127: Operation When Power Is Turned On
SiUS181631EA Test Operation 1.1.4 Confirmation on Normal Operation • Conduct normal unit operation after the check operation has been completed. (When outdoor air temperature is 24°CDB (75.2°FDB) or higher, the unit can not be operated with heating operation. See the installation manual attached.) •... -
Page 128: Branch Provider (Bp) Unit
Test Operation SiUS181631EA Branch Provider (BP) Unit 1.3.1 Judging and reprogramming in case of redundant BP addresses The BP unit of this system is provided with specific addresses in its production stage. These addresses are for various controls. If by any chance (on 3 out of 260000 units) these addresses are redundant, the system may get in trouble. - Page 129 SiUS181631EA Test Operation Example of DIP switch (DS2) settings on the BP unit's PCB DS2-1 DS2-2 DS2-3 DS2-4 BP unit 1 BP unit 2 BP unit 3 DS1 ~ 4 : Factory setting is OFF. The BP unit 1 through 3 show the first through third unit, respectively. The order of these BP units is flexible.
-
Page 130: Ctxg, Ctxs, Ftxs, Cdxs, Fdxs, Fvxs Series
Test Operation SiUS181631EA CTXG, CTXS, FTXS, CDXS, FDXS, FVXS Series Outline Carry out the trial operation in accordance with the operation manual to ensure that all functions and parts, such as flap movement, are working properly. Trial operation should be carried out in either cooling or heating operation. Details 1. - Page 131 SiUS181631EA Test Operation ARC466 Series (1) Press On/Off button to turn on the system. (2) Press the center of Temp button and Mode button at the same time. (3) Select T (test operation) with Temp ▲ or Temp ▼ button. (4) Press Mode button to start the test operation.
-
Page 132: Ffq Series
Test Operation SiUS181631EA FFQ Series Outline Make sure to install the decoration panel before carrying out trial operation if the wireless remote controller is used. Trial operation should be carried out in either cooling or heating operation. 1. Measure the supply voltage and make sure that it is within the specified range. 2. - Page 133 SiUS181631EA Test Operation With Wired Remote Controller (BRC1E73) 1. Set to COOL or HEAT operation using the Basic screen remote controller. Cool Set to 2. Press and hold Cancel button for 4 seconds Press and hold Cancel or longer. Service settings menu is button for 4 seconds or displayed.
- Page 134 Test Operation SiUS181631EA With Wireless Remote Controller Kit (BRC082A41W, BRC082A42W(S)) 1. Press button and select the COOL or HEAT operation. 2. Press button twice. “TEST” is displayed. 3. Press button within 10 seconds, and the test operation starts. Monitor the operation of the indoor unit for a minimum of 10 minutes. During test operation, the indoor unit will continue to cool/heat regardless of the temperature setpoint and room temperature.
-
Page 135: Field Settings
SiUS181631EA Field Settings 2. Field Settings Outdoor Unit 2.1.1 Setting Mode and Monitor Mode Outline The following 3 modes can be changed over with the button switches on the service PCB and you can find the present mode by the status of the H1P indicator. H1P H3P H5P H7P H2P H4P H6P (SET) -
Page 136: Demand
Field Settings SiUS181631EA Setting Mode 1 This mode is used to set and check the following items. 1. Set items ············ In order to make COOL/HEAT selection in a batch of outdoor unit group, change the setting. • COOL/HEAT selection (IND) ·····················Used to select COOL or HEAT by individual outdoor unit (factory setting). -
Page 137: Night-Time Low Noise Setting
SiUS181631EA Field Settings Setting Mode 2 Press MODE (BS1) button for 5 Setting item Description seconds and enter the setting mode Cool/heat unified Sets address for cool/heat unified operation. address Low noise/demand Address for low noise/demand operation address Used to conduct test operation without making changes to Test operation the PCB and replacing the refrigerant, after the completion settings... -
Page 138: Yes
Field Settings SiUS181631EA Setting item display C/H selection Setting condition display MODE TEST Demand Setting item noise Master Slave ∗ Factory setting k h h h h h h ∗ Address k h h h h h k Binary number Cool/heat unified address (6 digits) -
Page 139: Level
SiUS181631EA Field Settings Setting item display C/H selection Setting condition display MODE TEST Low noise Demand Setting item Master Slave ∗ Factory setting k h h h h h k Level 1 (outdoor fan with 6 step or lower) k h h h h k h ∗ Setting of low noise Level 2 (outdoor fan with 5 step or lower) level... - Page 140 Field Settings SiUS181631EA Monitor Mode LED display Press MODE (BS1) button and enter Check item Data display the monitor mode. h h h h h h See the note Various setting below. h h h h h k Cool/heat unified address h h h h k h Low noise/demand address h h h h k k...
- Page 141 SiUS181631EA Field Settings Press BS2 (SET button) and match with the LEDs No. 1 - 15, press BS3 (RETURN button), and confirm the data for each setting. ★ Data such as addresses and number of units is expressed as binary numbers; the two ways of expressing are as follows: The No.
- Page 142 Field Settings SiUS181631EA Switching Mode (1): Set Cool/Heat Separately for Each Outdoor Unit System by Indoor Unit Remote Controller It does not matter whether or not there is outdoor - outdoor unit wiring. Set the DIP switch DS1-1 of the outdoor unit PCB (A2P) to IN (factory setting). Set cool/heat switching to IND (individual) in the setting mode 1 (factory setting).
- Page 143 SiUS181631EA Field Settings Set the master unit (indoor unit having the right to select the cooling/heating operation mode). In the case of wired remote controllers • After the check operation, “CHANGEOVER UNDER CONTROL” is flashing in all connected remote controllers. •...
- Page 144 Field Settings SiUS181631EA 2.1.3 Setting of Low Noise Operation and Demand Operation Setting of Low Noise Operation By connecting the external contact input to the low noise input of the outdoor unit external control adaptor (optional), you can lower operating noise by 2 ~ 3 dB. When the low noise operation is automatically carried out at night (The external control adaptor for outdoor unit is not required) 1.
-
Page 145: Rated Power Consumption
SiUS181631EA Field Settings Setting of Demand Operation By connecting the external contact input to the demand input of the outdoor unit external control adaptor (optional), the power consumption of unit operation can be saved suppressing the compressor operating condition. Set item Condition Content Demand... -
Page 146: Rated Power
Field Settings SiUS181631EA Detailed Setting Procedure of Low Noise Operation and Demand Control 1. Setting mode 1 (H1P off) In setting mode 2, press BS1 (MODE button) one time. → The system enters setting mode 1 and the H1P goes off. In setting mode 1, the H6P (In low noise operation) and the H7P (In demand control) keep lighting. - Page 147 SiUS181631EA Field Settings 2.1.4 Setting of Refrigerant Additional Charging Operation When the outdoor unit is stopped and the entire quantity of refrigerant cannot be charged from the stop valve on the liquid side, make sure to charge the remaining quantity of refrigerant using this procedure.
- Page 148 Field Settings SiUS181631EA 2.1.6 Setting of Vacuuming Mode In order to perform vacuuming operation at site, fully open the expansion valves of indoor and outdoor units and turn on some solenoid valves. Operating procedure (1) In setting mode 2 with units in stop mode, set the item No.21 (refrigerant recovery/vacuuming mode) to ON.
-
Page 149: Ctxg, Ctxs, Ftxs, Cdxs, Fdxs, Fvxs Series
SiUS181631EA Field Settings CTXG, CTXS, FTXS, CDXS, FDXS, FVXS Series 2.2.1 Model Type Setting ARC452A21, ARC452A23 The remote controller is common to the heat pump model and cooling only model. Make sure the DIP switch is set to the left side. The heating operation will not be available when the DIP switch is set to the right side. -
Page 150: Temperature Display Switch
Field Settings SiUS181631EA 2.2.2 Temperature Display Switch You can select Fahrenheit or Celsius for temperature display. ARC452A9, ARC452A21, ARC452A23 Press TEMP▲ and TEMP▼ buttons at the same time for 5 seconds to change the unit of temperature display. (R14477) ARC466A21, ARC466A36 Press the upper side of Temp button and On button at the same time for 5 seconds to change the unit of temperature display. -
Page 151: When 2 Units Are Installed In 1 Room
SiUS181631EA Field Settings 2.2.3 When 2 Units are Installed in 1 Room Outline When 2 indoor units are installed in 1 room, 1 of the 2 indoor units and the corresponding wireless remote controller can be set for different address. Both the indoor unit PCB and the wireless remote controller need alteration. - Page 152 Field Settings SiUS181631EA CDXS, FDXS Cut the jumper JA on PCB. Series ADDRESS : JA EXIST (R19089) Caution Replace the PCB if you accidentally cut a wrong jumper. Jumpers are necessary for electronic circuit. Improper operation may occur if you cut any of them. FVXS Series (1) Remove the front grille.
-
Page 153: Jumper And Switch Settings
SiUS181631EA Field Settings Wireless Remote (1) Remove the cover and take it off. Controller (2) Cut the address setting jumper. ARC452 series ARC466 series Jumper Jumper ADDRESS ADDRESS EXIST EXIST (R12065) ∗ Do not cut the left jumper. (R18416) Caution Replace the remote controller if you accidentally cut a wrong jumper. -
Page 154: Ffq Series
Field Settings SiUS181631EA FFQ Series 2.3.1 How to Change the Field Settings Outline If optional accessories are mounted on the indoor unit, the indoor unit setting may have to be changed. Refer to the instruction manual for each optional accessory. Note: When using 2 remote controllers for 1 indoor unit, change the field settings from MAIN remote controller. - Page 155 SiUS181631EA Field Settings 3. Highlight the mode, and select desired “Mode No.” by using ▲ ▼ (Up/Down) button. 4. In the case of setting per indoor unit during group control (When Mode No. such as 20 22 23 25 are selected), highlight the unit No.and select “Indoor unit No.” to be set by using ▲...
- Page 156 Field Settings SiUS181631EA Wireless Remote Controller Kit (BRC082A41W, BRC082A42W(S)) UP button Mode No. Field setting mode DOWN button First code No. RESERVE button MODE button Second code No. INSPECTION/TEST button (R24061) To set the field settings, you have to change: Mode No.
- Page 157 SiUS181631EA Field Settings 2.3.2 Overview of the Field Settings First Second Code No. Mode Code Description of setting Approx. Approx. Filter cleaning Longlife 2,500 1,250 — — — — sign interval filter hrs. hrs. (20) Remote controller thermistor Enabled Disabled —...
- Page 158 Field Settings SiUS181631EA 2.3.3 MAIN/SUB Setting when Using 2 Wired Remote Controllers Outline The MAIN/SUB setting is necessary when 1 indoor unit is controlled by 2 remote controllers. When you use 2 remote controllers, set one to MAIN and the other to SUB. Details 1.
- Page 159 SiUS181631EA Field Settings 2.3.4 Address and MAIN/SUB Setting for Wireless Remote Controller Outline If setting multiple wireless remote controllers to operate in one room, perform address setting for the receiver and the wireless remote controller. If using both a wired remote controller and a wireless remote controller with 1 indoor unit, change the MAIN/SUB switch of the transmitter board.
- Page 160 Field Settings SiUS181631EA Wireless Remote Factory set is 1. Change the wireless remote controller address setting by the following steps, if Controller necessary. 1. Hold down button and /TEST button at the same time for at least 4 seconds to enter the Address field setting mode.
- Page 161 SiUS181631EA Field Settings After Setting Affix corresponding unit number labels onto both air outlet of the decoration panel and onto back of the wireless remote controller. (R24066) Note: Set the unit No. of the receiver and the wireless remote controller to be the equal. If the settings differ, the signal from the remote controller cannot be transmitted.
-
Page 162: Part 7 Remote Controller
SiUS181631EA Part 7 Remote Controller 1. Applicable Remote Controller ..............153 2. ARC466A36 .................... 154 3. ARC452A9 ....................156 4. ARC452A21 .................... 158 5. ARC452A23 .................... 160 6. ARC466A21 .................... 162 7. BRC1E73 (Wired Remote Controller) .............164 8. BRC082A41W, BRC082A42W(S) (Wireless Remote Controller Kit) ..170 Remote Controller... -
Page 163: Applicable Remote Controller
FFQ15Q2VJU BRC082A41W BRC082A42W(S) FFQ18Q2VJU Note: Refer to the operation manual of applicable model for details. You can download operation manuals from Daikin Business Portal: Daikin Business Portal → Document Search → Item Category → Installation/Operation Manual (URL: https://global1d.daikin.com/business_portal/login/) Remote Controller... -
Page 164: Arc466A36
ARC466A36 SiUS181631EA 2. ARC466A36 Signal transmitter Receiver 19-11/16” Display (LCD) (50 cm) or more • Displays the current settings. (In this illustration, each section is shown with all its displays on for the • To use the remote controller, aim the purpose of explanation.) transmitter at the indoor unit. - Page 165 SiUS181631EA ARC466A36 Open the Front Cover Mode button • Selects the operation mode. AUTO COOL HEAT Econo / Quiet button • Every time you press Econo/Quiet button, the setting changes in the following order. Lamp brightness ECONO OUTDOOR UNIT setting button QUIET •...
-
Page 166: Arc452A9
ARC452A9 SiUS181631EA 3. ARC452A9 Signal transmitter Display (LCD) Receiver • Displays the current settings. (In this illustration, each section is • To use the remote controller, aim the shown with all its displays on for the transmitter at the indoor unit. If there purpose of explanation.) is anything to block signals between the unit and the remote controller,... - Page 167 SiUS181631EA ARC452A9 Open the Front Cover MODE button • Selects the operation mode. AUTO COOL HEAT HOME LEAVE button • Press this button to start HOME LEAVE operation. QUIET button The HOME LEAVE lamp lights • OUTDOOR UNIT QUIET operation. •...
-
Page 168: Arc452A21
ARC452A21 SiUS181631EA 4. ARC452A21 Signal transmitter Display (LCD) Receiver • Displays the current settings. (In this illustration, each section is • To use the remote controller, aim the shown with all its displays on for the transmitter at the indoor unit. If there purpose of explanation.) is anything to block signals between the unit and the remote controller,... - Page 169 SiUS181631EA ARC452A21 Open the Front Cover MODE button • Selects the operation mode. AUTO COOL HEAT ECONO button • Starts ECONO operation. QUIET button SWING buttons • OUTDOOR UNIT QUIET • Adjusts the airflow direction. operation. • When you press the SWING •...
-
Page 170: Arc452A23
ARC452A23 SiUS181631EA 5. ARC452A23 Signal transmitter Display (LCD) Receiver • Displays the current settings. (In this illustration, each section is • To use the remote controller, aim the shown with all its displays on for the transmitter at the indoor unit. If there purpose of explanation.) is anything to block signals between the unit and the remote controller,... - Page 171 SiUS181631EA ARC452A23 Open the Front Cover MODE button • Selects the operation mode. AUTO COOL HEAT ECONO button • Starts ECONO operation. QUIET button • OUTDOOR UNIT QUIET operation. SELECT button • OUTDOOR UNIT QUIET • Changes the ON/OFF TIMER operation is not available in settings.
-
Page 172: Arc466A21
ARC466A21 SiUS181631EA 6. ARC466A21 Signal transmitter Display (LCD) • Displays the current settings. (In this illustration, each section is shown with all its displays on for the Receiver purpose of explanation.) Temperature • To use the remote controller, aim the transmitter at the indoor unit. - Page 173 SiUS181631EA ARC466A21 Open the Front Cover Mode button • Selects the operation mode. AUTO COOL HEAT Econo button • Starts ECONO operation. Quiet button Swing button • OUTDOOR UNIT QUIET • Adjusts the airflow direction. operation. • When you press Swing •...
-
Page 174: Brc1E73 (Wired Remote Controller)
BRC1E73 (Wired Remote Controller) SiUS181631EA 7. BRC1E73 (Wired Remote Controller) 1. Operation mode selector button 11. LCD (with backlight) 4. Up button 5. Down button 6. Right button 7. Left button 9. Operation lamp 8. On/Off button 3. Menu/OK button 10. -
Page 175: Operation Lamp
SiUS181631EA BRC1E73 (Wired Remote Controller) 1. Operation mode selector button 7. Left button • Press this button to select the operation • Used to highlight the next items on the mode of your preference. left-hand side. • * Available modes vary with the indoor unit Each screen is scrolled in the left-hand model. - Page 176 BRC1E73 (Wired Remote Controller) SiUS181631EA Liquid Crystal Display • Three types of display mode (Standard, Detailed and Simple) are available. • Standard display is set by default. • Detailed and Simple displays can be selected in the main menu. Standard display 10.Changeover controlled 11.Setback by the master indoor unit...
- Page 177 SiUS181631EA BRC1E73 (Wired Remote Controller) Simple display 1.Operation mode 14.Selectable Display Item 3.Setpoint 11.Setback 2.Fan speed 4.Stand by for Defrost/ <Simple display example> Hot start Note for all display modes • Depending on the field settings, while the indoor unit is stopped, OFF may be displayed instead of the operation mode and/or the setpoint may not be displayed.
-
Page 178: Fan Speed
BRC1E73 (Wired Remote Controller) SiUS181631EA “Error: Push Menu button” 1. Operation mode “Warning: Push Menu button” Used to display the current operation • • Displayed if an error or warning is detected. mode: Cool, Heat, Vent, Fan, Dry or Auto. In Auto mode, the actual operation mode •... -
Page 179: Airflow Direction
SiUS181631EA BRC1E73 (Wired Remote Controller) 11. Setback “ ” • The setback icon flashes when the unit is turned on by the setback control. 12. Airflow Direction “ ” Displayed when the airflow direction and • swing are set. If the connected indoor unit model does not •... -
Page 180: Brc082A41W, Brc082A42W(S) (Wireless Remote Controller Kit)
BRC082A41W, BRC082A42W(S) (Wireless Remote Controller Kit) SiUS181631EA 8. BRC082A41W, BRC082A42W(S) (Wireless Remote Controller Kit) (R23936) (R23937) Remote Controller... - Page 181 SiUS181631EA BRC082A41W, BRC082A42W(S) (Wireless Remote Controller Kit) 11 TIMER MODE START/STOP BUTTON DISPLAY (SIGNAL TRANSMISSION) 12 TIMER RESERVE/CANCEL BUTTON This lights up when a signal is being 13 AIRFLOW DIRECTION ADJUST BUTTON transmitted. OPERATION MODE SELECTOR BUTTON DISPLAY Press this button to select OPERATION MODE. (OPERATION MODE) 15 FILTER SIGN RESET BUTTON This display shows the current OPERATION...
-
Page 182: Part 8 Troubleshooting
SiUS181631EA Part 8 Troubleshooting 1. Troubleshooting with LED ...............174 1.1 Outdoor Unit ..................... 174 1.2 Branch Provider (BP) Unit ................ 179 1.3 Indoor Unit....................180 2. Service Diagnosis ................... 182 2.1 CTXG, CTXS, FTXS, CDXS, FDXS, FVXS Series ........182 2.2 FFQ Series .................... - Page 183 SiUS181631EA 7.2 Actuation of High Pressure Switch ............227 7.3 Actuation of Low Pressure Sensor ............229 7.4 Compressor Motor Lock ................231 7.5 Outdoor Fan Motor Abnormality ............... 232 7.6 Moving Part of Electronic Expansion Valve (Y1E, Y3E) Abnormality..233 7.7 Discharge Pipe Temperature Abnormality ..........
-
Page 184: Troubleshooting With Led
Troubleshooting with LED SiUS181631EA 1. Troubleshooting with LED Outdoor Unit 1.1.1 Main PCB (A1P) The main PCB (A1P) has green LEDs (HAP, HBP). When the microprocessors work in order, the LEDs blink. (R22090) 1.1.2 Service PCB (A2P) The error code can be identified with the orange LEDs (H1P~H7P) on the service PCB (A2P) in monitor mode. - Page 185 SiUS181631EA Troubleshooting with LED Error code indication in monitor mode Monitor mode Error Press MODE (BS1) button and enter Contents of malfunction code the monitor mode. Outdoor unit PCB abnormality Detection of DIII-Net Actuation of high pressure switch High pressure switch activated (S1PH) Actuation of low pressure sensor Abnormal Pe Compressor motor lock...
- Page 186 Troubleshooting with LED SiUS181631EA k : ON h : OFF l : Blink Confirmation of malfunction 1 Confirmation of malfunction 2 Confirmation of malfunction 3 Confirmation of malfunction 4 Error code H1P H2P H3P H4P H5P H6P H7P H1P H2P H3P H4P H5P H6P H7P H1P H2P H3P H4P H5P H6P H7P H1P H2P H3P H4P H5P H6P H7P ∗...
- Page 187 SiUS181631EA Troubleshooting with LED Monitor mode Error Press MODE (BS1) button and enter Contents of malfunction code the monitor mode. High voltage of capacitor in main Imbalance of inverter power supply voltage inverter circuit Radiation fin thermistor abnormality Faulty thermistor of inverter fin Low pressure drop due to refrigerant Refrigerant shortage alarm shortage or electronic expansion valve...
- Page 188 Troubleshooting with LED SiUS181631EA k : ON h : OFF l : Blink Confirmation of malfunction 1 Confirmation of malfunction 2 Confirmation of malfunction 3 Confirmation of malfunction 4 Error code H1P H2P H3P H4P H5P H6P H7P H1P H2P H3P H4P H5P H6P H7P H1P H2P H3P H4P H5P H6P H7P H1P H2P H3P H4P H5P H6P H7P ∗...
-
Page 189: Branch Provider (Bp) Unit
SiUS181631EA Troubleshooting with LED Branch Provider (BP) Unit : ON, : OFF, : Blinks, —: No matter Green : Blinks in normal condition Red : OFF in normal condition BP Unit LED Indication Description Green Normal condition Defective electronic expansion valve or anti-icing control in non-operating indoor unit Defective thermistor Freeze-up protection control in operating indoor unit or standby indoor unit... -
Page 190: Indoor Unit
Troubleshooting with LED SiUS181631EA Indoor Unit Operation Lamp The operation lamp blinks when any of the following errors is detected. When a protection device of the indoor or outdoor unit is activated, or when the thermistor malfunctions. When a signal transmission error occurs between the indoor and outdoor units. In either case, conduct the diagnostic procedure described in the following pages. - Page 191 SiUS181631EA Troubleshooting with LED FFQ series with wired remote controller (BRC1E73) Operation lamp (green) The error or warning message also blinks on the basic screen. (R23942) FFQ series with wireless remote controller kit (BRC082A41W, BRC082A42W(S)) In case of wireless remote controller, a transmitter board (A2P) and a receiver (A3P) are installed on indoor unit.
-
Page 192: Service Diagnosis
Service Diagnosis SiUS181631EA 2. Service Diagnosis CTXG, CTXS, FTXS, CDXS, FDXS, FVXS Series 2.1.1 ARC452 Series Remote Controller 1. When TIMER CANCEL button is held down for 5 seconds, 00 is displayed on the temperature Method 1 display screen. TIMER CANCEL button <... - Page 193 SiUS181631EA Service Diagnosis Method 2 1. Press the 3 buttons (TEMP▲, TEMP▼, MODE) at the same time to enter the diagnosis mode. (R14550) The left-side number blinks. (R9430) 2. Press TEMP ▲ or TEMP ▼ button and change the number until you hear the two consecutive beeps or the long beep.
- Page 194 Service Diagnosis SiUS181631EA 5. Press TEMP ▲ or TEMP ▼ button and change the number until you hear the long beep. (R14547) 6. Diagnose by the sound. ★ beep : The left-side number does not correspond with the error code. ★...
- Page 195 SiUS181631EA Service Diagnosis 2.1.2 ARC466 Series Remote Controller 1. When Timer Cancel button is held down for 5 seconds, 00 is displayed on the temperature Method 1 display screen. Timer Cancel button (R24045) < ARC466 Series > 2. Press Timer Cancel button repeatedly until a long beep sounds. The code indication changes in the sequence shown below.
- Page 196 Service Diagnosis SiUS181631EA Method 2 1. Press the center of Temp button and Mode button at the same time. (R24046) is displayed on the LCD. (R11821) 2. Select 5C (service check) with Temp ▲ or Temp ▼ button. 3. Press Mode button to enter the service check mode. (R24047) The left-side number blinks.
- Page 197 SiUS181631EA Service Diagnosis 5. Diagnose by the sound. ★ beep: The left-side number does not correspond with the error code. ★ two consecutive beeps: The left-side number corresponds with the error code but the right- side number does not. ★ long beep: Both the left-side and right-side numbers correspond with the error code.
-
Page 198: Ffq Series
Service Diagnosis SiUS181631EA FFQ Series 2.2.1 Wired Remote Controller (BRC1E73) Relations On power-up, the message Checking the connection. Please standby. will be displayed on the remote controller screen temporarily and then the basic screen will be displayed. To access a mode Between Modes from the basic screen, refer to the figure below. - Page 199 The error code will flash and the service Error Code: A1 Contact Info contact and model name or code may 0123-456-7890 be displayed. Indoor Model ---/000 Notify your Daikin dealer of the Error Outdoor Model ---/000 code and model name or code. Troubleshooting...
- Page 200 Service Diagnosis SiUS181631EA 2.2.2 Wireless Remote Controller Kit (BRC082A41W, BRC082A42W(S)) Relations The following modes can be selected by using INSPECTION/TEST OPERATION button on the remote controller. Between Modes Service data can be obtained. Indoor unit settings can be made. Press INSPECTION/TEST Error code history Filter cleaning sign time OPERATION button for...
- Page 201 SiUS181631EA Service Diagnosis Step Action Press UP or DOWN button and change the UNIT No. until the indoor unit starts to beep. UP button DOWN button (R15408) If you hear... Then... 3 short beeps Follow all steps below. 1 short beep Follow steps 3 and 4.
- Page 202 Service Diagnosis SiUS181631EA Step Action Press UP or DOWN button to change the error code upper digit until the indoor unit beeps. DOWN UP button DOWN button (R15411) If you hear... Then... 2 short beeps The upper digit matches. 1 short beep No digits match.
- Page 203 SiUS181631EA Service Diagnosis Step Action Press UP or DOWN button and change the error code lower digit until the indoor unit generates long beep. DOWN UP button DOWN button (R15413) If you hear... Then... 2 short beeps No digits match. 1 long beep Both upper and lower digits match.
-
Page 204: Error Codes And Description
Error Codes and Description SiUS181631EA 3. Error Codes and Description Error code Description Reference page RA Indoor SA Indoor BP Unit Outdoor Unit Unit Unit Indoor Indoor unit PCB abnormality — — Unit Drain level control system abnormality — — —... - Page 205 SiUS181631EA Error Codes and Description Error code Description Reference page RA Indoor SA Indoor BP Unit Outdoor Unit Unit Unit Outdoor Low pressure sensor abnormality — — — Unit Outdoor unit PCB abnormality — — — Radiation fin temperature rise —...
-
Page 206: Troubleshooting For Ctxg, Ctxs, Ftxs, Cdxs, Fdxs, Fvxs Series
Troubleshooting for CTXG, CTXS, FTXS, CDXS, FDXS, FVXS Series SiUS181631EA 4. Troubleshooting for CTXG, CTXS, FTXS, CDXS, FDXS, FVXS Series Indoor Unit PCB Abnormality Error Code Method of Error The system checks if the circuit works properly within the microcomputer of the indoor unit. Detection Error Decision The system cannot set the internal settings. - Page 207 SiUS181631EA Troubleshooting for CTXG, CTXS, FTXS, CDXS, FDXS, FVXS Series Troubleshooting Be sure to turn off the power switch before connecting or disconnecting Caution connectors, or parts may be damaged. Combination of the indoor and outdoor Match the compatible unit matched? models.
-
Page 208: Freeze-Up Protection Control/Heating Peak-Cut Control
Troubleshooting for CTXG, CTXS, FTXS, CDXS, FDXS, FVXS Series SiUS181631EA Freeze-up Protection Control/Heating Peak-cut Control Error Code Method of Error Freeze-up protection control During cooling operation, the freeze-up protection control (operation halt) is activated according Detection to the temperature detected by the indoor heat exchanger thermistor. Heating peak-cut control During heating operation, the temperature detected by the indoor heat exchanger thermistor is used for the heating peak-cut control (operation halt, outdoor fan stop, etc.) -
Page 209: Indoor Fan Motor Or Related Abnormality
SiUS181631EA Troubleshooting for CTXG, CTXS, FTXS, CDXS, FDXS, FVXS Series Indoor Fan Motor or Related Abnormality 4.3.1 Indoor Fan Motor (DC Motor) or Related Abnormality Applicable CTXG09/12/18QVJUW(S) CTXS07JVJU Models CTXS09/12HVJU CTXS07LVJU FTXS09/12/15/18/24LVJU FVXS09/12/15/18NVJU Error Code Method of Error The rotation speed detected by the Hall IC during indoor fan motor operation is used to determine abnormal fan motor operation. - Page 210 Troubleshooting for CTXG, CTXS, FTXS, CDXS, FDXS, FVXS Series SiUS181631EA Troubleshooting Be sure to turn off the power switch before connecting or disconnecting Caution connectors, or parts may be damaged. Check the power supply Check No.02 voltage. Refer to P.206 Is the voltage fluctuation...
- Page 211 SiUS181631EA Troubleshooting for CTXG, CTXS, FTXS, CDXS, FDXS, FVXS Series 4.3.2 Indoor Fan Motor (AC Motor) or Related Abnormality (CDXS, FDXS Series) Applicable FDXS09/12LVJU CDXS15/18/24LVJU Models Error code Method of Error The rotation speed detected by the Hall IC during indoor fan motor operation determines abnormal Detection fan motor operation.
- Page 212 Troubleshooting for CTXG, CTXS, FTXS, CDXS, FDXS, FVXS Series SiUS181631EA Troubleshooting Be sure to turn off the power switch before connecting or disconnecting Caution connectors, or parts may be damaged. Check No.04 Check the power supply voltage. Refer to P.206 Is the voltage fluctuation Correct the power supply.
-
Page 213: Thermistor Or Related Abnormality
SiUS181631EA Troubleshooting for CTXG, CTXS, FTXS, CDXS, FDXS, FVXS Series Thermistor or Related Abnormality C4, C9 Error Code Method of Error The temperatures detected by the thermistors are used to determine thermistor errors. Detection Error Decision The voltage between both ends of the thermistor is either 4.96 V or more, or 0.04 V or less during compressor operation. -
Page 214: Front Panel Open/Close Fault
Troubleshooting for CTXG, CTXS, FTXS, CDXS, FDXS, FVXS Series SiUS181631EA Front Panel Open/Close Fault Applicable CTXG09/12/18QVJUW(S) Models Error Code Error Decision If the error repeats, the system is shut down. Conditions Supposed Defective reduction motor Malfunction or deterioration of the front panel mechanism Causes Defective limit switch Troubleshooting... -
Page 215: Check For Ctxg, Ctxs, Ftxs, Cdxs, Fdxs, Fvxs Series
SiUS181631EA Troubleshooting for CTXG, CTXS, FTXS, CDXS, FDXS, FVXS Series Check for CTXG, CTXS, FTXS, CDXS, FDXS, FVXS Series 4.6.1 Thermistor Resistance Check Check No.01 Disconnect the connectors of the thermistors from the PCB, and measure the resistance of each thermistor using a multimeter. -
Page 216: Hall Ic Check
Troubleshooting for CTXG, CTXS, FTXS, CDXS, FDXS, FVXS Series SiUS181631EA 4.6.2 Indoor Fan Motor Connector Check Check No.02 CTXG, CTXS, FTXS, FVXS Series 1. Check the connection of connector. 2. Check motor power supply voltage output (pins 4 - 7). 3. -
Page 217: Troubleshooting For Ffq Series
SiUS181631EA Troubleshooting for FFQ Series 5. Troubleshooting for FFQ Series Indoor Unit PCB Abnormality Error Code Method of Error The system checks the data from EEPROM. Detection Error Decision The data from the EEPROM is not received correctly. Conditions EEPROM (Electrically Erasable Programmable Read Only Memory): A memory chip that holds its content without power. -
Page 218: Drain Level Control System Abnormality
Troubleshooting for FFQ Series SiUS181631EA Drain Level Control System Abnormality Error Code Method of Error The float switch detects error. Detection Error Decision The water level reaches its upper limit and the float switch turns OFF. Conditions Supposed Defective drain pump Causes Improper drain piping work Clogged drain piping... -
Page 219: Indoor Fan Motor (Dc Motor) Or Related Abnormality
SiUS181631EA Troubleshooting for FFQ Series Indoor Fan Motor (DC Motor) or Related Abnormality Error Code Method of Error The rotation speed detected by the Hall IC during fan motor operation determines abnormal fan motor operation. Detection Error Decision The fan motor is not revved up. Conditions Supposed Layer short inside the fan motor winding... - Page 220 Troubleshooting for FFQ Series SiUS181631EA Troubleshooting Be sure to turn off the power switch before connecting or disconnecting Caution connectors, or parts may be damaged. Check the power supply voltage. Check No.02 Refer to P.218 Is the voltage fluctuation within Correct the power ±10% from the rated supply.
-
Page 221: Humidifier Or Related Abnormality
SiUS181631EA Troubleshooting for FFQ Series Humidifier or Related Abnormality Error Code Method of Error Water leakage from humidifier(s) is detected based on the float switch ON/OFF changeover while the system is not operating. Detection Error Decision The float switch changes from ON to OFF while the system is OFF. Conditions Supposed Defective float switch... -
Page 222: Thermistor Or Related Abnormality
Troubleshooting for FFQ Series SiUS181631EA Thermistor or Related Abnormality C4, C5, C9 Error Code Method of Error The temperatures detected by the thermistors determine thermistor errors. Detection Error Decision The voltage between the both ends of the thermistor is 4.96 V and more or 0.04 V and less during compressor operation. -
Page 223: Presence Sensor Or Floor Sensor Abnormality
SiUS181631EA Troubleshooting for FFQ Series Presence Sensor or Floor Sensor Abnormality Error Code Method of Error The system detects abnormality by the output signal from the sensor(s). Detection Error Decision The sensor is disconnected or shorted while the unit is running. Conditions Supposed Disconnection of connector... -
Page 224: Remote Controller Thermistor Abnormality
Troubleshooting for FFQ Series SiUS181631EA Remote Controller Thermistor Abnormality Error Code Method of Error Even if remote controller thermistor is faulty, system is possible to operate by system thermistor. Malfunction detection is carried out by the temperature detected by the remote controller Detection thermistor. -
Page 225: Signal Transmission Error (Between Indoor Unit And Remote Controller)
SiUS181631EA Troubleshooting for FFQ Series Signal Transmission Error (Between Indoor Unit and Remote Controller) Error Code Method of Error In case of controlling 1 indoor unit with 2 remote controllers, check the system using microcomputer if signal transmission between indoor unit and remote controller (main and sub) is normal. Detection Error Decision Normal transmission does not continue for specified period. -
Page 226: Signal Transmission Error (Between Main Remote Controller And Sub Remote Controller)
Troubleshooting for FFQ Series SiUS181631EA Signal Transmission Error (Between MAIN Remote Controller and SUB Remote Controller) Error Code Method of Error In case of controlling 1 indoor unit with 2 remote controllers, check the system using microcomputer if signal transmission between MAIN remote controller and SUB remote controller is normal. Detection Error Decision Normal transmission does not continue for specified period. -
Page 227: Mismatching Of Indoor Unit And Outdoor Unit
SiUS181631EA Troubleshooting for FFQ Series 5.10 Mismatching of Indoor Unit and Outdoor Unit Error Code Error Decision Improper combination of indoor and outdoor units Conditions Supposed Defective indoor unit PCB Indoor-outdoor unit transmission wiring error Causes Defective optional unit(s) wirings Improper power supply wiring of indoor unit Improper wiring of connecting wires between indoor/outdoor units Troubleshooting... -
Page 228: Check For Ffq Series
Troubleshooting for FFQ Series SiUS181631EA 5.11 Check for FFQ Series 5.11.1 Indoor Fan Motor Connector Check Check No.02 FFQ Series 1. Check the connection of connector. 2. Check motor power supply voltage output (pins 5 - 8). 3. Check motor control voltage (pins 5 - 4). 4. -
Page 229: Troubleshooting For Branch Provider (Bp) Unit
SiUS181631EA Troubleshooting for Branch Provider (BP) Unit 6. Troubleshooting for Branch Provider (BP) Unit Electronic Expansion Valve Abnormality Error Code Method of Error Detection by checking continuity and lack of connector Detection Error Decision No voltage applied when turning the power supply on Conditions Supposed Broken harness of electronic expansion valve coil... -
Page 230: Branch Provider (Bp) Unit Pcb Abnormality
Troubleshooting for Branch Provider (BP) Unit SiUS181631EA Branch Provider (BP) Unit PCB Abnormality Error Code Method of Error Check data from EEPROM Detection Error Decision When data could not be correctly received from the EEPROM EEPROM : Type of nonvolatile memory. Maintains memory contents even when the power supply Conditions is turned off. -
Page 231: Branch Provider (Bp) Liquid Or Gas Pipe Thermistor Abnormality
SiUS181631EA Troubleshooting for Branch Provider (BP) Unit Branch Provider (BP) Liquid or Gas Pipe Thermistor Abnormality Error Code Method of Error Detection Error Decision When the BP liquid or gas pipe thermistor has short circuit or open circuit Conditions Supposed Defective BP liquid or gas pipe thermistor Incorrect connection of BP liquid or gas pipe thermistor Causes... -
Page 232: Signal Transmission Error Between Indoor Unit And Branch Provider (Bp) Unit
Troubleshooting for Branch Provider (BP) Unit SiUS181631EA Signal transmission Error between Indoor Unit and Branch Provider (BP) Unit Error Code Method of Error The signal transmission data from the BP unit is checked whether it is normal. Detection Error Decision When the data sent from the BP unit cannot be received normally, or when the content of the data is abnormal. - Page 233 SiUS181631EA Troubleshooting for Branch Provider (BP) Unit Troubleshooting Be sure to turn off the power switch before connecting or disconnecting Caution connectors, or parts may be damaged. Check No.11 Push and hold the RESET Refer to P.225 button on the outdoor unit PCB for 5 seconds.
-
Page 234: Transmission Error Between Outdoor Unit And Branch Provider (Bp) Unit
Troubleshooting for Branch Provider (BP) Unit SiUS181631EA Transmission Error between Outdoor Unit and Branch Provider (BP) Unit Error Code Method of Error Transmission error is detected when the outdoor unit could not received the data from BP unit correctly. Detection Error Decision When the data from BP unit could not be correctly received continuously for 10 minutes Conditions... -
Page 235: Check For Branch Provider (Bp) Unit
SiUS181631EA Troubleshooting for Branch Provider (BP) Unit Check for Branch Provider (BP) Unit 6.6.1 Power Supply Waveforms Check Check No.11 Measure the power supply waveform between the pins L1 and L2 on the terminal board, and check the waveform disturbance. Check if the power supply waveform is a sine wave (Fig.1). -
Page 236: Troubleshooting For Outdoor Unit
Troubleshooting for Outdoor Unit SiUS181631EA 7. Troubleshooting for Outdoor Unit Outdoor Unit PCB Abnormality Error Code Method of Error Check data from EEPROM Detection Error Decision When data could not be correctly received from the EEPROM EEPROM: Type of nonvolatile memory. Maintains memory contents even when the power supply is Conditions turned off. -
Page 237: Actuation Of High Pressure Switch
SiUS181631EA Troubleshooting for Outdoor Unit Actuation of High Pressure Switch Error Code Method of Error Abnormality is detected when the contact of the high pressure switch opens. Detection Error Decision When the high pressure switch activation count reaches the number specific to the operation mode (Reference) Conditions Operating pressure: 4.0 MPa (1338 ftAq) - Page 238 Troubleshooting for Outdoor Unit SiUS181631EA Troubleshooting Be sure to turn off the power switch before connecting or disconnecting Caution connectors, or parts may be damaged. Check No.30 Check for the points shown below. (1) Is the stop valve open? Refer to P.263 (2) Is the high pressure switch connector properly connected to the main PCB (A1P)? (3) Does the high pressure switch have continuity? Are the...
-
Page 239: Actuation Of Low Pressure Sensor
SiUS181631EA Troubleshooting for Outdoor Unit Actuation of Low Pressure Sensor Error Code Method of Error Detection by the pressure value with the low pressure sensor Detection Error Decision When the low pressure is dropped under specific pressure Operating pressure: 0.07 MPa (23 ftAq) Conditions Supposed Abnormal drop of low pressure (Lower than 0.07 MPa (23 ftAq)) - Page 240 Troubleshooting for Outdoor Unit SiUS181631EA Troubleshooting Be sure to turn off the power switch before connecting or disconnecting Caution connectors, or parts may be damaged. Check No.31 Refer to P.264 Open the stop valve. Is the stop valve open? (1) Mount a pressure gauge on the low pressure service port.
-
Page 241: Compressor Motor Lock
SiUS181631EA Troubleshooting for Outdoor Unit Compressor Motor Lock Error Code Method of Error The position signal is taken from UVW line, and the malfunction is detected when any abnormality is observed in the phase-current waveform. Detection Error Decision When the compressor motor does not start up even in forced startup mode Conditions Supposed Compressor lock... -
Page 242: Outdoor Fan Motor Abnormality
Troubleshooting for Outdoor Unit SiUS181631EA Outdoor Fan Motor Abnormality Error Code Method of Error The error is determined according to the fan speed detected by Hall IC when the fan motor runs. Detection Error Decision When the fan runs with speed less than a specified one for 6 seconds or more when the fan motor running conditions are met Conditions When the error is generated 4 times, the system shuts down. -
Page 243: Moving Part Of Electronic Expansion Valve (Y1E, Y3E) Abnormality
SiUS181631EA Troubleshooting for Outdoor Unit Moving Part of Electronic Expansion Valve (Y1E, Y3E) Abnormality Error Code Method of Error System checks if the connector is disconnected, and the detection is based on the continuity of electronic expansion valve coil. Detection Error Decision No current is detected in the common (COM +) when power supply is ON. - Page 244 Troubleshooting for Outdoor Unit SiUS181631EA Troubleshooting Be sure to turn off the power switch before connecting or disconnecting Caution connectors, or parts may be damaged. Turn power supply off, and turn power supply on again. Return to normal? Could be other causes than malfunction (for example, noise etc.).
-
Page 245: Discharge Pipe Temperature Abnormality
SiUS181631EA Troubleshooting for Outdoor Unit Discharge Pipe Temperature Abnormality Error Code Method of Error The temperature detected by the discharge pipe thermistor determines the error. Detection Error Decision When the discharge pipe temperature rises to an abnormally high level (135 °C (275°F) and above) Conditions When the discharge pipe temperature rises suddenly (120 °C (248°F) and above for 10... -
Page 246: Refrigerant Overcharged
Troubleshooting for Outdoor Unit SiUS181631EA Refrigerant Overcharged Error Code Method of Error Excessive charging of refrigerant is detected during check operation by using outdoor temperature, outdoor heat exchanger temperature, and liquid pipe temperature. Detection Error Decision When the amount of refrigerant, which is calculated during check operation by using outdoor Conditions temperature, outdoor heat exchanger temperature, and liquid pipe temperature, exceeds the standard. -
Page 247: Outdoor Temperature Thermistor (R1T) Abnormality
SiUS181631EA Troubleshooting for Outdoor Unit Outdoor Temperature Thermistor (R1T) Abnormality Error Code Method of Error The temperature detected by the outdoor temperature thermistor determines the error. Detection Error Decision When the outdoor temperature thermistor has short circuit or open circuit Conditions Supposed Disconnection of thermistor... -
Page 248: Discharge Pipe Thermistor (R2T) Abnormality
Troubleshooting for Outdoor Unit SiUS181631EA 7.10 Discharge Pipe Thermistor (R2T) Abnormality Error Code Method of Error The temperature detected by discharge pipe thermistor determines the error. Detection Error Decision When a short circuit or an open circuit in the discharge pipe thermistor is detected Conditions Supposed Disconnection of thermistor... -
Page 249: Suction Pipe Thermistor (R3T, R5T) Abnormality
SiUS181631EA Troubleshooting for Outdoor Unit 7.11 Suction Pipe Thermistor (R3T, R5T) Abnormality Error Code Method of Error The temperature detected by the suction pipe thermistor determines the error. Detection Error Decision When a short circuit or an open circuit in the suction pipe thermistor is detected Conditions Supposed Disconnection of thermistor... -
Page 250: Outdoor Heat Exchanger Thermistor (R4T) Abnormality
Troubleshooting for Outdoor Unit SiUS181631EA 7.12 Outdoor Heat Exchanger Thermistor (R4T) Abnormality Error Code Method of Error The temperature detected by the outdoor heat exchanger thermistor determines the error. Detection Error Decision When a short circuit or an open circuit in the outdoor heat exchanger thermistor is detected Conditions Supposed Disconnection of thermistor... -
Page 251: Outdoor Liquid Pipe Thermistor (R7T) Abnormality
SiUS181631EA Troubleshooting for Outdoor Unit 7.13 Outdoor Liquid Pipe Thermistor (R7T) Abnormality Error Code Method of Error The temperature detected by the outdoor liquid pipe thermistor determines the error. Detection Error Decision When a short circuit or an open circuit in the outdoor liquid pipe thermistor is detected Conditions Supposed Disconnection of thermistor... -
Page 252: Subcooling Heat Exchanger Gas Pipe Thermistor (R6T) Abnormality
Troubleshooting for Outdoor Unit SiUS181631EA 7.14 Subcooling Heat Exchanger Gas Pipe Thermistor (R6T) Abnormality Error Code Method of Error The temperature detected by subcooling heat exchanger gas pipe thermistor determines the error. Detection Error Decision When the subcooling heat exchanger gas pipe thermistor is short circuited or open Conditions Supposed Disconnection of thermistor... -
Page 253: High Pressure Sensor Abnormality
SiUS181631EA Troubleshooting for Outdoor Unit 7.15 High Pressure Sensor Abnormality Error Code Method of Error The pressure detected by high pressure sensor determines the error. Detection Error Decision When the high pressure sensor is short circuit or open circuit Conditions Supposed Defective high pressure sensor Wrong connection with low pressure sensor... -
Page 254: Low Pressure Sensor Abnormality
Troubleshooting for Outdoor Unit SiUS181631EA 7.16 Low Pressure Sensor Abnormality Error Code Method of Error The pressure detected by low pressure sensor determines the error. Detection Error Decision When the low pressure sensor is short circuit or open circuit Conditions Supposed Defective low pressure sensor Wrong connection with high pressure sensor... -
Page 255: Outdoor Unit Pcb Abnormality
SiUS181631EA Troubleshooting for Outdoor Unit 7.17 Outdoor Unit PCB Abnormality Error Code Method of Error The error is detected based on the current value during waveform output before starting compressor. Detection The error is detected based on the value from current sensor during synchronous operation when starting the unit. -
Page 256: Radiation Fin Temperature Rise
Troubleshooting for Outdoor Unit SiUS181631EA 7.18 Radiation Fin Temperature Rise Error Code Method of Error Fin temperature is detected by the thermistor of the radiation fin. Detection Error Decision When the radiation fin temperature increases above 83°C (181.4°F) Conditions Supposed Defective main PCB (A1P) Defective radiation fin thermistor (FINTH) Causes... -
Page 257: Inverter Compressor Abnormality
SiUS181631EA Troubleshooting for Outdoor Unit 7.19 Inverter Compressor Abnormality Error Code Method of Error The error is detected from current flowing in the power transistor. Detection Error Decision When an excessive current flows in the power transistor (Instantaneous overcurrent also causes activation.) Conditions Supposed Defective compressor coil (disconnected, defective insulation) -
Page 258: Inverter Current Abnormality
Troubleshooting for Outdoor Unit SiUS181631EA 7.20 Inverter Current Abnormality Error Code Method of Error The error is detected by current flowing in the power transistor. Detection Error Decision When overload in the compressor is detected. (Inverter secondary current 16.1 A) (1) 19.0 A and over continues for 5 seconds. -
Page 259: Compressor Start-Up Error
SiUS181631EA Troubleshooting for Outdoor Unit 7.21 Compressor Start-up Error Error Code Method of Error The error is detected from current flowing in the power transistor. Detection Error Decision Starting control of the compressor does not complete. Conditions Supposed Defective compressor Large pressure difference before starting the compressor Causes Defective main PCB (A1P) -
Page 260: High Voltage Of Capacitor In Main Inverter Circuit
Troubleshooting for Outdoor Unit SiUS181631EA 7.22 High Voltage of Capacitor in Main Inverter Circuit Error Code Method of Error The error is detected according to the voltage waveform of main circuit capacitor built in the inverter. Detection Error Decision When the voltage waveform becomes identical with the waveform of the power supply open phase Conditions Supposed Defective main circuit capacitor... -
Page 261: Radiation Fin Thermistor Abnormality
SiUS181631EA Troubleshooting for Outdoor Unit 7.23 Radiation Fin Thermistor Abnormality Error Code Method of Error Resistance of radiation fin thermistor is detected when the compressor is not operating. Detection Error Decision When the resistance value of thermistor becomes a value equivalent to open or short circuited status Conditions ★... -
Page 262: Low Pressure Drop Due To Refrigerant Shortage Or Electronic Expansion Valve Abnormality
Troubleshooting for Outdoor Unit SiUS181631EA 7.24 Low Pressure Drop due to Refrigerant Shortage or Electronic Expansion Valve Abnormality Error Code Method of Error Refrigerant shortage is detected by discharge pipe thermistor and low pressure saturation temperature. Detection Error Decision Microcomputer judge and detect if the system is short of refrigerant. ★... - Page 263 SiUS181631EA Troubleshooting for Outdoor Unit Troubleshooting Be sure to turn off the power switch before connecting or disconnecting Caution connectors, or parts may be damaged. Low pressure is Cooling? Refrigerant shortage, 0.25 MPa (84 ftAq) closed stop valve or or less? refrigerant system is clogged.
-
Page 264: Power Supply Insufficient Or Instantaneous Failure
Troubleshooting for Outdoor Unit SiUS181631EA 7.25 Power Supply Insufficient or Instantaneous Failure Error Code Method of Error Detection of voltage of main circuit capacitor built in the inverter and power supply voltage. Detection Error Decision When the abnormal voltage of main circuit capacitor built in the inverter and abnormal power supply voltage are detected Conditions Supposed... -
Page 265: Check Operation Is Not Conducted
SiUS181631EA Troubleshooting for Outdoor Unit 7.26 Check Operation is not Conducted Error Code Method of Error Check operation is executed or not Detection Error Decision When the unit starts operation without check operation Conditions Supposed Check operation is not executed. Causes Troubleshooting Be sure to turn off the power switch before connecting or disconnecting... -
Page 266: Signal Transmission Error Between Indoor Unit And Outdoor Unit In The Same System
Troubleshooting for Outdoor Unit SiUS181631EA 7.27 Signal Transmission Error between Indoor Unit and Outdoor Unit in the Same System Error Code Method of Error Detection Error Decision Conditions Supposed Signal transmission error within system Defective electronic expansion valve in indoor unit of other system Causes Defective indoor unit PCB in other system Improper connection of transmission wiring between indoor and outdoor unit... -
Page 267: Excessive Number Of Indoor Units
SiUS181631EA Troubleshooting for Outdoor Unit 7.28 Excessive Number of Indoor Units Error Code Method of Error A difference occurs in data by the type of refrigerant between indoor and outdoor units. The number of indoor units is out of the allowable range. Detection Incorrect signals are transmitted among the indoor unit, BP unit, and outdoor unit. -
Page 268: Address Duplication Of Central Remote Controller
Troubleshooting for Outdoor Unit SiUS181631EA 7.29 Address Duplication of Central Remote Controller Error Code Method of Error The principal indoor unit detects the same address as that of its own on any other indoor unit. Detection Error Decision The malfunction decision is made as soon as the abnormality is detected. Conditions Supposed Address duplication of centralized remote controller... -
Page 269: Transmission Error Between Centralized Remote Controller And Indoor Unit
SiUS181631EA Troubleshooting for Outdoor Unit 7.30 Transmission Error between Centralized Remote Controller and Indoor Unit Error Code Method of Error Microcomputer checks if transmission between indoor unit and centralized remote controller is normal. Detection Error Decision When transmission is not carried out normally for a certain amount of time Conditions Supposed Transmission error between optional controllers for centralized control and indoor unit... - Page 270 Troubleshooting for Outdoor Unit SiUS181631EA Troubleshooting Be sure to turn off the power switch before connecting or disconnecting Caution connectors, or parts may be damaged. an indoor unit once connected Reset power supply been remove or its simultaneously for all address changed? optional controllers for...
-
Page 271: System Is Not Set Yet
SiUS181631EA Troubleshooting for Outdoor Unit 7.31 System is not Set yet Error Code Method of Error On check operation, the number of indoor units in terms of transmission is not corresponding to that of indoor units that have made changes in temperature. Detection Error Decision The malfunction is determined as soon as the abnormality aforementioned is detected through... -
Page 272: System Abnormality, Refrigerant System Address Undefined
Troubleshooting for Outdoor Unit SiUS181631EA 7.32 System Abnormality, Refrigerant System Address Undefined Error Code Method of Error The system detects an indoor unit to which auto address has not been assigned. Detection Error Decision The malfunction decision is made as soon as the abnormality is detected. Conditions Supposed Improper connection of transmission wiring between indoor and outdoor unit... -
Page 273: Check For Outdoor Unit
SiUS181631EA Troubleshooting for Outdoor Unit 7.33 Check for Outdoor Unit 7.33.1 Check for Causes of Rise in High Pressure Check No.30 Referring to the Fault Tree Analysis (FTA) shown below, probe the faulty points. ←Check to be sure the stop valve is open. Stop valve closed Local High pipe... - Page 274 Troubleshooting for Outdoor Unit SiUS181631EA 7.33.2 Check for Causes of Drop in Low Pressure Check No.31 Referring to the Fault Tree Analysis (FTA) shown below, probe the faulty points. In cooling ←Are the electrical characteristics normal? Faulty low pressure sensor (See ∗1.) Faulty compressor...
- Page 275 SiUS181631EA Troubleshooting for Outdoor Unit 7.33.3 Outdoor Fan Motor Connector Check Check No. 32 (1) Turn the power supply off. (2) With the fan motor connector disconnected, measure the resistance between each pin, then make sure that the resistance is more than the value mentioned in the following table. X106A, X107A (M1F, M2F) Measurement point...
- Page 276 Troubleshooting for Outdoor Unit SiUS181631EA 7.33.4 Check for the Factors of Overheat Operation Check No. 33 Identify the defective points referring to the failure factor analysis (FTA) as follows. Hot gas circuit clogging Faulty hot Defective solenoid ← Check if coil resistance and insulation gas bypass valve coil control...
-
Page 277: Thermistor Resistance/Temperature Characteristics
SiUS181631EA Thermistor Resistance/Temperature Characteristics 8. Thermistor Resistance/Temperature Characteristics Table 1 Applicable Indoor unit Indoor unit Outdoor unit BP unit thermistor R2T: Indoor heat exchanger R1T: Room temperature R1T: Outdoor temperature DGA - DGC: Gas pipe 1 (liquid pipe) DLA - DLC: Liquid pipe R3T: Indoor heat exchanger Outdoor unit R3T: Suction pipe 1... - Page 278 Thermistor Resistance/Temperature Characteristics SiUS181631EA Table 2 Applicable Outdoor unit Outdoor unit thermistor FINTH: Radiation fin R2T: Discharge pipe Thermistor Resistance (k Ω ) Resistance (k Ω ) temperature °C (°F) –30 (–22) 354.1 4759 –25 (–13) 259.7 3454 –20 (–4) 192.6 2534 –15 (5)
-
Page 279: Pressure Sensor
SiUS181631EA Pressure Sensor 9. Pressure Sensor 4.15 4.15 : High pressure (MPa) = × V – × 0.5 : Low pressure : Output Voltage (High Side) (VDC) (MPa) = × V – × 0.5 Detected Pressure : Output Voltage (Low Side) (VDC) 1 MPa = 334.6 ftAq (ftAq) (kgf/cm... -
Page 280: Method Of Replacing Inverter's Power Transistors Modules
Method of Replacing Inverter’s Power Transistors Modules SiUS181631EA 10.Method of Replacing Inverter’s Power Transistors Modules Check the power semiconductors mounted on the main PCB (A1P) with a multimeter. Items to be prepared Multimeter : Prepare the digital type of multimeter with diode check function. Preparation Turn OFF the power supply. - Page 281 SiUS181631EA Method of Replacing Inverter’s Power Transistors Modules Power module checking When using the digital type of multimeter, make measurement in diode check mode. Multimeter terminal Criterion Remark – Not less than 0.3 V It may take time to (including ∞ ) ∗ determine the voltage due to capacitor charge or else.
-
Page 282: Part 9 Appendix
SiUS181631EA Part 9 Appendix 1. Piping Diagrams..................273 1.1 Outdoor Unit ..................... 273 1.2 Branch Provider (BP) Unit ................ 274 1.3 Indoor Unit....................275 2. Wiring Diagrams..................278 2.1 Outdoor Unit ..................... 278 2.2 Branch Provider (BP) Unit ................ 279 2.3 Indoor Unit....................280 3. -
Page 283: Piping Diagrams
SiUS181631EA Piping Diagrams 1. Piping Diagrams Outdoor Unit RMXS48LVJU Electronic expansion valve Double pipe Fusible Electronic heat exchanger plug expansion valve Filter Heat exchanger Pressure regulating valve Filter Service port Four way valve High pressure Service port sensor Low pressure sensor Filter Capillary... -
Page 284: Branch Provider (Bp) Unit
Piping Diagrams SiUS181631EA Branch Provider (BP) Unit BPMKS048A2U INDOOR UNIT GAS SIDE ROOM A THERMISTOR ( DGA ) ( 5/8 CuT ) LOCAL PIPING SINGLE UNION JOINT GAS SIDE ROOM B REFRIGERANT FLOW THERMISTOR ( DGB ) ( 5/8 CuT ) HEATING LOCAL PIPING SINGLE UNION JOINT... -
Page 285: Indoor Unit
SiUS181631EA Piping Diagrams Indoor Unit CTXG09/12QVJUW(S) CTXG18QVJUW(S) Indoor unit Indoor unit Heat exchanger thermistor Heat exchanger thermistor 1/4 CuT 1/4 CuT Heat exchanger Heat exchanger Crossflow fan Crossflow fan Field piping Field piping 1/4 CuT 1/4 CuT Fan motor Fan motor Field piping Field piping 3/8 CuT... - Page 286 Piping Diagrams SiUS181631EA FTXS15/18LVJU FTXS24LVJU INDOOR UNIT INDOOR UNIT 5/16 CuT 5/16 CuT DISTRIBUTOR DISTRIBUTOR HEAT EXCHANGER HEAT EXCHANGER THERMISTOR THERMISTOR CROSS FLOW FAN CROSS FLOW FAN ON HEAT EXCH. ON HEAT EXCH. FIELD PIPING FIELD PIPING 1/4 CuT 1/4 CuT FAN MOTOR FAN MOTOR HEADER...
- Page 287 SiUS181631EA Piping Diagrams CDXS24LVJU FVXS09/12NVJU INDOOR UNIT MUFFLER ASSY HEAT EXCHANGER 1/4 CuT 9/32 CuT INDOOR UNIT ( 3/8CuT ) 1/4 CuT THERMISTOR ON HEAT EXCH. HEAT EXCHANGER 1/4 CuT FIELD PIPING TURBO FAN FAN MOTOR 1/4 CuT (1/4 CuT) THERMISTOR ON HEAT FIELD PIPING...
-
Page 288: Wiring Diagrams
Wiring Diagrams SiUS181631EA 2. Wiring Diagrams Outdoor Unit RMXS48LVJU POWER SUPPLY ~208/230V 60Hz GRN/YLW X37A H2P H4P H1P H3P ( BACK ) ( FRONT ) BS2 BS3 BS4 BS5 X205A EL , COMPO , BOX X37A NOTE ) 4 S1NPH X17A WHT LD X25A... -
Page 289: Branch Provider (Bp) Unit
SiUS181631EA Wiring Diagrams Branch Provider (BP) Unit BPMKS048A2U ( DLA ) ( DGA ) ( DLB ) ( DGB ) t˚ t˚ t˚ t˚ FIELD WIRING 2 DS2 X22A ROOM B ( BLU ) X21A LEDA ROOM A INDOOR ( RED ) LED1 ROOM A LED2... -
Page 290: Indoor Unit
Wiring Diagrams SiUS181631EA Indoor Unit CTXG09/12/18QVJUW(S) Wiring diagram : Frame ground : Signal receiver F1U, F2U : Fuse : Ground OUTDOOR H1P, H2P : Pilot lamp H1-H3 : Harness GRN/YLW R1T, R2T : Thermistor MR10 : Magnetic relay S25-S200 : Connector : Varistor GRN/YLW : Operation switch... - Page 291 SiUS181631EA Wiring Diagrams CTXS07JVJU, CTXS09/12HVJU FIELD WIRING. PCB3 PCB1 RECTIFIER 3.15A OUTDOOR t˚ CAUTION TRANSMISSION CIRCUIT NOTE THAT OPERATION WILL RESTART AUTOMATICALLY IF PCB4 THE MAIN POWER SUPPLY IS TURNED OFF AND THEN BACK ON AGAIN. LED1 LED2 LED3 : FRAME GROUND : FUSE H1~H3 : HARNESS...
- Page 292 Wiring Diagrams SiUS181631EA CTXS07LVJU, FTXS09/12LVJU PCB3 PCB1 LED1 OUTDOOR 3.15A C102 LED2 MR10 FIELD WIRING. LED3 C101 GRN/YLW TRANSMISSION CIRCUIT CAUTION NOTE THAT OPERATION WILL RESTART AUTOMATICALLY IF THE MAIN POWER SUPPLY IS TURNED OFF AND THEN BACK ON AGAIN. t˚...
- Page 293 SiUS181631EA Wiring Diagrams FTXS15/18/24LVJU PCB3 PCB1 LED1 OUTDOOR 3.15A C102 LED2 MR10 FIELD WIRING. LED3 C101 TRANSMISSION CIRCUIT CAUTION NOTE THAT OPERATION WILL RESTART AUTOMATICALLY IF THE MAIN POWER SUPPLY t˚ IS TURNED OFF AND THEN BACK ON AGAIN. : BUZZER RTH1 C101, C102 : CAPACITOR...
- Page 294 Wiring Diagrams SiUS181631EA FDXS09/12LVJU, CDXS15/18/24LVJU → V1TR 3.15A OUTDOOR LED LED GRN/YLW FIELD WIRING. TERMINAL FOR CAUTION TRANSMISSION CENTRALIZED CONTROL CIRCUIT NOTE THAT OPERATION WILL RESTART AUTOMATICALLY IF THE MAIN POWER SUPPLY IS TURNED OFF AND THEN BACK SIGNAL ON AGAIN. RECEIVER RTH1 H1P~H3P...
- Page 295 SiUS181631EA Wiring Diagrams FVXS09/12/15/18NVJU PCB3 PCB2 → RECTIFIER S2W ( 4 ) 3.15A OUTDOOR GRN/YLW MR10 FIELD WIRING. WIRELESS TRANSMISSION REMOTE CIRCUIT CAUTION CONTROLLER PCB4 NOTE THAT OPERATION WILL SIGNAL RESTART AUTOMATICALLY IF RECEIVER THE MAIN POWER SUPPLY IS TURNED OFF AND THEN BACK LED2 LED1 3.15A...
- Page 296 Wiring Diagrams SiUS181631EA FFQ09/12/15/18Q2VJU INDOOR UNIT PILOT LAMP (ON-RED) PRINTED CIRCUIT BOARD PILOT LAMP WIRING DIAGRAM WIRELESS REMOTE CONTROLLER C105 (TIMER-GREEN) CAPACITOR (M1F) (RECEIVER/DISPLAY UNIT) DIP SWITCH ON PCB PILOT LAMP (OPTIONAL ACCESSORY) FUSE (F, 5A, 250V) (FILTER SIGN-RED) FLASHING LAMP PILOT LAMP (SERVICE MONITOR GREEN) (DEFROST-ORANGE)
-
Page 297: Operation Limit
SiUS181631EA Operation Limit 3. Operation Limit RMXS48LVJU Heating Cooling Indoor temp. (˚ FWB ) Indoor temp. (˚ FDB ) Notes : The graphs are based on the following conditions. • Equivalent piping length 16.4ft From outdoor unit to BP unit From BP unit to each indoor units 9.8ft •... - Page 298 Revision History Month / Year Version Revised contents 09 / 2016 SiUS181631E First edition 03 / 2017 SiUS181631EA Model addition: FFQ18Q2VJU...
- Page 299 Improper installation can result in water or refrigerant leakage, electrical shock, fire or explosion. Use only those parts and accessories supplied or specified by Daikin. Ask a qualified installer or contractor to install those parts and accessories. Use of unauthorized parts and accessories or improper installation of parts and accessories can result in water or refrigerant leakage, electrical shock, fire or explosion.
Need help?
Do you have a question about the RMXS-L Series and is the answer not in the manual?
Questions and answers