Table of Contents
Advertisement
Quick Links
Advertisement
Table of Contents

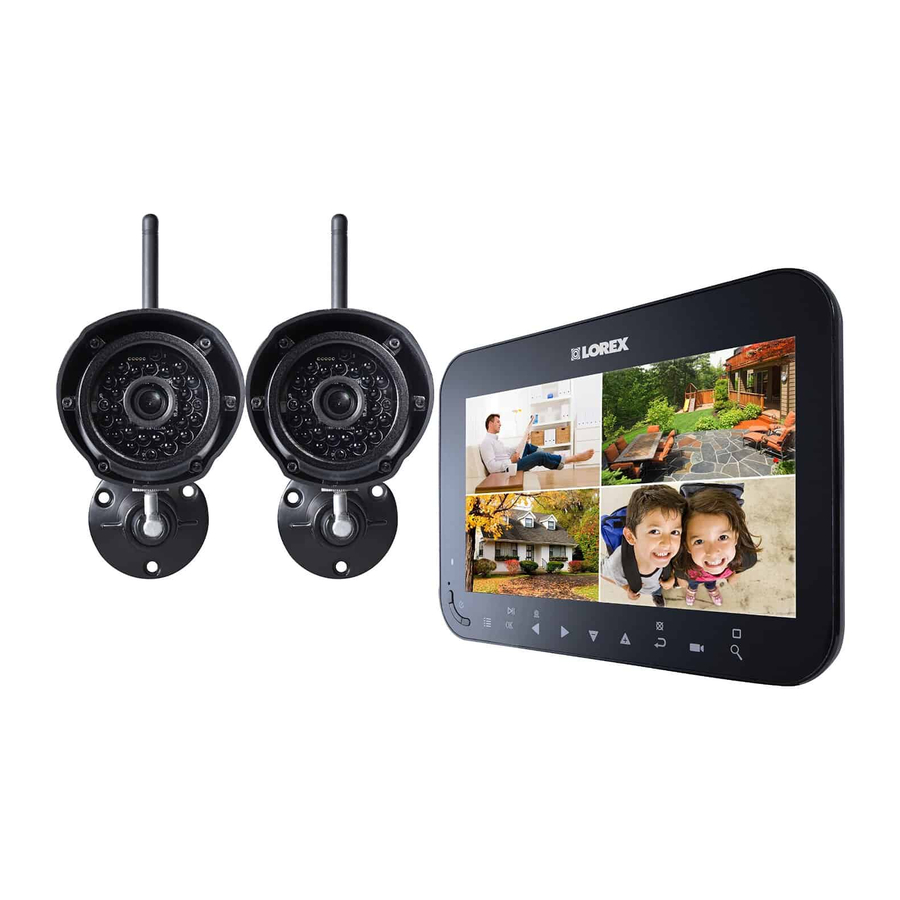
Related Manuals for Lorex LW1741


Summary of Contents for Lorex LW1741
- Page 1 USER’S GUIDE LW1741SERIES...
- Page 2 USER’S GUIDE LW1741SERIES #LX400030; r.16602/16610; en-US...
- Page 3 Thank you for purchasing this product. Lorex is committed to providing our customers with a high quality, reliable security solution. This manual refers to the following models: LW1741 LW1742 LW1744 For the latest online manual, downloads and product updates, and to learn about our complete line of accessory products, please visit our website at: www.lorextechnology.com...
-
Page 4: Table Of Contents
Table of contents Important Safeguards ................1 General Precautions..............1 Installation................. 1 Service ..................3 Use..................3 LW1740 Series Features ...............4 Getting Started..................5 Installing the Camera(s) ...............6 Installation Tips ................6 Mounting Positions..............6 Installing the Receiver................9 Camera Overview ................12 LCD Receiver Overview.............. -
Page 5: Important Safeguards
Important Safeguards In addition to the careful attention devoted to quality standards in the manufacturing proc- ess of your product, safety is a major factor in the design of every instrument. However, safety is your responsibility too. This sheet lists important information that will help to en- sure your enjoyment and proper use of the product and accessory equipment. - Page 6 Important Safeguards 5. Power Sources - This product should be operated only from the type of power source indicated on the marking label. If you are not sure of the type of power supplied to your location, consult your video dealer or local power company. For products intended to operate from battery power, or other sources, refer to the operating instructions.
-
Page 7: Service
Important Safeguards 17. Camera Installation - Cameras are not intended for submersion in water. Not all cam- eras can be installed outdoors. Check your camera environmental rating to confirm if they can be installed outdoors. When installing cameras outdoors, installation in a sheltered area is required. -
Page 8: Lw1740 Series Features
For outdoor applications, install under shelter protected from the elements. Audio recording without consent is illegal in certain jurisdictions. Lorex Corporation assumes no li- ability for use of its products that does not conform with local laws. -
Page 9: Getting Started
Getting Started The system includes the following components: Indoor / outdoor wireless camera Power adapters for receiver and 7” rechargeable LCD receiver / (s)* camera(s)* recorder Rechargeable Lithium polymer Wireless antenna for camera Camera mounting stand* battery (SMA)* 4GB microSD memory card Mounting kit(s)* Quick Start Guide * Configuration may vary by model... -
Page 10: Installing The Camera(S)
Installing the Camera(s) CAUTION Cameras are suitable for outdoor installation, but are weather resistant, not weatherproof. Cameras are not intended for direct exposure to rain or snow. For outdoor applications, install under shelter pro- tected from the elements, such as beneath roof eaves. The diagram below shows an example of an ideal location for outdoor placement. - Page 11 Installing the Camera(s) Wall Counter To install the camera(s): 1. Use the included mounting screws to attach the camera stand(s) to the mounting surface: • Mark the positions of the screw holes on the mounting surface with the base of the mounting stand.
- Page 12 Installing the Camera(s) 3. Loosen the adjustment ring on the metal camera stand(s) and move the camera to the desired position. Tighten the adjustment ring when finished, holding the camera firmly in position. 4. Connect one end of the camera’s power adapter to the camera and the other end to an electrical outlet or surge protector.
-
Page 13: Installing The Receiver
Installing the Receiver 1. Use a Phillips screwdriver (not included) to open the battery compartment on the back panel. 2. Insert the included battery so the statement "THIS SIDE UP" is visible, and the clear plastic tabs on the side of the battery face outwards. Replace the battery compartment cover. - Page 14 Installing the Receiver 3. Connect the included power adapter to the receiver and to an electrical outlet. 4. Charge the receiver overnight before using for the first time. 5. Pull up the antenna on the back of the LCD receiver. 6.
- Page 15 Installing the Receiver • The receiver comes with a 4 GB microSD card pre-inserted, so you can start recording right away. The receiver is compatible with most major brands of microSD cards up to 32 GB. For recording times on microSD cards, see CROSSREF. #LX400030;...
-
Page 16: Camera Overview
Camera Overview Pair 1. Antenna: Removable wireless antenna (SMA) 2. IR LEDs: Night vision IR LEDs. 3. Lens 4. Pair: Press to pair additional cameras to the system. See 12 Pairing Additional Cam- eras, page 30 for full details. 5. Microphone: Built-in microphone for listen-in audio. 6. -
Page 17: Lcd Receiver Overview
LCD Receiver Overview 7.1 Front Panel 1. LCD Screen 2. Indicator LED: Indicates system status in the following ways: • Solid green: Indicates that battery life is half-full or greater. • Solid red: Indicates that the receiver is plugged in and turned off. •... -
Page 18: Side Panel
The receiver supports microSD cards up to 32 GB. • Lorex recommends microSD or microSDHC cards for use with this receiver. The following brands of microSD cards are confirmed by Lorex: Adata, Kingston, Patriot, Sandisk, and Toshiba. 7.3 Rear Panel 1. -
Page 19: Using The System
Using the System By default, the camera(s) included with your system are automatically paired to the re- ceiver. The camera(s) and receiver will communicate with each other once they are pow- ered on. Note It is recommended to power on the camera(s) before powering on the receiver. 8.1 Understanding the On-screen Display With camera 1 properly connected and powered on, the system displays a full-screen live view of the camera. -
Page 20: Navigating Menu Screen
Using the System 2014/0 8/18 17:14:18 1. Channel indicator: Displays the camera you are presently viewing. If viewing multiple cameras at once, the camera indicator will appear above each video display. 2. Viewing mode indicator: Indicates the viewing mode by showing a different icon for Single Channel Viewing ( ), Quad Viewing ( ), and Auto Sequence... -
Page 21: Viewing Modes
Using the System • Press to open the Main Menu. • Press the keys to move the cursor left, right, up, and down. • Press to open sub-menus and confirm menu selections. • Press to save changes and exit menus. 8.3 Viewing Modes There are 3 different viewing modes available on the system: Single Channel Viewing mode, Auto Sequence Viewing mode (view individual channels automatically in se-... -
Page 22: Quad Mode
Using the System 8.3.2 Quad Mode Use Quad Viewing mode to view up to four cameras simultaneously. To enable Quad mode: • Press until a split-screen display appears with the Quad icon ( ) at the top of the display. The receiver displays all 4 channels simultaneously. Quad Example 8.4 Digital Zoom The digital zoom feature allows you to zoom in 2x on a single camera during live viewing. - Page 23 Using the System Note There is no audio in Quad mode. #LX400030; r.16602/16610; en-US...
-
Page 24: Setting The Time
Setting the Time It is highly recommended to set the date and time on the system prior to recording, as they will be used to stamp recordings. You must set the correct date and time in order to use schedule recording. To set the time: 1. -
Page 25: Recording
208 hours 32 GB Note The system supports microSD or microSDHC cards up to 32 GB. The following brands of microSD cards are confirmed by Lorex: Adata, Kingston, Patriot, Sandisk, and Toshiba. Recording Mode Summary: Mode Description How to Operate Manual Recording •... -
Page 26: Format Memory
Recording 10.1 Format Memory It is highly recommended to format the microSD card prior to initial recording. To format the microSD card: CAUTION Formatting erases all data on the microSD card. This step cannot be undone. 1. Insert the microSD card into the card slot on the receiver until you hear a "click." Please insert the card according to the diagram on the side panel of the receiver. - Page 27 Recording To create a recording schedule: 1. Press , then select the Recording Schedule Setting icon. Press confirm. 2. Use the keys to select the first available slot and press #LX400030; r.16602/16610; en-US...
-
Page 28: Stopping Scheduled Recording
Recording 3. Use the keys to move the selection between the start time, end time, and schedule type. Use the keys to configure each item. Press to save the schedule. • For scheduled continuous recording: See the following example. The system begins recording continuously at 7:00PM and stops recording at 10:00AM each day. - Page 29 Recording 1. Press , then select the Recording Schedule Setting icon. Press confirm. 2. Use the keys to select the schedule you would like to modify and press 3. Use the keys to move the selection between the start time, end time, and schedule type.
-
Page 30: Manual Recording
Recording 10.3 Manual Recording Manual recording allows you to manually start and stop recording. You can record video from one channel in full-screen, or all 4 channels in Quad or Auto Sequence Viewing mode. When should I use manual recording? •... - Page 31 Recording 2. Select Overwrite and press 3. Select ON and press to enable file overwrite. 4. Press repeatedly until all menus are closed. #LX400030; r.16602/16610; en-US...
-
Page 32: Playback
Playback Playback mode allows you to playback recorded video files and view snapshots from the microSD card. You can view videos and snapshots directly on the system or by connecting the microSD card to your computer. 11.1 Video Playback To playback recorded video on the system: 1. -
Page 33: Mac
Playback 11.2.1 PC Note You can view ASF files natively in Windows Media Player™, as well as other media players such as VLC. VLC is an open-source software application available at www.videolan.org To playback recorded video on a PC: 1. Remove the microSD card from the receiver by gently pushing on the microSD card and then releasing. -
Page 34: Pairing Additional Cameras
Pairing Additional Cameras Note If you have purchased additional cameras, it is highly recommended to pair the cameras to the receiver before permanent installation. "Pairing" is an electronic handshake between wireless devices. Wireless devices and components need to be paired in order to communicate with each other. The camera(s) provided with the system have already been paired to the receiver. - Page 35 Pairing Additional Cameras 4. Use the arrow keys on the receiver to select the channel you want to pair the camera to. Channels that are paired to an existing camera show the statement PAIR OK, while open channels show NO PAIR. Press on the desired channel to begin pairing.
-
Page 36: Technical Specifications
Technical Specifications 13.1 General Specifications Description Specification Transmission Frequency 2,400 ~ 2,483.5MHz Transmission Power 16dBm(Camera) 20dBm(Monitor) Data Rate 3 Mbps Unobstructed Wireless Range Up to 450ft (m) outdoors Up to 150ft (m) indoors (disclaimer!) Spread Spectrum FHSS Modulation GFSK Operating Humidity <... -
Page 37: Dimensions
Technical Specifications Description Specification Dimensions (W x D x H) 7.4” x 5.2” x 0.7” 188mm x 132mm x 17mm Weight 13.4 Dimensions 13.4.1 LCD Receiver 0.7” / 7.4” / 17mm 188mm 5.2” / 132mm 13.4.2 Camera with Metal Stand 3.1”... -
Page 38: Troubleshooting
The signal range also depends on whether there are competing signals using the same frequency as the camera. For example, signals from cordless phones or routers may affect signal strength. Adaptive Frequency Hopping Spread Spectrum (FHSS) technology fea- tured in the latest Lorex models greatly reduces signal interference. Range Limiting Factors Reflection... -
Page 39: Frequently Asked Questions
Q: How many frames per second should I expect from a digital wireless camera? A: Current Lorex digital wireless cameras offer 10 - 30 FPS (Frames Per Second) perform- ance. Actual frame rate depends mainly on signal strength (see the chart in section above). - Page 40 Legal disclaimer As our product is subject to continuous improvement, Lorex Corporation & subsidiaries reserve the right to modify product design, specifications & prices without notice and without incurring any obligation.E&OE.
-
Page 41: Fcc Caution
FCC Caution: Any Changes or modifications not expressly approved by the party responsible for compliance could void the user's authority to operate the equipment. This device complies with part 15 of the FCC Rules. Operation is subject to the following two conditions: (1) This device may not cause harmful interference, and (2) this device must accept any interference received, including interference that may cause undesired operation.
Need help?
Do you have a question about the LW1741 and is the answer not in the manual?
Questions and answers