Brune B500 Operating Instructions Manual
Evaporation humidifier professional
Hide thumbs
Also See for B500:
- Operating instructions manual (21 pages) ,
- Operating instructions manual (89 pages)
Table of Contents
Advertisement
Advertisement
Table of Contents

Related Manuals for Brune B500


Summary of Contents for Brune B500
- Page 1 READ AND SAVE THESE INSTRUCTIONS!
- Page 2 Fax: +49 6262 32 55 E-mail: mail@brune.info Internet: www.brune.info Translation of the original operating manual Prok-22117-DE, 4, en_US This manual was created by: Kothes! Technische Kommunikation GmbH & Co. KG Internet: www.kothes.de © Brune Luftbefeuchtung Proklima GmbH 2015 Evaporation Humidifier B500 Professional...
- Page 3 Information about this manual This manual facilitates safe and efficient use of the Evaporation Humidifier B500 Professional. This manual is an integral part of the humidifier and must be stored, readily accessible for the personnel, in close proximity to the device.
-
Page 4: Table Of Contents
Table of contents Table of contents The Evaporation Humidifier B500 Professional....6 1.1 Complete overview............6 1.2 Remote control............. 8 1.3 Wireless sensor system..........8 1.4 Control panel..............9 1.5 Functional description..........10 Safety................. 11 2.1 Symbols in this manual..........11 2.2 Intended use............... - Page 5 Disposing of the humidifier..........77 Technical data..............78 11.1 Dimensions and weight..........78 11.2 Connection values............ 78 11.3 Performance data............. 78 11.4 Operating conditions..........78 11.5 Emissions..............79 11.6 Type plate..............79 Index................... 80 Appendix................82 Evaporation Humidifier B500 Professional...
-
Page 6: The Evaporation Humidifier B500 Professional
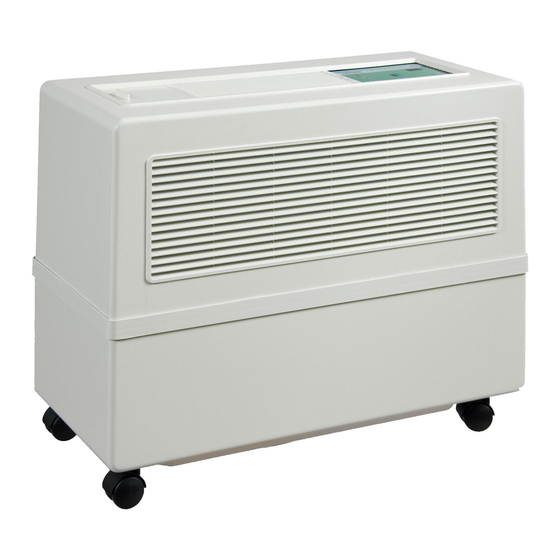
The Evaporation Humidifier B500 Professional The Evaporation Humidifier B500 Professional 1.1 Complete overview Fig. 1: Evaporation Humidifier B500 Filling opening Air inlet opening Air outlet opening Water tank Control panel Cover Accessories The following chapters provide only the description of the humidifier standard version. - Page 7 Scope of delivery Fig. 2: Scope of delivery Item Quantity Name Fig. 1 Evaporation Humidifier B500 Professional, incl. power plug Wireless sensor system AA batteries for wireless sensor system Remote control AAA batteries for remote control Cleaning brush Operation manual...
-
Page 8: Remote Control
The Evaporation Humidifier B500 Professional 1.2 Remote control Item Name Function [Humidity] The target value for the air humidity can rocker switch be set using the [Humidity] rocker switch. By pressing the "+" or "-" area several times or continuously, the desired humidity value can be increased or decreased. -
Page 9: Control Panel
The Evaporation Humidifier B500 Professional 1.4 Control panel The control panel provides information about the state of the device. It provides information about the current water level, the current air humidity value and any possible device malfunctions. Fig. 5: Control panel... -
Page 10: Functional Description
The Evaporation Humidifier B500 Professional 1.5 Functional description Fig. 6: Functional principle The humidifier B500 operates based on the natural principle of evaporation. A water pump continuously delivers water from the water tank (Fig. 6/3) to the oval water channel (Fig. 6/2). The water seeps through the drainage holes inside the channel and moistens the evaporation filter (Fig. -
Page 11: Safety
Safety instructions may refer to specific, individual procedural instructions instructions. Such safety instructions are embedded in the proce- dural instructions, so that they do not interrupt the flow of reading when performing the action. The signal words described above are used. Evaporation Humidifier B500 Professional... -
Page 12: Intended Use
Operating controls (e.g. buttons, switches), display elements (e.g. indicator lamps) 2.2 Intended use The Evaporation Humidifier B500 Professional is used exclu- sively to humidify the room air in residential and professional environments. The observation of all the information in this manual is also part of the intended use. -
Page 13: Symbols On The Device
Safety WARNING! Danger from improper use! Improper use of the Evaporation Humidifier B500 Pro- fessional can lead to dangerous situations. – Only fill the humidifier with normal tap water (max. 30 °C, 86 °F) or with treated water with at least 300 microsiemens. -
Page 14: Safety And Dangers
The humidifier has been designed according to the state of the art and according to current safety requirements. However, residual risks that require careful handling still exist. The residual risks and the resulting conduct and measures are listed below. Evaporation Humidifier B500 Professional... - Page 15 Always first disconnect the power plug prior to cleaning or troubleshooting. – Never touch the power plug with wet hands. – When pulling the power plug never pull on the cable but always the plug. – Never pull the device using the cable. Evaporation Humidifier B500 Professional...
- Page 16 – Always supervise children to ensure that they do not play with the device, or use the device as a climbing aid. Evaporation Humidifier B500 Professional...
- Page 17 This could lead to injuries. – Place the humidifier on a horizontal surface. – Immediately mop up water puddles using a cloth. – Regularly check the safety collecting basin (optional accessory) and empty it if required. Evaporation Humidifier B500 Professional...
-
Page 18: Responsibilities Of The Operator
The operator must provide the personnel with the necessary protective gear and instruct that wearing the required protective gear is mandatory. The operator must ensure that the cleaning intervals described in this manual are observed. Evaporation Humidifier B500 Professional... -
Page 19: Personnel Requirements
Certain work may only be performed by specialized staff of the manufacturer. Other personnel are not authorized to perform such work. To perform the required work, please contact our customer service. Operator The operator uses and operates the device within the limits of intended use. Evaporation Humidifier B500 Professional... -
Page 20: Environmental Protection
The following environmentally hazardous substances are used: Batteries Batteries contain toxic heavy metals. They are subject to special refuse treatment and must be deposited at municipal collection points or be disposed of by a specialist company. Evaporation Humidifier B500 Professional... -
Page 21: Transport And Storage
The arrow tips of the symbol indicate the upper part of the package. They should always point upwards to prevent damage to the contents. 3.3 Storage of packages Store packages under the following conditions: Do not store outdoors. Store dry and free of dust. Evaporation Humidifier B500 Professional... -
Page 22: Inspection Of Delivery
41). Clean the humidifier ( Ä Chapter 6.3.4 “Decalcifying the device” on page 45). Store the humidifier according to the information provided Ä Chapter 3.3 “Storage of packages” on page 21. under Evaporation Humidifier B500 Professional... -
Page 23: Transporting The Humidifier
(Fig. 7/arrow). To do so, grasp the humidifier at the green marked area (Fig. 7). Fig. 7: Moving the humidifier If the humidifier is moved back and forth, grasp it underneath as well (Fig. 8). Fig. 8: Moving the humidifier back and forth Evaporation Humidifier B500 Professional... -
Page 24: Start-Up
However, the direct temperature influ- ence should not exceed 70 °C (158 °F). On water-sensitive flooring, additional safety measures must be provided. 4.3 Commissioning the humidifier for the first time Proceed as follows to commission the humidifier: Evaporation Humidifier B500 Professional... - Page 25 Fig. 10: Incorrect filter placement Remote control Replace the device cover. Commissioning the wireless Personnel: Operator sensor system Carefully lift and remove the cover of the wireless sensor system using a small screwdriver. Fig. 11: Opening the cover Evaporation Humidifier B500 Professional...
- Page 26 Switch on the humidifier using the [ON/OFF] button on the remote control. Enter the desired value for the air humidity using the [Humidity] rocker switch ( Ä Chapter 5.4 “Setting the desired air humidity” on page 34) on the remote control. Evaporation Humidifier B500 Professional...
-
Page 27: Coding The Wireless Sensor System
Several devices are operated via one sensor. For this, all devices should have the same coding. Each device is controlled via a separate sensor. For this, all devices have to be coded differently. Fig. 15: Slide controls for coding Evaporation Humidifier B500 Professional... - Page 28 Code the wireless sensor system by setting the slide controls (Fig. 17/1) using a suitable non-metallic object. Close the cover plate of the wireless sensor system again. Fig. 17: Coding the wireless sensor system Evaporation Humidifier B500 Professional...
- Page 29 The electronics of the control panel are very sen- sitive. Ensure that you do not touch the elec- tronics and do not damage any components. Remove the control panel and place on the operating side (Fig. 20). Fig. 20: Removing the control panel Evaporation Humidifier B500 Professional...
- Page 30 Close the cover of the device again. Check that the system functions. To do so, carefully breathe into the housing of the wireless sensor system. ð The actual value indicated on the control panel changes. The wireless sensor system is operational. Evaporation Humidifier B500 Professional...
-
Page 31: Operating The Humidifier
When in automatic function, the device controls the fan speed independently, depending on the required output. This means that any change of air humidity is measured via the wireless sensor system, and the fan speed is increased or decreased accordingly. Evaporation Humidifier B500 Professional... -
Page 32: Switching On And Off
5.3 Filling the water tank Improper filling DANGER! Risk of electric shock from improper filling! Improper filling can lead to death or serious injury from electrical shock. – Carefully pour in water. – Always use a funnel for filling. Evaporation Humidifier B500 Professional... - Page 33 Using a watering can, carefully fill the water tank (up to 50 liters / 13.2 gallons). Close the fill flap again. Fig. 22: Opening the fill flap ð The [Water level indicator] shows the current fill level (max. 5 bars). Evaporation Humidifier B500 Professional...
-
Page 34: Setting The Desired Air Humidity
Now increase or decrease the fan speed using the "+" and "-" area of the [Fan] rocker switch. ð The current fan speed level is shown in the [Fan speed level indicator]. Proceed as follows to activate the fan automatic: Evaporation Humidifier B500 Professional... -
Page 35: Changing The Menu Settings
(display of the actual humidity value). The programming process can be cancelled at any time by pressing the [ON/OFF] button. In this case, the performed changes are lost. Evaporation Humidifier B500 Professional... - Page 36 01 = ON Relay active if fill amount of 00 = OFF water tank ≥ 50 liters (13.2 01 = ON gallons). Relay active during missing 00 = OFF radio signal. 01 = ON Evaporation Humidifier B500 Professional...
- Page 37 230 V switch-on mecha- 90%. The actual value con- 01 = ON nism. stantly shows 00%. The fan setting is freely selectable. Adjustment/control interval of 01 ... 10 min. Depending on room size. fan during automatic opera- tion. Evaporation Humidifier B500 Professional...
-
Page 38: Cleaning And Servicing The Humidifier
– Always clean on a water-resistant surface. – Ensure that electronic components do not come into contact with water. – Ensure that the device is dry before recommis- sioning. Evaporation Humidifier B500 Professional... -
Page 39: Cleaning Schedule
Ä Chapter 6.3.4 “Decalcifying the device” on page 45). Clean the UV degermination system and lime transforming cartridge Operator Ä Chapter 8.6.1 “Cleaning the UV degermina- (optional accessory) ( tion system and lime transforming cartridge” on page 67). Evaporation Humidifier B500 Professional... -
Page 40: Cleaning Tasks
Fig. 23: Removing the cover Check the drainage holes of the water distribution (Fig. 24/1) for blockages. Remove residues such as lime or dust using a needle, a screwdriver or wet vacuum cleaner. Fig. 24: Cleaning the drainage holes Evaporation Humidifier B500 Professional... -
Page 41: Replacing The Evaporation Filter
Spare evaporation filters can be ordered from your local specialized retailer (order number: 1603). Removing the old filter Personnel: Operator WARNING! Risk of electrical shock if the power plug is not disconnected! Switch off the humidifier and disconnect the power plug. Evaporation Humidifier B500 Professional... - Page 42 Press the filter bracket together and unhinge it (Fig. 28). Fig. 28: Removing the filter bracket Unlatch the attachment hooks from the filter. Then loosen the filter along the water distribution and remove. Fig. 29: Filter removed Evaporation Humidifier B500 Professional...
- Page 43 Insert the clamping brackets again. Ensure correct fit of the clamping brackets. The filter should not touch the housing, as this could cause water leakage. Replace the cover of the humidifier. Fig. 32: Inserting the clamping brackets Evaporation Humidifier B500 Professional...
-
Page 44: Cleaning The Water Tank
To avoid lime remover residues, flush the water tank thor- oughly with tap water. Place the center piece back into the water tank and replace the cover. Fig. 34: Removing the center piece Evaporation Humidifier B500 Professional... -
Page 45: Decalcifying The Device
Before decalcifying, observe the instructions on the packaging of the lime remover. – To achieve the best results, we recommend Optima lime remover (order no. 9016) from Brune. – For decalcifying, place the device on a suitable, nonsensitive surface. Preparation... - Page 46 Lift the center piece from the water tank and place it on the side surface (Fig. 37). Place a suitable container under the pump hoses to collect any possible residual water. Fig. 37: Removing the center piece Evaporation Humidifier B500 Professional...
- Page 47 To avoid lime remover residues in the device, flush the water tank thoroughly with tap water. Place the center piece back into the water tank and replace the cover. Fig. 41: Cleaning the copper elec- trodes Evaporation Humidifier B500 Professional...
- Page 48 Cleaning and servicing the humidifier Vacuum the surface of the fan (Fig. 42/1) using a vacuum nozzle. Fig. 42: Vacuuming the fan Evaporation Humidifier B500 Professional...
-
Page 49: Detecting And Remedying Malfunctions
For all other problems, contact the manufacturer. 7.2 Malfunction indication The Evaporation Humidifier B500 Professional has an independent monitoring system that can quickly and reliably detect errors and respond accordingly. If a malfunction is present, it is displayed on the malfunction indica- tion on the control panel. - Page 50 Check the coding of the wireless sensor system Ä Chapter 4.4 “Coding the wireless sensor system” on page 27). Several errors occurred at Check the device as described in errors 01 - 05. User the same time. Evaporation Humidifier B500 Professional...
-
Page 51: Error Table
Clean the water distribution and the Operator Ä Chapter flowing. are blocked. drainage holes ( 6.3.1 “Monthly cleaning” on page 40). Water is leaking from the The water tank is Check the water tank for damage. Operator device. leaking. Evaporation Humidifier B500 Professional... - Page 52 Newly inserted batteries do The batteries have Insert the batteries correctly Operator Ä Chapter 4.3 “Commissioning the not work. been incorrectly inserted – polarity not humidifier for the first time” observed. on page 24). Evaporation Humidifier B500 Professional...
-
Page 53: Remedying Errors
Risk of electrical shock if the power plug is not disconnected! Switch off the humidifier and disconnect the power plug. Lift the cover of the humidifier upwards and place it to the side (Fig. 43). Fig. 43: Removing the cover Evaporation Humidifier B500 Professional... - Page 54 ð The water pump is located at the bottom on the right- hand side (Fig. 45/1). Fig. 45: Water pump To collect any possible residual water, place a suitable con- tainer under the pump hoses (Fig. 46/1). Remove the pump hoses. Fig. 46: Removing the pump hoses Evaporation Humidifier B500 Professional...
- Page 55 Insert the water pump into the opening and turn in the direc- tion of the arrow until it latches in and sits securely (Fig. 49/1). Ensure that the pump cable is not crushed when inserting the pump. Fig. 49: Attaching the pump Evaporation Humidifier B500 Professional...
-
Page 56: Replacing The Fan
ð The fan is located in the center piece next to the control panel. Fig. 51: Removing the cover Loosen and pull out the fan plug by pressing the plug clamps (Fig. 52/1). Fig. 52: Removing the fan plug Evaporation Humidifier B500 Professional... - Page 57 Insert a new fan. Run the screw threads on the vibration dampers through the holes in the center plate. Tighten the fan at the bottom of the center piece again (Fig. 55/1). Fig. 55: Tightening the fan Evaporation Humidifier B500 Professional...
- Page 58 Detecting and remedying malfunctions Connect the fan plug again (Fig. 56/1). Place the center piece back into the water tank and replace the cover. Fig. 56: Connecting the fan Evaporation Humidifier B500 Professional...
-
Page 59: Accessories
The use of incorrect or defective accessories may cause harm to the user, damage, malfunctions or total failure. – Only use original accessories from Brune Luftbe- feuchtung Proklima GmbH or accessories author- ized by Brune Luftbefeuchtung Proklima GmbH. – Always contact our customer service if anything is not clear. -
Page 60: Automatic Water Supply
The water supply is controlled via the electrode rods of the water level indicator. For the water supply to function properly, it is necessary to clean the electrode rods monthly and to remove lime- Ä Chapter 6.3.1 “Monthly cleaning” on page 40). scale ( Evaporation Humidifier B500 Professional... -
Page 61: Automatic Flushing Device
Always observe the regulations of the local water sup- plier. A backflow preventer may be required. For a diagram with the dimensions of the connection, see Fig. 58. 8.3 Automatic flushing device Order number: 1740 Evaporation Humidifier B500 Professional... - Page 62 ð The display read-out jumps back to the default state (dis- play of the actual humidity value). The changes have been saved. Information for licensed plumbers The following information is directed exclusively to licensed plumbers who connect the humidifier to the local water supply system. Evaporation Humidifier B500 Professional...
-
Page 63: Activated Charcoal Cleaning Filter
To prevent the formation of a vacuum, equip the line with a bleeder if required. For dimensions and connection sizes, see drawing Fig. 58. Fig. 58: Automatic flushing device 8.4 Activated charcoal cleaning filter 8.4.1 Overview Order number: 1605/500 Evaporation Humidifier B500 Professional... -
Page 64: Replacing The Activated Charcoal Cleaning Filter
Risk of electrical shock if the power plug is not disconnected! Switch off the humidifier and disconnect the power plug. Lift the cover of the humidifier upwards and place it to the side (Fig. 61). Fig. 61: Removing the cover Evaporation Humidifier B500 Professional... -
Page 65: Air Hood With Flexible Air Hose
Diameter: 150 mm (5.9 inches) Total height with air hose: 570 mm (22.4 inches) Fig. 63: Air hood 8.6 UV degermination system and lime transforming cartridge Mercury vapor Order numbers: – UV lamp: 1721 – Lime transforming cartridge: 1725 Evaporation Humidifier B500 Professional... - Page 66 NOTICE! Risk of damage from using softened water! The use of softened water can cause damage to the lime transforming cartridge. – Never use softened water when using a lime trans- forming cartridge. Evaporation Humidifier B500 Professional...
-
Page 67: Cleaning The Uv Degermination System And Lime Transforming Cartridge
Risk of electrical shock if the power plug is not disconnected! Switch off the humidifier and disconnect the power plug. Lift the cover of the humidifier upwards and place it to the side (Fig. 64). Fig. 64: Removing the cover Evaporation Humidifier B500 Professional... - Page 68 Fig. 66: UV degermination system Take the pump hoses off the stainless steel pipe and clean them using the cleaning brush. In the event of severe con- tamination or wear, replace the pump hoses. Fig. 67: Cleaning the pump hoses Evaporation Humidifier B500 Professional...
- Page 69 To remove the cartridge, first remove the evaporation filter from the retaining lugs (Fig. 69/3) and tilt to the side. Remove the pump hoses (Fig. 69/ 2) and remove the lime transforming cartridge. Fig. 69: Lime transforming cartridge Evaporation Humidifier B500 Professional...
-
Page 70: Replacing The Uv Lamp
Gently remove stains with a clean cloth soaked in alcohol. – Always remove the UV lamp slowly and carefully. The UV lamp is located under the control panel on the center plate adjacent to the pump motor. Proceed as follows to replace it: Evaporation Humidifier B500 Professional... - Page 71 Remove the control panel and place it on the operating side (Fig. 73). ð The UV lamp is located in metal housing below the con- trol panel (Fig. 74/1). Fig. 73: Removing the control panel Evaporation Humidifier B500 Professional...
-
Page 72: Safety Collecting Basin
Safety collecting basin, gray: 1752.2 – Safety collecting basin, anthracite: 1752.4 The safety collecting basin (Fig. 76/1) is placed below the Evapora- tion Humidifier B500. It collects any excess water during water leakage. Fig. 76: Safety collecting basin Evaporation Humidifier B500 Professional... -
Page 73: Safety Water Sensor
(03). As soon as the leaked water is removed, the humidifier starts again automatically. Fig. 77: Safety water sensor 8.9 External water sensor Order number: 1753 Requirement – Automatic water supply – Safety collecting basin Evaporation Humidifier B500 Professional... -
Page 74: Safety Pressure Hose
If leakage occurs on the hose, this is detected by a safety fabric within the hose and the water supply is automatically stopped. Fig. 79: Safety pressure hose 8.10.2 Replacing the safety pressure hose Proceed as follows to replace the safety pressure hose: Evaporation Humidifier B500 Professional... - Page 75 Attach the new safety pressure hose at the water monitor connection and tighten the twist-lock. Attach the safety pressure hose at the water supply connec- tion and tighten the twist-lock. Fig. 81: Removing the safety pressure hose from the water monitor Evaporation Humidifier B500 Professional...
-
Page 76: Spare Parts
Using incorrect or faulty spare parts endangers the user and can cause damage, malfunctions or complete failure. – Only use original spare parts from Brune Luftbe- feuchtung Proklima GmbH or spare parts author- ized by Brune Luftbefeuchtung Proklima GmbH. –... -
Page 77: Disposing Of The Humidifier
Electronic waste and electronic components must be disposed of by authorized certified companies. – In case of doubt, information about correct dis- posal can be obtained from the local authorities or from special waste management companies. Evaporation Humidifier B500 Professional... -
Page 78: Technical Data
Evaporation performance 2.6 / 16.5 l/h / US Evaporation filter surface 3.5 / 37.7 m² / sq ft 11.4 Operating conditions Environment Data Value Unit Temperature range 10 – 40 / 50 °C / °F – 104 Evaporation Humidifier B500 Professional... -
Page 79: Emissions
32 – 44 dB(A) 11.6 Type plate The type plate is located under the cover above the power connec- tion and contains the following information: Manufacturer Type Series Serial number Electrical power and connection values Fig. 82: Type plate Evaporation Humidifier B500 Professional... -
Page 80: Index
Cleaning ......38 Fan ....... . . 56 Evaporation Humidifier B500 Professional... - Page 81 Coding ......27 Switching on ......32 Evaporation Humidifier B500 Professional...
-
Page 82: Appendix
Appendix Appendix Evaporation Humidifier B500 Professional... - Page 83 Appendix Table of contents for the appendix Exploded view ..............84 Parts list ................ Evaporation Humidifier B500 Professional...
- Page 84 – Never disassemble the device on your own. – Only perform the repairs described in this manual. – For problems where the solution is not described in this manual, contact the local specialized retailer. Evaporation Humidifier B500 Professional...
-
Page 86: Parts List
Shaft 1525 Pump impeller blade 1312/500 Shaft cover 1526 Y piece 1326 Electrode rods (set = 7) with head 1529 Pump hose, crystal clear (2) 1339 Cable harness 1551 Cylinder head screw M 4 x 10 Evaporation Humidifier B500 Professional... - Page 87 Water monitor with sensor 1720 UV technology 1754 Safety pressure hose 1721 6-watt emitter (UV degermination 1755.1 Hood, white system) 1723 Quartz dip tube B500 1755.2 Hood, gray 1725 Lime transforming cartridge 1755.4 Hood, anthracite 1740 Flushing device, complete 1757 Safety water sensor...
- Page 88 Luftbefeuchtung Proklima GmbH - Schwarzacher Str. 13 - 74858 Aglasterhausen - Germany Tel.: 06262-5454 - Fax: 06262-3255 - Mail: mail@brune.info - Web: www.brune.info...
Need help?
Do you have a question about the B500 and is the answer not in the manual?
Questions and answers