
Related Manuals for Culligan Iron-Cleer


Summary of Contents for Culligan Iron-Cleer
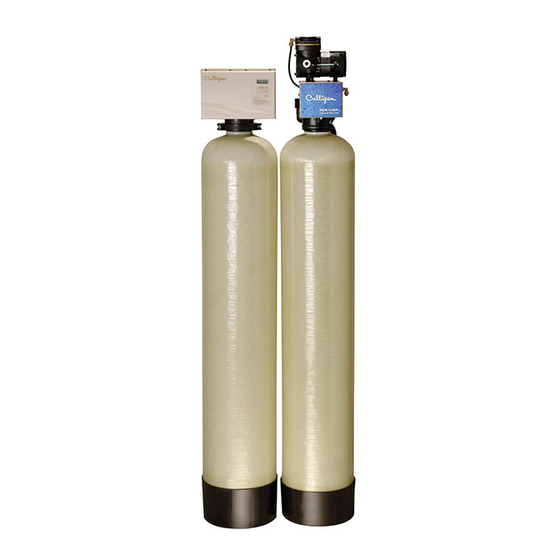
- Page 1 Cat. No. 01020478 Rev. A 11/26/07 DCO # 010173 Installation and Operation Instructions with Parts List Culligan Iron-Cleer ® ® Water Filters Models from 2007 © 2007 Culligan International Company...
- Page 2 Culligan equipment. This publication is written specifically for these individuals and is intended for their use. We encourage Culligan users to learn about Culligan products, but we believe that product knowledge is best obtained by consulting with your Culligan dealer. Untrained individuals who use this manual assume the risk of any resulting property damage or personal injury.
-
Page 3: Table Of Contents
Installation and Operation Instructions with Parts List Culligan Iron-Cleer ® ® Water Filters Models from 2007 Table of Contents Page Introduction........1 Specifications . - Page 4 Culligan Iron-Cleer Water Filters ® ®...
-
Page 5: Introduction
Introduction This system and its installation must comply with state and local regulations. The System is ONLY to be supplied with cold water. The Culligan Iron-Cleer water filters have been tested and certified by WQA against WQA-200 for the ®... -
Page 6: Specifications
Specifications Culligan Iron-Cleer Filters ® ® 10” Iron-Cleer 12” Iron-Cleer Control Valve 1” reinforced thermoplastic 1” reinforced thermoplastic Timer Electro-mechanical Electro-mechanical Overall Conditioner Height 67” 65” Media Tank Dimensions (D x H) 2 ea. 10” x 54” tanks 2 ea. 12” x 52” tanks Filter Media Type 1.0 cu. -
Page 7: Preparation
Preparation Component Description The Iron-Cleer water filter is shipped from the factory in nine(9) cartons. Remove all components from their cartons and inspect ® them before starting installation. Control Valve Assembly - Regeneration control valve, small parts package contains installation hardware and consumer literature, including the warranty policy. - Page 8 With the piston in the closed position, the air recharge inlet port is closed and direct communication between the bleed off tube and the drain port is also closed. Culligan Iron-Cleer Water Filters ® ®...
- Page 9 Water is then directed through a specific flow restrictor and out the drain port to be discharged to drain. Operation Of Aeration Pump The Iron-Cleer system introduces air into the aeration tank and bleeds off the old head of air automatically. The exchange of ™...
-
Page 10: Operating Conditions
Organic Matter (Tannins) — The presence of organic matter such as tannins will prevent the oxidation process of converting the dissolved element, such as iron or manganese, to a non-soluble precipitate or solid substance, allowing it to be filtered out. The Iron-Cleer® is not designed to remove organic bound iron. Unfiltered... - Page 11 ___ Water Pressure: A minimum of 20 psi at a predetermined flow rate is required to backwash the filter properly, with a maximum of 60 psi to be used. If pressure exceeds 60 psi a pressure reducing valve must be installed ahead of the Iron-Cleer System.
-
Page 12: Installation
• Assemble the tank clamp to the control, and tighten the clamp screw. Notice: The clamp and valve will be able to rotate on the tank until pressure is applied. Figure 3 Culligan Iron-Cleer Water Filters ® ®... - Page 13 Install Backwash Flow Control Washer Refer to figure 4 Locate the thin black flow control washer and the plastic flow control spacer from the small parts pack. Remove the drain elbow retaining clip and drain elbow from the filter control valve. Remove the rubber backwash flow control washer and discard it.
-
Page 14: Plumbing Connections
In all cases where metal pipe was originally used and is later interrupted by the bypass valve to maintain proper metallic pipe bonding, an approved ground clamp c/w not less than #6 copper conductor must be used for continuity. Check your local electrical code for the correct clamp and cable size. Culligan Iron-Cleer Water Filters ®... -
Page 15: Electrical Connections
To bypass, turn the blue knob clockwise (see directional arrow on end of knob) until the knob stops as shown. DO NOT OVERTIGHTEN! (Figure 6a). Figure 6a To return to service, turn the blue knob counter-clockwise (see directional arrow on the end of knob) until the knob stops as shown. DO NOT OVERTIGHTEN! (Figure 6b) About 1-1/4”... - Page 16 Vent Drain Line Connection 3/8” Bleed-off Drain Line Connection Aeration Tank Bypass 1“ Check Valve 1/2” Filter Tank Drain (Installed Line Connection Vertically) Aeration Tank Outlet Filter Tank Bypass Filter Tank Outlet Aeration Tank Inlet Figure 7 Culligan Iron-Cleer Water Filters ®...
- Page 17 Aeration Tank Installation Aeration Head Assembly Quick Install Insert the white disperser into the bottom of the aeration head. Twist it clockwise to lock it into position. See figure 8. Note: The small hole in the white disperser must be in the position shown after it is locked into position.
- Page 18 The off time (in hours) is set with the knob on the white “plug-in” style relay. See figure 15. Compressor “ON” time is fixed at 6 minutes. Set the “OFF” time with this knob. Figure 15 Culligan Iron-Cleer Water Filters ®...
- Page 19 Aeration Tank – Bypass Valve Operation Bypass Operation Normal Operation “Treated” Water Supply Water Supply Water Supply Water Exits Enters Exits Enters Diagnostic Mode Shut-Off Mode Supply Water Supply Water Supply Water is Shut No Water Exits Enters Exits Off From The House and The Valve Installation...
-
Page 20: Settings
Settings Your Culligan Iron-Cleer Water Filter is designed to perform efficiently on a wide range of water supplies. Before the unit can be ® ® recharged and put into service, several settings must be made. Backwash Step Backwash expands and loosens the media bed, and flushes away accumulated particulate matter. The backwash interval is preset at the factory for 10 minutes, which is adequate for most water supplies. -
Page 21: Circuit Board
Circuit Board Circuit Board Connections Refer to Figure 16 for all circuit board connections. Power terminals are located along the side edge of the circuit board. The connection marked ‘MAIN’ is for the main wire harness. The Soft-Minder connection is located in the upper left side of the board. Next to the meter connection is a connection marked ‘BATT’, which is for the optional battery back-up. -
Page 22: Programming
Set in the off position for 8” and 10” units. On - The 0.80 gpm refill flow control is used to control the refill flow rate. Set in the on position for 12” Culligan Iron-Cleer Water Filters ®... - Page 23 The programming menu for Medallist is outlined in the following table: Setting Display Range Limits Default Comments Time of Day 12:00 AM - 11:59 PM (12hr) 12:00 PM 12 / 24 hour function set 00:00 - 23:59 (24hr) 12:00 with dip #6 *Time of Regeneration 12:00 AM - 11:30 PM (12hr) 2:00 AM...
- Page 24 Adjust the value with the “+” or “-” keys. Pressing the “Status” key will save the setting and move to the next programming step. Culligan Iron-Cleer Water Filters ®...
- Page 25 Settline Time This setting is used to set the time in minutes for cycle 2. This cycle is a settling time for filters. The display will show “br” in the left most digits and the cycle time in the right most digits. Adjust the value with the “+” or “-” keys. Pressing the “Status”...
- Page 26 “UnL” if EEPROM has no saved value. Toggle between “Loc” and UnL” with the “+” or “-” keys. Pressing the “Status” key will save the setting, exit the Hidden Menu and return to the regular time of day Service Mode display. Culligan Iron-Cleer Water Filters ®...
-
Page 27: Manual Cycling
Manual Cycling Manual Control Cycling The control can be manually cycled through a regeneration to troubleshoot the control or verify that the set-up is complete. When a control is manually cycled back to the service position, the statistical counters of capacity remaining, days since last regeneration and the number of regenerations is in the last 14 days and the life of the unit are not to be reset or updated. - Page 28 Note: If the “+” key is pressed to cycle the value from position “3” to “Home”, the # regen counters will not be updated. The control can be indexed through the various regeneration stages. For all steps, the cycle numbers do not appear or change, until the motor stops. Culligan Iron-Cleer Water Filters ®...
-
Page 29: Service Check
Service Check The service mode allows one to view the number of regenerations in the past 14 days, the total number of regenerations the control has cycled through and the number of days since the last regeneration. The statistical functions are reached by pressing the “Status” key until the screen blanks and then pressing the “-” key. Repetitive presses of the “-”... - Page 30 If no key activity occurs for a period of 600 seconds (10 minutes) while in statistics functions mode, the mode will time out and return to the time of day display. Pressing the “Status” key at any time will return he unit back to the time display. Culligan Iron-Cleer Water Filters ®...
-
Page 31: Start-Up
Start-Up Caution! The media must be soaked for at least 12 hours before start-up (see preparation). Filling the tank without presoaking will likely cause media loss! Once all plumbing is finished and with the unit on bypass, flush the plumbing system until water is clear and no foreign material is detected. -
Page 32: Recommended Preventative Maintenance
Recommended Preventative Maintenance The Culligan Iron Cleer water filter has been designed to provide a good, consistent service life. Because of the nature of problem water, we recommend that the local Culligan dealer provide regular maintenance/service contracts for the proper operation of your systems. -
Page 33: Troubleshooting Guide
Troubleshooting Guide Complaint Problem Cause Solution Iron bleed-through or A. Inadequate 1. Plugged drain line flow control 1. Clean or replace drain line flow control staining. backwash of filter 2. Insufficient water supply from well. 2. Check for minimum specified flow and pressure requirements of filter system. - Page 34 . whistling noise during 2. Drain line is vibrating against other 2. Insulate drain line, specifically at regeneration cycle. pipes, conduits, pipe hangers, heat points of contact with other materials. ducts, floor joists,etc. Culligan Iron-Cleer Water Filters ®...
- Page 35 2. In rare occasions, highly aerated 2. Install a polyphosphate cartridge filter system. water in combination with a specific after the Iron-Cleer Filter System to water supply can create a slightly protect the distribution piping. corrosive condition. Compressor doesn’t 1.
- Page 36 Sometimes a loose or poorly connected wire can give feedback to the board that would result in an error code or default. After checking all of these possibilities you should run the diagnostics (test mode) on the board Instructions are listed on page 33. Culligan Iron-Cleer Water Filters ®...
- Page 37 Listed below are some other circuit board problems and their explanations: – Board skips the service position or only stops for a second in service before advancing to the backwash position Board has been armed for regeneration. Let the board time out of all three cycles or reset and reprogram the board. Resetting the board can be done by connecting or disconnecting the meter cable.
- Page 38 If the dip switch or sensors have change, the values should reset to factory defaults. In either case the valve should home itself upon exit of test mode. Culligan Iron-Cleer Water Filters ®...
-
Page 39: Operation, Maintenance & Service
Service Familiarize yourself with the replacement procedures and component parts thoroughly before attempting any repair. Warning! Disconnect all electrical power to the unit before servicing. Bypass the unit and relieve system pressure before attempting to repair. Circuit Board To replace the AccuSoft circuit board, refer to figure 17 and the parts list and proceed as follows: ™... - Page 40 Note: When attaching the yoke support plate be certain to push up on the plate until the two mounting screws bottom in the U-shaped channels of the support plate. Figure 18 Culligan Iron-Cleer Water Filters ®...
- Page 41 Seal Pak Assembly Follow the instructions for replacing the drive motor assembly through step 7, then continue as follows: With the drive motor and backplate set aside, firmly pull the seal pack assembly from the valve body. Lightly lubricate the o-rings of the replacement seal pack with silicone grease. Reverse the procedure for reassembly.
- Page 42 Service The Iron-Cleer filters rely on the action of air and the filter media to efficiently remove iron and hydrogen sulfide. A failure in the air delivery and venting system will cause a general failure of the filter. Refer to the troubleshooting guide and the following service procedures.
-
Page 43: Wiring Diagram
Wiring Diagram Iron Cleer Relay Base Ground Green Green Black Black Compressor White Black Solenoid Valve Black White Medallist Plus Control Gearmotor Motor Motor Position Home Switch Switch (Top) (Bottom) Circuit Board Brown Power Cord Wiring Diagram... -
Page 44: Parts List
Control Valve Parts List Culligan Iron-Cleer Water Filters ®... - Page 45 Item Part No. Description 01017638 Control Valve Assembly - Medallist Plus 01013976 Control Valve Body - Medallist Plus P0444914 O-ring (10 pk) 00448126 Plug Body Rear 01013083 Seal Pack Assembly 00448128 Clip Ret SS .187” dia. P0331636 Flow Control #3 Green 3.5 gpm (10 pk) P0331637 Flow Control, Red 4.5 gpm (10 pk) P0401031...
- Page 46 O-ring outlet manifold (1” control) (50 pk) 01014539 Outlet manifold 10” x 54” (1” control) 01014540 Outlet manifold 12” x 52” ( 1” control) 01011195 Strainer 01017724 10” Tank Base 01017752 Screw for tank base (2 required per tank) Culligan Iron-Cleer Water Filters ®...
- Page 47 Compressor Parts List Item No. Description Qty. Item No. Description Qty. Piston Cup Screw - Head **17 Connecting Rod/Eccentric Bearing Assem. Head Screw - Cover O-Ring Head Cover - Fan Screw - Exhaust Valve Flapper Valve Keep Strip Motor End Cap Exhaust Valve Flapper Air Filter O-Ring - Valve Flapper...
- Page 48 Disperser and Bleed Tube Kit 01018745 Seal Kit 01018161 Pickup Tube 01018746 Plumbing Connector Kit, 1” Male NPT P1018748 Plumbing Connector Kit, 1” Brass Sweat 01018921 Tool Kit, Solenoid Valve & Duckbill Check valve replacement Culligan Iron-Cleer Water Filters ®...
Need help?
Do you have a question about the Iron-Cleer and is the answer not in the manual?
Questions and answers