Advertisement
Quick Links
E337347
Water pressure : 5 - 50 psi (min.-max.)35 - 345 kPa (min.-max.)
Marco Beverage Systems Limited.
63d Heather Road,
Sandyford Industrial Estate,
Dublin 18.
Ireland Tel: +353 (0)1 295 2674
Ireland Fax: +353 (0)1 295 3715
email: sales@marco.ie
www.marco.ie
Marco Beverage Systems Ltd.
INSTRUCTIONS FOR MODEL
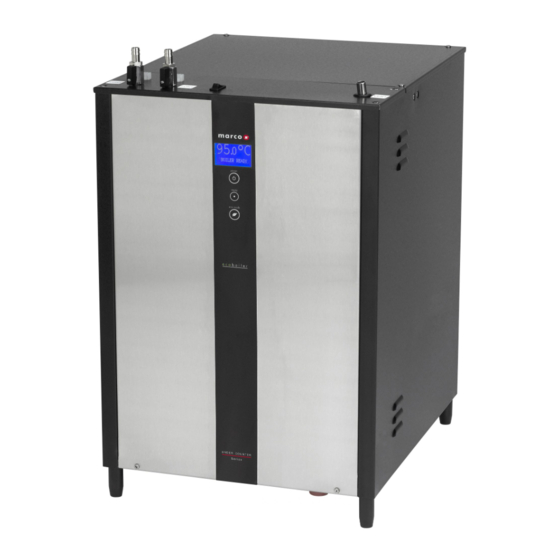
Ecoboiler UC45
1000743 (2.8kW)
1000744 (5.6kW)
1000744US (5.6kW)
1000745 (8.4kW)
1000753 (2.8kW)
1000754 (5.6kW)
1000755 (8.4kW)
1000743A (2.8kW)
1000744A (5.6kW)
1000745A (8.4kW)
1000753A (2.8kW)
1000754A (5.6kW)
1000755A (8.4kW)
NSF/ANSI 4
Marco Beverage Systems
Limited.
Shire House, Strixton Manor,
Strixton, Wellingborough, Northants,
NN29 7PA
UK Tel: +44 (0)2072 744 577
UK Fax: +44 (0)2079 788 141
email: sales@marco-bev.co.uk
www.marco-bev.co.uk
Advertisement

Summary of Contents for Marco Ecoboiler UC45 1000743
- Page 1 Marco Beverage Systems Ltd. INSTRUCTIONS FOR MODEL Ecoboiler UC45 1000743 (2.8kW) 1000744 (5.6kW) 1000744US (5.6kW) 1000745 (8.4kW) 1000753 (2.8kW) 1000754 (5.6kW) 1000755 (8.4kW) 1000743A (2.8kW) 1000744A (5.6kW) 1000745A (8.4kW) 1000753A (2.8kW) 1000754A (5.6kW) 1000755A (8.4kW) NSF/ANSI 4 E337347 Water pressure : 5 - 50 psi (min.-max.)35 - 345 kPa (min.-max.) Marco Beverage Systems Limited.
- Page 2 Installation details: Power Supply: 1000744, 100744US, 1000744A, 1000754, 1000754A (5.6kW/230V, 6.1kW/240V) - This needs to be connected to a 30A isolator outlet. 1000743, 1000743A, 1000753, 1000753A(2.8kW, 230V) – connected via a 13A plug. 1000745, 1000745A, 1000755 , 1000755A (8.4kW, 230V) – requires a 3 Phase (3L,-N-PE) Connection.
- Page 3 ECO BOILER VERSION 1000743 (2.8kW), 1000744 (5.6kW), 1000744US (5.6kW), 1000745 (8.4kW), 1000743A (2.8kW), 1000744A (5.6kW), 1000745A (8.4kW) Operating boiler for the first time: Setting time dispense for two left hand side pumps. Open the service door on the front panel ...
- Page 4 Troubleshooting: The Ready/Status light signals various errors or problems. A cycle of red flashes indicates an error. The number of flashes in a cycle corresponds to the symptom in the table below: Status/Diagnostic light guide: Status Tank below set point temperature. AMBER Machine is heating.
- Page 5 ECO SMART VERSION 1000753 (2.8kW), 1000754 (5.6kW), 1000755 (8.4kW), 1000753A (2.8kW), 1000754A (5.6kW), 1000755A (8.4kW) Operating boiler for the first time: Check that all installation procedures have been carried out. Ensure water valve is on. Plug boiler into 13A socket and press power button on the front of the machine marked ‘Power’. Refer to Figure 1.
- Page 6 Setting time dispense for two left hand side pumps. Open the service door on the front panel Once the machine is full and heated up (the status LED glowing green) press the tactile switch on the TOP control PCB (timer board). ...
- Page 7 Ecosmart Features : The Ecosmart boiler has many settable features which gives the operator great flexibility in choosing how the unit will operate. The following explains how the various features may be changed and their function. There are 2 Menus in the Ecosmart Boiler: 1 is to set the Boiler User settings and 1 is to set the Service/Maintanence parmeter, HOW TO SETUP AN ECOSMART:...
-
Page 8: User Set Up Options
USER SET UP OPTIONS: User Setup Default Screen view Description value Sets new tank temperature. 95.0 Range: 60 – 99.5 °C Resolution: 0.5 °C Sets dispense time. 00.0 Range: 0 – 99.9 seconds Resolution: 0.1 second For PUSH & HOLD mode set to 0 (default). Sets number of pauses during time dispense. -
Page 9: Service Setup Options
SERVICE SETUP OPTIONS: Default Screen view Description value No. 1 Sets and shows remaining weeks before de-scaling is needed (“DESCALE TANK” message on the screen). Setting it to OFF will disable the function. Range: 1 – 60 weeks No. 2 Sets and shows remaining litres of water before filter change is needed (“CHANGE FILTER”... - Page 10 COOL FILL (allows cooling but reduces tank size by using ECO mode), MANUAL (manual filling). See further explanations pg 8 No. 8 Sets temperature units on screen. Celsius No.9 This sets max limit of the temperature that Celsius user can set in USER SETUP;...
- Page 11 Descale timer elapsed. Time to descale the tank. DESCALE TANK Litres output exceeds set value. CHANGE FILTER Time to change the water filter. Low water level probe broken (disconnected). Machine CHECK LOW PROBE detects high level probe signal but can not detect low level one.
-
Page 12: Troubleshooting
ECO Mode Operation: Note In the COOL FILL mode [ see Service setup setting 5] the ECO Mode is automatically selected. All ECO Boilers use high grade insulation and it is applied to give a significant energy usage improvement over a standard water boiler. ... - Page 13 Access: Slide down panel and pull out from bottom 1900055 REV.8 Page 13 of 17...
- Page 14 Maintenance: Marco machines have been designed to give many years of trouble free service. The only regular maintenance required is occasional de-scaling. Isolate machine from power supply.
- Page 15 Connections to an Undercounter 45 style unit. Font Connection: Figure shows the typical connection method for connecting font(s) to the UnderCounter Boiler. Refer to the Font instructions which accompanied the Font unit for more details. Fonts will vary. Depending on font the type the drip tray will either have to be manually emptied Connected to a drain via...
- Page 16 Connections 1000744US Font Connection: Figure shows the typical connection method for connecting font(s) to a US under counter boiler. Refer to the Font instructions which accompanied the Font unit for more details. Fonts will vary. Depending on font the type the drip tray will either have to be manually emptied Connected to a drain via...
- Page 17 1900055 REV.8 Page 17 of 17...


Need help?
Do you have a question about the Ecoboiler UC45 1000743 and is the answer not in the manual?
Questions and answers
Our tap which is fed from the Marco eco boiler is spouting hot water when operated