Advertisement
Quick Links
Advertisement

Subscribe to Our Youtube Channel
Related Manuals for Elcometer 108


Summary of Contents for Elcometer 108
- Page 1 Elcometer 108 Hydraulic Adhesion Tester Operating Instructions...
- Page 2 (electronic, mechanical, magnetic, optical, manual or otherwise) without the prior written permission of Elcometer Limited. A copy of this Instruction Manual is available for download on our Website via www.elcometer.com. Doc.No. TMA-0108 Issue 09...
-
Page 3: Table Of Contents
CONTENTS Section Page About your gauge ..............2 Test procedure . -
Page 4: About Your Gauge
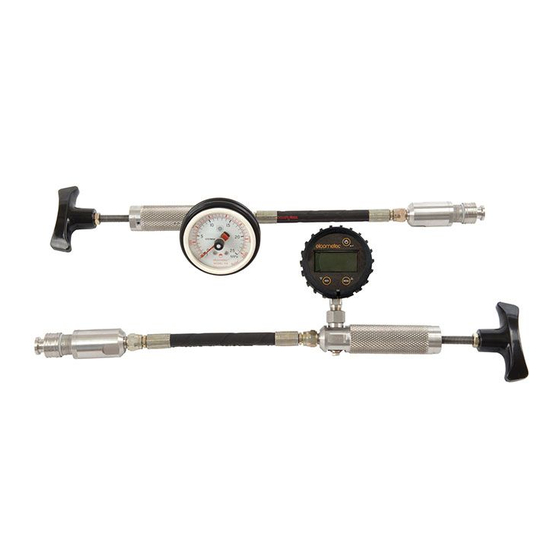
These include surface preparation, cleanliness and contamination, the coating system, the compatibility of the different coating layers and the climatic conditions during the process. There are two versions of the Elcometer 108; one is fitted with a dial pressure gauge and the other is fitted with a digital pressure gauge. - Page 5 The Elcometer 108 Hydraulic Adhesion Tester can be used in accordance with the standard methods: ASTM D4541, SO 16276-1 and NFT30-606.
- Page 6 1.2 THIS GAUGE OPERATES AT HIGH PRESSURE The operating range of the Elcometer 108 is 0 MPa to 18 MPa (0 PSI to 2600 PSI). When the dolly and coating separate from the substrate, a large amount of energy may be released in a short period of time.
-
Page 7: Test Procedure
2 TEST PROCEDURE Operation of the gauge is a straightforward three-stage process: 1. Adhere dolly to coating 2. Attach gauge to dolly 3. Apply pressure and record result 2.1 ADHERE DOLLY TO COATING 1. Identify dolly test surface (Figure 1). 2. - Page 8 2.2 ATTACH GAUGE TO DOLLY 1. Turn handle fully anti-clockwise to release any pressure in the instrument. 2. Use a thumb or finger to push pin fully upwards towards the coupling. 3. Pull coupling sleeve up and insert pin into centre of dolly. 4.
- Page 9 2.3 APPLY PRESSURE AND RECORD RESULT 1. Increase pressure by turning handle clockwise, slowly and smoothly, until either of the following end points: • For destructive testing, the dolly and coating pulls off the substrate. • For non-destructive testing, the minimum specified pressure value is reached. If possible, complete the test within 90 seconds of starting.
- Page 10 2.4 AFTER THE TEST Decrease pressure to zero by turning handle fully anti-clockwise. 2.5 CLEAN THE DOLLY Cleaning the dolly produces unpleasant fumes - ensure that the work area is extremely well ventilated. Do not inhale the fumes. HOT! Exposed very hot surfaces. Use great care when handling or placing the tongs. Allow to cool before storing.
-
Page 11: Supplementary Information
3 SUPPLEMENTARY INFORMATION 3.1 USE OF DOLLY PLUGS Particularly in the case of low viscosity adhesives it is advisable to place a nylon plug in the centre of the dolly before gluing it to the surface. This dolly plug (Figure 3) stops glue going up the centre of the dolly, which can impede the pin and prevent the test being carried out properly. - Page 12 The substrate must be solid enough to withstand the force at the pin without distorting. Metals thicker than 4 mm are usually satisfactory. The Elcometer 108 is not suitable for wood and similar compressible materials. Warped, deformed or distorted substrates will affect the test and may lead to invalid results.
- Page 13 3.4 CURVED SURFACES Using a flat dolly on a curved surface can produce misleading results. The gap between the flat and curved surfaces will not be filled by the adhesive, resulting in one or more of the following effects: 1. The dolly may peel or twist off instead of being pushed off. 2.
- Page 14 3.6 DIGITAL PRESSURE GAUGE Read this section if you are using an Elcometer 108 Hydraulic Adhesion Tester fitted with a digital pressure gauge. Note: The digital pressure gauge can be rotated to allow the operator to view the gauge during the test.
-
Page 15: Storage
Always store the gauge in its case when it is not being used. If an Elcometer 108 with a digital pressure gauge is to remain unused for long periods of time, remove the batteries and store them separately. This will prevent damage to the gauge in the event of malfunction of the batteries. -
Page 16: Maintenance
The calibration of the gauge can be verified in the field using the Elcometer 1970 PFCV - Portable Field Calibration Verification Unit. This unit connects to the Elcometer 108 Gauge. Turn the handle of the Elcometer 108 to apply pressure and compare the reading on the gauge with that of the gauge on the Elcometer 1970 PFCV. -
Page 17: Technical Specification
6 TECHNICAL SPECIFICATION 6.1 PERFORMANCE ANALOGUE INSTRUMENT Operating range: 0 MPa - 18 MPa (0 PSI - 2600 PSI) Scale range: 0 MPa - 25 MPa (0 PSI - 3500 PSI) Scale resolution: Metric (black) 1 division = 1 MPa Imperial (red) 1 division = 100 PSI Accuracy: Metric (black) 1 MPa... - Page 18 6.3 PHYSICAL Net weight: 1.4 kg (3 lb) Gross weight: Approx. 4.6 kg (10 lb) Including case and accessories Instrument length: Approx. 520mm (20") Carrying case size (external): 520 mm x 370 mm x 125 mm (20.4" x 14.5" x 4.75") Dolly: Area = 284mm (0.44 sq in);...
-
Page 19: Spares And Accessories
Liquid Crystal Display (LCD) 4 Digits Character height: 12.5 mm (0.5") Backlight: 7 SPARES AND ACCESSORIES The following replacement and optional items are available from your local Elcometer supplier or direct from Elcometer: Description Sales Part No. Cyanoacrylate Adhesive (50g):... -
Page 20: Related Equipment
Elcometer or your local Elcometer supplier for full details of the range. 8 RELATED EQUIPMENT Elcometer produces a wide range of adhesion gauges and associated inspection equipment. Users of the Elcometer 108 may also benefit from the following Elcometer products: •...
Need help?
Do you have a question about the 108 and is the answer not in the manual?
Questions and answers