Advertisement
Harbor Breeze® is a registered trademark
of LF, LLC. All Rights Reserved.
ATTACH YOUR RECEIPT HERE
Serial Number
Questions, problems, missing parts? Before returning to your retailer, call our customer
service department at
5 p.m., EST, Friday.
XXXXXXX
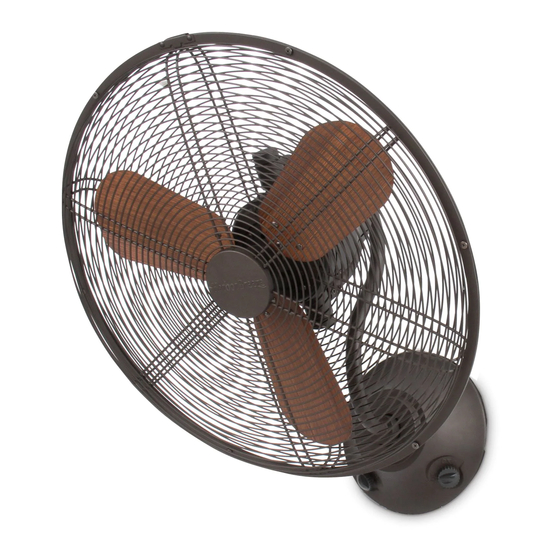
OSCILLATING WALL FAN
Purchase Date
1-800-643-0067, 8 a.m. - 6 p.m., EST, Monday - Thursday, 8 a.m. -
Lowes.com/harborbreeze
1
ITEM
#0275422
MODEL #JP18EB3
Español p. 15
LISTED
For
Damp Location
E192641
Advertisement
Table of Contents

Related Manuals for Harbor Breeze JP18EB3


Summary of Contents for Harbor Breeze JP18EB3
- Page 1 ITEM #0275422 OSCILLATING WALL FAN MODEL #JP18EB3 Español p. 15 Harbor Breeze® is a registered trademark of LF, LLC. All Rights Reserved. LISTED ATTACH YOUR RECEIPT HERE Damp Location E192641 Serial Number Purchase Date Questions, problems, missing parts? Before returning to your retailer, call our customer service department at 1-800-643-0067, 8 a.m.
-
Page 2: Table Of Contents
TABLE OF CONTENTS Safety Information .......................2 Package Contents .......................4 Hardware Contents ......................5 Preparation ..........................5 Assembly Instructions ......................6 Operating Instructions ......................11 Care and Maintenance ......................12 Troubleshooting .........................13 Limited Lifetime Warranty ....................13 Replacement Parts List .....................14 SAFETY INFORMATION READ AND SAVE THESE INSTRUCTIONS Please read and understand this entire manual before attempting to assemble, install or operate the product. - Page 3 SAFETY INFORMATION DANGER If using this fan in a DAMP location, this fan must be connected to a supply circuit that is protected by a Ground Fault Circuit Interrupter (GFCI) to reduce the risk of personal injury, electrical shock or death. WARNING To reduce the risk of fire, electrical shock or personal injury, use the metal wall mounting bracket provided with the fan.
-
Page 4: Package Contents
PACKAGE CONTENTS PART DESCRIPTION QUANTITY Fan Assembly Wall Mounting Bracket Front Cage Blade Assembly Back Cage Blade Assembly Nut (preassembled) Set Screw (preassembled) Fuse (preassembled) IMPORTANT REMINDER: You must use the parts provided with this fan for proper installation and safety. Lowes.com/harborbreeze... -
Page 5: Hardware Contents
Allen Wrench Qty. 1 Front Back Cage Cage Wood Screw Screw Screw Qty. 8 Qty. 4 Qty. 4 + 1 extra + 1 extra + 1 extra PREPARATION Before beginning assembly of product, make sure all parts are present. Compare parts with package contents list and hardware contents list. -
Page 6: Assembly Instructions
ASSEMBLY INSTRUCTIONS Turn off circuit breakers and wall switch to the fan supply line leads. DANGER: Failure to disconnect power supply prior to installation may result in serious injury or death. This fan assembly (A) can only be mounted on an indoor wall or on an enclosed porch or enclosed patio wall. - Page 7 ASSEMBLY INSTRUCTIONS Determine the approximate position of where you want the fan to be located on the wall. Then, Stud locate the stud in the wall. Position wall mounting bracket (B) on wood stud or wood post and mark the location of the four holes using a pencil or a marker (not included).
- Page 8 ASSEMBLY INSTRUCTIONS Replace set screw (G) at bottom of fan assembly (A). Tighten securely. Align the four holes in the front of the motor on fan assembly (A) with the four holes in the center of the back cage (E). Install four back cage screws (CC) into each of the four holes in the center of the back cage (E) to secure back cage (E) to motor on fan assembly (A).
- Page 9 ASSEMBLY INSTRUCTIONS Turn blade assembly nut (F) clockwise to remove from shaft on fan motor. Place blade assembly (D) over motor shaft and lock pin, making sure to align gap on the blade assembly (D) with lock pin on motor. Using the Allen wrench (DD), turn preassembled set screw located on the blade assembley (D) clockwise to secure blade assembly (D) to fan motor.
- Page 10 ASSEMBLY INSTRUCTIONS Place hook at top of front cage (C) over edge at top of back cage (E). Note: Make sure hook engages with verticle rib and all front and back cage holes Hook match up; this will allow the front cage (C) and the back cage (E) to hang together while you put the front cage screw (BB) into the the front and back cage holes.
-
Page 11: Operating Instructions
OPERATING INSTRUCTIONS It is recommended you test the fan before finalizing installation. Restore power from circuit box. Test fan speeds with wall control on the left side of fan assembly. Start at the Off position (no blade movement). One turn of the dial will set the fan to HIGH (H). -
Page 12: Care And Maintenance
CARE AND MAINTENANCE At least twice each year tighten all screws on fan assembly and front cage. Clean fan assembly with only a soft brush or lint-free cloth to avoid scratching the finish. IMPORTANT: Shut off main power supply before beginning any maintenance. The three-prong plug is installed with a fuse (H) that is a vital safety device. -
Page 13: Troubleshooting
TROUBLESHOOTING WARNING: Before beginning work, shut off the power supply to avoid electrical shock. PROBLEM POSSIBLE CAUSE CORRECTIVE ACTION Fan does not move. Power is off or fuse is blown. Turn power on or check fuse. Noisy operation. Allow fan a “break in” period of a Fan is new. -
Page 14: Replacement Parts List
Back Cage 275422-E Blade Assembly Nut 275422-F Set Screw 275422-G Wood Screw 275422-AA Front Cage Screw 275422-BB Back Cage Screw 275422-CC Allen Wrench 275422-DD Printed in China Harbor Breeze® is a registered trademark of LF, LLC. All Rights Reserved. Lowes.com/harborbreeze LI1309...
Need help?
Do you have a question about the JP18EB3 and is the answer not in the manual?
Questions and answers