Table of Contents
Advertisement
Advertisement
Table of Contents

Related Manuals for Compex WPP54


Summary of Contents for Compex WPP54
- Page 1 Quick Install Guide Wireless 54Mbps Outdoor Access Point WPP54...
-
Page 2: Table Of Contents
Packaging Content.................. 5 Network Application ................6 Let’s Get Going-Hardware Setup ..........7 Overall Setup of Compex WPP54 ............8 Method 1: Mounting on the Wall ............9 Method 2: Mounting on the Pole ............12 Access to Web-based Interface ..........15 Method 1: Access to the Web interface with uConfig..... -
Page 3: 1: Introduction
LAN, while maintaining full access to the establishment’s resources. WPP54AG also incorporates unique features from Compex such as – the Parallel Broadband feature that allows bandwidth aggregation and fail-over redundancy capability. It uses Spanning Tree Protocol (STP) that provides the wireless network with extra redundancy and reliability. -
Page 4: Introduction To Wpp54Ag Multi-Ssid Firmware Version
LAN, while maintaining full access to the establishment’s resources. WPP54AG also incorporates unique features from Compex such as – the Parallel Broadband feature that allows bandwidth aggregation and fail-over redundancy capability. It uses Spanning Tree Protocol (STP) that provides the wireless network with extra redundancy and reliability. -
Page 5: Introduction To Wpp54G Non Multi-Ssid Firmware Version
LAN, while maintaining full access to the establishment’s resources. WPP54G also incorporates unique features from Compex such as – the Parallel Broadband feature that allows bandwidth aggregation and fail-over redundancy capability. It uses Spanning Tree Protocol (STP) that provides the wireless network with extra redundancy and reliability. -
Page 6: Introduction To Wpp54Ag Non Multi-Ssid Firmware Version
LAN, while maintaining full access to the establishment’s resources. WPP54AG also incorporates unique features from Compex such as – the Parallel Broadband feature that allows bandwidth aggregation and fail-over redundancy capability. It uses Spanning Tree Protocol (STP) that provides the wireless network with extra redundancy and reliability. -
Page 7: Packaging Content
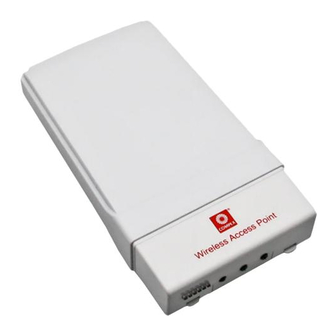
Chapter 1 Introduction Packaging Content Actual product appearance may slightly differ depending on the hardware version. 1 x WPP54 unit 1 x Mounting Bracket 2 x Self-taping Screws 1 x Product CD 1 x Read-Me-First Note... -
Page 8: Network Application
It enables you to bridge wireless clients that are kilometres apart (e.g. within 100 metres between two buildings) while unifying the networks. In this scenario, you may configure two Compex WPP54 units to perform transparent bridging between two buildings. -
Page 9: 2: Let's Get Going-Hardware Setup
Let’s Get Going - Hardware Setup 2: Let’s Get Going-Hardware Setup You can install your Compex WPP54 either onto the wall or mount it on a pole. The two mounting methods will be described as shown below. Note the following guidelines for choosing the best location for your wireless AP: Place the AP as close as possible to the area where users will require access to the WLAN. -
Page 10: Overall Setup Of Compex Wpp54
Let’s Get Going - Hardware Setup Overall Setup of Compex WPP54 The diagram below shows the overall setup of Compex WPP54. You may need to install a lightning arrestor to protect your outdoor AP from the lightning. Please note that you can power up your PoE Injector ONLY AFTER you had completely connected all the devices. -
Page 11: Method 1: Mounting On The Wall
4 holes into the wall. Next, secure the brackets to the wall as shown in the figure on the right. Align the main unit of Compex WPP54 with the bracket to attach them as shown in the figure. - Page 12 Connect one end of an RJ45 Ethernet cable to the LAN OUT port of the Injector and the other end to Ethernet Port 1 of Compex WPP54. Maximum length RJ45 Category 5 cable is 100 metres. Next, connect your SMA antenna (not provided) to the SMA reverse connector.
- Page 13 PC you will use to configure the WPP54. Connect the power adapter in the Compex PoE kit (not provided) to the main electrical supply and the power plug into the socket of the injector.
-
Page 14: Method 2: Mounting On The Pole
Place the straps through the slots in the bracket and then around the pole. Tighten the straps. Align the main unit of Compex WPP54 with the bracket to attach them as shown in the figure. - Page 15 Connect one end of an RJ45 Ethernet cable to the LAN OUT port of the Injector and the other end to Ethernet Port 1 of Compex WPP54. Maximum length RJ45 Category 5 cable is 100 metres.
- Page 16 PC you will use to configure the WPP54. Connect the power adapter in the Compex PoE kit (not provided) to the main electrical supply and the power plug into the socket of the injector.
-
Page 17: 3: Access To Web-Based Interface
Chapter 3 Access to Web-based Interface 3: Access to Web-based Interface Once you have connected WPP54 to the management PC, there are two methods to access to the web-based Interface of Compex WPP54: Through our Compex Utility – uConfig You can access to the web-based interface directly without having to change the IP address of your PC. - Page 18 Chapter 3 Access to Web-based Interface The program will prompt you with the following message. Click on the Yes button to proceed. Select Compex WPP54 in the Compex Products List section and click on Open Web button.
- Page 19 Chapter 3 Access to Web-based Interface Next, the system will prompt you not to close the uConfig program until you wish to exit your web-based interface. Click Ok button to proceed. At the authentication page, click on the Log On! Button to enter the main configuration page.
- Page 20 Chapter 3 Access to Web-based Interface You will then reach the home page of Compex WPP54’s web-based interface. Note: For full instructions on how to configure WPP54, please refer to the User’s Manual provided in the Product CD.
-
Page 21: Method 2: Access To The Web Interface Manually
Internet browser. But you will first need to change the IP address of your PC so that it is in the same subnet as your WPP54. Note: For full instructions on how to configure WPP54, please refer to the User’s Manual provided in the Product CD. -
Page 22: 4: Tcp/Ip Configuration
Once the hardware has been set up, you need to assign an IP address to your PC so that it will be in the same subnet as Compex WPP54. By default, Compex WPP54’s IP address is 192.168.168.1; and its subnet mask is 255.255.255.0. You need to configure your PC’s IP address to 192.168.168.xxx;... - Page 23 Chapter 4 TCP/IP Configuration Highlight TCP/IP and click on the Properties button. Select radio button Specify an IP address. Enter the IP Address and Subnet Mask 192.168.168.xxx 255.255.255.0, where xxx can be any number from 2 to 254, except for 1. In this example, we are using 192.168.168.160 as the static IP Address.
-
Page 24: For Windows Xp/2000
Chapter 4 TCP/IP Configuration In order to check if the IP address has been assigned correctly to your PC, simply go to the Start menu, select Run, and enter the command winipcfg. Select your respective Ethernet Adapter from the drop down list and click OK. - Page 25 Chapter 4 TCP/IP Configuration Highlight Internet Protocol (TCP/IP) and click on Properties button. Select the radio button for Use the following IP address. Enter the IP Address Subnet Mask 192.168.168.xxx and 255.255.255.0, where xxx can be any number from 2 to 254, except for 1. In this example, using 192.168.168.160...
- Page 26 PC, go to Start menu, Accessories, select Command Prompt and type the command ipconfig/all. Further Information References For more details on the WPP54 configuration, please refer to the User’s Manual in the accompanying Product CD. This document may become superseded, in which case you may find its latest version from the website at http://www.compex.com.sg...
-
Page 27: 5: Panel Views And Descriptions
Power is supplied to the device. No power is supplied to the device. 10 ACT LED Steady Red The respective port has successfully connected to Compex WPP54AG. Blinking The respective port is transmitting or receiving data. No connection is established. - Page 28 Chapter 5 Panel Views and Descriptions Features Status and Indication WLAN LED Steady Red Wireless interface up and running. Ready for operation. Flashing Red Activity is detected in the wireless network. WAN Conn LED Flashing Red Data transmission at WAN connection. DIAG LED Flashing Red It indicates that the firmware is...
-
Page 29: 6: Technical Specifications
Chapter 6 Technical Specifications 6: Technical Specifications Safety and FCC Part 15 SubPart B and SubPart C (for Electromagnetic wireless module) Conformance EN 300 328-2 EMC CE EN 301 489 (EN300 826) EN 55022 (CISPR 22)/EN 55024 Class B EN 61000-3-2 EN 61000-3-3 CE EN 60950 EN 301 893... - Page 30 Chapter 6 Technical Specifications Wireless Operation Modes Access Point Mode (multi-SSID firmware) Client Mode Wireless Routing Client Gateway Mode Wireless Adapter Mode Transparent Client Mode • Repeater Mode Wireless Operation Modes Access Point (non multi-mSSID Access Point Client firmware) Point to Point Point to Multiple Point •...
- Page 31 Chapter 6 Technical Specifications Output Power (WPP54G) IEEE 802.11b: 20 dBm IEEE 802.11g: 20 dBm Output Power (WPP54AG) IEEE 802.11a: 18 dBm IEEE 802.11b: 20 dBm IEEE 802.11g: 20 dBm Operating Distance (WPP54G) IEEE 802.11b: 300 m (11Mbps outdoor) 30 m (11Mbps) IEE 802.11g: 80 m (11Mbps outdoor) 15 m (11Mbps indoor)
- Page 32 Chapter 6 Technical Specifications Operating Channels 11 Channels: US and Canada 13 Channels: Europe 14 Channels: Japan Load Balancing Parallel Broadband (in Gateway mode) Fail-Over Redundancy Parallel Broadband (in Gateway mode) Virtual Server IP and Port Forwarding, De-Militarised Zone IP Packet Filtering Time-based By TCP Port By Source IP...
- Page 33 Disclaimer: Compex, Inc. provides this guide without warranty of any kind, expressed or implied, including but not limited to the implied warranties of merchantability and fitness for a particular purpose. Compex, Inc. may make improvements and/or changes to the product and/or specifications of the product described in this guide, without prior notice.
- Page 34 DECLARATION OF CONFORMITY: Compex, Inc. declares that the product: Product Name: Compex Wireless-G 54Mbps Outdoor Access Point Model No.: WPP54 conforms to the following Product Standards: This device complies with the Electromagnetic Compatibility Directive (89/336/EEC) issued by the Commission of the European Community. Compliance with this directive implies conformity to the following European Norms (in brackets are the equivalent international standards.)
-
Page 35: Warranty Registration Card
WARRANTY REGISTRATION CARD [M-0088-V2.4C] Register via the Internet at http://www.cpx.com or http://www.compex.com.sg To activate the warranty, please complete this card and return to Compex within ninety 90 days from the date of purchase. Please e-mail this warranty card to support@compex.com.sg. Product:... - Page 36 Manual Number: M-0486-V1.1 Version 1.1 October 2006...
Need help?
Do you have a question about the WPP54 and is the answer not in the manual?
Questions and answers