
Related Manuals for Wiznet WIZ610wi


Summary of Contents for Wiznet WIZ610wi
- Page 1 WIZ610wi User’s Manual ( Version 1.9.1 ) ©2009 WIZnet Co., Ltd. All Rights Reserved. ☞ For more information, visit our website at http://www.wiznet.co.kr - 1 -...
- Page 1 Distributed by www.embeddedworks.net WIZ610wi User’s Manual ( Version 1.8 ) ©2009 WIZnet Co., Ltd. All Rights Reserved. ☞ For more information, visit our website at http://www.wiznet.co.kr - 1 -...
- Page 2 -Serial command amended 2010-12-01 V.1.9 -Serial command modified & amended -Serial max baud rate modified (Max 921,600bps) -Temperature specification modified -Aging test report added. 2011-01-25 V.1.9.1 -Pin pitch information added at Fig.36 (WIZnet Co.,Ltd) WIZ610wi User’s Manual - 2 -...
- Page 2 -Serial Command Added *Socket Connection Status Checking *TCP Server setup(IP address or Domain Name) -SSL module added -Default SSID is changed to ‘WLANAP’ -Serial to WiFi Reference schematic Added 2010-08-03 V.1.8 -Serial command amended (WIZnet Co.,Ltd) WIZ610wi User’s Manual - 2 -...
- Page 3 Q&A Board. We will reply your questions as soon as possible COPYRIGHT NOTICE Copyright 2009 WIZnet Co., Ltd. All Rights Reserved. Technical Support: support@wiznet.co.kr Sales & Distribution: sales@wiznet.co.kr...
- Page 3 WIZnet’s Online Technical Support If you have any questions about our products, please visit our website and submit your questions on the Q&A Board. We will reply your questions as soon as possible (WIZnet Co.,Ltd) WIZ610wi User’s Manual - 3 -...
- Page 4 2. Getting Started ................................ 6 2.1. Hardware Installation ..........................6 2.2. Configuration ............................... 7 2.2.1 Wizard Program ..........................7 2.2.2 Connecting the Web page of WIZ610wi ................10 2.2.3 Checking Status ..........................11 2.2.4 Network Setting ........................... 13 2.2.5. Wireless Setting .......................... 15 2.2.5.1.
- Page 4 COPYRIGHT NOTICE Copyright 2009 WIZnet Co., Ltd. All Rights Reserved. Technical Support: support@wiznet.co.kr Sales & Distribution: sales@wiznet.co.kr For more information, visit our website at http://www.wiznet.co.kr (WIZnet Co.,Ltd) WIZ610wi User’s Manual - 4 -...
-
Page 5: Table Of Contents
7. Aging test report ..............................66 7.1 Test environment ............................66 7.2 Test condition ............................66 7.3 Test result ..............................67 (WIZnet Co.,Ltd) WIZ610wi User’s Manual - 5 -... -
Page 5: Table Of Contents
2. Getting Started ................................ 6 2.1. Hardware Installation ..........................6 2.2. Configuration ............................... 7 2.2.1 Wizard Program ..........................7 2.2.2 Connecting the Web page of WIZ610wi ................10 2.2.3 Checking Status ..........................11 2.2.4 Network Setting ........................... 13 2.2.5. Wireless Setting .......................... 15 2.2.5.1. - Page 6 ............................... 28 IGURE URVEY 30. S ....................29 IGURE ERIAL TO THERNET ONFIGURATION 31. P ............................. 34 IGURE ASSWORD ETUP 32. S .............................. 34 IGURE YSTEM 33. U ..........................35 IGURE PGRADE IRMWARE (WIZnet Co.,Ltd) WIZ610wi User’s Manual - 6 -...
- Page 6 URVEY ..........................28 30. S IGURE ERIAL TO THERNET ONFIGURATION ..................29 31. P IGURE ASSWORD ETUP ........................34 32. S IGURE YSTEM ..........................34 33. U IGURE PGRADE IRMWARE ......................... 35 (WIZnet Co.,Ltd) WIZ610wi User’s Manual - 6 -...
- Page 7 34. R ............................37 IGURE EBOOT YSTEM 35. WIZ610WI PIN M ..........................38 IGURE 36. WIZ610WI B ) ................... 40 IGURE OARD IMENSIONS UNIT 37. S ..................42 IGURE ERIAL ERMINAL ROGRAM CONFIGURATION 38. N ................43 IGURE ETWORK ERMINAL ROGRAM CONFIGURATION 39.
- Page 7 34. R IGURE EBOOT YSTEM ........................37 35. WIZ610WI PIN M IGURE ....................... 38 36. WIZ610WI B ) ................40 IGURE OARD IMENSIONS UNIT 37. S IGURE ERIAL ERMINAL ROGRAM CONFIGURATION ................42 38. N IGURE ETWORK ERMINAL ROGRAM CONFIGURATION ..............
- Page 8 13. S STX & ETX ...................... 45 ABLE ERIAL ONFIGURATION 14. S ...................... 46 ABLE ERIAL ONFIGURATION EPLY 15. WIZ610 ........................63 ABLE SSIGNMENT 15. A ............................. 67 ABLE GING TEST RESULT (WIZnet Co.,Ltd) WIZ610wi User’s Manual - 8 -...
- Page 8 ABLE ERIAL ONFIGURATION EPLY RAME FORMAT ................45 13. S STX & ETX ................... 45 ABLE ERIAL ONFIGURATION 14. S ABLE ERIAL ONFIGURATION EPLY ................... 46 15. WIZ610 ABLE SSIGNMENT ...................... 56 (WIZnet Co.,Ltd) WIZ610wi User’s Manual - 8 -...
-
Page 9: Introduction
1. Introduction WIZ610wi is the gate way module which provides a bridge for RS-232 or Ethernet to IEEE802.11 b/g wireless communications. Devices with the interface of RS-232 serial or Ethernet can established a wireless network which can enable remote monitoring, management and controlling. -
Page 9: Introduction
1. Introduction WIZ610wi is the gate way module which provides a bridge for RS-232 or Ethernet to IEEE802.11 b/g wireless communications. Devices with the interface of RS-232 serial or Ethernet can established a wireless network which can enable remote monitoring, management and controlling. - Page 10 Products Contents (WIZ610wi-EVB) WIZ610WI Module WIZ610wi Evaluation Board Serial Cable (Connect Serial Device to Test Board) Network Cable (Crossover Cable) Power (DC 5V 2A Adaptor)
- Page 10 Products Contents (WIZ610wi-EVB) WIZ610WI Module WIZ610wi Evaluation Board Serial Cable (Connect Serial Device to Test Board) Network Cable (Crossover Cable) Power (DC 5V 2A Adaptor)
-
Page 11: Product Specification
Antenna (2dBi PCB type + Coaxial Cable) (Manual, H/W & SW related Materials) Table 1. Products Contents. 1.1 Product Specification 1.1.1 WIZ610wi Module Wireless ITEM Specification Wireless Standard IEEE802.11b/g Frequency Range 2.412~2.485GHz Output Power 802.11b: 16dBm@11Mbps (Tolerance(+/-1dBm) 802.11g: 14dBm@6~54Mbps 802.11b: -65dBm@11Mbps Receive Sensitivity 802.11g: -76dBm@54Mbps... -
Page 12: Table 3. Products Specification - Hardware
Operation: -30℃~70℃ (Refer to the 7. Aging test report) Temperature Storage: -40℃~115℃ Operation: 10% to 90%, Non-Condensing Humidity Storage: 5% to 90%, Non-Condensing Baud Rate : Max 921,600bps Stop bits: 1 Serial Parity: None, Odd, Even Flow Control: XON/XOFF(software), CTS/RTS(hardware), none Power 3.3V... -
Page 12: Table 3. Products Specification - Hardware
Operation: -5℃~55℃ Temperature Storage: -20℃~70℃ Operation: 10% to 90%, Non-Condensing Humidity Storage: 5% to 90%, Non-Condensing Baud Rate : Max 230,400bps Stop bits: 1 Serial Parity: None, Odd, Even Flow Control: XON/XOFF(software), CTS/RTS(hardware), none Power 3.3V Power Consumption Under 470mA(3.3V) 39mm X 32mm X 4.7mm Dimension Ø... -
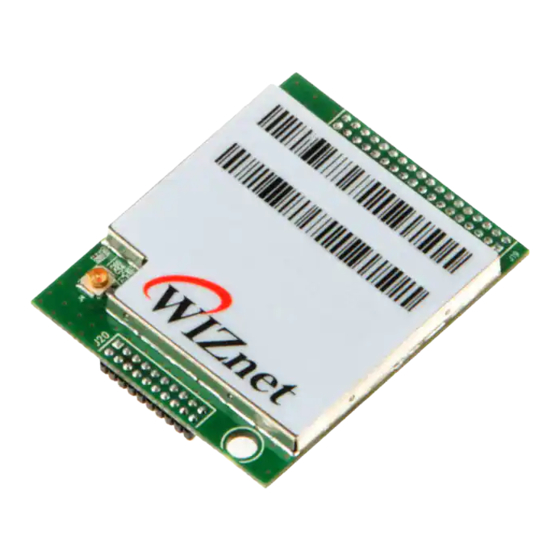
Page 13: Wiz610Wi Test Board
1.1.2 WIZ610wi Test Board Figure 1. WIZ610wi Test Board... -
Page 13: Wiz610Wi Test Board
1.1.2 WIZ610wi Test Board Figure 1. WIZ610wi Test Board... -
Page 14: Getting Started
“WIZ610wi Quick Installation Guide” 2.1. Hardware Installation For the testing, module and test board should be prepared. STEP1: Insert WIZ610wi module in the socket of test board. STEP2: Connect the test board to the HUB or PC by using a network cable. STEP3: Connect the test board to the serial device by using the RS-232 serial cable. -
Page 15: Configuration
Type (802.11b or g) and SSID. ⓑ IP Info: If you select a WIZ610wi, the IP address information is displayed. ⓓ You can check or modify the IP address, Subnet Mask and Gateway of a WIZ610wi module. ⓔ MAC Addr: It displays the MAC Address of a WIZ610wi. -
Page 15: Configuration
Type (802.11b or g) and SSID. ⓑ IP Info: If you select a WIZ610wi, the IP address information is displayed. ⓓ You can check or modify the IP address, Subnet Mask and Gateway of a WIZ610wi module. ⓔ MAC Addr: It displays the MAC Address of a WIZ610wi. -
Page 16: Figure 3. Wiz610 Wi Telnetw
ⓜ EXIT: Wizard Program will be closed. Figure 4. WIZ610wi Wizard Program ⓝ: Select a WIZ610wi on the left window and click Get button. The wireless LAN configuration detail of the selected module will be displayed after 4 seconds. You can check the detail of SSID, Authentication, Encryption Mode, Key length, Key Format, Key Value, Data Rate, Tx Power, Work Mode, Channel and etc. -
Page 17: Figure 5. Wiz610 Wi Wizardp
ⓟ Serial Comm: You can test the function of “Serial to Wireless”. After connecting PC and WIZ610wi using serial cable, execute serial terminal program. ⓠ Select protocol type – UDP or TCP, and input port number. Port Open button is enabled at the UDP mode, and Connect button is enabled at the TCP mode. -
Page 18: Connecting The Web Page Of Wiz610Wi
Figure 6. Connecting to the Web page of WIZ610wi Notice : Configure the network parameters of WIZ610wi and your PC. The default IP address of WIZ610wi is “192.168.1.254”. Your PC’s IP address should start with these three sets of numbers “192.168.1.XXX”. -
Page 18: Connecting The Web Page Of Wiz610Wi
Notice : Configure the network parameters of WIZ610wi and your PC. The default IP address of WIZ610wi is “192.168.1.254”. Your PC’s IP address should start with these three sets of numbers “192.168.1.XXX”. WIZ610wi and PC can be connected through wireless network. Connect to WIZ610wi from PC by using default SSID “WLANAP”... -
Page 19: Checking Status
2.2.3 Checking Status 1) System Data Figure 8. System Data ITEM Description Firmware Version The firmware version of WIZ610wi is displayed Firmware Date The last date and time of firmware upgrade MAC Address(LAN) Address WIZ610wi Ethernet communication. IP Address the IP address of WIZ610wi. -
Page 20: Figure 9. Active Clients
: WIZ610wi supports the MAC addresses for both Ethernet and Wireless interfaces. 2) Active Client Figure 9. Active Clients In this page, the information of clients connecting to WIZ610wi is displayed. If you click “Refresh” button, the client list and information are updated. -
Page 21: Network Setting
“Disable”. Notice: When the WIZ610wi’s IP address is managed by another DHCP server in the upper layer, the DHCP function in your wireless module will be disabled. All your clients connecting to your WIZ610wi can not recognize your module as a DHCP server. -
Page 21: Network Setting
“Disable”. Notice: When the WIZ610wi’s IP address is managed by another DHCP server in the upper layer, the DHCP function in your wireless module will be disabled. All your clients connecting to your WIZ610wi can not recognize your module as a DHCP server. -
Page 22: Figure 11. Active Dhcp Client
Figure 11. Active DHCP Client Table Apply Changes : By clicking this button, the modified values are applied. After changing, the page is refreshed to re-connected to the new IP address. -
Page 22: Figure 11. Active Dhcp Client
Figure 11. Active DHCP Client Table Apply Changes : By clicking this button, the modified values are applied. After changing, the page is refreshed to re-connected to the new IP address. -
Page 23: Wireless Setting
WAN page by using PPPOE, DHCP client, PPTP client or static IP. 3) Client Mode In this mode, your device act as a client. If you configure PC or application device as DHCP client, Access Point will be the DCHP Server and WIZ610wi doesn’t act as DHCP Server. -
Page 23: Wireless Setting
WAN page by using PPPOE, DHCP client, PPTP client or static IP. 3) Client Mode In this mode, your device act as a client. If you configure PC or application device as DHCP client, Access Point will be the DCHP Server and WIZ610wi doesn’t act as DHCP Server. -
Page 24: Ip Configuration In Each Mode
Figure 14. Access Point Mode - 1 - The IP address assigned to WIZ610wi is for administration and web configuration. - Even though the WIZ610wi is configured as DHCP Server, the PC will acquire IP address from IP Sharing device or ADSL/Cable Modem. -
Page 24: Ip Configuration In Each Mode
Figure 14. Access Point Mode - 1 - The IP address assigned to WIZ610wi is for administration and web configuration. - Even though the WIZ610wi is configured as DHCP Server, the PC will acquire IP address from IP Sharing device or ADSL/Cable Modem. -
Page 25: Figure 16. Gateway Mode
3) Client Mode Figure 17. Client Mode WIZ610wi can be set IP as Static or DHCP client at ‘Client Setup>WAN Port Setup’. And also WIZ610wi can be act DHCP Server simultaneously by assigning adding 100 of first DHCP server. For example, if DHCP server’s client range is XXX.XXX.XXX.2~100, then WIZ610wi’s... -
Page 26: Access Point Setup
Manually Select a Channel : You can select a channel in the range of 1~13.. Mode : AP : IF AP is selected, WIZ610wi operates as Access Point. WDS Repeater : WDS(Wireless Distribution System) that can be used for the... -
Page 26: Access Point Setup
Manually Select a Channel : You can select a channel in the range of 1~13.. Mode : AP : IF AP is selected, WIZ610wi operates as Access Point. WDS Repeater : WDS(Wireless Distribution System) that can be used for the... -
Page 27: Figure 19. Wireless Security
WIZ610wi and WIZ610wi. When this mode is selected, AP function operates at the same time. Security : Configure the security options for WIZ610wi. When you click “Setup” button, below page appears. Figure 19. Wireless Security Setup Authentication : You can select an authentication method for the clients to connect to AP. -
Page 28: Table 6. Authentication Method
WPA2 PSK WPA2-PSK uses Advanced Encryption Standard(AES) for encryption Keys together with WPA PSK method. Table 6. Authentication Method Encryption : It configures authentication mode for security of wireless network. There are options of WEP and None. If WEP is selected, the below items are activated for configuration. -
Page 29: Figure 20. Wireless Advanced
Advanced Settings : If you click the “Setup” button, below page is appeared. Figure 20. Wireless Advanced Settings Field Description Fragment Threshold This value specifies the maximum size for a packet before data is fragmented into multiple packets. If you experience a high packet error rate, you may slightly increase the Fragmentation Threshold. -
Page 30: Figure 21. Wireless Accessc
Router to synchronize the wireless network. Table 8. Wireless Advanced Settings Access Control : By registering the MAC address of a client, WIZ610wi blocks or allows the client to access. If you click the “Setup” button, page below appears. Figure 21. Wireless Access Control Wireless Access Control Mode : This option allows you to enable or disable the “Wireless... -
Page 30: Figure 21. Wireless Accessc
Router to synchronize the wireless network. Table 8. Wireless Advanced Settings Access Control : By registering the MAC address of a client, WIZ610wi blocks or allows the client to access. If you click the “Setup” button, page below appears. Figure 21. Wireless Access Control Wireless Access Control Mode : This option allows you to enable or disable the “Wireless... - Page 31 WIZ610wi WDS Setting : If AP mode is set as WDS Repeater, WDS Setting button is activated. WDS is Wireless Distribution System that is working as a wireless bridge between AP and AP. If you click the “Setup” button, the page below appears.
- Page 31 WIZ610wi WDS Setting : If AP mode is set as WDS Repeater, WDS Setting button is activated. WDS is Wireless Distribution System that is working as a wireless bridge between AP and AP. If you click the “Setup” button, the page below appears.
-
Page 32: Gateway Setup
2.2.5.4. Gateway Setup <Notice> When changed to Gateway mode, wired network is disconnected, It because WIZ610wi’s wire port act as WAN Port. So to solve this problem.. 1. Connect WIZ610wi through wireless 2. Check WAN IP of Gateway mode setup page 3. -
Page 32: Gateway Setup
2.2.5.4. Gateway Setup <Notice> When changed to Gateway mode, wired network is disconnected, It because WIZ610wi’s wire port act as WAN Port. So to solve this problem.. 1. Connect WIZ610wi through wireless 2. Check WAN IP of Gateway mode setup page 3. - Page 33 Advanced Settings: Refer to “2.2.4.3 Access Point Setup”. Access Control: Refer to “2.2.4.3 Access Point Setup”. WAN Port : If configures WAN port. It configures the network environment for the connection to WIZ610wi. Figure 24. WAN Port Configuration WAN Access Type Static IP : Manually input your IP address, Subnet Mask, Default Gateway and DNS.
- Page 33 Advanced Settings: Refer to “2.2.4.3 Access Point Setup”. Access Control: Refer to “2.2.4.3 Access Point Setup”. WAN Port : If configures WAN port. It configures the network environment for the connection to WIZ610wi. Figure 24. WAN Port Configuration WAN Access Type Static IP : Manually input your IP address, Subnet Mask, Default Gateway and DNS.
- Page 34 DMZ Remote Management : Configure the port number for the connection to WIZ610wi from a remote site. Default Port Number is set as “8080”. URL Filter: It enables to connect or disconnect to the specified URL.
- Page 34 DMZ Remote Management : Configure the port number for the connection to WIZ610wi from a remote site. Default Port Number is set as “8080”. URL Filter: It enables to connect or disconnect to the specified URL.
-
Page 35: Client Setup
Figure 27. WAN Access Type - DDNS 2.2.5.5. Client Setup In client mode, WIZ610wi connects to an access point. Figure 28. Client Setup Alias Name: Input the name for WIZ610wi. Band: Select a communication protocol for your module. It supports 802.11b, 802.11g and 802.11b/g mode. -
Page 35: Client Setup
Figure 27. WAN Access Type - PPPoE 2.2.5.5. Client Setup In client mode, WIZ610wi connects to an access point. Figure 28. Client Setup Alias Name: Input the name for WIZ610wi. Band: Select a communication protocol for your module. It supports 802.11b, 802.11g and 802.11b/g mode. -
Page 36: Figure 29. Site Survey
If PC or application device is set as DHCP Client, the AP will operates as its DHCP server and WIZ610wi doesn’t act as DHCP Server. When you connect to an AP with security enabled ,the “Wireless Security Setup Page” will appear automatically to set-up your security settings. -
Page 37: Serial Setting
In server mode, WIZ610wi waits for the connection from a client. In client mode, WIZ610wi operates as client at the TCP Client mode on the process of connection, and tries to connect to the server’s IP and Port. Mixed modes supports both of Server and Client at the same time. -
Page 37: Serial Setting
In server mode, WIZ610wi waits for the connection from a client. In client mode, WIZ610wi operates as client at the TCP Client mode on the process of connection, and tries to connect to the server’s IP and Port. Mixed modes supports both of Server and Client at the same time. - Page 38 1. A client connects to the WIZ610wi which is in TCP Server mode. 2. As the connection is established, data can be transmitted in both directions –...
- Page 38 1. A client connects to the WIZ610wi which is in TCP Server mode. 2. As the connection is established, data can be transmitted in both directions –...
- Page 39 Stopbits: Configure stop bit option.(Option: 1, 2) FlowControl: Configure flow control option. (option: none, Xon/Xoff, RTS/CTS) Aux Port Configuration You can control serial devices through the serial port of WIZ610wi by using AUX port, while you can keep serial to WiFi data communication port.
- Page 39 Stopbits: Configure stop bit option.(Option: 1, 2) FlowControl: Configure flow control option. (option: none, Xon/Xoff, RTS/CTS) Aux Port Configuration You can control serial devices through the serial port of WIZ610wi by using AUX port, while you can keep serial to WiFi data communication port.
- Page 40 Status: You can enable Aux Port. Protocol : Aux port can use only UDP protocol. Mode : You can select server or client mode. Server IP : If you select the client mode, Server IP is enabled. Server Port: Input the port number of the server. Data Packing Condition : You can specify how the serial data can be packed to be sent to the Ethernet.
- Page 40 Status: You can enable Aux Port. Protocol : Aux port can use only UDP protocol. Mode : You can select server or client mode. Server IP : If you select the client mode, Server IP is enabled. Server Port: Input the port number of the server. Data Packing Condition : You can specify how the serial data can be packed to be sent to the Ethernet.
-
Page 41: Security Setup
Save : Save the configuration values. Reset : Discard all changes in all fields 2.2.7. Security Setup Refer to “2.2.4.3. Access Point Setup’. 2.2.8. Others 2.2.8.1. Password You can change the password of WIZ610wi... -
Page 41: Security Setup
Save : Save the configuration values. Reset : Discard all changes in all fields 2.2.7. Security Setup Refer to “2.2.4.3. Access Point Setup’. 2.2.8. Others 2.2.8.1. Password You can change the password of WIZ610wi... -
Page 42: Log
Figure 32. System Log 2.2.8.3. Upgrade In this page, you can upgrade the firmware of your WIZ610wi. Browse the firmware file by clicking the “Find” button. If you click “Upload” button after selecting firmware file, the firmware starts uploading. This process will take about 60... -
Page 42: Log
Figure 32. System Log 2.2.8.3. Upgrade In this page, you can upgrade the firmware of your WIZ610wi. Browse the firmware file by clicking the “Find” button. If you click “Upload” button after selecting firmware file, the firmware starts uploading. This process will take about 60... -
Page 43: Factory Default
Figure 33. Upgrade Firmware 2.2.8.4 Factory Default If you click the “Factory Default” button, all settings value are restored to the factory default setting. The factory default values are shown below: Field Default Value IP Address 192.168.1.254 Subnet Mask 255.255.255.0 Default Gateway 0.0.0.0 DHCP... -
Page 44: Table 9. Factory Default Value
SSID WLANAP Channel AP Mode Authentication Open system or Shared Key Encryption None Fragment Threshold 2346 RTS Threshold 2346 Preamble Type Long Preamble Beacon Interval 100ms Inactivity Time 30000ms Broadcast SSID Enable Enable Password Admin Disable Table 9. Factory Default Value... -
Page 45: Reboot
2.2.8.5. Reboot In this page, you can reboot your module. Figure 34. Reboot System... -
Page 45: Reboot
2.2.8.5. Reboot In this page, you can reboot your module. Figure 34. Reboot System... -
Page 46: Pin Assignment And Module Size
3. Pin Assignment and Module Size Figure 35. WIZ610WI PIN Map Name In/Out Description UART : CTS UART : RTS HW_Trigger Low : Entering serial command mode High : Exit serial command mode nRS232_LED Serial RX/TX LED (Active Low) Reserved... -
Page 46: Pin Assignment And Module Size
3. Pin Assignment and Module Size Figure 35. WIZ610WI PIN Map Name In/Out Description UART : CTS UART : RTS HW_Trigger Low : Entering serial command mode High : Exit serial command mode nRS232_LED Serial RX/TX LED (Active Low) Reserved... -
Page 47: Table 10. Wiz610Wi Pin Function
MII receive data RXD1 MII receive data RXD3 MII receive data MII transmit clock TXEN MII transmit enable TXD3 MII transmit data TXD2 MII transmit data TXD0 MII transmit data TXD1 MII transmit data Carrier sense Table 10. WIZ610wi Pin Function... -
Page 47: Table 10. Wiz610Wi Pin Function
MII receive data RXD1 MII receive data RXD3 MII receive data MII transmit clock TXEN MII transmit enable TXD3 MII transmit data TXD2 MII transmit data TXD0 MII transmit data TXD1 MII transmit data Carrier sense Table 10. WIZ610wi Pin Function... - Page 48 Figure 36. WIZ610WI Board Dimensions (unit : mm)
- Page 48 Figure 36. WIZ610WI Board Dimensions (unit : mm)
-
Page 49: Demonstration And Test
4. Demonstration and Test In this chapter, an example is provided for you to test the functionality of WIZ610wi. The testing environments are the followings: <Hardware> A PC equipped with a RS-232 serial port WIZ610WI module and WIZ610WI base board Connect PC and module’s Ethernet port by using an Ethernet Cable(Direct or... -
Page 50: Figure 37. Serial Terminal Program Configuration
Figure 37. Serial Terminal Program configuration ③ Connect to “WIZ610wi” in the Wireless Network Setting of your PC ④ Execute one more terminal program, and set IP address and Port number. -
Page 50: Figure 37. Serial Terminal Program Configuration
Figure 37. Serial Terminal Program configuration ③ Connect to “WIZ610wi” in the Wireless Network Setting of your PC ④ Execute one more terminal program, and set IP address and Port number. -
Page 51: Figure 38. Network Terminal Program Configuration
Figure 38. Network Terminal Program configuration ⑤ Input any characters in the Hyper Terminal for Serial. (In the example below, “01234567890” is input). The same characters are outputted in the Hyper Terminal for Network. A Serial to Wireless LAN test was performed. Figure 39. -
Page 52: Figure 40. Device Terminal Program
TCP Client and TCP Server modes at the same time. If the Server Mode is enabled, Device Terminal will operate as server mode, and the WIZ610wi module will work as client mode. The PC where the Device Terminal is operating will work as a server, the IP address of the PC should be set as Server IP of the module. -
Page 53: Serial Configuration
Serial Command Format It is possible to configure WIZ610wi by using serial command. Pin number 4 of WIZ610wi is Hardware trigger pin.(‘1’: H/W trigger disable, ‘0’: enable) Or you can use h/w trigger switch of WIZ610wi EVB board < Frame Format >... -
Page 53: Serial Configuration
Serial Command Format It is possible to configure WIZ610wi by using serial command. Pin number 4 of WIZ610wi is Hardware trigger pin.(‘1’: H/W trigger disable, ‘0’: enable) Or you can use h/w trigger switch of WIZ610wi EVB board < Frame Format >... -
Page 54: Table 14. Serial Configuration Reply Code
Invalid STX Invalid command Invalid parameter Invalid ETX Enter Serial Command Mode Table 14. Serial Configuration Reply Code Command Code Get/ Time Comments Parameter mand (sec) Network * Command Syntax Firmware <RF> Version * Response Syntax <Svx.x.x> * Command Syntax <RA>... -
Page 54: Table 14. Serial Configuration Reply Code
Invalid STX Invalid command Invalid parameter Invalid ETX Enter Serial Command Mode Table 14. Serial Configuration Reply Code Command Code Get/ Comments Parameter Time mand Network Firmware vx.x.x Version 0:Ethernet MAC address, 1:Wireless MAC address, MAC Address <0xx.xx.xx.xx.xx.xx_1xx.xx.xx.xx.xx.xx> IP Address <Sxxx.xxx.xxx.xxx>... - Page 55 * Command Syntax <WSxxx.xxx.xxx.xxx> Subnet Mask * Response Syntax <S> * Command Syntax <RG> Gateway * Response Syntax <Sxxx.xxx.xxx.xxx> * Command Syntax <WGxxx.xxx.xxx.xxx> Gateway * Response Syntax <S> * Command Syntax <RD> DHCP Server * Response Syntax <Sx> 1:Enable, 0:Disable * Command Syntax <WDx>...
- Page 55 <IP address_MAC address> DHCP Client <Sxxx.xxx.xxx.xxx_xxxxxxxxxxxx[:xxx.xxx.xxx.xxx_xxxxxxxxxxxx:…] List > 1:Enable, 0:Disable DNS Server <1:xxx.xxx.xxx.xxx[_xx.xx.xx.xx]> or<0> 1:Enable, 0:Disable_DNS Server IP address DNS Server <Sx_xxx.xxx.xxx.xxx[_xx.xx.xx.xx]> or<0> 0:Static, 1:DHCP Client, 2:PPPoE, 3:PPTP -Static: 0_Ipaddress_Subnet_Gateway_DNS <S0_xxx.xxx.xxx.xxx_xxx.xxx.xxx.xxx_xxx.xxx.xxx.xxx_xxx.xxx.xxx.x xx> -DHCP Client: 1_IPaddress_Subnet_Gateway <S1_xxx.xxx.xxx.xxx_xxx.xxx.xxx.xxx_xxx.xxx.xxx.xxx> WAN Port PPPoE: 2_UserName_Password <S2_User Name_Password>...
- Page 56 MAC address_Channel_TxRate_RSSI * Command Syntax <RL> DHCP Client * Response Syntax List <Sxxx.xxx.xxx.xxx_xxxxxxxxxxxx[:xxx.xxx.xxx.xxx_xxxxxxxxxxxx:…] > IP address_MAC address * Command Syntax <WV0> or <WV1_xxx.xxx.xxx.xxx[_xxx.xxx.xxx.xxx]> DNS Server 0:Auto_DNS server IP address, 1:Manual * Response Syntax <S> * Command Syntax <RV> DNS Server * Response Syntax <Sx_xxx.xxx.xxx.xxx[_xxx.xxx.xxx.xxx]>...
- Page 56 Wireless Wireless 0: 11b+g, 2: 11b, 3:11g Band <Sx> Wireless 0: 11b+g, 2: 11b, 3:11g Band <x> Operation 0:AP, 1:Gateway, 2: AP+WDS, 3:Client Mode <Sx> Operation 0:AP, 1:Gateway, 2: AP+WDS, 3:Client Mode <x> 1~32 chars SSID <Sxxxx~> 1~32 chars SSID <xxxx~>...
- Page 57 * Command Syntax <WT0_xxx.xxx.xxx.xxx_xxx.xxx.xxx.xxx_xxx.xxx.xxx.xxx_xxx.xxx.xxx .xxx> or <WT1> or <WT2_User Name_Password> WAN Port 0:Static, 1:DHCP Client, 2:PPPoE -Static: 0_Ipaddress_Subnet_Gateway_DNS -DHCP Client: 1 -PPPoE: 2_UserName_Password * Response Syntax <S> * Command Syntax <RC> Connection * Response Syntax status <Sx> 0: Not Connect, 1:Connect * Command Syntax <WC>...
- Page 57 <Sx> 1:Enable, 0:Disable <x> 0:Disable,1:AllowListed,2:DenyListed[_count[_MACaddress_Co MAC Access mment]] Control <Sx_x_xxxxxxxxxxxx_xxx~> 0:Disable,1:AllowListed,2:DenyListed[_1:add,2:delete_count_M MAC Access ACaddress_Comment] Control <x_x_x_xxxxxxxxxxxx_xxx~> SSID_BSSID_Channel_RSSI_Security Site Survey <Sxxxx_xxxxxxxxxxxx_xx_xx_x> Alias Name Alias Name <Sxxx> Alias Name, Max Length: 29bytes Alias Name <xxx> Module connection status_SSID_BSSID_CHAN_RATE_RSSI Status Conn_status: ‘0’ is not connected, ‘1’ is connected. Checking <Sx_xxxx_xxxxxxxxxxxx_xx_xxM_xx>...
- Page 58 0: 11b+g, 2: 11b, 3:11g * Response Syntax <S> * Command Syntax <DO> Operation * Response Syntax Mode <Sx> 0:AP, 1:Gateway, 2: AP+WDS, 3:Client * Command Syntax <GOx> Operation 0:AP, 1:Gateway, 2: AP+WDS, 3:Client Mode * Response Syntax <S> * Command Syntax <DS>...
- Page 58 KeyLength: 0(None), 1(WEP64), 2(WEP128) KeyFormat(WEP): 0(Ascii), 1(Hex) KeyFormat(WPA-PSK): 0(Passphrase), 1(Hex) (WPA-PSK KeyValue: 8~63byte) <x_x_x_x_x_x_x_x> Serial TCP_0, UDP_1 Protocol <Sx> TCP_0, UDP_1 Protocol <x> 0:Client, 1:Mixed, 2:Server Mode <Sx> 0:Client, 1:Mixed, 2:Server Mode <x> Server IP address Server IP <Sxxx.xxx.xxx.xxx> Server IP address Server IP <xxx.xxx.xxx.xxx>...
- Page 59 <Sx_x_xxxxxxxxxxxx_xxx~> 1:Master, 2:Slave _count_MACaddress_Comment[_MACaddress_Comment_...] * Command Syntax <GWx_x_x_xxxxxxxxxxxx_xxx~> 1:Master, 2:Slave _count_MACaddress_Comment[_MACaddress_Comment_...] * Response Syntax <S> * Command Syntax <DP> Tx Power * Response Syntax <Sxx> 0: off, 1~16: power(dBm) * Command Syntax <GPxx> Tx Power 0: off, 1~16: power(dBm) * Response Syntax <S>...
- Page 59 [Stopbits]; 1: 1stop, 2:2stop <xxxxx> Domain <Sstring>, Max 64 characters Name Domain <string>, MAX 64 characters Name 0~65535 Time <Sxxxxx> 0~65535 Time <xxxxx> 0~255 Size <Sxxx> 0~255 Size <Sxxx> 00~ff Char <Sxx> 00~ff Char <xx> Inactivity 00~60 Time <Sxx> Inactivity 00~60 Time <xx>...
- Page 60 0:Enable, 1:Disable * Response Syntax <S> * Command Syntax <DM> * Response Syntax <Sx> 1:Enable, 0:Disable * Command Syntax <GMx> 1:Enable, 0:Disable * Response Syntax <S> * Command Syntax <DA> MAC Access * Response Syntax Control <Sx_x_xxxxxxxxxxxx_xxx~> 0:Disable, 1:AllowListed, 2:DenyListed[_count[_MACaddress_Comment]] * Command Syntax <GAx_x_x_xxxxxxxxxxxx_xxx~>...
- Page 60 Enable: 0(Disable), 1(Enable), If Disable is set, data can be omitted. Protocol: 0(UDP), 1(TCP) Mode: 0(Server), 1(Client) ServerIP: in the a.b.c.d format Domain: xxx.yyy.zzz ServerPort: 0~65535 <Sx_x_x_a.b.c.d_x> Enable[_Protocol_Mode_ServerIP or Domain_ServerPort] Enable: 0(Disable), 1(Enable), If Disable is set, data can be omitted.
- Page 61 connection is not established. In this cause, use <GU>command for the connection. * Response Syntax <S> * Command Syntax <DN> Alias Name * Response Syntax <Sxxx~> Alias Name, Max Length: 29 characters * Command Syntax <GNxxx~> Alias Name Alias Name, Max Length: 29 characters * Response Syntax <S>...
- Page 61 maximum 16 characters. <Sx_xxx_xxx> Enable(0~1)[_String1_String2] 0: disable, default value, String can be omitted. 1: enable String1, String2: It is available when Enable is set as “1”. Set insert tag String1 is the string which is added when transmitted from main port to serial. String2 is the string which is added when transmitted from aux port to serial.
- Page 62 AuthMode_Encrypt[_DefaultKey_KeyLength_KeyFormat_KeyVa lue_radiusPasswd_radiusIP_radiusPort] AuthMode: 0(Open or Shared), 1(Open), 2(802.1x), 3(Shared), 4(WPA), 5(WPA-PSK), 6(WPA2), 7(WPA2-PSK) Encrypt: 0(None),1 (WEP), 2(TKIP), 3(AES), 4(TKIP_AES) DefaultKey: 1~4 KeyLength: 0(None), 1(WEP64), 2(WEP128) KeyFormat(WEP): 0(Ascii), 1(Hex) KeyFormat(WPA-PSK): 0(Passphrase), 1(Hex) * Response Syntax <S> Serial * Command Syntax <RK> Protocol * Response Syntax <Sx>...
- Page 62 If multi command input, response time be delayed For example DA, GA, DW, GW Security Available mode AP/GW Mode AuthMode: 0-7 EncryptType: 0-3 Client Mode AuthMode: 1,3,5,7 EncryptType: 0,1,4 **Security Example parameter <GU5_2_0_0_12345678> <GU4_2_0_0_12345678_abcd_192.168.123.111_1812>...
-
Page 63: Reference Schematics
Server IP address * Command Syntax <WXxxx.xxx.xxx.xxx> Server IP Server IP address * Response Syntax <S> * Command Syntax <RP> Port * Response Syntax <Sxxxxx> Port number: 0~65535 * Command Syntax <WPxxxxx> Port Port number: 0~65535 * Response Syntax <S> * Command Syntax <RB>... -
Page 63: Reference Schematics
6. Reference Schematics In this chapter, the reference schematics are provided for the WIZ610wi’s MII & UART interfaces. 6.1 WIZ610wi Module Pin assign Figure 41. WIZ610wi Module Pin Assignment MII interface signal TXD[0..3] MII transmit data TXEN MII transmit enable... -
Page 64: External Phy Interface Using Mii
Table 15. WIZ610wi Pin Assignment 6.2 External PHY interface using MII Figure 42. Schematic - External PHY Interface using MII As shown in the above schematic, each MII interface signal of WIZ610wi can be connected to MII interface by using an external PHY chip. -
Page 64: External Phy Interface Using Mii
[Stop bits]; 1: 1stop, 2:2stop * Response Syntax <S> * Command Syntax <RW> Domain * Response Syntax Name <Sxxxx~> Domain name: Max 64 characters * Command Syntax <WWxxxx~> Domain Domain name: Max 64 characters Name * Response Syntax <S> * Command Syntax <QT>... -
Page 65: Rs-232C Interface
6.3 RS-232C interface Figure 43. Schematic – RS-232C Interface As shown above diagram, each UART interface signal can be connected to the interface of RS-232C transceiver chip. (e.g. Sipex’s SP3232EBEY RS-232C Transceiver chip) -
Page 65: Rs-232C Interface
<Sxx> 00~ff * Command Syntax <OCxx> Char 00~ff * Response Syntax <S> * Command Syntax <QI> Inactivity * Response Syntax Time <Sxx> 00~60 * Command Syntax <OIxx> Inactivity 00~60 Time * Response Syntax <S> * Command Syntax <QU> * Response Syntax <Sx>... -
Page 66: Serial To Wifi Interface
6.4 Serial to WiFi interface Figure 44. Schematic – Serial to WiFi Reference Schematic... -
Page 66: Serial To Wifi Interface
<RU> * Response Syntax <Sx_x_x_a.b.c.d_x> Enable[_Protocol_Mode_ServerIP or Domain_ServerPort] Enable: 0(Disable), 1(Enable) If Disable is set, data can be omitted. Protocol: 0(UDP), 1(TCP) Mode: 0(Server), 1(Client) ServerIP: a.b.c.d format Domain: xxx.yyy.zzz ServerPort: 0~65535 * Command Syntax <WUx_x_x_a.b.c.d_x> Enable[_Protocol_Mode_ServerIP or Domain_ServerPort] Enable: 0(Disable), 1(Enable) If Disable is set, data can be omitted.
Need help?
Do you have a question about the WIZ610wi and is the answer not in the manual?
Questions and answers