Table of Contents
Advertisement
Quick Links
Advertisement
Table of Contents

Related Manuals for IBM RackSwitch G8264T


Summary of Contents for IBM RackSwitch G8264T
- Page 1 IBM System Networking RackSwitch G8264T Installation Guide...
- Page 3 IBM System Networking RackSwitch G8264T Installation Guide...
- Page 4 Note: Before using this information and the product it supports, read the general information in the Safety information and Environmental Notices and User Guide documents on the IBM Documentation CD and the Warranty Information document that comes with the product.
-
Page 5: Safety Information
Перед установкой продукта прочтитe инcтрyкции по тexникe безопасности. Pred inštaláciou tohto zariadenia si prečítajte Bezpečnostné predpisy. Pred namestitvijo tega proizvoda preberite Varnostne informacije. Antes de instalar este producto, lea la información de seguridad. Läs säkerhetsinformationen innan du installerar den här produkten. © Copyright IBM Corp. 2012 Safety... - Page 6 DANGER Hazardous voltage, current, or energy levels are present inside any component that has this label attached. Do not open any cover or barrier that contains this label. (L001) RackSwitch G8264T: Installation Guide...
- Page 7 DANGER Multiple power cords. The product might be equipped with multiple power cords. To remove all hazardous voltages, disconnect all power cords. (L003) © Copyright IBM Corp. 2012 Safety...
- Page 8 Electrical voltage and current from power, telephone, and communication cables are hazardous. To avoid a shock hazard: • Connect power to this unit only with the IBM provided power cord. Do not use the IBM provided power cord for any other product.
- Page 9 • Use of the controls or adjustments or performance of procedures other than those specified herein might result in hazardous radiation exposure. (C026) CAUTION: This product contains a Class 1M laser. Do not view directly with optical instruments. (C028) © Copyright IBM Corp. 2012 Safety...
- Page 10 To provide the correct power connection to a rack, refer to the rating labels located on the equipment in the rack to determine the total power requirement of the supply circuit. RackSwitch G8264T: Installation Guide...
- Page 11 (R001 part 2 of 2) Important: This product is also designed for IT power distribution systems with phase-to-phase voltage of 230V. Important: Machinenlärminformations-Verordnung - 3. GPSGV, der höchste Shalldruckpegel beträgt 70 dB(A) oder weniger. © Copyright IBM Corp. 2012 Safety...
- Page 12 RackSwitch G8264T: Installation Guide...
-
Page 13: Table Of Contents
..... . 1 The IBM Documentation CD ..... 2 Related documentation . - Page 14 Hardware service and support ....40 IBM Taiwan product service ....40 Appendix B.
-
Page 15: Chapter 1. Introduction
If firmware and documentation updates are available, you can download them from the IBM website. The switch might have features that are not described in the documentation that comes with the switch, and the documentation might be updated... -
Page 16: The Ibm Documentation Cd
The IBM Documentation CD The IBM Documentation CD contains documentation for your switch in Portable Document Format (PDF) and includes the IBM Documentation Browser to help you find information quickly. Hardware and software requirements The IBM Documentation CD requires the following minimum hardware and software: •... -
Page 17: Related Documentation
Click Help for detailed information about using the Documentation Browser. Related documentation For documentation about configuring your switch, see the RackSwitch G8264T Application Guide and Command Reference. For details about the switch information, statistics, and configuration parameters, see the RackSwitch G8264T Command Reference. -
Page 18: Rackswitch G8264T Features
RackSwitch G8264T features This section provides an overview of RackSwitch G8264T features. Performance • 1280 Gbps throughput (full duplex), non-blocking switching architecture • 100% line rate at all packet sizes Management features • Clients – Industry standard command-line interface (ISCLI) –... - Page 19 – 8 K ARP entries – IPv6 host management • Quality of Service – 802.1p priority queues – Differentiated Services Code Point (DSCP) support • Availability – Layer 2 Failover – Hot Links – VRRP © Copyright IBM Corp. 2012 Chapter 1. Introduction...
-
Page 20: Switch Components
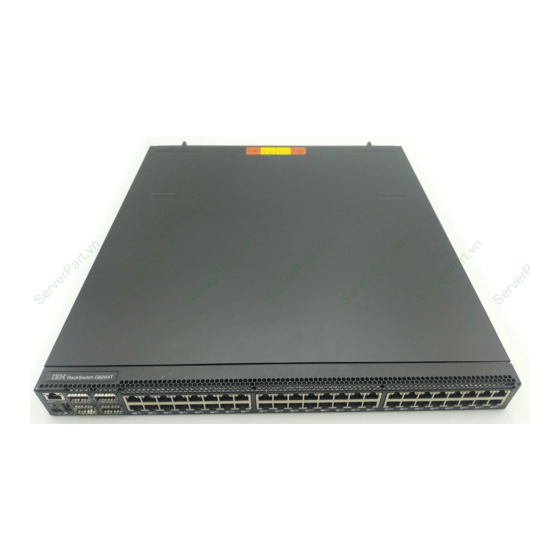
Each RackSwitch G8264T series switch unit is a 1U rack-mountable Ethernet switch. You can mount the G8264T in either the horizontal or vertical direction. The RackSwitch G8264T allows for flexible mounting of the switch, as follows: • The RackSwitch G8264T (front to rear) provides front-to-rear airflow. - Page 21 51 52 53 54 55 56 57 58 59 60 61 62 63 64 10GBASE-T Ports Figure 2. RackSwitch G8264T Front Panel (Detail) RJ-45 Port Mgmt Reset Button USB Port RS-232 Port System Status LEDs Figure 3. RackSwitch G8264T Rear Panel...
-
Page 22: Reset Button
There is no power switch on the G8264T; the switch unit powers up when power is supplied through the power cord(s). Power cords must be ordered separately. RackSwitch G8264T: Installation Guide... -
Page 23: Switch Ports
The LED lights steady when both power cords are connected. Switch ports The RackSwitch G8264T switch ports and port options are described in this section. 10GBASE-T Ports Forty-eight 10GBASE-T ports are located on the front panel. These ports accept the following copper cables: •... -
Page 24: Usb Port
USB drive, or from the USB drive to the switch. You also can start the switch using files on the USB drive. For more information about using the USB drive, see the RackSwitch G8264T Release Notes. - Page 25 RJ-45 port on the console cable, and the other end of the patch cable to the RJ-45-to-DB9 adapter (see the following illustration). Figure 4 Console Cable Connections To PC Switch Terminal Switch Category 5 Console Cable Patch Cable RJ-45 Adapter © Copyright IBM Corp. 2012 Chapter 1. Introduction...
-
Page 26: Leds
Note 3: If service required due to stacking error, this LED flashes or is steady green, depending on its last known good state. Note 4: If an operations command is sent to the unit, this LED is steady blue. It can be used to locate the device. RackSwitch G8264T: Installation Guide... - Page 27 Management Port RJ-45 LEDs Status LEDs for the RJ-45 management port are described in the following table. Table 7. RJ-45 LEDs Status Solid Blink Status (Green) Down Activity (Amber) Link activity No activity © Copyright IBM Corp. 2012 Chapter 1. Introduction...
-
Page 28: Technical Specifications
Technical specifications The RackSwitch G8264T technical specifications are described in the following sections. Physical characteristics Physical characteristics of the RackSwitch G8264T switch unit are listed in the following table. Table 8. RackSwitch G8264T Physical Characteristics Dimensions (H x W x D) Weight 4.4 x 43.9 x 51.6 cm. -
Page 29: Power Specifications
Power specifications Power specifications for the RackSwitch G8264T switch unit are listed in Table Table 10. AC Power Specifications Specification Measurement Number of power supplies 2 (1+1 load sharing/redundant) AC-input frequency (universal) 50/60 Hz AC-input voltage (universal) 100-127 / 200-240 VAC AC-input current (typical) 3.2 A (RMS) @ 120 V... - Page 30 RackSwitch G8264T: Installation Guide...
-
Page 31: Chapter 2. Installing The Rackswitch G8264T
Chapter 2. Installing the RackSwitch G8264T This chapter describes how to install and initialize the RackSwitch G8264T. Required tools You need the following tools or equipment to install the RackSwitch G8264T: • Standard flat-blade screwdriver • #2 Phillips screwdriver •... - Page 32 Electrical voltage and current from power, telephone, and communication cables are hazardous. To avoid a shock hazard: • Connect power to this unit only with the IBM provided power cord. Do not use the IBM provided power cord for any other product. •...
-
Page 33: Handling Static-Sensitive Devices
Do not place the device on a switch cover or on a metal surface. • Take additional care when you handle devices during cold weather. Heating reduces indoor humidity and increases static electricity. © Copyright IBM Corp. 2012 Chapter 2. Installing the RackSwitch G8264T... -
Page 34: Installing The Rackswitch G8264T In A Standard Equipment Rack
Installing the RackSwitch G8264T in a standard equipment rack This section describes how to install the RackSwitch G8264T in a standard 19-inch equipment rack. For information about mounting the G8264T in other rack types, refer to the following sections: •... - Page 35 To mount the RackSwitch G8264T in a standard equipment rack, complete the following steps. 1. Use the M4 screws to attach a mounting bracket to each side of the switch. Torque the screws to approximately 10 inch-pounds (1.13 Nm). 2. Slide the switch into the rack.
-
Page 36: Installing The Rackswitch G8264T In An Ibm Idataplex Rack
Installing the RackSwitch G8264T in an IBM iDataPlex rack This section describes how to install the RackSwitch G8264T in an IBM iDataPlex rack. The iDataPlex mounting kit allows the switch to be mounted either vertically or horizontally. For information about mounting the G8264T in other rack types, see the following sections: •... - Page 37 To mount the RackSwitch G8264T in an iDataPlex rack, complete the following steps: 1. Use the M4 screws to attach front and rear mounting brackets to each side of the switch unit. Torque the screws to approximately 1.3 newton-meters(10 inch-pounds).
- Page 38 3. M6 screws, washers, and clip nuts are used to attach the alignment plate. Torque the screws to approximately 3.5 newton-meters (30 inch-pounds). RackSwitch G8264T: Installation Guide...
-
Page 39: Installing The Rackswitch G8264T In An Ibm System X Rack
4-post rack, such as the IBM e1350. For information about mounting the G8264T in other rack types, refer to the following sections: • “Installing the RackSwitch G8264T in a standard equipment rack” on page 20 • “Installing the RackSwitch G8264T in an IBM iDataPlex rack” on page 22 The System x mounting kit must be purchased separately. - Page 40 To mount the RackSwitch G8264T into a System x 4-post rack, complete the following steps: 1. Use M4 screws to attach the front mounting brackets to each side of the switch. Torque the screws to approximately 1.13 newton-meters (10 inch-pounds).
- Page 41 SEE STEP 5 4. Use M6 washers, screws, and clip nuts to attach the filler plate to the rear mounting brackets. Torque the screws to approximately 3.5 newton-meters (30 inch-pounds). © Copyright IBM Corp. 2012 Chapter 2. Installing the RackSwitch G8264T...
- Page 42 5. Use M3 screws to secure the rear brackets to the front brackets. Torque the screws to approximately 0.5 newton-meters4 inch-pounds). 10 11 RackSwitch G8264T: Installation Guide...
-
Page 43: Initializing The Rackswitch G8264T
Initializing the RackSwitch G8264T When you supply power to the RackSwitch G8264T, the switch initializes automatically. DANGER Multiple power cords. The product might be equipped with multiple power cords. To remove all hazardous voltages, disconnect all power cords. (L003) The following LEDs indicate the overall system status: •... -
Page 44: Default Configuration
CLI to perform many basic network management functions. In addition, you can configure the switch for management using an SNMP-based network management system or a Web browser. For more information about using the CLI, refer to the RackSwitch G8264T Command Reference. RackSwitch G8264T: Installation Guide... -
Page 45: Using The Boot Management Menu
• To perform an Xmodem download (boot image only), press 4 and follow the screen prompts. • To exit the Boot Management menu, press 6. The booting process continues. © Copyright IBM Corp. 2012 Chapter 2. Installing the RackSwitch G8264T... -
Page 46: Installing Qsfp+ Transceivers
Installing QSFP+ transceivers The RackSwitch G8264T supports QSFP+ fiber transceivers. For the available transceivers for the switch, see https://www-01.ibm.com/products/hardware/ configurator/americas/bhui/launchNI.wss. The QSFP+ ports accept approved QSFP+ transceivers. The QSFP+ optical transceiver provides an MTP cable connector for connecting to external ports. -
Page 47: Installing Or Replacing A Power Supply Module
To remove all hazardous voltages, disconnect all power cords. (L003) The RackSwitch G8264T operates with either one or two active power supply modules. Each hot-swap power supply module can be replaced by the customer without powering off the switch or disrupting switch functions. -
Page 48: Installing An Ac Power Supply Module
2. Connect the power cord to the power supply module and to an AC power source. 3. Turn on the power at the power source. 4. Make sure that the power supply OK and AC LEDs are green. RackSwitch G8264T: Installation Guide... -
Page 49: Installing Or Replacing A Fan Module
Installing or replacing a fan module The RackSwitch G8264T contains four hot-swap fan modules. All four fan modules are required for normal operation. The switch continues to operate when there is one failed fan module. If one fan module fails, the switch sends an error message. If a second module fails, the switch sends an error message, writes a failure log to flash memory, and shuts down. -
Page 50: Troubleshooting
If you have problems accessing the switch or working with the software, see the RackSwitch G8264T Command Reference. For information about calling IBM for service, see “Getting help and technical assistance” on page System LEDs is not lit Symptom: The power supply LED is not lit. -
Page 51: Chapter 3. Replaceable Switch Parts
Replaceable switch parts The replaceable switch parts are Tier 1 customer replaceable units (CRUs). Replacement of Tier 1 CRUs is your responsibility. If IBM installs a Tier 1 CRU at your request, you will be charged for the installation. For information about the terms of the warranty, see the Warranty Information document that comes with the switch. -
Page 52: Power Cords
Power Cord China AC plug 16A/250V; OPT 39Y7929 Power Cord Brazil AC plug 16A/250V; OPT 39Y7930 Power Cord Uruguay/Argentina AC plug 16A/250V; OPT 46M2592 Power Cord US 2.8M AC plug 10A/250V; OPT 46M2593 Power Cord Japan 2.8M AC plug 12A/125V; OPT RackSwitch G8264T: Installation Guide... -
Page 53: Appendix A. Getting Help And Technical Assistance
If you need help, service, or technical assistance or just want more information about IBM products, you will find a wide variety of sources available from IBM to assist you. This section contains information about where to go for additional information about IBM and IBM products, what to do if you experience a problem with your system, and whom to call for service, if it is necessary. -
Page 54: Software Service And Support
You can find service information for IBM systems and optional devices at http://www.ibm.com/systems/support/. Software service and support Through IBM Support Line, you can get telephone assistance, for a fee, with usage, configuration, and software problems with System x and x Series servers, BladeCenter products, IntelliStation workstations, and appliances. For information about which products are supported by Support Line in your country or region, see http://www.ibm.com/services/sl/products/. -
Page 55: Appendix B. Notices
The materials at those websites are not part of the materials for this IBM product, and use of those websites is at your own risk. IBM may use or distribute any of the information you supply in any way it believes appropriate without incurring any obligation to you. -
Page 56: Telecommunication Regulatory Statement
These products are offered and warranted solely by third parties. IBM makes no representations or warranties with respect to non-IBM products. Support (if any) for the non-IBM products is provided by the third party, not IBM. RackSwitch G8264T: Installation Guide... -
Page 57: Particulate Contamination
If IBM determines that the levels of particulates or gases in your environment have caused damage to the device, IBM may condition provision of repair or replacement of devices or parts on implementation of appropriate remedial measures to mitigate such environmental contamination. -
Page 58: Electronic Emission Notices
In the request, be sure to include the publication part number and title. When you send information to IBM, you grant IBM a non-exclusive right to use or distribute the information in any way it believes appropriate without incurring any obligation to you. -
Page 59: European Union Emc Directive Conformance Statement
Klasse A ein. Um dieses sicherzustellen, sind die Geräte wie in den Handbüchern beschrieben zu installieren und zu betreiben. Des Weiteren dürfen auch nur von der IBM empfohlene Kabel angeschlossen werden. IBM übernimmt keine Verantwortung für die Einhaltung der Schutzanforderungen, wenn das Produkt ohne Zustimmung der IBM verändert bzw. -
Page 60: Japan Vcci Class A Statement
914-499-1900 Der verantwortliche Ansprechpartner des Herstellers in der EU ist: IBM Deutschland Technical Regulations, Department M456 IBM-Allee 1, 71137 Ehningen, Germany Telephone: +49 7032 15-2937 E-mail: tjahn@de.ibm.com Generelle Informationen: Das Gerät erfüllt die Schutzanforderungen nach EN 55024 und EN 55022 Klasse A. -
Page 61: Korea Communications Commission (Kcc) Statement
This is for any areas other than home. Russia Electromagnetic Interference (EMI) Class A statement People’s Republic of China Class A electronic emission statement Taiwan Class A compliance statement © Copyright IBM Corp. 2012 Appendix B. Notices... - Page 62 RackSwitch G8264T: Installation Guide...
- Page 64 Part Number: 00D2275 Printed in USA (IP) P/N: 00D2275...
Need help?
Do you have a question about the RackSwitch G8264T and is the answer not in the manual?
Questions and answers