LaMotte SMART3 Operator's Manual
Colorimeter
Hide thumbs
Also See for SMART3:
- Operator's manual (264 pages) ,
- Quick start manual (2 pages) ,
- Manual (32 pages)
Table of Contents
Advertisement
1910-MN-V3
06.01.17
Warning! This set contains chemicals
that may be harmful if misused. Read
cautions on individual containers
carefully. Not to be used by children
except under adult supervision.
1910-MN-V3.indd
SMART3
Colorimeter
Operator's
Manual
Firmware Version 2.10
PO Box 329 • Chestertown • MD • 21620
800-344-3100 • 410-778-3100
www.lamotte.com
and greater
Advertisement
Table of Contents

Subscribe to Our Youtube Channel
Related Manuals for LaMotte SMART3


Summary of Contents for LaMotte SMART3
- Page 1 SMART3 Colorimeter Operator’s Manual Firmware Version 2.10 and greater 1910-MN-V3 06.01.17 Warning! This set contains chemicals that may be harmful if misused. Read cautions on individual containers carefully. Not to be used by children except under adult supervision. PO Box 329 • Chestertown • MD • 21620 800-344-3100 •...
-
Page 3: Table Of Contents
TESTING ƒ Testing Menu ............................26 ƒ Test Sequences ..........................27 ƒ General Testing Procedures ......................27 ƒ Testing With LaMotte Pre-Programmed Tests ................28 ƒ Calibrating LaMotte Pre-Progammed Tests ................30 ƒ Measuring in the Absorbance Mode ....................33... - Page 4 ƒ Battery/AC Operation .........................71 ƒ Battery Replacement .........................71 MAINTENANCE ƒ Cleaning ...............................73 ƒ Repairs ..............................73 ƒ Meter Disposal ............................ 73 TROUBLESHOOTING ƒ Error Messages ........................... 74 ƒ Troubleshooting Guide ........................75 ƒ Software Troubleshooting Guide ....................75 SMART3 COLORIMETER TEST PROCEDURES APPENDIX...
-
Page 5: General Information
Continent 813-248-0585 (call collect). Be prepared to supply the name and four-digit LaMotte code number found on the container label or at the top of the SDS or in the contents list of the procedure. LaMotte reagents are registered with a computerized poison control information system available to all local poison control centers. -
Page 6: X83; Limits Of Liability
ƒ LIMITS OF LIABILITY Under no circumstances shall LaMotte Company be liable for loss of life, property, profits, or other damages incurred through the use or misuse of its products. ƒ WARRANTY LaMotte Company warrants this instrument to be free of defects in parts and workmanship for 2 years from the date of shipment. -
Page 7: X83; Specifications
Battery Life: Approximately 500 charges. Electrical Rating Rated voltage (5V), Rated power of input current (1.0A) at mini-USB input port Data Logger 500 test results stored for download to a PC Waterproof IP67 with USB port plug in place SMART3 Colorimeter 09.16... - Page 8 B Canada CAN ICES-3(A)/NMB-3(A) AU/NZ AS/NZS CISPR 22 Dimensions (LxWxH) 3.5 x 7.5 x 2.5 inches, 8.84 x 19.05 x 6.35 cm Weight 13 oz, 362 g (meter only) †525 nm and 568 nm only SMART3 Colorimeter 09.16 3.17...
-
Page 9: X83; Statistical And Technical Definitions
Statistics in Analytical Chemistry: Part 7 – A Review, D. Coleman and L Vanatta, American Laboratory, Sept 2003, P. 34. Jeffery G. H., Basset J., Mendham J., Denney R. C., Vogel’s Textbook of Quantitative Chemical Analysis, 5th ed., Longman Scientific & Technical, 1989, p. 130. SMART3 Colorimeter 09.16... -
Page 10: X83; Contents And Accessories
Test Tubes, with Caps Code 0290 COD/UDV Adapter Code 1724 USB Wall Adapter Code 1721 USB Cable Code 1720 Smart3 Colorimeter Quick Start Guide Smart3 Colorimeter Manual Accessories Test Tubes, with Caps Code 0290-6 Replacement Chamber Code 3-0038 USB Cable... -
Page 11: X83; Epa Compliance
EPA-Accepted instruments may be used with approved test procedures without additional approval. ƒ CE COMPLIANCE The Smart3 Colorimeter has earned the European CE Mark of Compliance for electromagnetic compatibility and safety. The Declaration of Conformity for the Smart3 colorimeter is available at www.lamotte.com. -
Page 12: Chemical Testing
For dissolved oxygen studies, or for tests requiring small sample sizes, a Water Sampler (LaMotte Code 1060) will serve as a subsurface or in-depth sampler. This weighted device is lowered to the sampling depth and allowed to rest at this depth for... -
Page 13: X83; Filtration
To test for total constituents, organically bound and suspended or colloidal materials, a rigorous high temperature acid digestion is necessary. **LaMotte offers a filtering apparatus: syringe assembly (Code 1050) and membrane filters, 0.45 micron, (Code 1103). SMART3 Colorimeter 09.16... -
Page 14: X83; An Introduction To Colorimetric Analysis
Most test substances in water are colorless and undetectable to the human eye. To test for their presence we must find a way to “see” them. The Smart3 Colorimeter can be used to measure any test substance that is itself colored or can be reacted to produce a color. -
Page 15: X83; Reagent Blank
To eliminate this error the tubes should be placed in the chamber with the same orientation each time. Chambers which have been scratched through excessive use should be discarded and replaced with a new one. SMART3 Colorimeter 09.16... -
Page 16: X83; Meter Care
ƒ METER CARE The optical system of the Smart3 must be kept clean and dry for optimal performance. Dry the colorimeter tubes before placing them in the chamber to avoid introducing moisture. For best results store the instrument in a area that is dry and free from aggressive chemical vapors. - Page 17 0, 10%, 30%, 50%, 70%, and 90% of the system’s maximum range. 1. Turn on the Smart3 Colorimeter. Select the appropriate wavelength from the absorbance mode. Be sure to select the appropriate wavelength for the color produced by the reagent system.
- Page 18 5.0 ppm 100 mL 1000 ppm 0.50 mL 10.0 ppm 3.0 ppm 100 mL 1000 ppm 0.30 mL 10.0 ppm 1.0 ppm 100 mL 1000 ppm 0.10 mL 10.0 ppm 0 ppm 100 mL 1000 ppm 0 mL SMART3 Colorimeter 09.16...
-
Page 19: X83; Standard Additions
ƒ SAMPLE DILUTION TECHNIQUES & VOLUMETRIC MEASUREMENTS If a test result using the Smart3 Colorimeter gives an over range message then the the sample must be diluted. The test should be repeated on the diluted sample to obtain a reading which is in the concentration range for the test. (Note: This is not true for colorimetric determination of pH.) -
Page 20: X83; Interferences
10 mL of sample is diluted with three 10 mL volumes of demineralized water; the dilution factor is four. ƒ INTERFERENCES LaMotte reagent systems are designed to minimize most common interferences. Each individual test instruction discusses interferences unique to that test. Be aware of possible interferences in the water being tested. -
Page 21: Operation Of The Smart3 Colorimeter
The menus can be displayed in seven different languages. The test library consists of over 80 LaMotte tests and 25 “User Tests”. The LaMotte tests are precalibrated for LaMotte reagent systems.The colorimeter displays the result of these tests directly in units of concentration. -
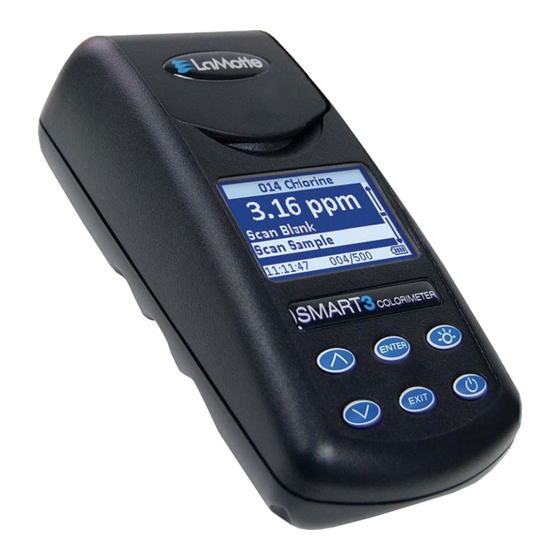
Page 22: X83; Components
ƒ COMPONENTS Figure 1 shows a diagram of the Smart3 Colorimeter and its components. Bottom View Top View Serial Number SMART3 COLORIMETER ENTER EXIT Side Views USB Port with plug Figure 1 SMART3 Colorimeter 09.16... -
Page 23: General Operating Procedures
GENERAL OPERATING PROCEDURES The operation of the Smart3 Colorimeter is controlled by a microprocessor. The microprocessor is programmed with menu driven software. A menu is a list of choices. This allows a selection of various tasks for the colorimeter to perform, such as, scan blank, scan sample, and edit test sequences. -
Page 24: X83; Sample Holders
Some menus in the Smart3 are looping menus. The top and bottom menu choices are connected in a loop. Scrolling down past the bottom of the menu will lead to the top of the menu. Scrolling up past the top of the menu will lead to the bottom of the menu. - Page 25 Large format graphic information, such as test results or error messages or the LaMotte logo is displayed. The top two lines of the display are used to display information in a large, easy to read format. The menus work in the same way as previously described but two lines of the menu are visible at the bottom of the display.
-
Page 26: Testing
TESTING ƒ TESTING MENU The Testing Menu is used to run all LaMotte pre-programmed tests, User Tests and Absorbance tests at one of four wavelengths. Testing from any of three sequences can also be done. Main Menu 1. Press and briefly hold turn the meter on. -
Page 27: X83; Test Sequences
Editing Menu. Any of the LaMotte pre-programmed tests or User Tests may be placed in these sequences in whatever testing order that is preferred. There are three intial sequences in the Smart3 that can be customized by adding or deleting tests:... -
Page 28: X83; Testing With Lamotte Pre-Programmed Tests
ƒ TESTING WITH LaMOTTE PRE-PROGRAMMED TESTS Main Menu 1. Press and briefly hold turn the meter on. The LaMotte Testing Menu logo screen will appear for about Editing Menu 3 seconds and the Main Menu will appear. 12:00:00 001/500 Testing Menu 2. - Page 29 %T/Abs. Press to escape to previous EXIT menus. NOTE: The menus loop in this screen so either will lead to the menu selection needed. To use the Print Test function, see the Bluetooth Menu section (page 60). SMART3 Colorimeter 09.16...
-
Page 30: X83; Calibrating Lamotte Pre-Progammed Tests
The LaMotte Pre-Programmed tests are standardized with one standard solution. To standardize over the full range of the test, the concentration of the standard should be chosen from the high end of the range. - Page 31 Scan Blank about 1 second. The result will Scan Sample appear on the screen. 12:00:00 001/500 8. The displayed result can now be 005 Aluminum standardized. Press 0.28 ppm to scroll to Calibrate. %T/Abs Calibrate 12:00:00 001/500 SMART3 Colorimeter 09.16...
- Page 32 %T/Abs EXIT Calibrate Press at any ENTER time to return to the default 12:00:00 001/500 value. The calibration has now been standardized and can be used for testing. Scroll to Scan Blank and begin testing. SMART3 Colorimeter 09.16...
-
Page 33: X83; Measuring In The Absorbance Mode
ƒ MEASURING IN THE ABSORBANCE MODE Main Menu 1. Press and briefly hold turn the meter on. The LaMotte Testing Menu logo screen will appear for about Editing Menu 3 seconds and the Main Menu will appear. 12:00:00 001/500 Testing Menu 2. - Page 34 8. Insert the reacted sample. Press 102 Absorbance 525 to scan the sample. The 0.425 ENTER screen will display Scan Sample Sample Done for about 1 second. The result will appear on Scan Sample the screen. Next Test 12:00:00 001/500 SMART3 Colorimeter 09.16...
- Page 35 Print Test %T/Abs. Press to escape EXIT to previous menus. NOTE: The menus loop in this screen so either will lead to the menu selection needed. NOTE: The calibrate function does not work in the Absorbance mode. SMART3 Colorimeter 09.16...
-
Page 36: Editing Menu
The Edit Sequence menu allows three alterable test sequences (Sequence 1, Sequence 2, Sequence 3) to be edited. Main Menu 1. Press and briefly hold turn the meter on. The LaMotte Testing Menu logo screen will appear for about Editing Menu 3 seconds and the Main Menu will appear. - Page 37 Edit Sequence 1 Edit Sequence 2 Edit Sequence 3 12:00:00 001/500 EDIT SEQUENCE 2 6. Press to select the ENTER sequence to be edited. 005 Aluminum 025 Chlorine T DPD 056 Iron Phenanthro 060 Manganese LR 12:00:00 001/500 SMART3 Colorimeter 09.16...
-
Page 38: X83; Adding Or Deleting A Test
Insert After Delete 12:00:00 001/500 All Tests 4. Press to select the option, ENTER Insert Before, in this example. 002 Alkalinity UDV The All Test Menu will appear. 005 Aluminum 006 Ammonia-N LRF 007 Ammonia-N LRS 12:00:00 001/500 SMART3 Colorimeter 09.16... - Page 39 Edit Sequence 2 Menu. Edit Sequence 3 12:00:00 001/500 Main Menu 8. Press to select Edit ENTER Sequences to continue editing Testing Menu the sequences or press EXIT Editing Menu twice to return to the Main Menu. 12:00:00 001/500 SMART3 Colorimeter 09.16...
- Page 40 The sequence will appear in 005 Aluminum the Edit Sequences menu and 025 Chlorine T DPD the selected test will have been 056 Iron Phenanthro deleted. All changes to the sequence will automatically 060 Manganese LR have been saved. 12:00:00 001/500 SMART3 Colorimeter 09.16...
- Page 41 Editing Menu. Edit User Test Set Clock Logging 12:00:00 001/500 Main Menu Press to select Edit ENTER Sequences to continue editing Testing Menu the sequences or press EXIT Editing Menu return to the Main Menu. 12:00:00 001/500 SMART3 Colorimeter 09.16...
-
Page 42: X83; Edit User Tests
ƒ EDIT USER TESTS If a test other than the LaMotte programmed tests is performed regularly, a calibration for it may be entered in one of the 25 User Tests. These tests are originally named “User Test 1 - 25”. It will be possible to rename the test, select a wavelength, enter a new calibration, select the number of decimal places used to display the results, and select the units. - Page 43 109 USER TEST 05 110 USER TEST 06 111 USER TEST 07 12:00:00 001/500 111 USER TEST 07 6. Press to select the User ENTER Test. Name the Test Select Vial/WL STD Calibration Enter Constants 12:00:00 001/500 SMART3 Colorimeter 09.16...
-
Page 44: X83; Naming The Test
In this example, the test name will be C D E F G I J K L M H2O. SER TEST 07 The character for a blank space is located after the lower case 12:00:00 001/500 SMART3 Colorimeter 09.16... - Page 45 F G H I J K 111 H2 R TEST 07 12:00:00 001/500 Name the Test Press to scroll to the desired character. J K L M N P Q R S T 111 H2 R TEST 07 12:00:00 001/500 SMART3 Colorimeter 09.16...
- Page 46 Hold down and press and release to save all ENTER remaining characters and exit the name edit screen. THe meter will return to the Edit Test manu. SMART3 Colorimeter 09.16...
-
Page 47: X83; Selecting The Vial And Wavelength
ƒ SELECT THE VIAL AND WAVELENGTH The Smart3 Colorimeter accepts three different vials (the 25 mm 0290 tube, UDVs and COD tubes) at 4 different wavelengths (428, 525, 560, and 635 nm). The colorimeter uses different settings for each of the twelve combinations of vial and wavelength. -
Page 48: X83; Entering A Two Point Calibration
ƒ ENTERING A TWO POINT CALIBRATION The Smart3 Colorimeter can scan two reacted standards and create a calibration curve. To create a calibration curve with multiple data points see Entering a Multiple Point Calibration Curve (pg. 51). 1. From the User Test menu, press... - Page 49 The screen will display the High Standard screen. A blinking reverse font (dark background with a light character) will appear to indicate the character that will be adjusted. The same character will appear in the center of the display. SMART3 Colorimeter 09.16...
- Page 50 <Enter> continue 12:00:00 001/500 13. Insert the high standard. Press K0 = 0.57246 . The meter will display ENTER K1 = 7.14547 the constants for the calibration K2 = 0.00000 curve. K3 = 0.00000 <Enter> Save 12:00:00 001/500 SMART3 Colorimeter 09.16...
-
Page 51: X83; Entering A Multiple Point Calibration
001/500 ƒ ENTERING A MULTIPLE POINT CALIBRATION The Smart3 can directly create a 2 point calibration curve. (See Entering a Two Point Calibration on page 48.) To create a multiple point calibration curve, constants obtained from a linear regression of multiple data points can be entered into the Smart3. - Page 52 5 6 7 8 9 - 0 1 2 3 4 – 00000 12:00:00 001/500 Enter Constants K0 6. Press to scroll to the next character. 6 7 8 9 . - 1 2 3 4 5 – 00000 12:00:00 001/500 SMART3 Colorimeter 09.16...
- Page 53 10. After the final character is 111 H2O entered the meter will save Name the Test the constants. The screen will Select Vial/WL display Storing... and return to the Edit Test menu. STD Calibration Enter Constants 12:00:00 001/500 SMART3 Colorimeter 09.16...
-
Page 54: X83; Selecting The Numerical Format Of The Result
4. Press to select the ENTER decimal places. The screen wil Select Vial/WL display Storing... for about 1 STD Calibration second and the meter will return to the Edit Test menu. Enter Constants Decimal Places 12:00:00 001/500 SMART3 Colorimeter 09.16... -
Page 55: X83; Selecting Units Of Concentration
ƒ SELECTING THE UNITS OF CONCENTRATION The Smart3 Colorimeter has seven options for units of concentration. They are No Units, ppm, pH, FAU, ppb, ppt and mgL. 1. From the User Menu, press 111 H2O to scroll to Select STD Calibration Units. -
Page 56: X83; Setting The Clock
Editing Menu 3. Press to select the final ENTER character. The time and date Edit Sequences will be saved and the meter will Edit User Test return to the Editing Menu. Set Clock Logging 12:00:00 001/500 SMART3 Colorimeter 09.16... -
Page 57: X83; Logging Data
Logging Disabled Erase Log 12:00:00 001/500 Editing Menu 4. Press . The screen will ENTER display Storing... for about 1 Edit Sequences second and return to the Editing Edit User Test Menu. Set Clock Logging 12:00:00 001/500 SMART3 Colorimeter 09.16... -
Page 58: X83; Factory Setup
ƒ FACTORY SETUP The Factory Setup menu is used in manufacturing of the Smart3 Colorimeter. This menu is not for use by the operator in the field. ƒ SETTING POWER SAVE The power saving Auto Shutoff feature will turn the meter off when a button has not been pushed for a set amount of time. -
Page 59: X83; Setting Backlight Time
12:00:00 001/500 Editing Menu 4. Press . The screen will ENTER display Storing... for about 1 Logging second and the meter will return Factory Setup to the Editing Menu. Set Power Save Set Backlight Time 12:00:00 001/500 SMART3 Colorimeter 09.16... -
Page 60: X83; Bluetooth Menu
2. Press to select Bluetooth ENTER Menu. Bluetooth Power Bluetooth Mode Bluetooth Scan Set BT Timeout 12:00:00 001/500 Bluetooth Menu 3. Press to scroll to Bluetooth Power. Bluetooth Power Bluetooth Mode Bluetooth Scan Set BT Timeout 12:00:00 001/500 SMART3 Colorimeter 09.16... - Page 61 Mobile Printer (Code 5-0066). Bluetooth Scan The screen will display Set BT Timeout Storing… for about 1 second and the meter will return to the 12:00:00 001/500 Bluetooth Menu. A flashing P symbol will indicate that Bluetooth is enabled. SMART3 Colorimeter 09.16...
- Page 62 12:00:00 001/500 Bluetooth Menu 3. Press to scroll to Bluetooth Mode. Bluetooth Power Bluetooth Mode Bluetooth Scan Set BT Timeout 12:00:00 001/500 Bluetooth Mode 4. Press to select ENTER Bluetooth Mode. Mobile Device BT Printer 12:00:00 001/500 SMART3 Colorimeter 09.16...
- Page 63 Bluetooth Scan Set BT Timeout 12:00:00 001/500 Scan For Printers The Smart3 can only be used with Bluetooth Mobile Printer (Code 5-0066). 1. Turn on the power to the Bluetooth Mobile Printer (Code 5-0066). 2. From the Editing Menu, press...
- Page 64 Scanning (11)... begin scanning. A count down timer will begin counting down from 11 seconds. If “No BT Available…” is displayed, Bluetooth is not 12:00:00 001/500 enabled on the meter. Go to Bluetooth Power to enable it. SMART3 Colorimeter 09.16...
- Page 65 Connect to Printer press ENTER to pair the printer. 000D163140A0 The screen will display the BT Connecting Address and Working… for about 1 second. The meter will display a status message when the printer is connected. 12:00:00 001/500 SMART3 Colorimeter 09.16...
- Page 66 3. Press to scroll to Set BT Timeout. Bluetooth Power BluetoothMode Bluetooth Scan Set BT Timeout 12:00:00 001/500 Set BT Timeout 4. Press to select Set BT ENTER Timeout. 15 minutes 5 minutes 30 Seconds Disable 12:00:00 001/500 SMART3 Colorimeter 09.16...
-
Page 67: X83; Selecting A Language
Bluetooth Scan Set BT Timeout 12:00:00 001/500 ƒ SELECTING A LANGUAGE There are seven languages available in the Smart3: English, Spanish, French, Portuguese, Italian, Chinese, and Japanese. 1. From the Editing Menu, press Editing Menu to scroll to Set Power Save Select Language. - Page 68 NOTE: If meter unintentionally switches to another language, use the procedure above to reset the meter to the desired language. For example, to reset the meter to English: Turn meter on. 1. Press one time. Press ENTER 2. Press eight times. Press ENTER 3. Press ENTER SMART3 Colorimeter 09.16...
-
Page 69: X83; Looping Menu
AND SO ON SECOND CHOICE SECOND CHOICE THIRD CHOICE THIRD CHOICE ANOTHER ANOTHER LAST CHOICE AND ANOTHER AND ANOTHER The feature called Looping Menu can be turned on and off in the Editing Menu. The default setting is ON. SMART3 Colorimeter 09.16... -
Page 70: Computer Connection
USB Type A, USB mini B, Order Cable Code 1720. ƒ BLUETOOTH CONNECTION Barriers to wireless signals can reduce the range of wireless devices. The Smart3 will work best if there are no walls between it and the receiving device. -
Page 71: Battery
BATTERY ƒ BATTERY/AC OPERATION The Smart3 may be operated on battery power, using a USB wall adapter or USB computer connection. If using the meter as a bench top unit, use the wall adapter if possible to extend the battery life. The meter will remain on when the USB adapter is used. - Page 72 LaMotte Company. Battery replacement must be performed at a LaMotte authorized repair facility. The water resistant housing of this meter should not be opened by the user. Contact LaMotte Company by phone (1-800-344-3100) or email (tech@lamotte.com) for a return authorization number.
-
Page 73: Maintenance
Should it be necessary to return the meter for repair or servicing, pack the meter carefully in a suitable container with adequate packing material. A return authorization number must be obtained from LaMotte Company by calling 800-344-3100 (US only) or 410-778-3100, faxing 410-778-6394, or emailing tech@lamotte.com. Often a problem can be resolved over the phone or by email. -
Page 74: Troubleshooting
LaMotte Company for recalibration. (See page 73). STRAY LIGHT The Smart3 Colorimeter should have no problems with stray light. Make sure that the sample compartment lid is always fully closed, except when testing COD with the adapter. -
Page 75: X83; Troubleshooting Guide
Bluetooth range. Printer does not Printer in not powered Power on the printer appear in the list of Bluetooth devices Connection lost Bluetooth pairing with Re-pair the Printer to the the printer was lost. colorimeter SMART3 Colorimeter 09.16...
Need help?
Do you have a question about the SMART3 and is the answer not in the manual?
Questions and answers