
Related Manuals for LaMotte DC1500-CL


Summary of Contents for LaMotte DC1500-CL
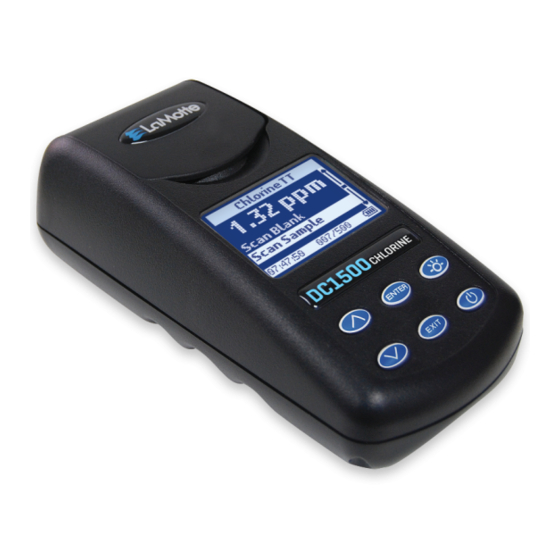
- Page 1 DC1500-CL Chlorine Colorimeter Kit • DPD Tablet Code 3240 lobalScientificSupply GLOBAL SCIENTIFIC SUPPLY sales@GlobalScientificSupp .com The Laboratory Supply Company!
-
Page 2: Table Of Contents
CONTENTS Chlorine & Bromine DPD Tablet Kit „ Kit Contents ..................4 „ Accessories ..................4 Test Method Specifications „ Application .................... 5 „ Range ..................... 5 „ Method ....................5 „ Handling & Preservation ..............5 „ Interferences ..................5 „... - Page 3 General Information „ Packaging and Delivery ..............32 „ General Precautions ................32 „ Safety Precautions ................32 „ Limits of Liability ................32 „ Specifications ..................33 „ CE ......................33 „ IP67 ......................34 „ Warranty .....................34 „ Register Your Meter................34 Trouble Shooting Guide „ Trouble Shooting ................35 „...
-
Page 4: X84; Kit Contents
Omit any letter that follows or precedes the four digit code number. For example if code is 4450WT-H, search 4450. To obtain a printed copy, contact LaMotte by e-mail, phone or fax. -
Page 5: Test Method Specifications
NPDES reporting regulations, the calibration should be checked periodically by using a set of reference standards including a 0 mg/L blank and 0.3, 1.0, and 3.5 mg/L chlorine. To prepare these standards, a LaMotte 1000 mg/L standard chlorine equivalent solution (Code 3858) is available. Consult with your local regulatory agency to determine standardization frequency. -
Page 6: Analysis „ Chlorine
ANALYSIS - CHLORINE PROCEDURE – FREE CHLORINE 1. Fill the Water Sample Collecting Bottle (0688) with sample water. Main Menu 2. Press and hold until colorimeter turns on. Testing Menu Editing Menu Run PC Link 12:00:00 001/500 Testing Menu 3. Press to select Testing ENTER Menu. - Page 7 6. Rinse a clean tube (0290) with sample water. Fill to the 10 mL line with sample. Cap and wipe dry. Insert tube into chamber, close lid and select Scan Blank. 8. Remove tube from colorimeter. Add one *Chlorine DPD #1 Instrument Grade Tablet (6903A).
- Page 8 11. Insert tube into chamber, close lid and select Scan Sample. Record result as Total Chlorine (Monochloramine, Dichloramine, and Nitrogen Trichloride) present in the water sample. 12. Subtract free chlorine reading from total chlorine reading to obtain concentration of combined chlorine. 13.
-
Page 9: X84; Bromine
ANALYSIS - BROMINE PROCEDURE 1. Fill the Water Sample Collecting Bottle (0688) with sample water. Main Menu 2. Press and hold until colorimeter turns on. Testing Menu Editing Menu Run PC Link 12:00:00 001/500 Testing Menu 3. Press to select Testing ENTER Menu. - Page 10 Omit any letter that follows or precedes the four digit code number. For example, if the code is 4450WT-H, search 4450. To obtain a printed copy, contact LaMotte by email, phone or fax.
- Page 11 (US, 1-800-255-3924) (International, call collect, 813-248-0585). NOTE: For the most accurate results, samples over 7 ppm bromine should be diluted with chlorine demand free water and re-tested. NOTE: The meter will remember the last scanned blank reading. It is not necessary to scan a blank each time the test is performed.
-
Page 12: Calibration
CALIBRATION Chlorine Standards The meter should be calibrated with free chlorine standards. The calibration should be done with a distilled or deionized water blank and one chlorine standard of known concentration. The concentration of the calibration standard should be similar to the expected concentration of the sample that will be tested. - Page 13 4. Scroll to and select Chlorine TT Chlorine TT from menu. Scan Blank Scan Sample 12:00:00 001/500 5. Rinse a clean tube (0290) three times with the chlorine standard. Fill the tube to the 10 mL line with the chlorine standard.
- Page 14 Chlorine TT 9. Press to scroll to 0.99 Calibrate. %T Absorbance Calibrate 12:00:00 001/500 Chlorine TT 10. Press to select Calibrate. ENTER 0.99 A reverse font (light background with dark characters) will appear to indicate that the reading can be adjusted. %T Absorbance Calibrate 12:00:00...
-
Page 15: Set Up
SET UP „ SETTING THE CLOCK Main Menu 1. Press and briefly hold turn the meter on. The LaMotte Testing Menu logo screen will appear for about Editing Menu 3 seconds and the Main Menu Run PC Link will appear. -
Page 16: X84; Setting Power Save
The default setting is 5 minutes. To change the setting: Main Menu 1. Press and briefly hold turn the meter on. The LaMotte Testing Menu logo screen will appear for about Editing Menu... - Page 17 Editing Menu 4. Press to scroll to Set PWR Save. Set Clock Logging Factory Setup Set PWR Save 12:00:00 001/500 Auto Shutoff 5. Press to select PWR ENTER Save. Disable 5 Minutes 15 Minutes 30 Minutes 12:00:00 001/500 Auto Shutoff 6.
-
Page 18: X84; Setting Backlight Time
USB/Wall Charger is not being used. Main Menu 1. Press and briefly hold turn the meter on. The LaMotte Testing Menu logo screen will appear for about Editing Menu... -
Page 19: X84; Factory Reset
There are two languages available in the DC1500 colorimeter: English, Spanish, French, Portuguese, Italinan, Chinese, and Japanese (Kana). Main Menu 1. Press and briefly hold turn the meter on. The LaMotte Testing Menu logo screen will appear for about Editing Menu 3 seconds and the Main Menu will appear. - Page 20 Editing Menu 2. Press to scroll to Editing Menu. Testing Menu Editing Menu Run PC Link 12:00:00 001/500 Editing Menu 3. Press to select Editing ENTER Menu. Set Clock Logging Factory Setup Set PWR Save 12:00:00 001/500 Editing Menu 4. Press to scroll to Select Language.
-
Page 21: Data Logging
The data logger is password protected and can only be accessed by authorized users. Main Menu 1. Press and briefly hold turn the meter on. The LaMotte Testing Menu logo screen will appear for about Editing Menu... - Page 22 Editing Menu 2. Press to scroll to Editing Menu. Testing Menu Editing Menu Run PC Link 12:00:00 001/500 Editing Menu 3. Press to select Editing ENTER Menu. Set Clock Logging Factory Setup Set PWR Save 12:00:00 001/500 Editing Menu 4. Press to scroll to Logging.
-
Page 23: Computer Connection
„ PC LINK The DC1500 may be interfaced with any Windows-based computer by using the LaMotte SMARTLink 3 Program and USB Cable. The program will store test information and results in a database. To transfer data from the meter to a computer, plug the smaller end of the USB cable (USB mini B connector) into the meter and the larger end of the USB cable (USB Type A connector) into a USB port on a computer. - Page 24 This unit uses a custom battery assembly that is only available from LaMotte Company. Battery replacement must be performed at a LaMotte authorized repair facility. The water resistant housing of this meter should not be opened by the user.
-
Page 25: Maintenance
LaMotte Company by calling 800-344-3100 (US only) or 410-778-3100, faxing 410-778-6394 or emailing tech@lamotte.com. Often a problem can be resolved over the phone or by email. If a return of the meter is necessary, attach a letter with... -
Page 26: X84; The Keypad
PC. The DC1500 may be interfaced with any Windows -based ® computer by using the LaMotte SMARTLink 3 Program. „ GENERAL OPERATING INFORMATION The operation of the DC1500 is controlled by the menu driven software and user interface. A menu is a list of choices. This allows a selection of various tasks for the DC1500 to perform, such as scan blank and scan sample. - Page 27 Large format graphic information, such as test results or error messages or the LaMotte logo is displayed. The top two lines of the display are used to display information in a large, easy to read format.
-
Page 28: X84; Tubes And Chambers
Header Menu Title Result or Message or Result Window Message Another Main Selection Window And Another Footer 12:00:00 001/500 And So On Last Choice button allows an exit or escape from the As described previously, the EXIT current menu and a return to the previous menu. This allows a rapid exit from an inner menu to the main menu by repeatedly pushing the button. -
Page 29: X84; Sample Dilution Techniques
new ones. Tubes should always be washed on the inside and outside with mild detergent prior to use to remove dirt or fingerprints. The tubes should be allowed to air- dry in an inverted position to prevent dust from entering the tubes. Dry tubes should be stored with the caps on to prevent contamination. -
Page 30: X84; Measuring In The Absorbance Mode
„ MEASURING IN THE ABSORBANCE MODE Main Menu 1. Press and briefly hold turn the meter on. The LaMotte Testing Menu logo screen will appear for about Editing Menu 3 seconds and the Main Menu Run PC Link will appear. - Page 31 Absorbance 525 6. Press to select the ENTER wavelength. Scan Blank Scan Sample 12:00:00 001/500 Insert the blank. Close the lid. Absorbance 525 Press to scan the blank. ENTER The screen wil display Blank Done for about 1 second and return to the Absorbance menu.
-
Page 32: General Information
* in the instruction manual. To view or print a Safety Data Sheet (SDS) for these reagents go to www.lamotte.com. To obtain a printed copy, contact LaMotte by e-mail, phone or FAX. Additional... -
Page 33: X84; Specifications
The DC1500 meter has been independently tested and has earned the European CE Mark of compliance for electromagnetic compatibility and safety. To view certificates of compliance, go to the LaMotte website at www.lamotte. com. NOTE: The device complies to the product specifications for the Low Voltage Directive. -
Page 34: X84; Ip67
TROUBLESHOOTING GUIDE TROUBLESHOOTING PROBLEM REASON SOLUTION “Blank?” Sample is reading lower With samples of very low than the blank. concentration reblank or record as zero. On samples of higher concentration reblank and read again. Low battery. Readings Charge battery or use Flashing are reliable. -
Page 35: X84; Trouble Shooting
802 Washington Ave • Chestertown • Maryland • 21620 • USA 410-778-3100 • 800-344-3100 www.lamotte.com 3240-MN 09.09.15 lobalScientificSupply GLOBAL SCIENTIFIC SUPPLY sales@GlobalScientificSupp .com The Laboratory Supply Company!
Need help?
Do you have a question about the DC1500-CL and is the answer not in the manual?
Questions and answers