Table of Contents
Advertisement
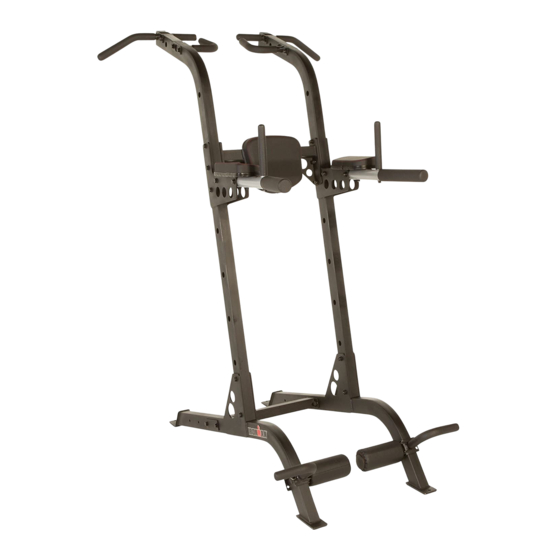
OWNER'S MANUAL
Power Tower
6880.2‐061416
6880.1-100715
The specifications of this product may vary from this photo and are subject to change without notice.
IRONMAN, IRONMAN TRIATHLON and M-DOT are registered trademarks of World Triathlon Corporation.
This product is licensed by the World Triathlon Corporation.
Advertisement
Table of Contents

Subscribe to Our Youtube Channel
Related Manuals for Ironman Fitness Power Tower


Summary of Contents for Ironman Fitness Power Tower
- Page 1 OWNER’S MANUAL Power Tower 6880.2‐061416 6880.1-100715 The specifications of this product may vary from this photo and are subject to change without notice. IRONMAN, IRONMAN TRIATHLON and M-DOT are registered trademarks of World Triathlon Corporation. This product is licensed by the World Triathlon Corporation.
- Page 2 ...
-
Page 3: Table Of Contents
TABLE OF CONTENTS SERVICE-------------------------------------------------------------------- LABEL PLACEMENT----------------------------------------------------- PRODUCT SAFETY------------------------------------------------------- 4 ASSEMBLY PREPARATION-------------------------------------------- EXPLODE DRAWING--------------------------------------------------- HARDWARE PACK-------------------------------------------------------- 8 PART LIST------------------------------------------------------------------- STEP 1----------------------------------------------------------------------- STEP 2----------------------------------------------------------------------- STEP 3----------------------------------------------------------------------- STEP 4----------------------------------------------------------------------- STEP 5----------------------------------------------------------------------- STEP 6----------------------------------------------------------------------- ADJUSTMENT------------------------------------------------------------- WARRANTY----------------------------------------------------------------- PART REQUEST FORM-------------------------------------------------... -
Page 4: Service
SERVICE IMPORTANT: FOR NORTH AMERICA ONLY For damage or defective product, questions, replacement parts or any other service support, please contact our customer service department (8:00 AM - 5:00 PM Pacific Standard Time, Open Daily) by below methods: For Best Service Email: Service@paradigmhw.com Website: www.paradigmhw.com... -
Page 5: Label Placement
LABEL PLACEMENT ... -
Page 6: Product Safety
WARNING: Before using this equipment you should consult with your personal physician to see if the Ironman Power Tower is appropriate for you. Do not use this equipment without your physician’s approval. Do not use this equipment if you have any of the following conditions or ailments: ... -
Page 7: Assembly Preparation
ASSEMBLY PREPARATION Warning: It is highly recommend that you have assistance during the assembly of the IRONMAN strength equipment. 1. Tools for assembly: General tools you may needed for the assembly of the IRONMAN strength equipment. Metric Allen Key Set ... -
Page 9: Explode Drawing
EXPLODE DRAWING ... -
Page 10: Hardware Pack
HARDWARE PACK ... -
Page 11: Part List
PART LIST Part# Description Q’ty. Part# Description Q’ty. Base Beam Washer D13.5xD24x2.5 Lower Post Washer D16xD8.4x1.6 Spring Washer Upper Crossbeam D12.3xD8.1x2.1 Spring Washer Lower Crossbeam D15.4xD10.2x2.6 Adjustable Handlebar Nylon Nut M12 Wide Grip Pull Up Bar Locking Pin Φ8x10⁷ Close Grip Pull Up Bar Big End Cap Φ70*Φ21*38 Grip Post Domed End Cap Φ32xt2.0... -
Page 12: Step 1
STEP 1 1A. Attach the Lower Crossbeam (D) between the two Base Beams (A) and two Mounting Plates (K) by using: 8 - (52) Washer D13.5xD24x2.5 4 - (7) Hex Bolt M12x1.75x80L 4 - (76) Nylon Nut M12 Thoroughly tighten the hardware once complete. Tip: Install the Base Beams (A) with the Ironman logo facing outward. -
Page 13: Step 1
STEP 1 Wrench 2PCS NO. 7 Hex Head Bolt NO. 76 Nylon Nut NO.52 Washer M12x1.75x80L M12 4PCS D13.5xD24x2.5 4PCS 8PCS... -
Page 14: Step 2
STEP 2 2A. Attach both Lower Posts (B) to the two Base Beams (A) by using: 8 - (52) Washer D13.5xD24x2.5 4 - (7) Hex Bolt M12x1.75x80L 4 - (76) Nylon Nut M12 Thoroughly tighten the hardware once complete. Appearance upon completion of Step 2. -
Page 15: Step 2
STEP 2 Wrench 2PCS NO. 7 Hex Head Bolt NO. 76 Nylon Nut NO.52 Washer M12x1.75x80L M12 4PCS D13.5xD24x2.5 4PCS 8PCS... -
Page 16: Step 3
STEP 3 3A. Insert one Upper Post (J) into the bracket of the Lower Post (B). Continue holding the Upper Post (J) and align its holes with the holes of the Lower Post (B). Insert three Hex Bolts (17) all the way through the Lower Post (B) and Upper Post (J). -
Page 17: Step 3
STEP 3 Wrench 2PCS NO. 17 Hex Head Bolt NO. 76 Nylon Nut NO.52 Washer M12x1.75x85L M12 6PCS D13.5xD24x2.5 6PCS 12PCS... - Page 18 STEP 4 4A. Attach the Forearm Pad (P) to the RIGHT Dip Bar (I-R) as in image AA-2, using: 2 - (56) Washer D16xD8.4x1.6 2 - (57) Spring Washer D12.3xD8.1x2.1 2 - (19) Hex Bolt M8x1.25x70L Thoroughly tighten the hardware once complete. 4B.
- Page 19 STEP 4 Wrench 2PCS NO. 7 Hex Head Bolt NO. 76 Nylon Nut NO.52 Washer M12x1.75x80L D13.5xD24x2.5 4PCS 4PCS 8PCS NO. 57 Spring Washer NO.19 Hex Bolt NO.56 Washer D12.3xD8.1x2.1 M8x1.25x70L D16xD8.4x1.6 4PCS 4PCS 4PCS NO.18 Hex Bolt NO.58 Spring Washer NO.51 Washer M10x1.5x25L D15.4xD10.2x2.6...
- Page 20 STEP 5 5. Attach the Backrest (M) to the Upper Crossbeam (C) at the by first aligning the screw holes and hand tightening the hardware listed below into place. Once all hardware has been inserted, fasten the hardware tightly. 2 - (19) Hex Bolt M8x1.25x70L 1 - (3) Hex Bolt M8x1.25x25L 3 - (57) Spring Washer D12.3xD8.1x2.1 3 - (56) Washer D16xD8.4x1.6...
- Page 21 STEP 5 Wrench 1PC NO.19 Hex Bolt NO.3 Hex Bolt NO.57 Spring Washer NO.56 Washer M8x1.25x70L M8x1.25x25L D12.3xD8.1x2.1 D16xD8.4x1.6 2PCS 3PCS 3PCS...
- Page 22 STEP 6 6A. Insert both Wide Grip Pull Up Bars (F) into the slots at the top of the Upper Posts (J) and attach by using: 4 - (7) Hex Bolt M12x1.75x80L 8 - (52) Washer D13.5xD24x2.5 4 - (76) Nylon Nut M12 6B.
- Page 23 STEP 6 NO. 103 Locking Pin Φ8x10⁷ 2 PCS NO. 7 Hex Head Bolt NO. 76 Nylon Nut NO.52 Washer M12x1.75x80L M12x1.75x12T D13.5xD24x2.5 8PCS 8PCS 16PCS...
-
Page 24: Adjustment
ADJUSTMENT Grip Post Adjustment: The Grip Posts (H) have two positions for mounting to the structure. For your comfort choose the position that suits the length of your forearm the best. Adjustable Handlebar Adjustments: The Adjustable Handlebars (E) can be used in any of the 1 inch holes available along the frame to allow for a variety of exercises. -
Page 25: Warranty
WARRANTY MANUFACTURER’S LIMITED WARRANTY Paradigm Health & Wellness guarantees to the original purchaser that this product is free from defects in material and workmanship when used for the purpose intended, under the conditions that it has been installed and operated in accordance with Paradigm’s Owner’s Manual. -
Page 26: Part Request Form
PART REQUEST FORM Paradigm Health & Wellness, Inc. EMAIL THIS FORM WITH YOUR RECIEPT OF PURCHASE TO Service@paradigmhw.com * NAME: _______________________________________________________ ADDRESS: ____________________________________________________ CITY ______________ STATE ______________ ZIP ___________________ TELEPHONE: (Day) ____________________________________________ (Night) ____________________________________________ SERIAL#: _____________________________________________________ MODEL#: _____________________________________________________ PURCHASE DATE: _____________________________________________ PLACE OF PURCHASE: _________________________________________ PART # DESCRIPTION “YOUR ORDER WILL BE PROCESSED WITHIN 3 BUSINESS DAYS”...
Need help?
Do you have a question about the Power Tower and is the answer not in the manual?
Questions and answers