Table of Contents
Advertisement
Quick Links
Advertisement
Table of Contents

Related Manuals for Winmate FM10A


Summary of Contents for Winmate FM10A
- Page 1 Winmate FM10A Vehicle Mounted Computer Android 4.4 User Manual Version 1.0...
- Page 2 Winmate Inc. warrants that each of its products is free from material and workmanship defect for a period of one year starting from the invoice date. If the customer discovers a defect, Winmate Inc. will, at its option, repair or replace the defective product at no charge to the customer, provided it is returned during the warranty period, with transportation charges prepaid.
-
Page 3: Fcc Regulations
Advisory Conventions Four types of advisories are used throughout the user manual to provide helpful information or to alert you to the potential for hardware damage or personal injury. These are Notes, Important, Cautions, and Warnings. The following is an example of each type of advisory. NOTE: A note is used to emphasize helpful information IMPORTANT:... - Page 4 CE Notice (European Union) This device has been tested and found to conform to the limits set for a Class B product. • EN 55022 — “Limits and Methods of Measurement of Radio Interference Characteristics of Information Technology Equipment” • EN 55024 —...
- Page 5 This Class B digital apparatus complies with Canadian ICES-003 Cet appareil numérique de la classe B est conforme à la norme NMB-003 du Canada. The device could automatically discontinue transmission in case of absence of information to transmit, or operational failure.
-
Page 6: Table Of Contents
Table of Contents READ ME FIRST ................................1 (FR) ............................ 2 NFORMATIONS DE SÉCURITÉ (EN) ............................. 3 AFETY NFORMATION ..............................4 BOUT THE DAPTER ................................4 ATTERY INTRODUCTION ................................5 ................................5 BOUT UIDE ............................... 6 ACKAGE ONTENTS ..............................7 PTIONAL CCESSORIES ................................. - Page 7 Calibrating the Screen ............................. 32 System Settings ..............................35 ..................................41 THERNET Configuring the Ethernet ............................42 Checking the Ethernet ............................. 43 .................................. 43 LUETOOTH ..........................45 ONNECTING TO ETWORKS WWAN ..................................46 ............................... 48 AMERA EATURES Opening the Camera ............................... 48 The Camera Menu ..............................
-
Page 8: Read Me First
FM10A User Manual Read Me First Follow and adhere to all warnings and instructions in this manual. For your safety, please read all safety and operating instructions before using the product. Keep this manual for future reference. ATTENTION: Pour réduire le risque d’incendie ou de choc électrique ne pas exposer l’appareil à la pluie ou à... -
Page 9: Informations De Sécurité (Fr)
FM10A User Manual Informations de sécurité (FR) Suivez et respectez tous les avertissements et instructions figurant sur l’écran. Pour votre sécurité, s’il vous plaît lire toutes les consignes de sécurité et de fonctionnement avant d’utiliser le device. Gardez ce manuel pour référence future. -
Page 10: Safety Information (En)
FM10A User Manual Safety Information (EN) Follow and adhere to all warnings and instructions on the screen. For your safety, please read all safety and operating instructions before using the device. Keep this manual for future reference. Carefully read all recommendations and precautions for use before using this product. -
Page 11: About The Adapter
IMPORTANT: The battery is consumable part. Therefore, it is recommended to replace the battery pack every two years with a new one recommended by Winmate. Contact our Service Center or sales representatives for more information on replacing the battery pack. -
Page 12: Introduction
Computer delivers flexibility and mobility in a vehicle mounted computer form factor. FM10A is designed to be easily removed from the dock with a latch on the top of the FM10A vehicle docking. Since the dock remains attached to the vehicle, this device can be easily moved or switched from one vehicle to another. -
Page 13: Package Contents
FM10A User Manual Package Contents Before using this device, make sure that all the items listed below are present in your package: Computer Dock + Latch 5 m Power Cable 0.3 m USB Stylus Kit + FM10A Locking Key with Fuse Kit... -
Page 14: Optional Accessories
FM10A User Manual Optional Accessories Your package may include the following items based on your order: 1.2 M 120 Watt 3 m DC Jack Power 4.2 m Adapter with Adapter 1.8 m RS232 Cable 0.3 m Audio Cable Cable Power Cable... -
Page 15: Components
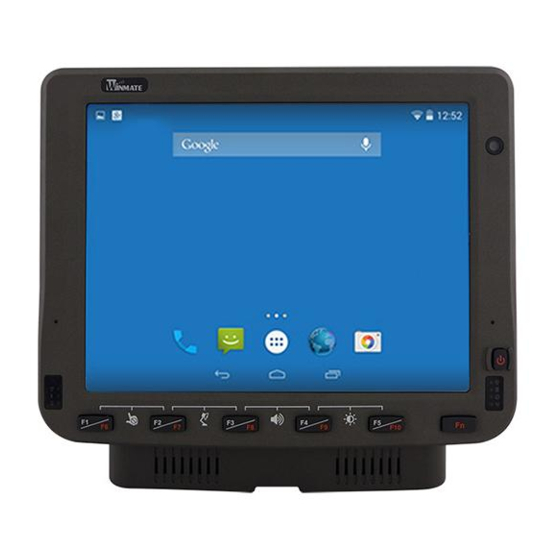
FM10A User Manual Components Front View Item Description 10.4” Touch Screen Displays and acts as one of the inputs for the device Power Button Press and hold the button for 3 second to turn on the device Power Indicator Power Indicator... -
Page 16: Rear View With Vehicle Dock
FM10A User Manual Wi-Fi Indicators LED indicators Bluetooth Indicators UPS Battery Indicators Label Space to print the label or company logo Programmable Function key that can be configured by using the Hot Tab Utility Function button Emits Sound Speaker Rear View with Vehicle Dock... -
Page 17: Side View With Vehicle Dock
FM10A User Manual Side View with Vehicle Dock Item Description COM1 and COM2 Connect a peripheral device such as a printer or scanner with serial port. Connect USB peripheral devices such as USB flash drive, mouse, keyboard, Two USB 2.0 / Audio printer, etc. -
Page 18: Top And Bottom View
FM10A User Manual Top and Bottom View Item Description Lock Lock the tablet in place Reading Light Use to provide illumination in dark environment... -
Page 19: Hardware
FM10A User Manual Hardware System Hardware Central Processing Unit The FM10A is running on Freescale Cortex A9 i.MX6 Dual Core processor, and Android 4.4.operating system. Input / Output Connectors The FM10A device supports the following I/O connectors: • SIM Card Slot •... -
Page 20: Audio Interface
WWAN Using a SIM card for network connection, your device supports Wireless Wide Area Networking (WWAN). Power Management Modes The FM10A has four power modes: • Full ON • Standby / Sleep • Hibernate •... -
Page 21: Full On Mode
By default, the FM10A turns off if the user turns off the device through the system or presses the power button for 8 seconds with a critical shut down. The FM10A will also be off when there is no connection to a power source or the UPS battery is depleted. -
Page 22: Ignition Control Via Software
FM10A User Manual Ignition Control via Software Winmate provides Ignition Control Software AP to control the timing of delay. You can select 1 to 120 seconds for each period of timing delay. To enter Ignition Control AP: Go to APPS > Ignition Control To setup the timing delay, select desirable option and value. -
Page 23: Power Control
NOTE: • The FM10A has to be docked in a powered vehicle docking station or UPS battery has to have a sufficient charge to power the device. • If no external power available and the UPS battery do not have enough charge, pressing the power... -
Page 24: Battery
There is a risk of an explosion caused by incorrect installation or misapplication of the battery pack. To avoid possible injury: Use only the type of the battery recommended by Winmate. Follow battery pack installation instructions in this user manual. -
Page 25: Backup Battery
The backup battery should be replaced only be authorized service personnel. External Connectors Power OFF the FM10A before connecting cables to any port. Most of the external connectors for the FM10A are located on the vehicle dock. • COM1 and COM 2 connect to devices such as printer or scanner. -
Page 26: Connector Pinouts
FM10A User Manual Connector Pinouts Serial Connector (COM) Signal Description Data Carrier Detect – Input Receive Data – Input Transmit Data – Output Data Terminal Ready – Output Signal / Power Ground Data Set Ready – Input Request to send – Output Clear to send –... - Page 27 FM10A User Manual USB2.0 (D-9 Female) Connector Signal CN1-1 CN1-2 USB1_D+ CN1-3 USB1_D- CN1-4 USB1_VCC CN1-5 CN1-6 CN1-7 USB2_D+ CN1-8 USB2_D- CN1-9 USB2_VCC Signal Description CN2-1 USBVCC1 CN2-2 USB1_DM White CN2-3 USB1_DP Green CN2-4 Black CN3-1 USBVCC2 CN3-2 USB2_DM White...
- Page 28 FM10A User Manual USB2.0 (D-15 Male) + Audio Connector Signal Description CN1-1 HP_JD Brown CN1-2 USBVCC1 CN1-3 USB1_DM White CN1-4 USB1_DP Green CN1-5 Black CN1-6 HP_R Blue CN1-7 AUGND Black CN1-8 MIC_L Pink CN1-9 AUGND Black CN1-10 HP_L Yellow CN1-11...
- Page 29 FM10A User Manual LAN Connector Pin No. SYMBOL TX_D1+ TX_D1- RX_D2+ BI_D3+ BI_D3- RX_D2- BI_D4+ BI_D4- Power Connector 1. Power Connector 2. Power Switch...
- Page 30 FM10A User Manual Power Connector Pin No. SYMBOL CN2-1 VIN + CN2-2 VIN + VIN - CN2-3 CN2-4 VIN - Earth_GND CN2-5 CN2-6 VIN + CN2-7 VIN + Ignition CN2-8 Pin No. SYMBOL Pin No. SYMBOL CN2-3 VIN - CN1-2...
-
Page 31: Antenna Connections
Antenna Connections The FM10A is equipped with an 802.11 radio and can be ordered with internal antennas or external remote mount antennas. When the FM10A is ordered with internal antennas, the external antenna connectors are not used. GPS and WWAN are optional on the device and require external remote mount antennas. -
Page 32: Keyboard Options
FM10A User Manual 3. Adjust the position of external antenna. Wi-Fi Antenna Installation Wi-Fi and WWAN Antenna Installation Keyboard Options Integrated Keypad The integrated keypad contains ten programmable keys, F1~ F10 are user programmable keys. Key Mapping is configured via the Hot Tab application on the control panel. See Programmable key to remap these keys. -
Page 33: Usb Keyboard / Mouse
FM10A User Manual USB Keyboard / Mouse A standard USB keyboard or mouse can be attached to the FM10A using the appropriate adapter cable. The cable attached to the device and provides USB connector. LED Function LED indicators are located on the front panel with the left and right sides. -
Page 34: Touch Screen
FM10A User Manual Display The FM10A display measures 10.4-inches diagonally, have display resolution of 1024 x 768 pixels and bonded with Projected Capacitive (P-CAP) multi-touch. Touch Screen The touch screen is a Projected Capacitive (P-CAP) multi-touch; the technology offers a fast and sensitive response and professional-grade reliability combined with a stylish, sleek design. -
Page 35: Software
This section includes the software and hardware installation, the FM10A configuration, the wireless communication, and some other optional features. Since this FM10A is bundled with several software and utility programs for its configurations and operations, the examples describe in this section are to be used as a guideline only;... -
Page 36: Quick Settings
FM10A User Manual Icon Description Back Opens the previous screen you were working in. Once you back up to the Home screen, you can’t go back any further. Home Opens the central Home screen. To open Google Now, swipe up. -
Page 37: Status And Notification Icons
FM10A User Manual Status and Notification Icons To open the status bar appears at the top of every screen. On the left are notification icons and on the right are status icons, along with the current time. Notification icons Status icons Status Icons Pull down from the right top of the screen to get the notifications area.The following icons indicate the status of... -
Page 38: Control Panel
FM10A User Manual Control Panel Using the Touch Screen The touch screen is a touch-sensitive device that allows you to control and make selections on the device by controlling the location of the pointer on the screen. NOTE: Do not use sharp or pointed objects on the touch screen. These objects may scratch the screen. -
Page 39: Calibrating The Screen
FM10A User Manual Calibrating the Screen You will require performing touch screen calibration in the following situations: 1. When there is a noticeable discrepancy in the placement of the stylus on the screen and the indicated position of the on screen pointer. - Page 40 FM10A User Manual Step 3 After all five calibration points are adjusted you will be asked whether you want to save the set values after the calibration. Tap Yes to save the settings. If you want to perform calibration once again, then tap No.
- Page 41 FM10A User Manual Step 4 Calibration is complete. Restart the device for new settings. Touch screen calibration if the touch screen was not calibrated properly and the settings were saved. Step 1 Connect the mouse to the HMI device through USB port.
-
Page 42: System Settings
FM10A User Manual System Settings Display In the Android 4.4 user can adjust the screen brightness. Pull down from the top of the screen to get the notifications area. You can also access display settings in settings: Go to Settings... - Page 43 FM10A User Manual Region and Language The instruction for installing, changing and uninstalling language in this section are applicable to FM10A with Android 4.4 OS. To access region and language settings, perform the following: Settings > Language & Input > Language...
- Page 44 FM10A User Manual Sound To access sound settings, perform the following: Settings > Sound In this option you can adjust volume, change phone ringtone, and other volume settings.
- Page 45 FM10A User Manual Key Map Introduction In this section, all function key will be introduced, including quick access to touch lock, volume adjustment, brightness adjustment, turn on/off the reading lamp, camera, and function key form of all other function key from F1~F5.
- Page 46 FM10A User Manual Touch Lock Press F1 and F2 simultaneously to perform touch lock. While the touch is locked, all function keys and touch will not be able to work, until you slide the bar to unlock the touch lock.
- Page 47 FM10A User Manual Lamp OFF Volume Adjustment Press F3 and F4 simultaneously to perform volume adjustment. The adjustment slide bar will appear on screen transparently. Slide to the right side to increase the volume and slide to the left side to decrease the...
-
Page 48: Ethernet
Slide to the right side to increase the volume and slide to the left side to decrease the brightness. Ethernet Vehicle computer supports Ethernet LAN. To use the Ethernet LAN feature to connect to the network, perform the following procedure: Step 1 Connect Ethernet Cable to the FM10A device. Step 2 Go to APPS > Ethernet... -
Page 49: Configuring The Ethernet
FM10A User Manual Step 3 Ethernet APP main menu appears Setting Description Check Ethernet connection parameters: IP mode, IP address, DNS address Check Ethernet and others Configure Ethernet Enable Ethernet connection and configure its such as connection type Advanced Settings... -
Page 50: Checking The Ethernet
FM10A User Manual Checking the Ethernet To check the Ethernet go to APPS > Ethernet > Check Ethernet Ethernet settings menu appears on the top right side of the desktop. Bluetooth Your device has integrated Bluetooth capabilities for short-range wireless communication between Bluetooth- enabled devices. - Page 51 FM10A User Manual NOTE: When FM10A is connected to other devices by Bluetooth, the flash light will be ON. To add a device: 1. Go to Settings > Bluetooth. Choose the Bluetooth device that you want to connect and follow onscreen prompt to continue...
-
Page 52: Connecting To Wi-Fi Networks
2. Input the SSID (name) of the network, if the network is secured, tap the security menu and then tap the type of security deployed on the network. 3. Enter any required security credentials. 4. Tap Save. NOTE: When FM10A is connected to other devices by Wi-Fi, the flash light will be ON. -
Page 53: Wwan
FM10A User Manual WWAN For vehicle computers equipped with wireless WAN (3G or 4G/LTE) card, to use the wireless WAN feature to connect to the network, perform the following procedure: 1. Go to Settings > More > Mobile Networks > Data Enabled... - Page 54 FM10A User Manual You can check the wireless WAN connection status through the wireless network connection status icon in the status area. Pull down from the right top of the screen to get the notifications area. The more bars encompassed, the better the signal is.
-
Page 55: Camera Features
FM10A User Manual Camera Features Your device has a built in camera. Opening the Camera Tap on camera icon to open the camera. The Camera Menu Item Icon Description Location setting Tap to open location settings. Make a picture Tap to immediately capture photos. - Page 56 FM10A User Manual • to close the preview and return to the camera screen. Location Settings to open location settings. Item Icon Description Location Tap to change location settings. Countdown timer Tap to set countdown timer. Picture size Tap to change picture size.
- Page 57 FM10A User Manual Camera Settings to open camera settings. Item Icon Description 7 Zoom in/ Zoom out Tap to zoom in or zoom out the picture. 8 Exposure Tap to change exposure settings. Shooting Videos Short tap > Tap to make a video.
-
Page 58: Software Update
Follow the software update guide to update the software. All the programming guides can be found in the driver CD included in the package. You need to download image tool driver to the SD card. Insert SD card to the FM10A device to perform OTA Updates. - Page 59 FM10A User Manual OTA Update Guide OTA is a tool which can help you to update OS image. To receive Android OS image file contact our sales representatives. Once you get the image file follow the guideline below. Step 1 Copy image files ota_FA33_X_X_X_X.zip and FA33_X_X_X_X. md5 and to micro SD card.
- Page 60 FM10A User Manual Step 4 Tap Update Image Step 5 Make sure the file founded by the system is image update file. Tap OK. Step 6 Tap OK. Make sure the battery level is at least 50%.
- Page 61 FM10A User Manual Step 7 Tap OK. IMPORTANT: Do not disconnect the power source! Do not remove the battery! Step 8 After update the system will automatically restart.
- Page 62 FM10A User Manual OS Image Update Guide Step 1 Decompress the archive FSL_MFG_TOOL_WM.zip Step 2 Go to the directory “FSL_MFG_TOOL_WM\Profiles\MX6Q Linux Update\OS Firmware\files\android”. Step 3 Move the following items to one folder: the u-boot-6q.bin, boot.img, system.img, userdata_img.tar.gz and recovery.img Step 4 In FSL_MFG_TOOL_WM folder that you decompressed in Step 1 click “MfgTool2.exe”.
- Page 63 FM10A User Manual Step 6 Go to Settings > About tablet Step 7 Go to Settings > About tablet > Additional system updates Step 8 Warning menu pops up. Confirm the system update by clicking YES. IMPORTANT: Assure OTG and power already connected. Do not disconnect the OTG from the source of power...
- Page 64 FM10A User Manual Step 9 Enter the hint number 1655 to confirm the update and click OK. Step 10 In the dialog click Yes to shut down and restart the system. Step 11 After the system reboot you will be able to see the system change.
-
Page 65: Accessories Installation
FM10A User Manual Accessories Installation Installing a SIM Card The Vehicle mounted computer supports data connection using 3G or 4G/LTE SIM cards and fits Micro-SIM card. (Note: 4G/LTE feature is optional). Perform the following to install the SIM card to your vehicle mounted computer: 1. -
Page 66: Installing A Stylus With The Holder
FM10A User Manual 1. Reposition the removed service window and then screw to secure the service window Installing a Stylus with the holder Perform the following to dock the device Align the screw hole between the stylus holder and the rear side of device, fasten it with the given screw. - Page 67 FM10A User Manual...
-
Page 68: Vehicle Mounting
Introduction The FM10A is designed to be mounted to a docking station on the vehicle with RAM mount. The vehicle mount holds the dock and FM10A attaches to the dock. The FM10A can operate on another vehicle equipped with the docking station without the need to mount the device again. -
Page 69: Ram Mount Installation
FM10A User Manual RAM Mount Installation The docking of this device is designed to be mounted to RAM Mount solutions, which provides various mount types to fit any industrial use or vehicle. Mounting kit 1 – No Drill Solution Part Number: 98K000A0005Y The docking of this device is designed to be mounted to RAM Mount solutions, which provides various types of mount types to fit any industrial use or vehicle. -
Page 70: Mounting Kit 2 - Drill Solution (98K000A0006P)
FM10A User Manual Mounting Kit 2 – Drill Solution Part Number: 98K000A0006P Winmate Part RAM Mount Part Component Description Number Number RAM round base 3.68” Round Base with 2.25” mounts - on the 9B000000008R RAM-D-202U Ball forklift A1-1 Screw 91351110112N - SUS304 M8 x 40mm Screw Arm for 2.25”... -
Page 71: Mounting Kit 3 - Keyboard Mounting Installation (98K000A0005X)
FM10A User Manual 1.2 Place the upper clamp with ball on the beam, insert the bolt. 1.3 Place the lower clamp below the beam. Align the bolts with the holes in the lower clamp. 1.4 Place the nuts and then tighten it. - Page 72 FM10A User Manual Winmate Part RAM Mount Part Component Description Number Number Winmate Keyboard 4 VESA Holes on the plate to Adapter Plate 821009131600 device (designed by and 4 AMPS holes to RAM Ball Winmate) Screw 913511101149 SUS304 M5 x 12mm Screw...
-
Page 73: Docking/ Undocking The Device
FM10A User Manual 2. Fasten the keyboard adapter on the other end of the RAM mount ball. 3. Fasten the RAM mount ball screws on the back of the device, so all mounting parts are fastening together. Docking/ Undocking the Device Perform the following to dock the device: 1. -
Page 74: Power Cable Installation
Wiring steps: 1. Place the device on the vehicle dock and make sure the device is Off. 2. Connect the CN2 to the FM10A vehicle dock by aligning the connector pins and then push it, twist to fasten the connection. -
Page 75: Connecting The Power Cable For Installation On The Vehicle
FM10A User Manual Connecting the power cable for installation on the vehicle WARNING!/ AVERTISSEMENT! This power cable should only be used on the 24, 36, or 48 Volt forklifts. Note that, this power cable cannot work for 12 Volt forklifts. - Page 76 FM10A User Manual Color Symbol VCC+ Black VCC- Green Ground Blue Ignition input (optional) WARNING!/ AVERTISSEMENT! Do not perform the installation on a moving or live electric forklift. Ne pas effectuer l'installation sur un mobile ou un chariot élévateur électrique sous tension.
- Page 77 FM10A User Manual With Ignition Function 7. The ignition cable (Blue cable) must be connected to the battery negative if the customer does not want to have ignition function , as following. Without Ignition Function 8. Secure the power cable to the device using cable clamps and place the device in the dock. See Power...
- Page 78 FM10A User Manual WARNING!/ AVERTISSEMENT! Use the proper cable clamps and do not over tighten it to prevent it from break. Utilisez les pinces appropriées du câble et ne serrez pas pour l'empêcher de pause. 9. Press the power switch on the back of the dock See Power switch.
- Page 79 FM10A User Manual Vehicle Installation Office Test / Evaluation With Ignition Without Ignition Power Connector Power Mode Ignition-On mode AC/DC Mode AC/DC Mode AP to switch Auto-On is Auto-On Auto-On is ON Auto-On is ON BIOS switch Ignition √ √...
-
Page 80: Connecting Peripherals
FM10A User Manual Connecting peripherals Item Description Connect a peripheral device such as a printer or scanner with serial port COM1 and COM2 Connect USB peripheral devices such as USB Flash drive, mouse, keyboard, Two USB 2.0 printer, etc. Service Window... -
Page 81: Technical Specifications
FM10A User Manual Technical Specifications Item Specifications System Specifications: Processor Freescale Cortex A9 i.MX6 Dual Core System Memory 1G LPDDR3 Storage 16GB eMMC , Micro SD Operating System Android 4.4 Display Specifications: Size / Technology 10.4" (4:3) Resolution 1024 x 768 Viewing Angle -88~88(H) ;... - Page 83 FM10A User Manual Standards and Certifications Safety CE, FCC, UL60950-1, EN60950-1 Compliant with EN61000-4-2 (enhanced ESD to ±12kV direct & ±15kV air) I/O Connectors: 1 x SIM card slot 1 x Micro SD card slot Computer 1 x USB 3.0...
- Page 84 Winmate Inc. 9F, No.111-6, Shing-De Rd., San-Chung District, New Taipei City 24158, Taiwan, R.O.C Tel: 886-2-8511-0288 Fax: 886-2-8511-0211 Email: sales@winmate.com.tw Official website: www.winmate.com...
Need help?
Do you have a question about the FM10A and is the answer not in the manual?
Questions and answers